BDL4290VL
28
Pixel shift
For video input sources, you may choose {
On
} to move the screen
image automatically to protect the display from “burn-in” or “after-image”
symptoms 30 seconds after not operating the display.
Smart power
Choose a backlight level to optimise dynamic power consumption and
picture contrast.
The options are: {
Off
}, {
Standard
}, {
Medium
}, {
High
}.
Wake on lan
Choose {
On
} and you can turn on the display by network.
Switch on state
Choose the display status used for the next time you connect the power
cord.
• {
On
} - The display will turn on when the power cord is connected
to a wall outlet.
• {
Standby
} - The display will remain Standby when the power cord is
connected to a wall outlet.
• {
Last status
} - The display will return to the previous power status
(on/off/standby) when removing and replacing the power cord.
Light sensor
Choose {
On
} and the display will automatically adjust backlight.
Power LED Light
Choose {
Off
} to turn off the indicator.
Logo
Choose {
Off
} and the display will not display the
logo when you
switch on.
The options are
Off, On
, and
User
.
Note
: For the option User, users have to copy the Logo file(*.png) to
USB flash device and named it “WelcomeLogo.png”. After that, go to
Storage and choose USB copying and select Import and press [OK].
Advanced power management
Choose {
On
}. Then, when no signal, the display will automatically turn off.
Source notification
When you press
[ ] POWER
button to turn on the display from
standby mode or change the input signal, the information OSD is
displayed on the upper left corner of the screen.
Choose {
Off
} to turn off this function.
DisplayPort Ver.
Set the DisplayPort version to 1.1a or 1.2, this setting is only valid on
DisplayPort input and output,
1.1a: Switch DisplayPort Ver. to 1.1a(default), the DisplayPort output is
the clone of the DisplayPort input.
1.2: Switch DisplayPort Ver. to 1.2 to support MST(Multi-Stream
Transport)
NOTE: If the display is black screen or abnormal under DisplayPort
source, please switch to 1.1a and turn AC off and on.
Cooling Fan
Select {On} to turn on the cooling fan all the time. Select {Auto} to turn
on/off the cooling fan according to the display’s temperature.
NOTES:
• The default {Auto} option will start running the cooling fan if the
temperature of 60°C (140°F) is reached,.
• If the temperature exceeds 70°C (158°F) over 3 minutes and then
a temperature warning message will be shown on the screen for 10
seconds, the display will be shut down automatically with blinking red
& green LED lights.
Network control port
Choose the RS232 control form Card OPS or embedded RS232 in PD
set.
Factory settings
Reset all your customized settings to the factory defaults
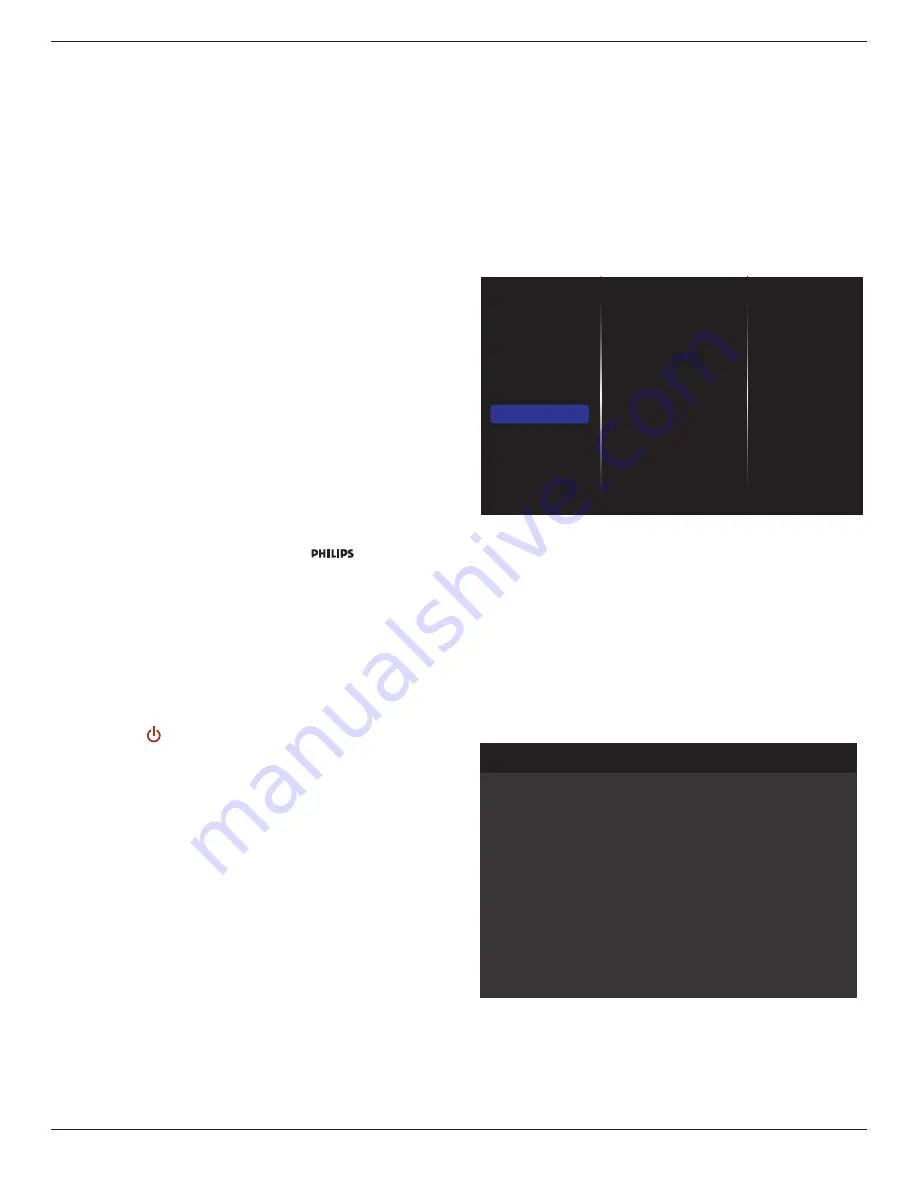
5.1.7. Adv.
Advanced settings page enables you to configure HDMI and DVI signal
settings for image quality.
Picture
Sound
Tiling
Network
Storage
General settings
Adv.
Jitter clean
VCO gain
Jitter clean
Turn on/off jitter cleaning function for HDMI and DVI signal quality
enhancement. The default setting is on.
VCO gain
Adjust VCO gain automatically or manually. The default setting is Auto.
Note: When the signal is unstable and lose the picture from HDMI input,
you can adjust VCO gain to get good picture.
5.1.8. Web control
A. Ensure you have connected to the network. You can press INFO
button to display the connection of the network.
Picture format
Picture style
Sound style
Smart power
Volume
Monitor group
Monitor ID
Model name
SW Version
Serial no
Temperature
Network configuration
IP address
Netmask
Gateway
Network name
Ethernet MAC address
Auto zoom
Standard
Original
Off
20
1
1
BDL4290VL
0.07
39°C
DHCP
192.168.0.101
255.255.255.0
192.168.0.1
BDL4290VL
00:00:00:00:00:00
HDMI 1 1080p60 29/12/2014 Monday 16:10:14
From the computer connected to the PD, first open your Web browser.
Then enter the PD’s address(192.168.0.101) for network administration
in the web address field and hit enter to reach the home page of Web
Control.


