Page 9
q
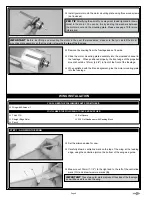
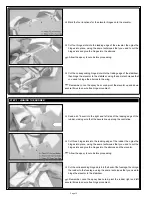
Use a set square to double-check that the wing is perpendicular to the
fuselage side. If it's not, you may need to remove the wing and lightly
sand down the higher side of the wing opening until you're satisfied with
the alignment.
q
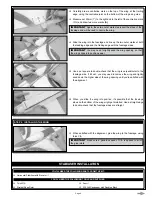
When you slide the wing into position, it's possible that the fuselage
sides on the bottom of the wing might get distorted. Use a straight edge
to double-check that the fuselage sides are straight.
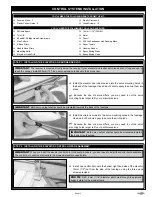
steP 2: iNstaLLiNG tHe WiNG
staBiLiser iNstaLLatiON
yOu'LL Need tHe fOLLOWiNG Parts frOM tHe Kit:
yOu'LL Need tHe fOLLOWiNG tOOLs aNd suPPLies:
q
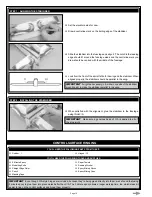
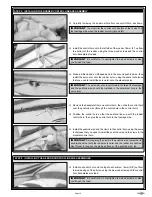
Carefully draw a centreline mark on the top of the wing, at the trailing
edge, using the centreline joint on the bottom of the wing as a guide.
q
Measure out 25mm (") to the right and to the left of the centreline mark
(C/L) and draw two more marks
(a)
.
IMPORTANT
Again, these two outer marks represent the sides of the
fuselage and will be used to centre the wing.
q
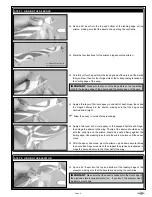
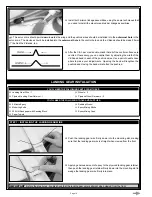
Slide the wing into the fuselage and line up the two outer marks at both
the leading edge and the trailing edge with the fuselage sides.
IMPORTANT
You may need to lightly sand the wing opening, so that
the wing slides into position easier.
q
When satisfied with the alignment, glue the wing to the fuselage, using
thick C/A.
IMPORTANT
Make sure a generous bead of C/A is applied to all of
the glue joints.
q
Thick C/A
q
Straight Edge Ruler
q
Horizontal Stabiliser with Elevator -
q
Pencil
q
220 Grit Sandpaper with Sanding Block


