


9
4. Creating a Route
Please note
: After creating a route, the GPS may need to be Powered On in the
software before navigation can begin. (Section 8.1)
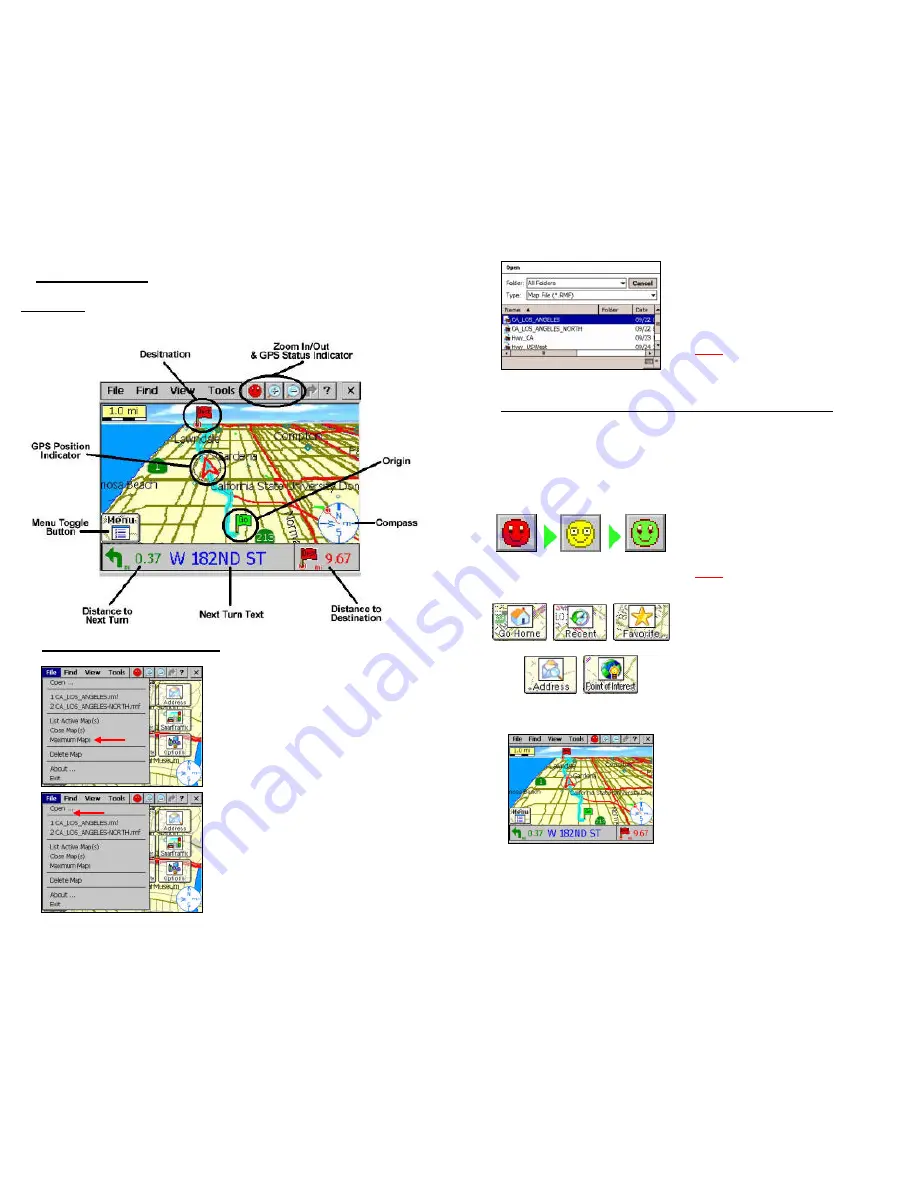
4.1 Opening & Viewing a Map
1. Click File
à
Maximum Maps.
Up to 10 maps can be open at the
same time. Set max number of maps
to be open at same time. This setting
will be saved for future use, 3 is the
default.
2. Click File
à
Open
Note: last map opened re-opens,
previous PoRs clear when new map
opens
Continued on next page >>
10
3. A list of all available maps will be
listed.
4.
Click on the map that you want to
use to have it displayed on the screen.
Note:
1 through 3 must be repeated to
open multiple maps.
4.2 Finding Origins, Destinations, and Creating Routes
There are
2 methods
to find a route
, active
and
pre-planned.
•
The Active Method
is using the buttons from the on-screen menu.
1. First, Power On the GPS to locate
your position, which will be used as the
route origin (starting
PoR
). (See
Section 8.1) – only if you are on a
paved roadway.
Note:
GPS is Powered On by default
(See section 3.1 for details)
2. Next select one of the Menu items
and enter the appropriate information
to find a destination (ending
PoR
).
After a destination has been set, the
system will ask if you would like to
create a route, select YES.
3. The route will be displayed on the
screen along with on-screen text
directions and you are ready to
navigate.