42
3
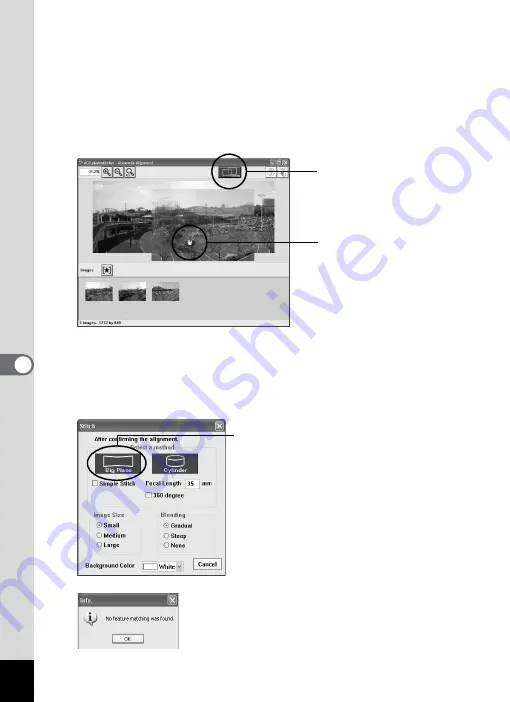
Correct the image positioning.
ACD photostitcher starts, and the selected images appear in
panorama format.
Move the mouse pointer over the image. It changes into a
e
symbol.
Hold down the left mouse button and drag the images to adjust the
stitching position (
A
).
After the position has been adjusted, click the [STITCH] button (
B
).
4
Select the stitching method.
You can choose from [Big Plane] or [Cylinder] for the stitching method.
Here, you will create a flat panorama. Click the [Big Plane] button.
A confirmation message appears. Click [OK].
If a message like the one shown on the
left appears, click [OK] to continue.
(
B
) Click the [STITCH]
button.
(
A
) Click and drag to
adjust the position.
Click the [Big Plane] button.
Содержание Optio Optio X
Страница 1: ...Enjoying Your Digital Camera Images On Your PC PC Connection Manual...
Страница 48: ...46 10 Save the image Click the Save button in the Stitching result display window window 3 to save the image...
Страница 69: ...67 5 Select Explore on the menu 6 Double click the PC_ camera folder 7 Double click the WinXP folder...
Страница 71: ...Memo...


