manualshive.com logo in svg
background image

COLORVISION Light Installation and User’s Guide

       COLORVISION Light Installation and User’s Guide


   1

IMPORTANT SAFETY INSTRUCTIONS

READ AND FOLLOW ALL INSTRUCTIONS

SAVE THESE INSTRUCTIONS

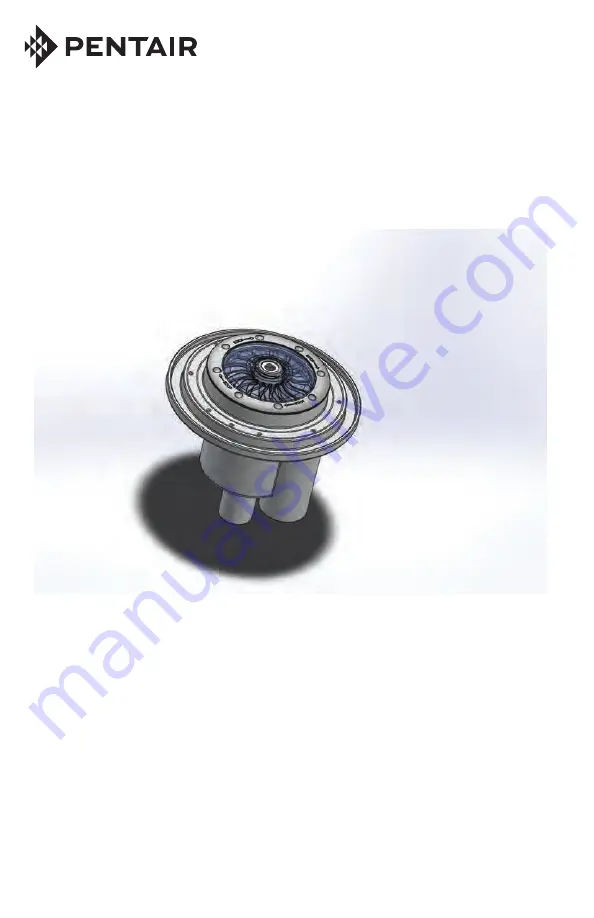
COLORVISION™ UNDERWATER COLOR 

CHANGING LED LIGHT

FOR POOL AND SPA

INSTALLATION 

AND  

USER’S GUIDE

Содержание COLORVISION

Страница 1: ...t Installation and User s Guide 1 IMPORTANT SAFETY INSTRUCTIONS READ AND FOLLOW ALL INSTRUCTIONS SAVE THESE INSTRUCTIONS COLORVISION UNDERWATER COLOR CHANGING LED LIGHT FOR POOL AND SPA INSTALLATION A...

Страница 2: ...truction 5 Installing the ColorVision Light Niche in a Gunite Concrete Pool after electrical requirements are met 5 Installing the ColorVision Color Light Niche in a Fiberglass Pool 7 Installing the C...

Страница 3: ...should be given to the owner and or operator of this equipment IMPORTANT WARNING AND SAFETY INSTRUCTIONS Before working on or servicing pool lights always disconnect power to the pool and or spa light...

Страница 4: ...D LIGHTING NEC PROVISIONS WHEN THE UL LISTED NON METALLIC COLORVISION LIGHT LOW VOLTAGE LIGHTS ARE USED WITH THE LIGHT APPROVED NICHE THE CURRENT NEC PROVIDES AN EXCEPTION TO LUMINAIRE BONDING AND GRO...

Страница 5: ...therwise all lights connected to the same transformer will be working together Operating ColorVision Lights Using a Wall Switch ColorVision lights can also be automatically controlled via Pentair Inte...

Страница 6: ...150 feet of total cable run between the transformer and lights Maximum wattage when using multiple ColorVision Light and IntelliBrite Color LED lights using a 300 Watt Transformer IMPORTANT When usin...

Страница 7: ...olors emulates the Pentair SAm Color Light 2 Party Mode Rapid color changing building energy and excitement 3 Romance Mode Slow color transitions creating a mesmerizing and calming effect 4 Caribbean...

Страница 8: ...so that it points to the desired selection The color mode selections start in a clockwise direction from the 9 o clock position Hold and Recall Feature Note When ColorVision lights are powered on the...

Страница 9: ...in 10 16 cm above ground level or 8 in 20 3 cm above maximum water level whichever is higher The Junction Box must be at least 48 in 1 22 m from the edge of the pool See Figure 1 on page 6 To be cert...

Страница 10: ...ver the top of the niche using the supplied machine screws see Figure 2 This will protect the light cavity of the niche during installation Secure the gunite cover with the eight 8 8 32 x 1 2 machine...

Страница 11: ...ng gasket on top of the fiberglass aligning the screw holes on the niche as shown below Installing ColorVision Color Light Niche in a Fiberglass Pool To install the ColorVision Color Light niche in a...

Страница 12: ...th tape to prevent concrete and plaster from entering the holes Note If a gunite cover is not available use masking tape to protect the light cavity from the plaster operation Installing ColorVision C...

Страница 13: ...TIGHTEN THE SCREWS DO NOT ASSEMBLE WITH POWER TOOLS Note Over tightening or using a motorized screwdriver on the gunite cover can over torque the screw threads and damage the niche housing and or vin...

Страница 14: ...ilips head screwdriver tighten each retaining screw to a torque value of 10 00 minimum to 15 0 maximum in lbs to secure the face ring and gaskets on the niche DO NOT OVER TIGHTEN THE SCREWS DO NOT USE...

Страница 15: ...tors Be careful not to damage the copper conductor 5 Connect both 2 wires to the corresponding circuit wires in the Junction Box or 12 Volt AC Transformer black wire to power white wire to common and...

Страница 16: ...ht are properly aligned with the niche openings inside the niche 7 Place the light installation tool P N 620057 over the front of the light Turn the tool and light clockwise less than 1 8th turn while...

Страница 17: ...ning screw to a torque value of 10 00 minimum to 15 0 maximum in lbs to secure the lens on the niche DO NOT OVER TIGHTEN THE SCREWS DO NOT ASSEMBLE WITH POWER TOOLS Over tightening or using a motorize...

Страница 18: ...ition Adjust the eyeball for proper water direction 12 Before operating the ColorVision light fill the pool with water until the light is completely submerged Note The ColorVision light should not be...

Страница 19: ...page 6 To be certain that the pool s electrical system meets all applicable requirements the electrician should also consult the local building department Risk of Electrical Shock or Electrocution Th...

Страница 20: ...tion box cut off any extra cord Leave at least six 6 inches 15 2 cm of cord in the Junction Box or transformer to facilitate the light installation niche inspection Cut off any extra cord 7 Strip back...

Страница 21: ...feel the stop point This indicates the light is properly seated locked and the niche is completely sealed Note If the light does not turn smoothly pull the light slightly out and make sure that it s s...

Страница 22: ...ovided see Figure 1 on page 6 Using a No 2 Philips head screwdriver tighten each retaining screw to a torque value of 10 00 minimum to 15 0 maximum in lbs to secure the lens on the niche DO NOT OVER T...

Страница 23: ...ition Adjust the eyeball for proper water direction 15 Before operating the ColorVision light fill the pool with water until the light is completely submerged Note The ColorVision light should not be...

Страница 24: ...loBrite light or rubber expansion plug Caution If using a GloBrite Light to seal the electrical conduit it is advised to use an old failed GloBrite Light as the pressure testing may damage a functioni...

Страница 25: ...nect the 120 Volt side of a 12 VAC transformer to the LOAD SIDE of one of the auxiliary AUX relays in the load center 6 Connect the Neutral conductor from the 12 VAC transformer to the Neutral bus bar...

Страница 26: ...0W or 300W Black White CIRCUITBREAKER LOAD 1 LINE 1 NEUTRAL EASYTOUCH 4 AUTOMATION CONTROL AUXILIARY RELAYS AUX 1 see page 2 for transformer load maximum ColorVision Light to EasyTouch or IntelliTouch...

Страница 27: ...nds to its assigned circuit name 2 Press the Up Down button to scroll through the list of preset names Select a name such as Pool Light AUX 1 has now been assigned the circuit name Pool Light To assig...

Страница 28: ...ilter pump pool and spa modes and all high voltage auxiliary circuits connected to the main Load Center or Power Center Display 2 This screen shows circuit names for the additional auxiliary circuits...

Страница 29: ...reen 5 Press the right side button next to CONFIGURE 6 Press the button next to NONE to assign an IntelliBrite light circuit to the selected button Light names can be setup to display on the left side...

Страница 30: ...pool users or others due to electrical shock To wire multiple 12 Volt ColorVision Lights to an IntelliBrite Controller 1 Neatly arrange the wires in the back of the outlet box 2 Align the Controller...

Страница 31: ...on Light Extension cord wire nut 120 VAC Input 12O VAC Wall Outlet GREEN WHITE BLACK GREEN WHITE BLACK WHITE IntelliBrite Controller RED ColorVision Lights BLACK 12 VAC Transformer 12 VAC Output 12 VA...

Страница 32: ...r OFF Remove excessive load or short 2 Press the IntelliBrite Controller power switch to power on the unit Ensure that the LEDs are no longer flashing The light will not illuminate Light does not func...

Страница 33: ...depth and desired plume height To increase the plume height use the smaller eyeball Eyeball Assembly Installation and Replacement Instructions Eyeball Assembly Installation To install the eyeball ass...

Страница 34: ...opening 2 Pull the eyeball out of the lens 3 Insert the alternate size eyeball perpendicular into the slots in the lens opening 4 Rotate and center the eyeball into the lens COLORVISION LIGHT EXTENDED...

Страница 35: ...lens over the top of the niche using the supplier machine screws Secure the lens with the eight 8 8 32 x 1 2 machine screws provided see Figure 2 on page 6 Using a No 2 Philips head screwdriver tight...

Страница 36: ...Ring Tan 6 590130Z Color Ring Black 7 590135 Eyeball Assy Kit 8 590109Z Vinyl Spacer 9 590102Z Gunite Cover with O Ring 10 590106Z Vinyl Fiberglass Ring White 10 590132Z Vinyl Fiberglass Ring Blue 10...

Страница 37: ...COLORVISION Light Installation and User s Guide 33 7 6 2 1 4 11 10 3 8 9 5 12 ColorVision Light Replacement Parts List Illustration...

Страница 38: ...umbing and water conditions WATER DEPTH 2 4 6 8 10 GPM 1 2 3 4 1 2 3 4 1 2 3 4 15 20 42 11 28 8 14 6 12 4 20 32 18 12 24 8 16 8 25 26 18 12 23 10 30 25 16 14 35 24 18 40 30 22 45 26 NOZZLE DIAMETER 1...

Страница 39: ...COLORVISION Light Installation and User s Guide 35 ColorVision Light Niche Dimensions 6 06 0 46 1 03 2 07 8 93 5 69 1 10 1 Socket 1 1 2 Socket...

Страница 40: ...United States and or other countries Unless expressly noted names and brands of third parties that may be used in this document are not used to indicate an affiliation or endorsement between the owne...

Отзывы: