pela tools 32836 Скачать руководство пользователя страница 15

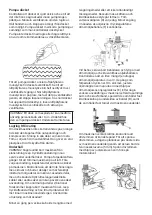
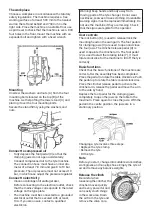
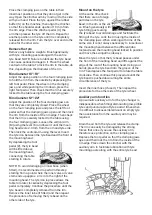
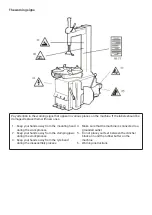
If the locking lever does not lock the vertical arm 

properly or if the mounting head cannot be lifted 

at least 2 mm above the rim, which is necessary 

for proper operation, loosen the nut and adjust the 

allen screw according to the figure.
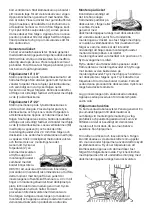
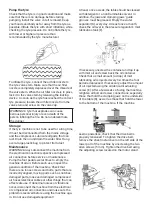
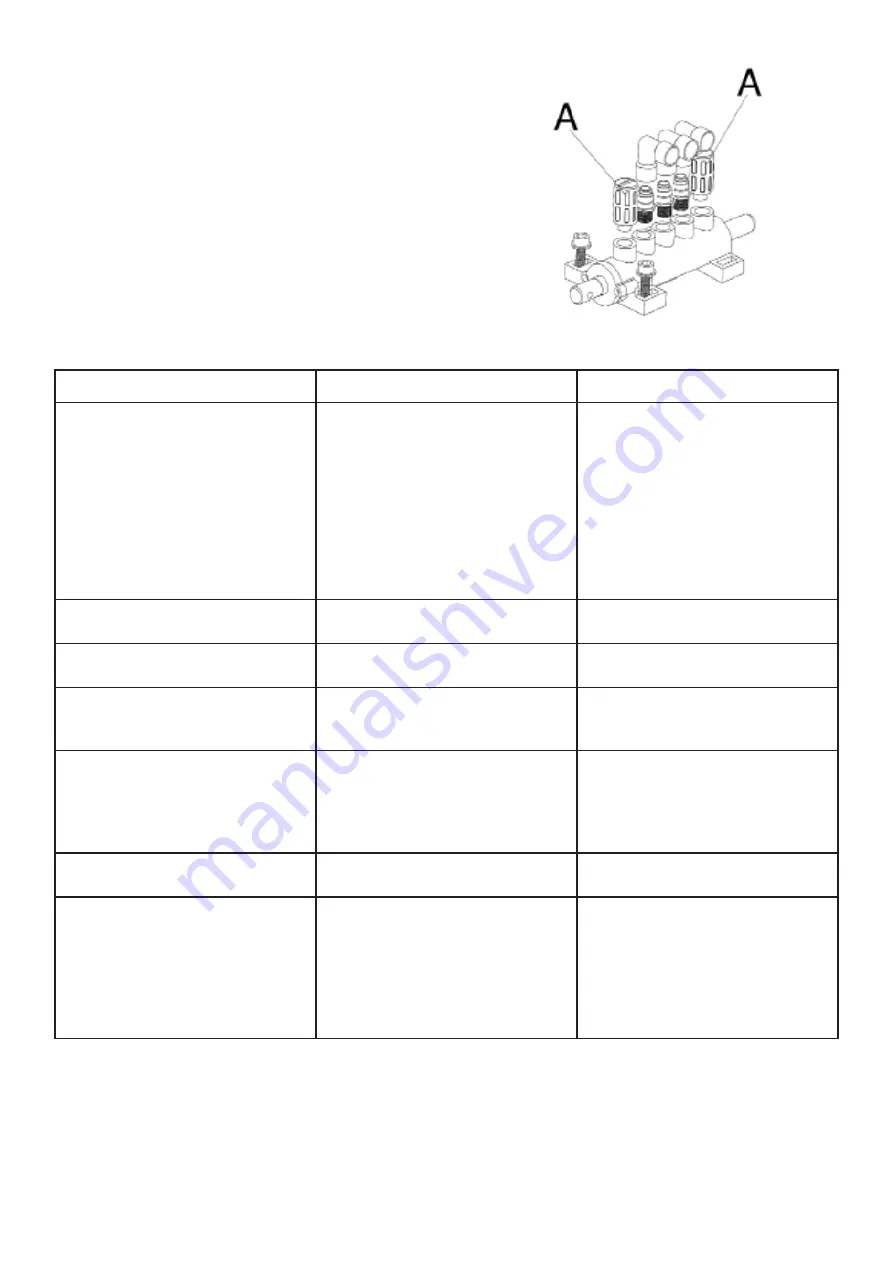
To maintain the reliability of the clincher and 

clamping jaws, the mufflers on the valve should be 

blown clean, remove the sheet metal cover on the 

left side of the machine part by unscrewing the two 

allen screws (5 mm). Remove the mufflers from the 

valve. Clean with compressed air (purge gun) or 

replace, if required.
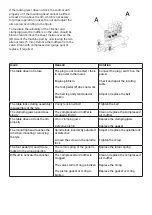
Issue

Reason

Solution

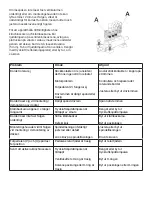
The table does not rotate

The plug is not connected / there 

is no power in the mains

Engine problem

The foot pedal (Z) does not work

The belt is poorly tensioned or 

broken

Connect the plug / switch on the 

power

Check and repair the rotating 

table

Adjust or replace the belt

The table locks during assembly/ 

disassembly of the tyre

Poorly tensioned belt

Tighten the belt

The clamping jaws open/close 

slowly

The compressed air muffler is 

clogged with dirt

Clean or replace the compressed 

air muffler

The table does not lock the rim

properly

Worn clamping jaws

Defective piston

Replace the clamping jaws

Replace the gasket

The mounting head touches the 

rim when mounting / removing 

the tyre

Spindle lock incorrectly adjusted 

or defective

Loosen the screw on the spindle 

lock

Adjust or replace the spindle lock

Tighten the screw

The foot pedal (V) and (U) are 

locked in the wrong position

The return spring of the pedal is 

broken

Replace the return spring

Difficult to activate the clincher

The compressed air muffler is 

clogged

The valve stem’s O-ring is broken

The piston gasket or O-ring is 

broken

Clean or replace the compressed 

air muffler

Replace the O-ring

Replace the gasket or O-ring

Содержание 32836

Страница 1: ...Tyre changer U 2011 D ckmaskin U 2011 Item No 32836...

Страница 2: ...ig en maskin obevakad d str mmen r p slagen Reng r maskinen efter anv ndning och serva den regelbundet F rvara maskinen p en torr och skyddad plats o tkomlig f r barn Uts tt inte elektriska maskiner f...

Страница 3: ...dning av s dana f r ndringar Det r absolut f rbjudet att ta bort eller manipulera maskinens s kerhetsanordningar Om s nd sker kan allvarlig skada eller olycka intr ffa Service reparation och reservdel...

Страница 4: ...av d ckmaskinen Anv nd inte halsband halsdukar eller l st h ngande kl der Ol sbara varningsskyltar skall omedelbart ers ttas Anv nd inte maskinen om dom saknas Kontrollera att skyltarna r l sbara f r...

Страница 5: ...d rekommenderas att utf ra detta moment med b rjan fr n en punkt d r innerslangens luftventilskaft hamnar ca 2 3 cm till h ger om monteringshuvudet Med d ckj rnet p plats l t bordet rotera medurs geno...

Страница 6: ...ndning inspektera det allm nna skicket p maskinen Kontrollera s att det inte finns n gra l sa skruvar och bultar detaljer som r felaktigt inriktade r rliga delar som k rvar skadade delar l sa och skad...

Страница 7: ...la p str mmen Kontrollera och reparera det roterande bordet Justera eller byt ut drivremmen Bordet l ser sig vid montering demontering av d cket D ligt sp nd drivrem Sp nn drivremmen Kl mbackarna ppna...

Страница 8: ...Varningsskyltarna...

Страница 9: ......

Страница 10: ...power is on Clean the machine after use and service it regularly Store the machine in a dry and sheltered place out of the reach of children Do not expose electrical machines to rain or moisture unles...

Страница 11: ...such changes It is strictly forbidden to remove or tamper with the machine s safety devices If this still happens serious injury or accident can occur Service repair and spare parts All maintenance an...

Страница 12: ...parts of the tyre changer Do not wear necklaces scarves or loose clothing Unreadable warning signs must be replaced immediately Do not use the machine if they are missing Check that the signs are legi...

Страница 13: ...head and lifts against the edge of the rear of the mounting head Using your hands press the tyre bead into the groove of the rim Then depress the foot pedal to rotate the table clockwise Then continu...

Страница 14: ...each use inspect the general condition of the machine Check that there are no loose screws and bolts parts that are incorrectly aligned moving parts such as notches damaged parts loose and damaged co...

Страница 15: ...Check and repair the rotating table Adjust or replace the belt The table locks during assembly disassembly of the tyre Poorly tensioned belt Tighten the belt The clamping jaws open close slowly The c...

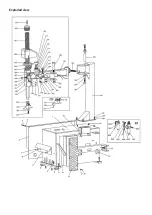
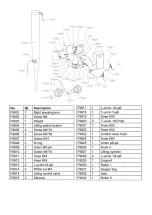
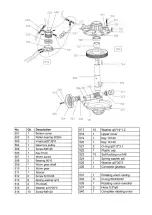
Страница 16: ...Exploded view...

Страница 17: ......

Страница 18: ......

Страница 19: ......

Страница 20: ......

Страница 21: ......

Страница 22: ......

Страница 23: ......

Страница 24: ......

Страница 25: ...Electrical circuit diagram...

Страница 26: ...Pneumatic diagram...

Страница 27: ...away from the mounting head during the work process 2 Keep your hands away from the clamping jaws during the work process 3 Keep your hands away from the tyre bead during the disassembly process 4 Ma...

Страница 28: ......

Страница 29: ......

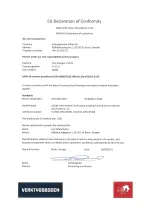
Страница 30: ...Verktygsboden Erfilux AB K llb cksrydsgatan 1 SE 507 42 Bor s Verktygsboden Bor s Sweden 0120504 03...

Отзывы: