background image


- 2 - 


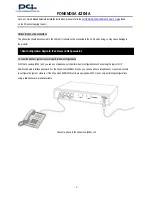
Connect a phone to the Fonemosa (4208/4216) unit’s phone jack 


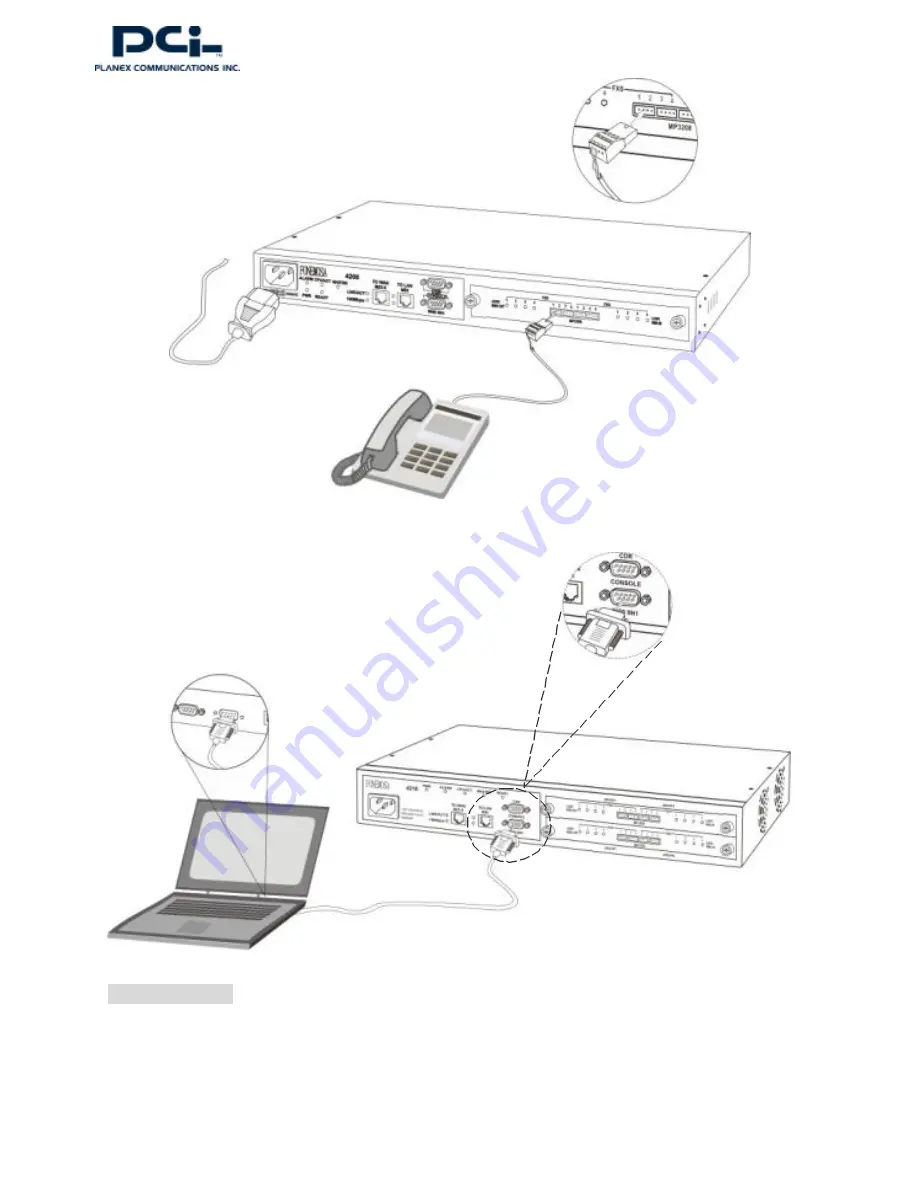
Use the RS-232 (DB9 DTE) port to connect a system console to the Fonemosa (4208/4216) unit 

System console settings 

Before you connect the RS-232 connector to the console port, you have to configure your VT100 terminal to match the settings of 

the Fonemosa unit’s console port. The console port’s terminal connection is set to 9600 baud, 8 data bits, 1 stop bit and no parity. 

Turn on the Fonemosa unit’s power and wait for the terminal to display  “Press Enter…” follow the directions to begin. 

Содержание Fonemosa 4204A

Страница 1: ... or system console to perform basic configurations With the Fonemosa 4204 unit you can use a telephone set to perform basic configurations such as setting the region ID IP address and web interface password For the Fonemosa 4208 4216 units you can use either a telephone set or a system console to configure the system However if the Fonemosa 4208 4216 units are equipped with FXO ports only performi...

Страница 2: ...ngs Before you connect the RS 232 connector to the console port you have to configure your VT100 terminal to match the settings of the Fonemosa unit s console port The console port s terminal connection is set to 9600 baud 8 data bits 1 stop bitand no parity Turn on the Fonemosa unit s power and wait for the terminal to display Press Enter follow the directions to begin ...

Страница 3: ...phone to configure the region ID 1 Pick up the phone and press 2 0000 You will hear 3 short tones 3 9507 Assuming you are modifying for China the last 2 digits 07 are China s regional ID 4 971 Enable the new region ID This action will change all setting values to return to their default values 5 Hang up the phone Using the ConsoleConfiguration FONEMOSA enable FONEMOSA configure Enter configuration...

Страница 4: ...ai 10 for Peking and 408 for San Jose USA The system console does not support area code and phone number configuration Using the system console to configure the area code and phone number is not supported The Fonemosa unitsupports three methods to obtain an IP address Static IP DHCP and PPPoE n Static IP If you have been assigned a public and static IP address by your ISP you can configure it to t...

Страница 5: ...regards to Web based management We strongly suggest that you use a private and fixed IP address such as 192 168 0 2 default setting so that you can use the web based interface to configure the Fonemosa unit s other advanced configurations Examples of advanced configurations include setting the supported T 38 fax transit function or configuring the PPPoE parameters You can skip this step if you are...

Страница 6: ...p the phone Using ConsoleConfiguration FONEMOSA enable FONEMOSA configure Enter configuration commands one per line End with CNTL Z FONEMOSA config password web_write password 2834 FONEMOSA config exit FONEMOSA You can use the web based interface using a popular browser such as IE or Netscape to perform further configurations You need to connect a PC to the Fonemosa unitand modify the PC s TCP IP ...

Страница 7: ...D A ANSWER CPU ACT ALARM PWR T O W A N M D I X TO LAN MDI 100Mbps MOSA SOHO Connect a PC to the Fonemosa 4204 unit Connect a PC to the Fonemosa 4208 4216 unit Click to highlight your Network Card s TCP IP options Click the Properties ...

Страница 8: ...r than using IP address 192 168 0 5 and Subnet Mask 255 255 255 0 as the above illustration demonstrates III Entering the Web Based Management Interface The Fonemosaunit s IP address Fill in WEB all capitals and the password that you have configured in the basic configuration section Press the OK button Fill in the IP Address and Subnet Mask They mustbe in the same subnet as the Fonemosa unit ...

Страница 9: ...the web based interface configuration please set the Support T 38 FAX to Yes V Configuring a Channel for T 38 FAX Support IV Configurethe Area Code and Phone Number Click the BASIC button to go to the basic configuration page Fill in the area code and phone number Click the Apply button to apply any changes ...

Страница 10: ...ook Set the Support T 38 FAX to Yes Click the Apply button to apply any changes Click the Select button to confirm Click the CHANNEL button on the top to go to the channel configuration page Select the channel that you want to configure ...

Страница 11: ...it will use the new IP setting When this happens you may no longer be able to access the Fonemosa unitusing a web browser You will then need to use a phone or console to configure the IP back to its default or fixed IP address such as 192 168 0 2 VII Configuring the Fonemosa unit s IP Modes usingthe Web Based Interface Click the PHONEBOOK button to go to the phonebook configuration page Fill in th...

Страница 12: ... the IP SETTINGS button to go to the IP settings configuration page Fill in the static IP address subnet mask and default gateway Select static IP mode Click the Apply button to apply any changes Static IP Mode ...

Страница 13: ... 13 Select DHCP mode Click the Apply button to apply any changes DHCP Mode ...

Страница 14: ...14 VIII Go tothe BASICPage to Restart the System Fill in the PPPoE account username and password re enter the password to confirm Select PPPoE mode Click the Apply button to apply any changes PPPoE Mode ...

Страница 15: ...de to determine the problem n Use FONEMOSA to dial VoIP service number Distributor s VoIP Service Number Following examples are for Taipei s distributor Taipei area please dial Distributor s Phone Number Taiwan other areas please dial 02 Distributor s Phone Number China area please dial 008862 Distributor s Phone Number Other countries please dial International Access Code 8862 Distributor s Phone...

Страница 16: ...d end the learning procedure and use that IP to setup the call 3 If the number can t be found in the dynamic phone book the Fonemosa unit will then use the phone line to dial 002862164458275 through PSTN to reach the remote Fonemosa unitand attempt to acquire the IP information At this point you will hear the ring back tone After a few seconds the phone will begin ringing The FXO LED should be fla...

Страница 17: ...e learning procedure will not start until the party receiving the call answers the phone In the duration of the learning process you will hear short sounds that should continue for about 30 seconds The FXO LED is ON but the phone is disabled 5 If the learning procedure is successful the Fonemosa unit will automatically disconnect the phone call made through the PSTN And should then begin dialing t...

Страница 18: ...me as the destination number For long distance calls place the long distance access code and area code in front of the destination number For international numbers you must add international access code country code area code destination number How to dial Description Traditional Phone Calls through PSTN Making phone calls as usual Phone Number Making traditional phone calls through the PSTN IP le...

Отзывы: