60
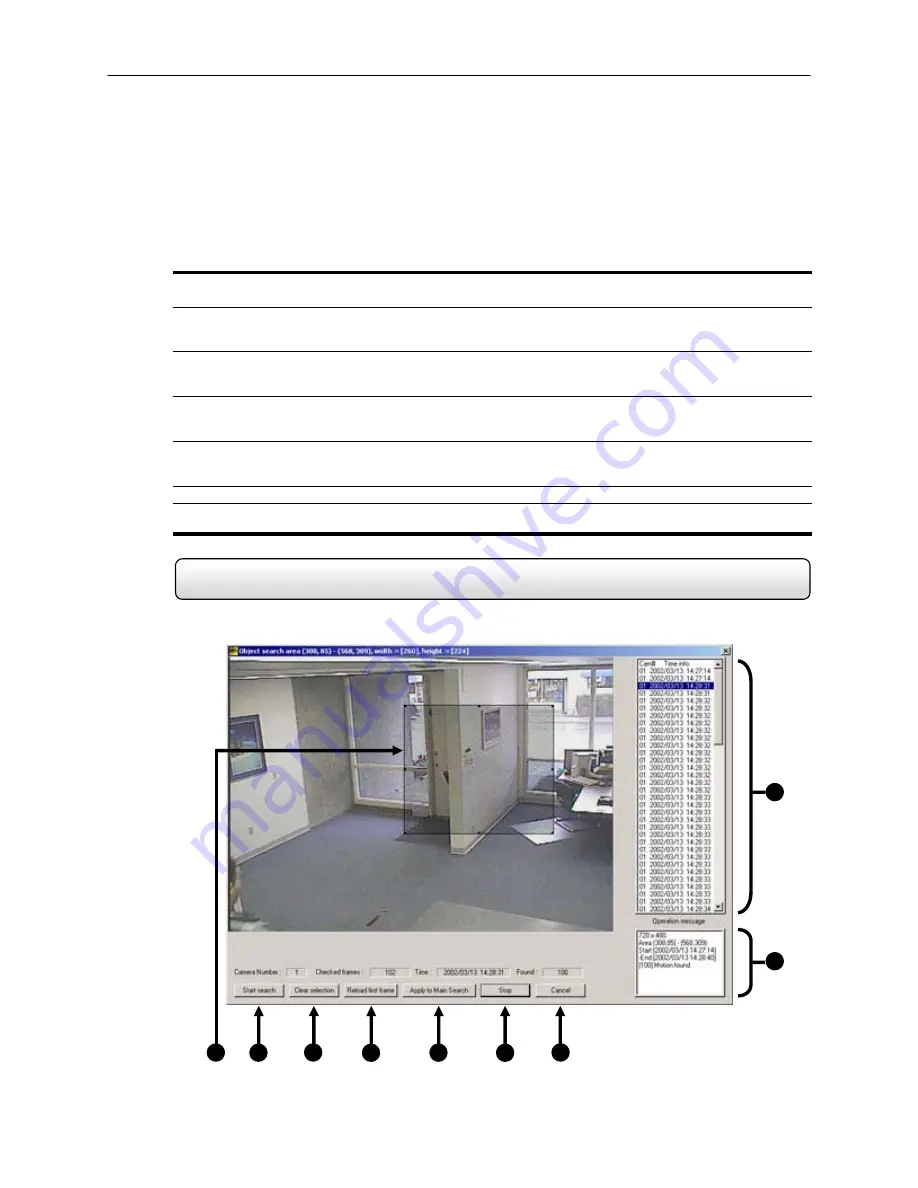
Object Search
The images in Figure 5.12 show how the Preview Search functions. The first screen that appears has 24 images
displayed. Each image represents the first second of each hour. If there is no image recorded during that period then
nothing will be displayed. When an hour is selected (by double clicking on the image) then a new screen appears with 6
images. Each of these images represents a 10 minute segment of video. Once a 10 minute segment is selected (by
double-clicking on the image) the final screen appears which breaks down that 10 minute segment into 1 minute
increments (10 images).
Performing a Preview Search
1) Begin by selecting a single camera. You can do this either by turning off all cameras but one, or by double clicking
a displayed image (it will then be the only image displayed on the screen)
2) Select the Preview Search Button.
24 Images should now be displayed. If there is no recorded video during a portion of the day then a ‘No
Image’ will be displayed where the image(s) should be.
3) Refine the search by selecting an image. Do this by double-clicking on the image.
6 Images should now be displayed. You can move back to the previous 24 image view by right clicking on an
image.
4) Refine the search by selecting an image. Do this by double-clicking on the image.
10 Images should now be displayed. You can move back to the previous 6 image view by right clicking on an
image.
5) To select a displayed 1 minute segment of video to begin playing it, simply double-click on the image.
A single image should now be displayed. You can move back to the previous 10 image view by right clicking
on an image.
6) You can now use the Play controls (See Section 5.3) to play the video.
7) To Apply the current image to the Main Search, that is, exit out of Preview search with the current image still
selected, simply deselect the Preview Search Button.
5.13
The Object Search is a powerful Search utility that allows you to search a region on the video for any motion changes.
The Results are neatly displayed and allows you to view them quickly.
1
2
3
4
5
6
7
8
Figure 5.13a
9
Содержание Open Eye HDDR-X240
Страница 71: ...71 Figure 7 6 Remove Disc from Drive...


