Connecting the SN4141 to a laptop PC
36
SmartNode 5541 & 4141 Series User Manual
4
• Initial Configuration
Note
The modified configuration is applied immediately. It is not necessary to
reboot the device when changing any configuration parameter.
172.16.1.99(if-ip) [WAN]#
copy running-config startup-config
172.16.1.99(if-ip) [WAN]
The SmartNode can now be connected to your network.
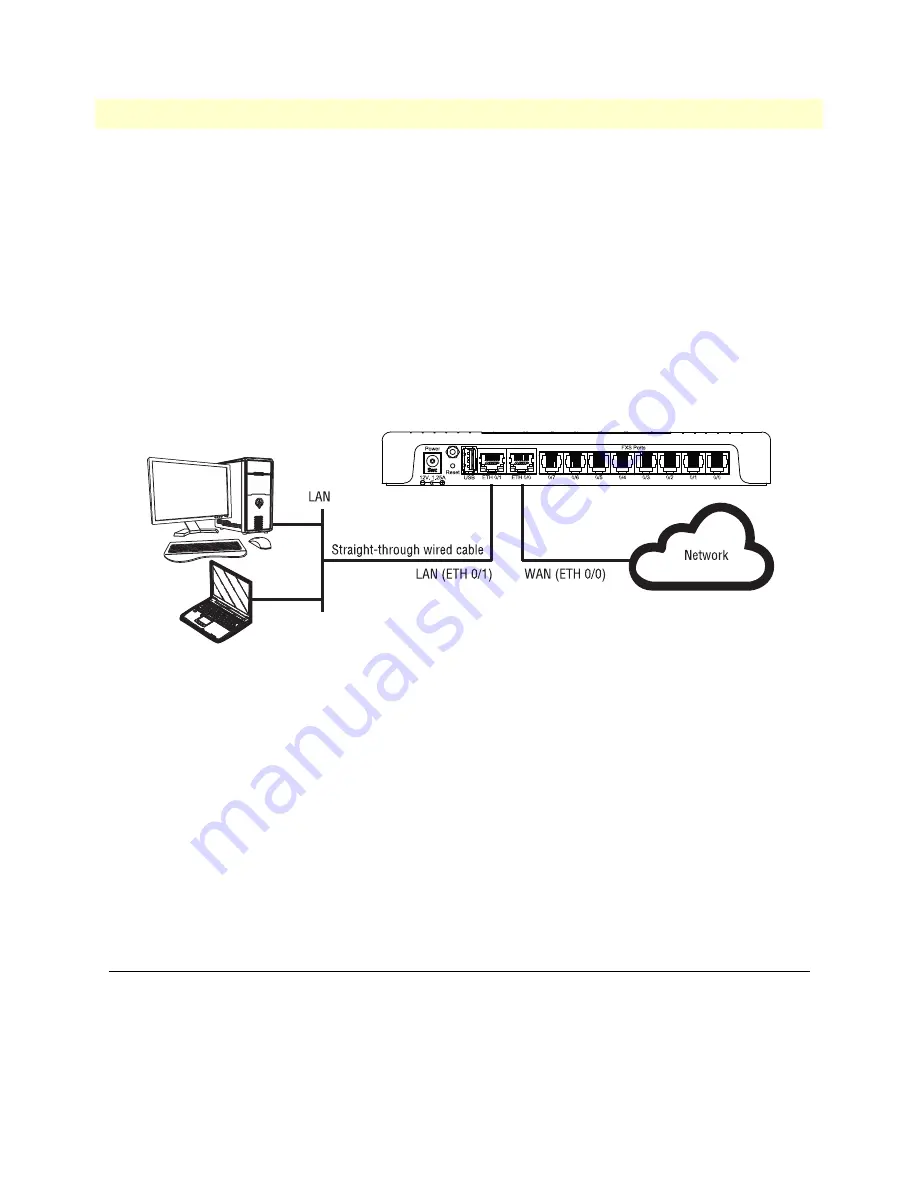
Connecting the SmartNode device to the network
In general, the SmartNode will connect to the network via the
WAN (ETH 0/0)
port. This enables the
SmartNode to offer routing services to the PC hosts on
LAN (ETH 0/1)
port. The SmartNode device is
equipped with Auto-MDX Ethernet ports, so you can use straight through or crossover cables for host or hub/
switch connections. (see
).
Figure 12. Connecting the SmartNode to the network
You can check the connection with the ping command from the SmartNode to another host on the network.
172.16.1.99(if-ip)[WAN]#ping <IP Address of the host>
Note
If the WAN address is
not
set to DHCP, to ping a device outside your local
LAN you must first configure the default gateway. (For information on con-
figuring the default gateway, refer to section “Set IP addresses” in the Trinity
Software Configuration Guide.)
Note
Connecting both Ethernet ports to the same switch will only work if the
switch has separate ARP tables for each connection.
“Loading the Configuration (optional)”
Connecting the SN4141 to a laptop PC
First, the SmartNode device must be connected to the main power supply with the power cable. Wait until the
Power
LED stops blinking and stays lit constantly. Now the SmartNode device is ready.
Содержание SmartNode 5541 Series
Страница 49: ...49 Appendix C Cabling Chapter contents Introduction 50 Ethernet 50 Analog FXS 51 ...
Страница 52: ...52 Appendix D Port pin outs Chapter contents Introduction 53 Ethernet 53 FXS port 53 ...
Страница 54: ...FXS port 54 SmartNode 5541 4141 Series User Manual D Port pin outs Figure 18 RJ 11 pinout diagram ...
Страница 55: ...55 Appendix E SmartNode Device Factory Configuration Chapter contents Introduction 56 ...


