www.parweld.com
18
4) Rotate the control knob to move the LED to the Peak duration
(L) This can be adjusted from 5 to 100% Peak duration is the
percentage of time the peak current is on relative to the background
current. 30% is a good starting point.
5) Rotate the control knob to move the LED to the Background
current (N) This can be adjusted from 5 to 200A (10-200A for
AC welding). The value is displayed on the digital display (B).
Background current is the minimum amperage that will be output.
It cannot be higher than the peak current and generally will be set
withing 50 to 70% Amps of the peak current.
6) Rotate the control knob to move the LED to the Pulse Frequency
(M) This can be adjusted from 0.5 to 200Hz. The value is displayed
on the digital display (B). Pulse Frequency is the number of pulses
per second generally a range of 50 to 150 hz will be used with
100Hz being a good base setting.
30-40Hz will help agitate the weld puddle and allow you to weld at a
lower amperage than without pulse.
50-150Hz really stiffen the arc and let you pinpoint the arc more than
without pulse.
0.5-10Hz reduce heat input the most.
The selected amperage and the consistency of travel speed can
negate some of the effects of Power pulsing.
7.8 Plasma Cutting
1) Push the torch connector into the socket on the machine taking
care to line up the pins.
2) Tighten the hand nut on the torch to secure the torch.
CAUTION: Before switching on the machine ensure all spares
are fitted correctly to the torch and in good condition. Failure to
do so can result in the destruction of the torch head.
7.8.1 Setting Air pressure
Connect the air line to the rear of the machine and Switch on
the machine. The air supply should be capable of supplying
compressed air at a pressure of 5Bar and a flow rate of 155lpm free
air delivery.
7.8.2 Preparing to Cut
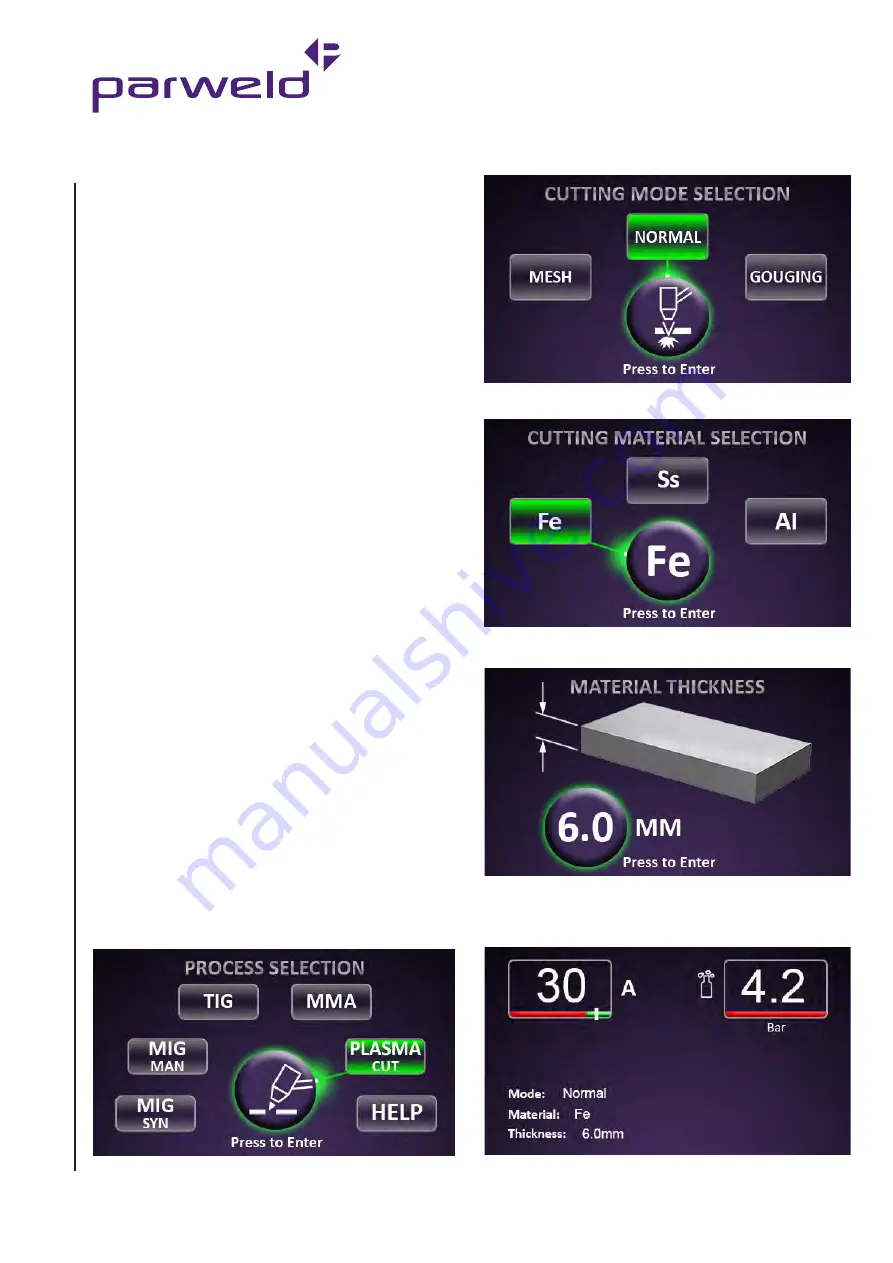
Switch on the machine and return to the home menu, then select the
Plasma Cut option.
Select the type of cutting operation, Mesh, Normal cutting or
Gouging.
Select the material type to be Cut or Gouged
Select the material thickness using the main control knob to
increase or reduce the thickness and press to select.
You are now ready to operate. On the following example screen, the
air pressure quoted is the suggested air pressure for the parameters
selected. Adjust the regulator inside the machine to match this.
Содержание XTM 221Di
Страница 1: ...OPERATOR MANUAL ISSUE 2 XTM 221Di...
Страница 31: ...www parweld com 31...


