background image

4

GB

IE

NI


Content

Introduction .................................4
Intended purpose ........................4
General description ....................5

Scope of delivery ...............................5
Overview ..........................................5
Functional description .......................5

Technical data ................................5
Safety precautions .........................6

Symbols used in the instructions ......6
Symbols on the shredder ......................6
General notes on safety ........................7

Installation manual ......................13

Unpacking .....................................13
Assembling the shredder .................13
Power-On indicator...........................13

Operation ....................................13

Start-up .........................................13
Switching the shredder on and off ...13
Pusher..............................................14
Emptying the collector box .............14
Overload protection ......................14
Restart prevention .........................14

Working methods ......................14

General working instructions ..........14
Shredding the material .......................15
Freeing up a jam ...............................15
Adjusting the pressure plate ...........16

Maintenance and cleaning .........17

General cleaning and servicing ....17

Replacement parts .....................17
Waste disposal and environmental
protection ..................................18
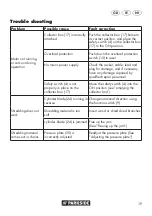
Trouble shooting ........................19
Exploded View ............................20
Guarantee .................................21
Repair Service ............................22
Service-Center ............................23
Translation of the original
EC declaration of conformity ......24

Introduction

Congratulations on the purchase of your

new device. With it, you have chosen a

high quality product.

The operating instructions constitute part of

this product. They contain important 

information on safety, use and disposal.

Before using the product, familiarise yourself

with all of the operating and safety

instructions. Use the product only as 

described and for the applications specified.

Keep this manual safely and in the event

that the product is passed on, hand over

all documents to the third party.

Intended purpose

The shredder is intended for compacting

fibrous and wood-related materials such as

hedge and tree cuttings, branches, bark

and pine cones.

Any use not expressly permitted in this

manual may damage the shredder and

pose a serious danger to the user. Note 

that despite the measures taken to integrate 

safety into the design, despite the safety 

precautions and despite the supplementary 

protective measures, there is still a residual 

risk. This applies in particular when 

chopping rose hedges or other thorny 

bushes. 

Do not fell the shredder with stones,
glass, metal, bones, plastics or 
fabrics.

The operator or user is responsible for

accidents and injury or damage to third

parties.

The manufacturer will not be held 

responsible for any damage caused by 

improper operation or use beyond the 

purpose intended.

This product is only intended for home use, 

it is not suitable for commercial use.

Содержание PLH 2800 B2

Страница 1: ...PLH 2800 B2 ELEKTRO LEISEH CKSLER Originalbetriebsanleitung GARDEN SHREDDER Translation of original operation manual IAN 315130 GB IE NI GB IE NI...

Страница 2: ...DE AT Seite Before reading unfold the page containing the illustrations and familiarize yourself with all functions of the device Klappen Sie vor dem Lesen die Seite mit den Abbildungen auf und mache...

Страница 3: ...A B C 1 2 4 5 6 7 8 9 10 11 12 13 15 16 17 18 19 20 21 3 21 3 18 14 20 19...

Страница 4: ...D E F G 15 16 9 11 10 12 13 AUS EIN 22 23 5 24 25 1 1 2 2...

Страница 5: ...f this product They contain important information on safety use and disposal Before using the product familiarise yourself with all of the operating and safety instructions Use the product only as des...

Страница 6: ...inder system is used for cutting which works extremely quietly and automatically draws in the shredding material A 60L transparent collector box is convenient for handle the debris and check the capac...

Страница 7: ...l cannot thus be considered as valid Safety precautions This shredder may cause serious injuries if improperly used Before using the shredder read the user manual carefully and familiarise yourself wi...

Страница 8: ...fore working on it Guaranteed noise power level Do not dispose of electrical equipment in the domestic waste Wait until all machine components have completely stopped before touching them Do not use a...

Страница 9: ...Only use the shredder in the open that is away from walls or other rigid structures on a firm level surface Only use the machine in the recommended position Do not use the machine on a paved gravelle...

Страница 10: ...ep your head hair and body away from the intake opening Do not touch dangerous moving parts before the machine has been disconnected from the power supply and the dangerous moving parts have come to a...

Страница 11: ...aving it unattended before releasing a jammed blade when you are checking the device cleaning it or removing blockages when you are carrying out cleaning or maintenance work or replacing accessories B...

Страница 12: ...replace or repair damaged parts 3 check for loose parts and tighten them CAUTION The following states how damage to the device and possible injury to people can be avoided Clean the ventilation slits...

Страница 13: ...rom moving dangerous parts to avoid damage to cables which may cause contact with live parts Electrical safety CAUTION The following states how to avoid accidents and injuries due to electric shock Us...

Страница 14: ...in the base frame 16 The collecting tray 17 can only be placed in one direction 7 Safe the Collecting container 17 by pulling the safety switch 4 into the ON position Power On indicator The Power On i...

Страница 15: ...er off see switching the shredder on and off 2 Unlock the collector box 17 by placing the safety switch 4 in the OFF position 3 Remove the collector box 17 from the chassis 16 and empty it 4 Make sure...

Страница 16: ...ng the material 1 Connect the power supply and switch the shredder ON to start shredding the material see switch the shredder on and off 2 Adjust the pressure plate 25 to correct position by rotating...

Страница 17: ...the jam is fixed 5 If jam is fixed switch the shredder ON see switching the shredder on and off to continue shredding the material 6 If jam is not fixed repeat above steps If still fail to fix open th...

Страница 18: ...eet out of openings while machine is running General cleaning and servicing Do not spray water onto the shredder Electric shock hazard Always keep the shredder wheels and air vents clean Use a brush o...

Страница 19: ...g centre when you have finished with them Machines do not belong with domestic waste Hand over the device at an utilization location The plastic and metal parts employed can be separated out into pure...

Страница 20: ...r damage and if necessary have any damage repaired by qualified repair personnel Safety switch 4 is not properly in place on the collector box 17 Move the safety switch 4 into the ON position see empt...

Страница 21: ...IE NI 1 2 3 4 5 8 6 7 Exploded View 1 Housing upper part 2 Motor assembly 3 Cutting roller 24 4 Cutting board cover 23 5 Subassembly housing lower part 6 Assembly frame 7 Collection box 17 8 Assembly...

Страница 22: ...able Guarantee Cover The equipment has been carefully produced in accordance with strict quality guidelines and conscientiously checked prior to delivery The guarantee applies for all material and man...

Страница 23: ...bulky goods express or other special freight Please send the equipment inc all accessories supplied at the time of purchase and ensure adequate safe transport packaging Repair Service For a charge rep...

Страница 24: ...l 01904 727516 GB NI 016950408 IE Fax 01904 720565 Website www coreservice co uk IAN 315130 Importer Please note that the following address is not a service address Please initially contact the servic...

Страница 25: ...uideline 2006 42 EC Machinery Directive 2014 30 EU EMC Directive 2000 14 EC Noise Directive amended by 2005 88 EC conformity assessment procedure 2000 14 EC Annex V Measured sound power level LwA 83 4...

Страница 26: ...zung und Entsorgung Machen Sie sich vor Gebrauch des Produkts mit s mtlichen Bedienungs und Sicherheitsvorschriften vertraut Verwenden Sie das Produkt ausschlie lich wie beschrieben und f r die angege...

Страница 27: ...hreibung Der Leiseh cksler ist mit einem leistungsstarken Motor sowie einem berlastschutz ausgestattet Eine Wiedereinschaltsperre sorgt au erdem f r erh hte Sicherheit Zum Schneiden ist eine Schneidwa...

Страница 28: ...in der Konformit tserkl rung erw hnten Normen und Vorschriften ermittelt Alle technischen und optischen Angaben sind unverbindlich und freibleibend nderungen im Zuge der Weiterentwicklung behalten wir...

Страница 29: ...hutz tragen Handschutz tragen Ger t vor Regen sch tzen Vorsicht Vor dem Einstellen vor Reinigungsarbeiten oder wenn das Kabel erfasst wurde oder besch digt ist den Motor abschalten und das Ger t vom N...

Страница 30: ...rieb Untere Stellung Normalbetrieb H ckseln Stellen Sie sich niemals auf die Maschine Allgemeine Sicherheitshinweise Gestatten Sie niemals Kindern Personen mit eingeschr nkten k rperlichen sensorische...

Страница 31: ...andschuhe festes Schuhwerk und lange Hosen tragen Keine locker sitzende Kleidung bzw Kleidung mit lose h ngenden Kordeln oder G rteln tragen Betreiben Sie die Maschine nicht barf ig oder in leichten S...

Страница 32: ...inal Hersteller gelieferter Teile erl schen sofort jegliche Garantieanspr che Lassen Sie den H cksler w hrend des Betriebs nicht unbeaufsichtigt und bewahren Sie ihn an einem trockenen Ort au erhalb d...

Страница 33: ...Schutzeinrichtungen oder schilden oder ohne Sicherheitseinrichtungen zum Beispiel dem angebrachten Fangsack oder mit besch digtem oder abgenutztem Kabel Schalten Sie die Maschine vor dem Anbringen od...

Страница 34: ...oder Vibrationen erzeugt Vor dem Wiedereinschalten ist der H cksler auf Sch den zu pr fen Achten Sie darauf dass sich kein H ckselmaterial im Bereich der Auswurf ffnung festsetzt da es sonst m glicher...

Страница 35: ...mechanismus ein Fremdobjekt trifft oder wenn die Maschine beginnt ungew hnliche Ger usche von sich zu geben oder zu vibrieren Material entfernt wird Achten Sie darauf dass der Motor frei von Schmutz u...

Страница 36: ...orgung anzuschlie en oder ein besch digtes Kabel zu ber hen bevor es von der Stromversorgung getrennt wurde da besch digte Kabel zum Ber hren aktiver Teile f hren k nnen Wenn das Netzkabel besch digt...

Страница 37: ...fang kontrollieren Zusammenbau des H ckslers 1 Montieren Sie die St tzf e 3 auf dem Chassisbein Befestigen Sie sie mit den selbstschneidenden Schrauben 5x45 mm 2 Radachse 21 durch die Bohrungen im Gru...

Страница 38: ...1 Verl ngerungskabel in die Steckdose 6 stecken Kontrollieren Sie ob die Bereitschafts LED 13 leuchtet Damit wird signalisiert dass das Ger t betriebsbereit ist 2 Kontrollieren Sie ob der Einf lltric...

Страница 39: ...nd die Bereitschafts LED 13 erlischt Damit wird signalisiert dass das Ger t abgeschaltet ist Wiedereinschaltsperre Das Ger t schaltet sich nach dem Abschalten infolge einer berlastung nicht automatisc...

Страница 40: ...starten siehe hierzu Ein und Ausschalten des H ckslers 2 Druckplatte 25 durch Drehen am Stellrad 5 in die richtige Position justieren siehe Justieren der Druckplatte 3 Material durch den Einf lltricht...

Страница 41: ...eht f Alles H ckselmaterial entfernen Fremdk rper k nnen den Wiedereinbau behindern g Druckplatte 25 und Schneidwalze 24 wieder einsetzen Achten Sie dabei auf die korrekte Orientierung beider Teile wi...

Страница 42: ...auf die korrekte Orientierung beider Teile wie in Bild F und au en auf der Schneidwerkabdeckung 22 dargestellt Die Nut der Schneidwalze 24 muss passgenau auf die Passfeder der Antriebswelle geschoben...

Страница 43: ...Stillstand gekommen sein Warnung Verletzungsgefahr durch bewegliche gef hrliche Teile Allgemeine Reinigungs und Instandhaltungsarbeiten Das Ger t nicht mit Wasser bespritzen Stromschlaggefahr Wenn di...

Страница 44: ...ann Lassen Sie die Maschine vor der Aufbewahrung immer abk hlen Ersatzteile Ersatzteile k nnen direkt bei unserem Kundendienst bestellt werden Bitte geben Sie in Ihrer Bestellung den Ger tetyp sowie d...

Страница 45: ...Sch den durch qualifiziertes Fachpersonal reparieren lassen Sicherheitsschalter 4 am Auffangbeh lter 17 ist nicht richtig geschaltet Sicherheitsschalter 4 in die EIN Stellung schalten siehe Entleeren...

Страница 46: ...sionszeichnung 1 Baugruppe Geh useoberteil 2 Baugruppe Motor 3 Schneidwalze 24 4 Schneidwerkabdeckung 23 5 Baugruppe Geh useunterteil 6 Baugruppe Rahmen 7 Auffangbeh lter 17 8 Baugruppe R der 1 2 3 4...

Страница 47: ...it anfallen sind kostenpflichtig Garantieumfang Das Ger t wurde mit gr ter Sorgfalt gem strenger Qualit tsstandards gefertigt und vor der Auslieferung gr ndlich gepr ft Die Garantie bezieht sich auf s...

Страница 48: ...ie abgedeckt sind werden kostenpflichtig in unserer Serviceniederlassung durchgef hrt wo man Ihnen gerne einen Kostenvoranschlag unterbreitet Wir k nnen nur Ger te bearbeiten die mit angemessener Verp...

Страница 49: ...EU EMV Richtlinie 2000 14 EG Richtlinie ber umweltbelastende Ger uschemissionen ge ndert durch die Richtlinie 2005 88 EG Konformit tsbewertungsverfahren 2000 14 EC Anhang V Gemessener Schallleistungsp...

Страница 50: ...Ga Po Vertrieb GmbH Heinrich Horten Stra e 5 47906 Kempen Last Information Update Stand der Informationen 16 05 2019 Ident No 1 05 IAN 315130 GB IE NI...

Отзывы: