AT-UHD-CAT-8
15
Basic Operation
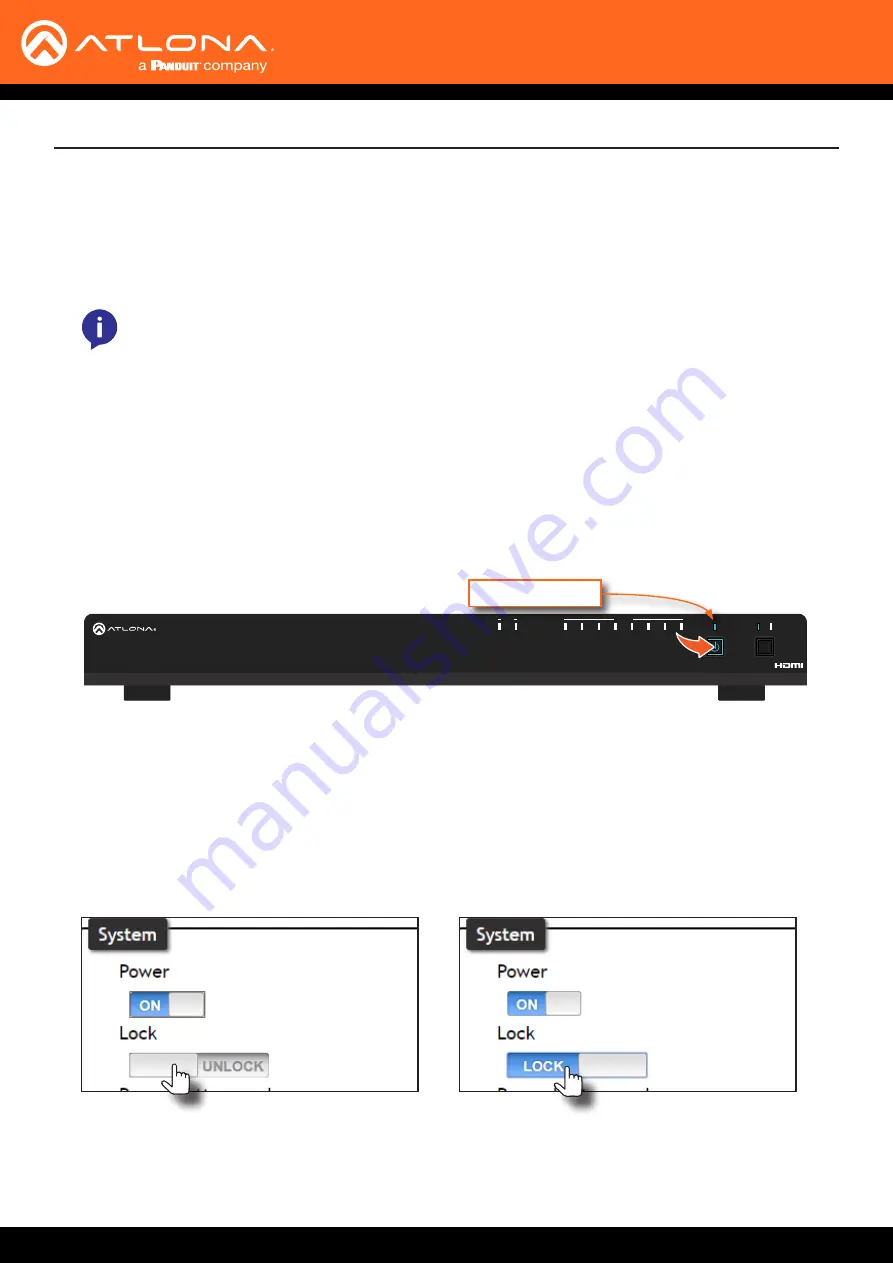
Locking the Front Panel
The buttons on the front panel can be locked or unlocked. Locking the front-panel buttons prevents accidental
pressing of the buttons, which may occur when the unit is mounted in a rack environment. Locking and unlocking of
the front-panel buttons is managed through the web GUI or by executing the
Lock
and
Unlock
API commands. Refer
to the API documentation for more information.
1. Make sure the unit is powered.
2.
Press and hold the
POWER
button for five seconds.
3. Release the
POWER
button. The
LOCK
LED indicator on the front panel will glow solid blue. The front panel
buttons are now locked.
4.
To unlock the front-panel buttons, press and hold the
POWER
button for five seconds, then release. The
LOCK
LED indicator will no longer be illuminated.
Using the Front Panel
Using the web GUI
1.
Login to the web GUI. Refer to
Introduction to the Web GUI (page 31)
for more information.
2. Click
System
in the menu bar.
3. Locate the
System
section and click the
Lock
toggle button to switch between
LOCK
and
UNLOCK
states.
4. The
LOCK
LED indicator, on the front panel, will reflect the current state. When the front-panel buttons are
locked, the
LOCK
LED indicator will glow solid blue.
NOTE:
Locking the front-panel buttons will also lock the EDID, preventing the EDID mode from being
switched between
INT
and
LEARN
modes.
AT-UHD-CAT-8
HDMI
OUT
IN
HDBaseT
4
3
2
1
8
7
6
5
POWER
EDID
LEARN
INT
LOCK
1
2
4
HDMI
IN
OUT
HDBaseT OUT
3
5
6
8
7
DC 48V IN
FW
LAN
MASTER
1
RS-232
IR
TX
RX
TX RX
2
RS-232
IR
TX
RX
TX RX
3
RS-232
IR
TX
RX
TX RX
4
RS-232
IR
TX
RX
TX RX
5
RS-232
IR
TX
RX
TX RX
6
RS-232
IR
TX
RX
TX RX
7
RS-232
IR
TX
RX
TX RX
8
RS-232
IR
TX
RX
TX RX
RS-232
IR
TX
RX
TX RX
LOCK LED indicator


