


AT-HDVS-150-TX / AT-HDVS-150-TX-PSK
9
+
OPTIONAL
DC 48V
2
3
9
11
4
1
5
7
8
10
12
6
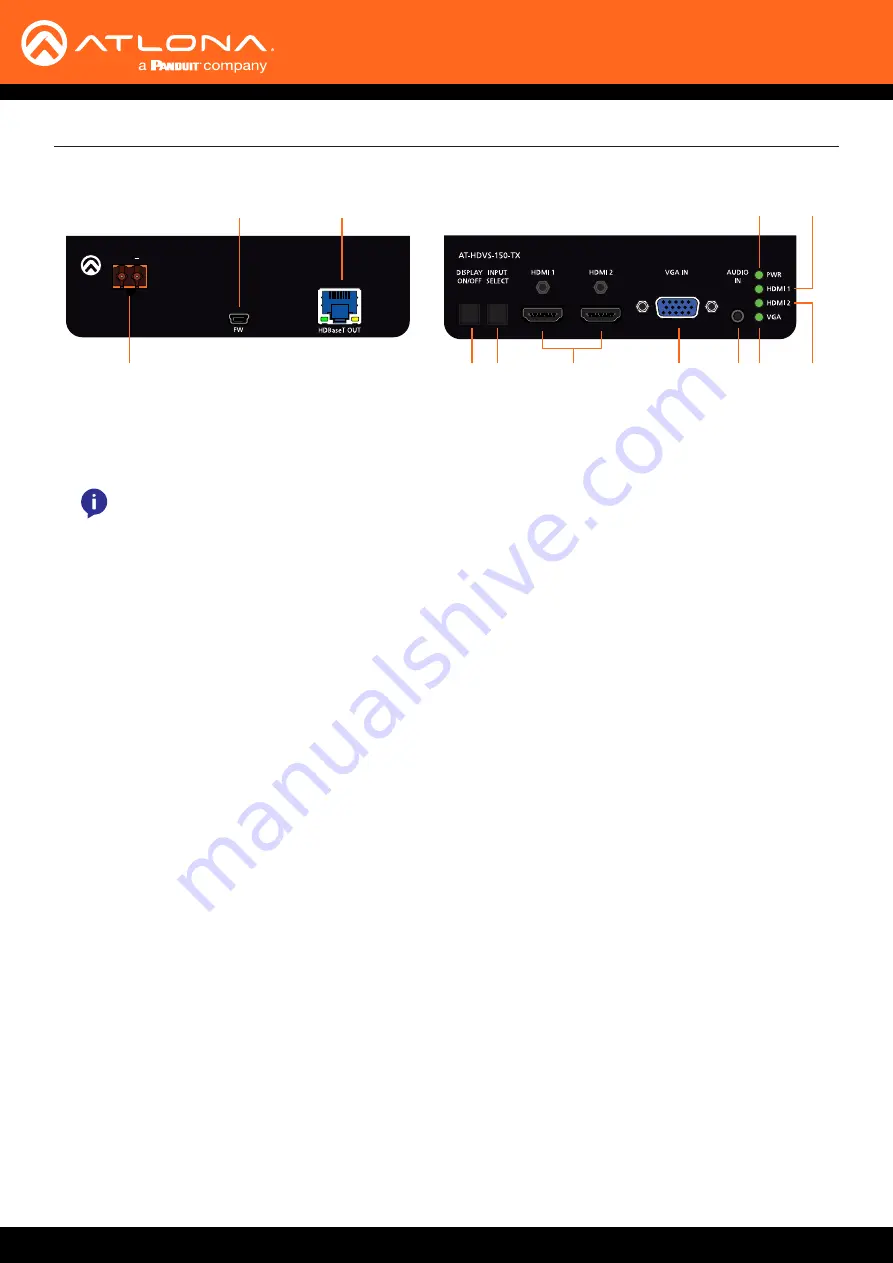
1 DC 48V
Connect the power supply to this port to power an
HDBaseT receiver, projector, or other PoE device.
2
FW
Connect a mini USB to USB-A type cable from this
port to a computer to update the firmware.
Updating the Firmware (page 22)
for more
information.
3 HDBaseT OUT
Use an Ethernet cable to connect an HDBaseT PoE
receiver to this port.
4
DISPLAY ON/OFF
Press this button to power-on / power-off the display
that is connected to the receiver.
5 INPUT SELECT
Press this button to select the desired input.
6 HDMI 1 / HDMI 2
Connect up to two HD sources using these HDMI
ports.
7 VGA IN
Connect a VGA source to this port.
8 AUDIO IN
Connect a 3.5mm mini-stereo audio cable, from
an analog audio source, to this port. See
for more information.
9 PWR
This LED indicator will glow bright green when the
switcher is powered.
10 VGA
This LED indicator will glow bright green when the
VGA IN port is selected.
11 HDMI 1
This LED indicator will glow bright green when the
HDMI 1 port is selected.
12 HDMI 2
This LED indicator will glow bright green when the
HDMI 2 port is selected.
Front
Rear
Panel Description
NOTE:
The
DC 48V
port is only available on
the AT-HDVS-150-TX-PSK.


