51
Camera Function Control
■
Camera Setup
The following function requires the use of cameras
equipped with this specific feature.
1. Select the desired monitor and camera.
Refer to the Monitor Selection and Camera Selection.
2. Pressing the
[STOP]
button while holding down the
[SHIFT]
button will open the Camera Setup Menu on
the active monitor.
The STOP indicator will light.
3. Select the desired item in the menu by moving the
Joystick Controller
UP
and
DOWN
, and then select the
desired parameter (or mode) in the menu by moving
the Joystick Controller
L
and
R
.
Press the
[CAMERA (ENTER)]
button to execute the
currently highlighted selection and to enter a submenu
of the Camera Setup Menu, or press the
[CLEAR
(ESC)]
button to leave from the currently selected
menu and return to the previous page of the menu.
4. Press the
[RESET]
button in the menu to reset the
parameter of a selected item to the factory default set-
ting or enter the Special Camera Menu when the cursor
is positioned on SPECIAL in the menu.
Pressing the
[RESET]
button while holding down the
[SHIFT]
button will restore all factory default settings.
Notes:
• Refer to the Operating Instructions of the selected
camera for more details.
• Moving the joystick while holding down the
[SHIFT]
button will move the camera smoothly for preset-
ting the position in the camera setup menu.
5. To close the Camera Setup Menu, press the
[PAUSE]
button while holding down the
[SHIFT]
button.
The STOP indicator will go off.
RESET
ACK
ALARM
DISARM
ALL RESET
NEXT
PREV
S-CTL ID
STOP
PAUSE
CAM MENU ON
CAM MENU OFF
TOUR
SEQ
GROUP
SEQ
MONITOR
LOCK
OSD SERVICE
CAM FUNC
OSD
OPE ID
GROUP PRESET
LOG OUT
F1
F2
PROGRAM
PRESET
CALL
PRESET
AUX1 OFF
ALM S
CAM ID
T&D
AUX1 ON
VLD S
GEN
WIPER
SYS S
AUX2 OFF
ALM H
AUX2 ON
VDL H
ALL
SHIFT
BLK
EXIT
CLEAR
(ESC)
DEF OFF
DEF ON
CAMERA
(ENTER)
AUTO
PAN
MON STATUS
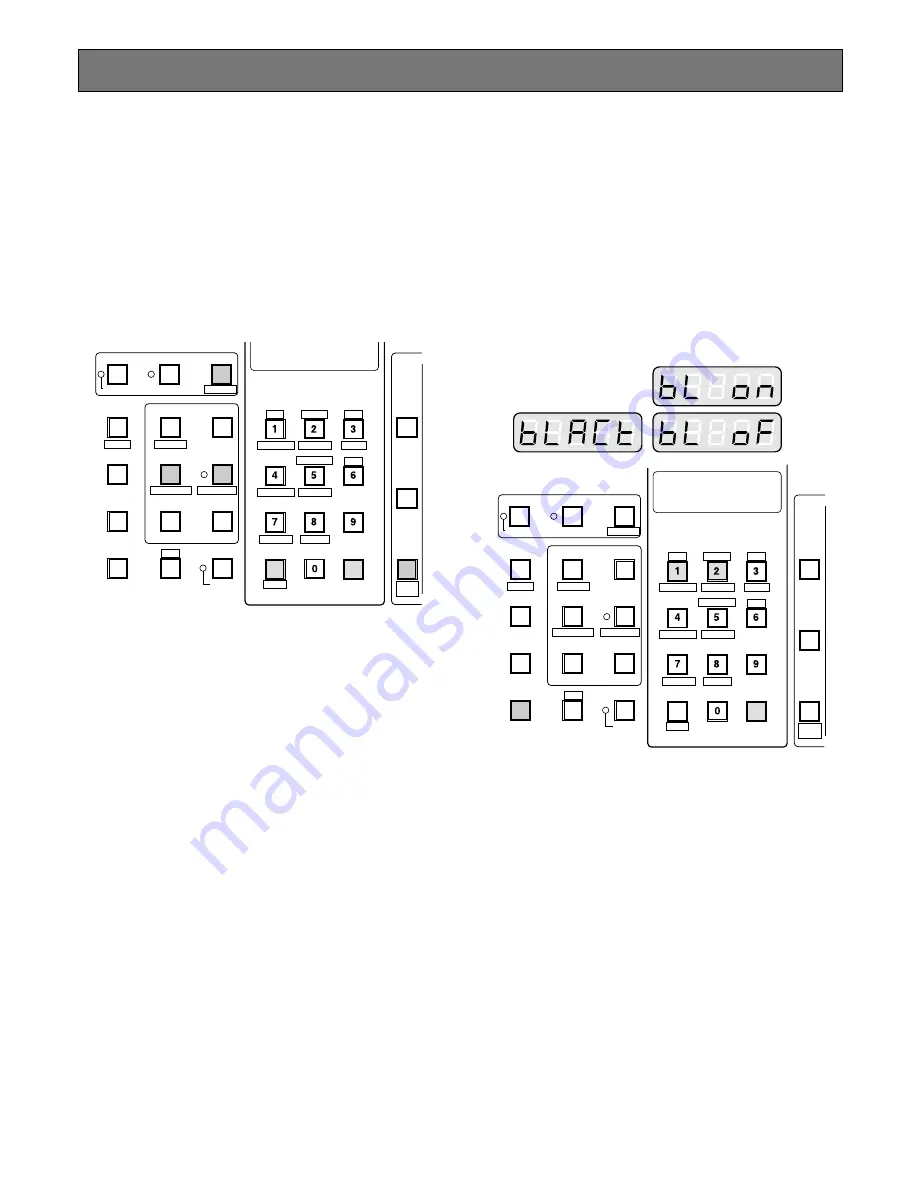
■
Changing to Black and White
Pictures
The following function is available only when specified cam-
eras having a color-black and white switching feature are
used.
1. Select the desired monitor and camera.
Refer to the Monitor Selection and Camera Selection.
2. Press the
[F2]
button two times.
"BLACT" as shown in the figure will appear on the LED
display of the controller.
3. Press the
[1]
button to change the picture from color to
black and white on the active monitor.
"BL ON" appears on the LED display to indicate the
selected mode.
4. Press the
[2]
button to change black and white to color
picture on the active monitor.
"BL OF" appears on the LED display to indicate the
selected mode.
5. To exit from the mode, press the
[CLEAR (ESC)]
but-
ton.
Note:
When the black and white parameter is set
AUTO in the camera setup menu, this function is
disabled.
RESET
ACK
ALARM
DISARM
ALL RESET
NEXT
PREV
S-CTL ID
STOP
PAUSE
CAM MENU ON
CAM MENU OFF
TOUR
SEQ
GROUP
SEQ
MONITOR
LOCK
OSD SERVICE
CAM FUNC
OSD
OPE ID
GROUP PRESET
LOG OUT
F1
F2
PROGRAM
PRESET
CALL
PRESET
AUX1 OFF
ALM S
CAM ID
T&D
AUX1 ON
VLD S
GEN
WIPER
SYS S
AUX2 OFF
ALM H
AUX2 ON
VDL H
ALL
SHIFT
BLK
EXIT
CLEAR
(ESC)
DEF OFF
DEF ON
CAMERA
(ENTER)
AUTO
PAN
MON STATUS
Содержание WJMPU955 - PROCESSING UNIT - TMU
Страница 26: ...26...
Страница 27: ...27 OPERATING PROCEDURES with WV CU850...
Страница 42: ...42...
Страница 43: ...43 OPERATING PROCEDURES with WV CU360C...
Страница 57: ...57 TROUBLESHOOTING...
Страница 61: ......