Technical Information
111
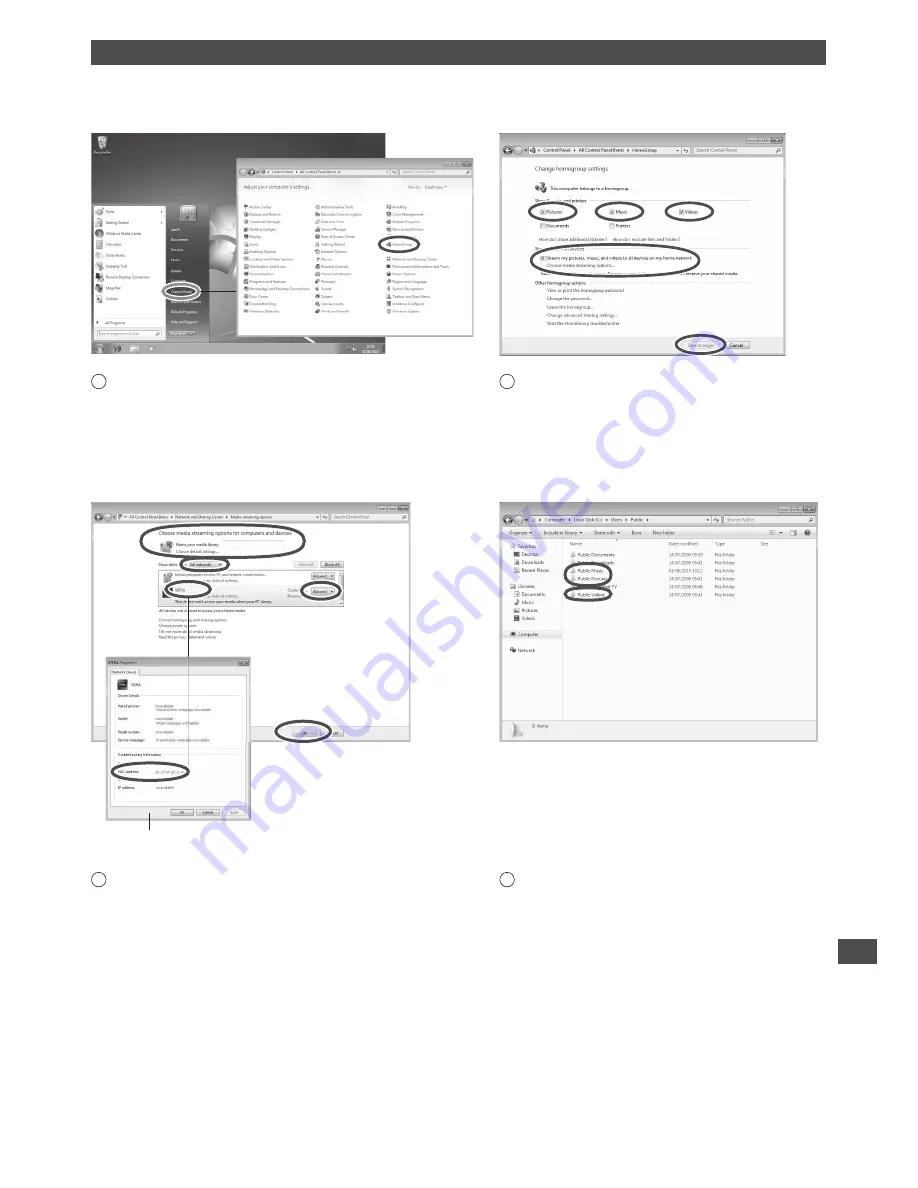
How to use Windows 7 as a media server
Follow the examples below to set up Windows 7 for use as a media server.
Confirm the MAC Address of VIERA in [Network Status] (p. 44).
The following procedure and screens are examples. For more information, refer to the help functions of Windows 7.
1
Open the Windows start menu and select [Control Panel].
Select [HomeGroup] in Control Panel window.
2
Be sure [Pictures], [Music] and [Videos] of “Share
libraries and printers” and [Stream my pictures,
music, and videos to all devices on my home
network] of “Share media with devices” are
checked. (Check them and click [Save changes]
if necessary). Then select [Choose media
streaming options...].
property window
3
In [Name your media library:] text box, enter a name that
will identify your PC on VIERA.
On the Show devices drop bar, select [All networks] to
display all the available devices in the list. VIERA Name
stored in [Network Link Settings] (p. 85) will be displayed.
Select the VIERA Name and click [Allowed] so that VIERA
can access your PC.
Then, click [OK].
If the VIERA Name is not displayed correctly, click the
device to confirm the MAC address of the device in property
window. Find a device that has the same MAC address as
VIERA: that is your VIERA.
4
To share photos, music and videos with VIERA,
put photo files into [Public Pictures] folder
and video files into [Public Videos] folder under
\Computer\Local Disk (C:)\Users\Public.


