


Advanced
Main Menu
VIERA Link
Picture
Sound
Setup
1/2
Q-Link Settings
Child Lock
Teletext
Shipping Condition
Input Labels
Banner Display Timeout
3 seconds
TOP
Tuning Menu
Off Timer
Off
Language
Access
Setup Menu
OPTION SD CARD
INPUT
EXIT
RETURN
Access
Tuning Menu
Auto Setup
Access
Programme Edit
Access
Manual Tuning
Access
22
23
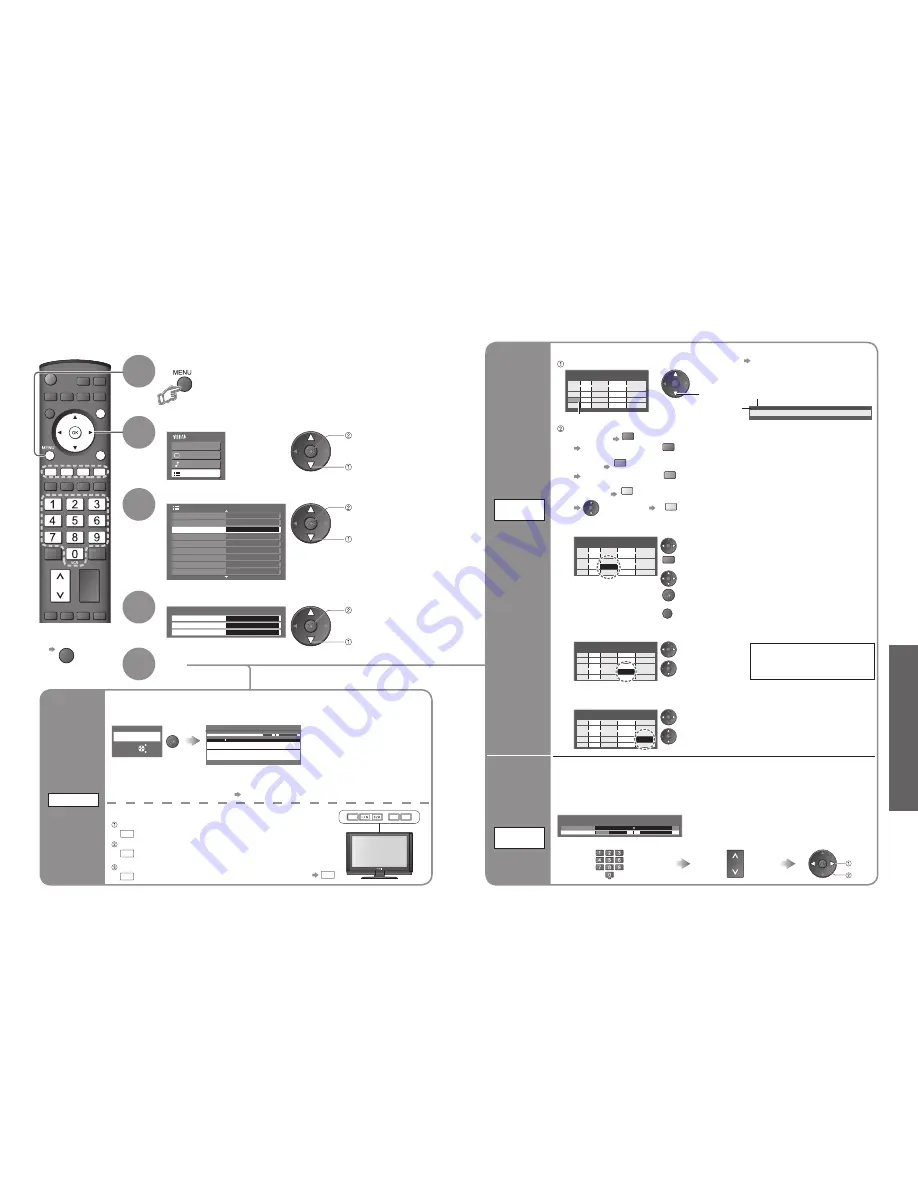
Editing and Setting Channels
The current channel settings can be changed according to your needs and reception conditions.
•
Editing and Setting Channels
Select “Setup”
2
Select “Tuning Menu”
3
Display the menu
Select a function
4
■
To return to TV
EXIT
1
access
select
access
select
access
select
Set
5
Set channels
automatically
Auto Setup
EXIT
RETURN
Start Auto Setup
All tuning data will be erased
Auto Setup
Start Auto Setup
Automatically set the channels received in the area.
If a Child Lock PIN number (p. 24) has been set, it must be entered.
•
All previous settings are erased.
•
The settings are downloaded to a Q-Link compatible equipment connected to the TV.
•
When the operation is completed, the broadcast of programme number “1” will appear.
•
If tuning has not done completely “Manual Tuning”
Auto Setup
This will take about 3 mins.
Scan
2
1
41
78
CH 29
Channel
Service Name
CH 33
Settings are made automatically
For Auto Setup, using the buttons on the top of the TV
Press repeatedly until “Auto Setup” appears
F
Access “Auto Setup”
TV
Start “Auto Setup”
TV
■
To return to TV
F
F
TV
AV
Set
channels
manually
Manual
Tuning
Fine Tuning
Programme
1
[CH33]
Manual Tuning
Manual Tuning
2
78
41
1
■
Fine Tuning
Use to make small adjustments to the tuning of an individual channel (affected by weather
conditions, etc.)
■
Manual Tuning
Set channel manually after Auto Setup.
If a VCR is connected with only the RF cable, select programme position “0”.
store
search
Search and store
Select the channel
Select the programme position
Edit
channels
3 FTP
CH05 SC1 PAL
Corontation Street
Programme Edit
1
CH33
2
CH21
3
CH21
4
CH60
5
CH21
Prog. Chan. Name
1 2 3
X Y Z
F T P
4 5 6
SC1
Auto
SC1
Auto
SC1
Auto
SC1
Auto
SC1
Auto
Sound Sys. Colour Sys.
■
To change sound system based on signals
Select the
“Sound Sys.”
fi
eld
Select
sound system
SC1 : PAL B, G, H / SECAM B, G
SC2 : PAL I
SC3 : PAL D, K / SECAM D, K
F :
SECAM L / L’
Programme Edit
1
CH33
2
CH21
3
CH21
4
CH60
5
CH21
Prog. Chan. Name
1 2 3
X Y Z
F T P
4 5 6
SC1
Auto
SC1
Auto
SC1
Auto
SC1
Auto
SC1
Auto
Sound Sys. Colour Sys.
Programme Edit
1
CH33
2
CH21
3
CH21
4
CH60
5
CH21
Prog. Chan. Name
1 2 3
X Y Z
F T P
4 5 6
SC1
Auto
SC1
Auto
SC1
Auto
SC1
Auto
SC1
Auto
Sound Sys. Colour Sys.
■
To change the name of the broadcaster displayed when selecting channels
Cursor
Select the “Name”
fi
eld
red
Enter the “User input” mode
Select the character
Select the channel to edit
Edit
■
To delete
red
After con
fi
rming, press
red
■
To add
green
After con
fi
rming, press
green
■
To move
yellow
Select new
position
yellow
Edit the programme position settings
select
Programme Edit
1
CH33
2
CH21
3
CH21
4
CH60
5
CH21
Prog. Chan. Name
1 2 3
X Y Z
F T P
4 5 6
SC1
Auto
SC1
Auto
SC1
Auto
SC1
Auto
SC1
Auto
Sound Sys. Colour Sys.
Select the “Colour Sys.”
fi
eld
Select colour system
■
To change colour system based on signal
•
Normally, select “Auto”
Channel
Name
( Maximum:
fi
ve characters)
Set
•
To change channel number
“Manual Tuning”
■
Delete
■
Add
■
Move
■
Change
name
■
Change
sound
system
■
Change
colour
system
Programme
Edit
RETURN
Store


