


Advanced
Main Menu
VIERA Link
Picture
Sound
Setup
Picture Menu
1/2
Viewing Mode
Auto
Contrast
Brightness
Colour
Sharpness
Tint
Colour Balance
Warm
Colour Management
Off
P-NR
Off
INPUT
OPTION SD CARD
MULTI WINDOW
DIRECT TV REC
EXIT
RETURN
Picture Menu
1/2
Contrast
Brightness
Colour
Sharpness
Tint
Colour Balance
Warm
Colour Management
Off
P-NR
Off
Viewing Mode
Auto
Colour Balance
Normal
Sharpness
Tuning Menu
Access
18
19
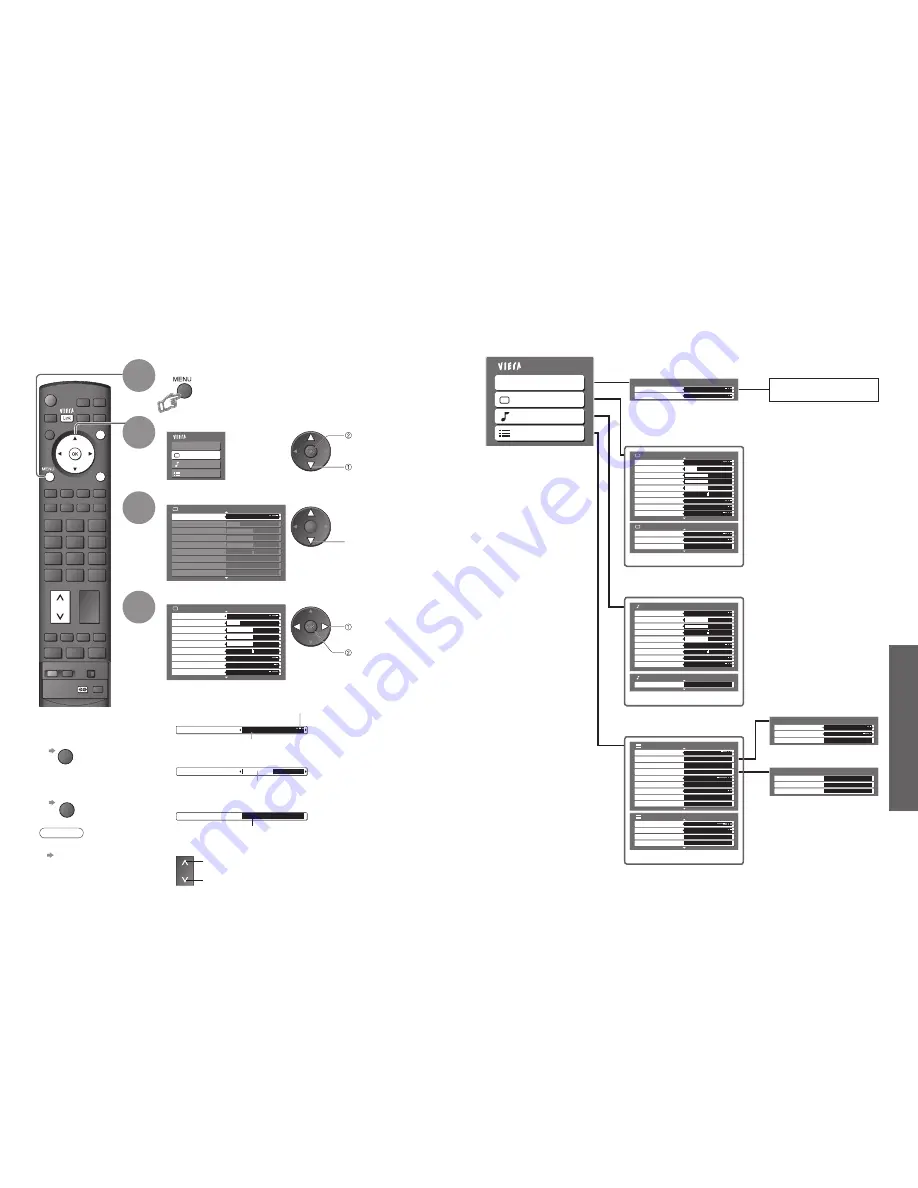
How to Use Menu Functions
•
How to Use Menu Functions
(picture, sound quality
, etc.)
Display the menu
3
2
4
Various menus allow you to make settings for the picture, sound, and other functions.
•
Displays the functions that can be set
(varies according to the input signal)
Note
•
To initialize all settings
“Shipping Condition”
(p. 25)
■
To return to TV
at any time
EXIT
■
To return to the
previous screen
RETURN
Select the menu
Select the item
(example: Picture Menu)
access
select
Adjust or select
change
(example: Picture Menu)
(example: Picture Menu)
Changed
Number and positions
of alternatives
Moved
■
Choose from among alternatives
■
Adjust using the slide bar
store or access
(Required by some
functions)
1
Displays the next screen
■
Go to the next screen
■
To change menu pages
up
down
select
■
Overview
VIERA Link Control
Speaker Selection
VIERA Link Menu
Home Cinema
Recorder
(p. 33)
Main Menu
VIERA Link
Picture
Sound
Setup
The menu of the accessed
equipment
Picture Menu
1/2
Contrast
Brightness
Colour
Sharpness
Tint
Colour Balance
Warm
Colour Management
Off
P-NR
Off
Viewing Mode
Auto
2/2
3D-COMB
Off
Reset to Default
Set
Picture Menu
MPEG NR
Off
(p. 20)
2/2
Reset to Default
Set
Sound Menu
Mode
Music
Bass
Treble
Balance
Headphone Volume
Surround
Off
Volume Correction
MPX
Stereo
Sound Menu
HDMI1 Input
Auto
1/2
(p. 20)
1/2
AV Colour System
Q-Link Settings
Access
Child Lock
Access
Tuning Menu
Teletext
TOP
Access
Setup Menu
Language
Access
Off Timer
Off
Auto
Shipping Condition
Access
Input Labels
Access
Access
2/2
Banner Display Timeout
3 seconds
Software License
System Information
Access
Access
Setup Menu
VIERA Link
On
(p. 21)
Q-Link Settings
Q-Link
AV2
AV2 out
TV
Download
Access
(p. 21)
Access
Tuning Menu
Auto Setup
Access
Programme Edit
Access
Manual Tuning
Access
(p. 22)
•
Only available items can be selected.


