


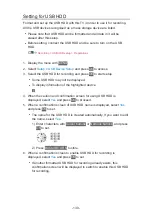

2) Set
Satellite
for the selected LNB.
– Select
No Satellite
if you do not know the connected satellite.
(Available satellite is searched in
Auto Setup
.)
– Select
User defined
to set
Test Transponder Frequency
manually.
– If you set to
Single Cable
, additional settings are required. Set
SingleCable Version
,
User Band
,
User Band Frequency
and
PIN
(depending on the Single Cable router you use). For details, read
the manual of the Single Cable router.
Watching > Tuning and editing channels > Selectable satellites
5. Press
BACK/RETURN
to store.
6. Select
Auto Setup
and press
OK
to access.
7. Select
Search Mode
/
Scan Mode
and press
OK
to access.
8. Set the item and press
OK
to store.
●
Scan Mode
Quick
:
Scans the suitable frequency for the selected satellite.
Full
:
Scans the whole frequency range.
●
After settings, select
Start scan
and press
OK
to search.
9. A confirmation screen is displayed and press
OK
to start
Auto Setup
.
(Settings are made automatically.)
●
When the operation is completed, the channel at the lowest position will
be displayed.
= Note =
●
Set
Dual Tuner Mode
to
On
to select DVB-S signal for DVB-via-IP server
function.
■
DVB-C, DVB-T, Analogue
1. Select
Auto Setup
and press
OK
to access.
2. Set
DVB-C Auto Setup Settings
and press
OK
to store. (DVB-C)
●
Scan Mode
Quick
:
Scans the suitable frequency in your country.
Full
:
Scans the whole frequency range.
- 118 -
Содержание TX-55FZ950E
Страница 1: ...eHELP English TX 55FZ950E TX 65FZ950E TX 55FZ800E TX 65FZ800E...
Страница 98: ...Note Voice guidance function may not correspond exactly 98...
Страница 143: ...For details of supported file formats Media Player Supported format 143...
Страница 199: ...Note Depending on the area this function may not be available For details consult your local Panasonic dealer 199...
Страница 203: ...Mirroring Settings Settings for the mirroring function Functions Mirroring Mirroring Settings 203...
Страница 283: ...Picture Viewing Mode Selects your favourite picture mode for each input Watching For best picture Viewing Mode 283...
Страница 293: ...PICTURE Button Setting Sets the viewing mode selection when pressing PICTURE Watching For best picture Viewing Mode 293...
Страница 294: ...Lock Settings Locks the settings of Professional1 2 for each input Watching For best picture Lock Settings 294...
Страница 296: ...Reset to Defaults Resets the current Picture Viewing Mode to the default settings 296...
Страница 297: ...Sound Mode Selects your favourite sound mode for each input Watching For best audio Sound mode 297...
Страница 303: ...Reset to Defaults Resets the current Sound Mode to the default settings 303...
Страница 306: ...TV Name Sets your favourite name for this TV Network Network settings TV Name 306...
Страница 312: ...Mirroring Settings Settings for the mirroring function Functions Mirroring Mirroring Settings 312...
Страница 313: ...Control4 Settings Settings for the Control4 function Network Network settings Control4 Settings 313...
Страница 315: ...Timer Off Timer Sets the duration of time until the TV automatically goes into Standby mode Watching Basic Off Timer 315...
Страница 317: ...Time Zone Adjusts the time data Watching Basic Adjusting time 317...
Страница 321: ...Voice Control Settings Settings for Voice Control function Functions Voice Control Settings 321...
Страница 322: ...USB Device Setup Formats the USB HDD or safely removes USB device Recording USB HDD setup Setting for USB HDD 322...
Страница 332: ...HDMI HDR Setting Set to On when the HDR device is connected to the TV Watching External equipment HDMI HDR Setting 332...
Страница 333: ...Common Interface Sets to watch encrypted channels etc Functions Common Interface Using Common Interface 333...
Страница 350: ...There is a little gap around the panel to prevent damage to the panel This is not a malfunction 350...
Страница 354: ...ver 3 100...