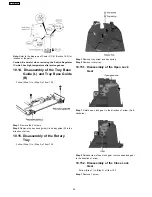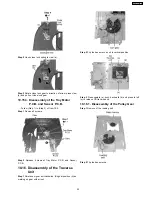
Step 3
Release the 2 claws in the direction of arrow (1), and
then push the pulley pin in the direction of arrow (2).
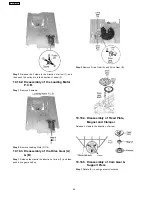
10.16.2. Disassembly of the Loading Motor
P.C.B.
Step 1
Remove 2 screws.
Step 2
Remove Loading Motor P.C.B.
10.16.3. Disassembly of the Drive Gear (A)
& (B)
Step 1
Release the claw in the direction of arrow (1), and then
push drive gear shaft up.
Step 2
Remove Drive Gear (A) and Drive Gear (B).
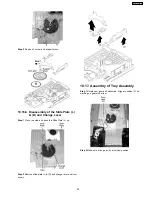
10.16.4. Disassembly of Fixed Plate,
Magnet and Clamper
Release 3 claws in the direction of arrow.
10.16.5. Disassembly of Cam Gear &
Support Piece
Step 1
Rotate (A) in cam gear anti-clockwise.
44
SA-HT640WPL
Содержание SA-HT640WPL
Страница 4: ...23 2 Packaging 109 24 Replacement Parts List 110 24 1 Component Parts List 111 4 SA HT640WPL ...
Страница 10: ...10 SA HT640WPL ...
Страница 16: ...16 SA HT640WPL ...
Страница 19: ...8 2 Detail Block Diagram Receiver module 19 SA HT640WPL ...
Страница 31: ...31 SA HT640WPL ...
Страница 37: ...10 1 Disassembly Flow Chart 37 SA HT640WPL ...
Страница 38: ...10 2 Main Components and P C B Locations 38 SA HT640WPL ...
Страница 46: ...Step 3 Push tray assembly to the direction of arrow shown 46 SA HT640WPL ...
Страница 53: ...14 2 Main P C B 53 SA HT640WPL ...
Страница 60: ...SA HT640WPL 60 ...
Страница 68: ...SA HT640WPL 68 ...
Страница 70: ...70 SA HT640WPL ...
Страница 80: ...SA HT640WPL 80 ...
Страница 86: ...SA HT640WPL 86 ...
Страница 88: ...SA HT640WPL 88 ...
Страница 97: ...97 SA HT640WPL ...
Страница 104: ...21 3 4 2 Receiver Module P C B 104 SA HT640WPL ...
Страница 106: ...23 Explode Views 23 1 Cabinet Parts Location 106 SA HT640WPL ...
Страница 107: ...107 SA HT640WPL ...
Страница 108: ...108 SA HT640WPL ...
Страница 109: ...23 2 Packaging 109 SA HT640WPL ...

