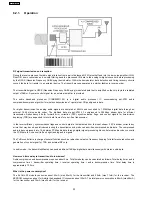
Class-D amp systems are basically switching systems. As such, it is prone to EMI. EMI issues can be rectified through proper
grounding techniques and proper components layout. It is quite common to see ferrite beads, capacitors and inductors on these
systems.
Another issue would be interchannel modulation. This problem would only arise if each channel is using different switching
frequency. It would create an amplified “beat” that can be heard from speakers.
8.3.6. Other issues should we be aware of ?
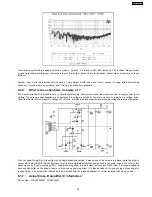
The class-D amplifier IC is limited to only +/- 30volts power supply. This system uses a linear power source to supply power to the
module. These linear power supplies are unregulated (i.e. voltage is not fixed). Therefore we have to implement a voltage limiter
circuit that would limit the maximum voltage of +/-27volts. It is also imperative that the power supply voltages are almost balanced.
Also, the class-D amplifier IC is configured as single-ended connection. It means one of the outputs is a signal while the other is
connected to ground. With this configuration, this Class D amplifiers will deliver energy back to the power supply. We refer to this
phenomenon as “Supply pumping effect”. Supply pumping effect is more evident on very low frequencies. It is recommended to
have enough buffer on the supply rails to limit the supply pumping effect. It is also advised not to use any type of speakers for
testing. There is an output filter that needs to be matched with the intended speaker. A normal resistive load may be used.
8.3.7. Actual Class-D amplifier IC information
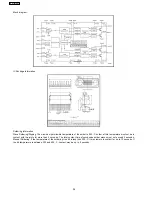
Part number: C1BA00000407 (TDA8920BJ)
25
SA-HT640WPL
Содержание SA-HT640WPL
Страница 4: ...23 2 Packaging 109 24 Replacement Parts List 110 24 1 Component Parts List 111 4 SA HT640WPL ...
Страница 10: ...10 SA HT640WPL ...
Страница 16: ...16 SA HT640WPL ...
Страница 19: ...8 2 Detail Block Diagram Receiver module 19 SA HT640WPL ...
Страница 31: ...31 SA HT640WPL ...
Страница 37: ...10 1 Disassembly Flow Chart 37 SA HT640WPL ...
Страница 38: ...10 2 Main Components and P C B Locations 38 SA HT640WPL ...
Страница 46: ...Step 3 Push tray assembly to the direction of arrow shown 46 SA HT640WPL ...
Страница 53: ...14 2 Main P C B 53 SA HT640WPL ...
Страница 60: ...SA HT640WPL 60 ...
Страница 68: ...SA HT640WPL 68 ...
Страница 70: ...70 SA HT640WPL ...
Страница 80: ...SA HT640WPL 80 ...
Страница 86: ...SA HT640WPL 86 ...
Страница 88: ...SA HT640WPL 88 ...
Страница 97: ...97 SA HT640WPL ...
Страница 104: ...21 3 4 2 Receiver Module P C B 104 SA HT640WPL ...
Страница 106: ...23 Explode Views 23 1 Cabinet Parts Location 106 SA HT640WPL ...
Страница 107: ...107 SA HT640WPL ...
Страница 108: ...108 SA HT640WPL ...
Страница 109: ...23 2 Packaging 109 SA HT640WPL ...

