23
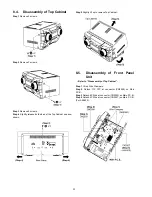
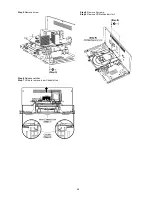
8.4. Disassembly of Top Cabinet
Step 1
Remove 2 screws.
Step 2
Remove 2 screws.
Step 3
Remove 5 screws.
Step 4
Slightly release both sides of the Top Cabinet as arrow
shown.
Step 5
Slightly lift up to remove Top Cabinet.
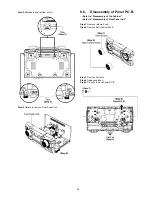
8.5. Disassembly of Front Panel
Unit
•
Refer to “Disassembly of Top Cabinet”.
Step 1
Lift up Wire Clampers.
Step 2
Detach 17P FFC at connector (CN2500) on Main
P.C.B..
Step 3
Detach 9P Wire at connector (CN2503) on Main P.C.B..
Step 4
Detach 4P Wire at connector (CN2507) on Main P.C.B..
(For AKX400)
Содержание SA-AKX200LM
Страница 5: ...5 1 4 1 For SA AKX200LM Figure 1 3 1 4 2 For SA AKX400LM Figure 1 4 ...
Страница 13: ...1 5 2 Main Unit Key Button Operation 5 2 1 For SA AKX200 ...
Страница 14: ...1 5 2 2 For SA AKX400 ...
Страница 20: ...20 7 Troubleshooting Guide Contents for this section is not available at time of issue ...


