


99
For Y
our
Inf
ormation
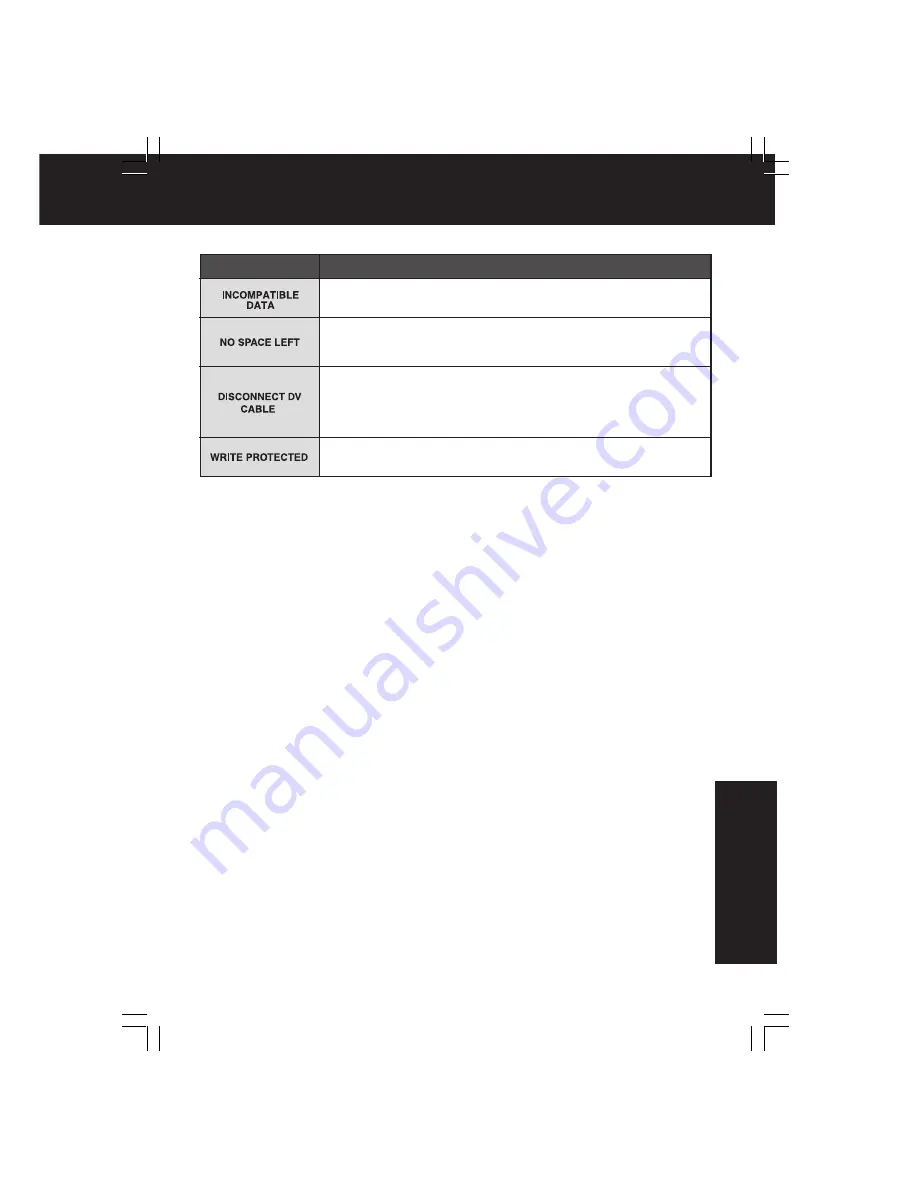
Indications
Condition
If you play a tape recorded in a format other than NTSC or you try
to copy copy-protected data, “INCOMPATIBLE DATA” will appear.
When a still image is transferred from a tape to an already full
Memory Card, or when setting is DPOF, “NO SPACE LEFT”
appears.
If the Palmcorder is in M-CARD mode or Photo Title (CAMERA
mode) and the DV Interface Cable (i.LINK) is connected,
“DISCONNECT DV CABLE” appears. In this case, remove the DV
Interface Cable (i.LINK) from the Palmcorder.
In M-CARD mode, this display appears if the SD Memory Card
Lock Switch is in the Lock position.
On-Screen Displays (OSD)
DV702-K.p 95-99.p65
02/06/06, 13:59
99


