Panasonic PT-VX61K Скачать руководство пользователя страница 10

Features of the Projector

Excellent Basic Performance


Unique optical system, lamp dimming 

system and the DAYLIGHT VIEW function 

allow you to project a good-quality image 

even in a bright room.


It has many useful functions such as 

compact design for portability and multiple 

input interface etc.

Easy Setup


The adoption of 1.6x optical zoom and the 

lens shift function ensures highly flexible 

setup of the projector.


KEYSTONE, CORNER CORRECTION and 

CURVED CORRECTION functions allow 

easy correction of various image distortions 

occurred in the installation location.

Maintenance cost down


The long life lamp with new lamp driving 

system and the water wash enabled 

long life filter have greatly reduced the 

maintenance time and the cost.
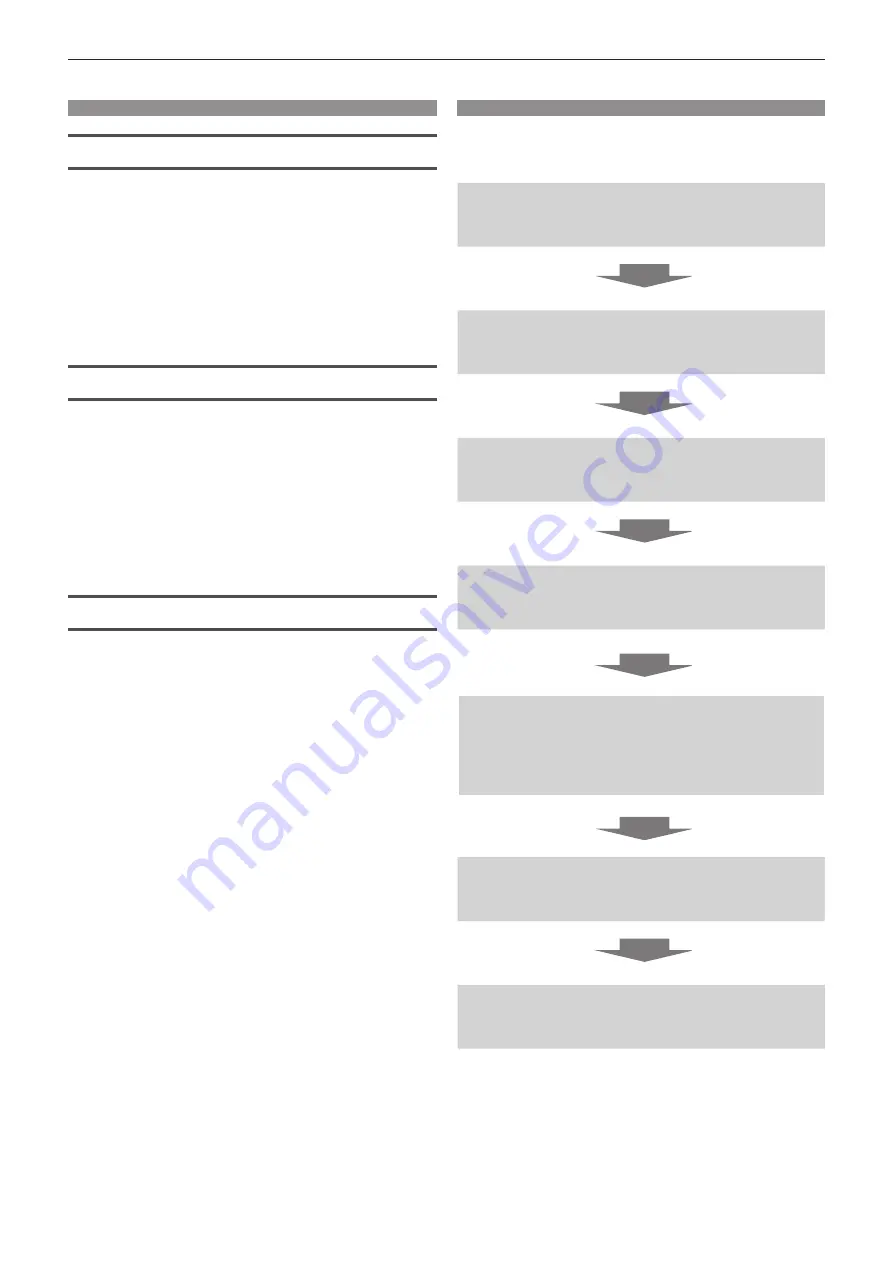
Quick Steps

For details, refer to the corresponding pages.

1.  Set up your projector.  

(

Æ

 page 25)

2.  Connect with external devices.  

(

Æ

 page 29)

3.  Connect the power cord.  

(

Æ

 page 33)

4.  Power on. 

(

Æ

 page 34)

5.  Make initial settings. 

(

Æ

 page 35)


f

Take this step when you power on for the first time after 

purchasing the projector.

6.  Select the input signal.  

(

Æ

 page 39)

7.  Adjust the image.  

(

Æ

 page 40)

10 -


ENGLISH

Содержание PT-VX61K

Страница 1: ...ank you for purchasing this Panasonic product Before operating this product please read the instructions carefully and save this manual for future use Before using your projector be sure to read Read...

Страница 2: ...39 Selecting the image input for projection 39 How to adjust the state of the image 40 Adjusting adjustable feet 41 Adjusting the projection position with the optical axis shift function 42 Operating...

Страница 3: ...u 84 WIRED LAN 84 PROJECTOR NAME 84 NETWORK CONTROL 84 NETWORK STATUS 85 INITIALIZE 85 Chapter 5 Operation of Function Network connection 87 Connecting via wired LAN 87 Web control function 89 Compute...

Страница 4: ...rician Do not defeat the purpose of the earthing plug WARNING RISK OF ELECTRIC SHOCK DO NOT OPEN o Indicated on the projector The lightning flash with arrowhead symbol within an equilateral triangle i...

Страница 5: ...z z If not using the projector for an extended period of time pull the power plug out from the wall outlet Pull the power plug out from the wall outlet and wipe it with a dry cloth regularly Do not ha...

Страница 6: ...ied one will result in falling accidents z z Attach the supplied safety cable to the ceiling mount bracket to prevent the projector from falling down ACCESSORIES Do not use or handle the batteries imp...

Страница 7: ...Doing so can cause damage and burns to clothing z z Strong light is emitted from the projector s lens Do not place objects in front of the lens while the projector is being used Doing so can cause fir...

Страница 8: ...from the remote control Failure to observe this will cause the batteries to leak overheat catch fire or explode which may result in fire or contamination of surrounding area Do not open the desiccant...

Страница 9: ...tries f f Adobe Acrobat Flash Player and Reader are either registered trademarks or trademarks of Adobe Systems Incorporated in the United States and or other countries f f Some of the fonts used in t...

Страница 10: ...CORRECTION functions allow easy correction of various image distortions occurred in the installation location Maintenance cost down The long life lamp with new lamp driving system and the water wash e...

Страница 11: ...Chapter 1 Preparation This chapter describes things you need to know or check before using the projector ENGLISH 11...

Страница 12: ...ors Doing so may interfere with the operation of the projector r rBe sure to ask a specialized technician or your dealer when installing the product to a ceiling This requires an optional ceiling moun...

Страница 13: ...diameter M4 tapping depth inside the projector 8 mm 5 16 torque 1 25 0 2 N m In such case make sure that there is no clearance between the screw holes for ceiling mount on the projector bottom and the...

Страница 14: ...The password for the web control function can be set on the Change password page of the web control screen Early Warning Software The projector supports Early Warning Software which monitors the statu...

Страница 15: ...polarizing plate and other optical parts may be shorter even if used for less than one year Consult your dealer for details r rLuminous lamp The light source of the projector is a high pressure mercu...

Страница 16: ...lens cap Lens cap 1 TKKL5577 Attached to the projector at the time of purchase Attention f f After unpacking the projector discard the power cord cap and packaging material properly f f Do not use the...

Страница 17: ...o transfer original images such as company logos to be displayed when projection starts to the projector Note f f The List of Compatible Device Models for the at panel display compatible with the Mult...

Страница 18: ...TUP button Used to perform automatic adjustment while projecting the image page 44 8 MUTE button Used to temporarily mute the projector page 43 9 AV MUTE button Used to turn off the audio and video te...

Страница 19: ...control may not operate correctly f f You can operate the projector by reflecting the remote control signal on the screen The operating range may differ due to the loss of light caused by the propert...

Страница 20: ...e 2 Power indicator ON G STANDBY R Displays the status of the power 3 Lamp indicator LAMP Displays the status of the luminous lamp 4 Temperature indicator TEMP Displays the status of the internal temp...

Страница 21: ...reless display adaptor etc 5 LAN terminal This is the LAN terminal to connect to the network 6 SERIAL IN terminal This is the RS 232C compatible terminal to externally control the projector by connect...

Страница 22: ...number at first you need to complete the Initial setting and then after setting the ID number of the projector set the ID number on the remote control About Initial setting please refer to When the in...

Страница 23: ...loss of the lens cap please attach the lens cap with the string of accessories according to the following procedures 1 Thread the thinner end of the string through the hole on the lens cap Lens cap S...

Страница 24: ...Chapter 2 Getting Started This chapter describes things you need to do before using the projector such as the setup and connections 24 ENGLISH...

Страница 25: ...ojector is automatically detected by setting the PROJECTOR SETUP menu PROJECTION METHOD to AUTO For rear projection set the PROJECTION METHOD to REAR DESK or REAR CEILING r rAngle sensor The range of...

Страница 26: ...n you install the bracket and the projector Attention f f To ensure projector performance and security installation of the ceiling mount bracket must be carried out by your dealer or a qualified techn...

Страница 27: ...CTION used Vertical keystone correction angle Horizontal keystone correction angle Vertical keystone correction angle Horizontal keystone correction angle Min value of R2 L2 Min value of R3 L3 Min val...

Страница 28: ...33 3 80 0 037 0 561 2 27 3 69 0 024 0 607 2 54 100 2 37 3 87 0 152 0 762 2 59 4 21 0 041 0 622 2 52 4 10 0 027 0 673 3 05 120 2 86 4 65 0 183 0 915 3 11 5 07 0 050 0 747 3 03 4 93 0 032 0 808 3 81 15...

Страница 29: ...es containing too much jitter may cause the images on the screen to randomly wobble or wafture In this case a time base corrector TBC must be connected f f The projector supports VIDEO signals YCB CR...

Страница 30: ...not conform to HDMI standards is used images may be interrupted or may not be displayed f f The HDMI 1 IN terminal HDMI 2 IN terminal can be connected to an external device with the DVI D terminal by...

Страница 31: ...t conforms to the HDMI standards If a cable that does not conform to the HDMI standards is used images may be interrupted or may not be projected f f If you operate the projector using the computer wi...

Страница 32: ...Chapter 3 Basic Operations This chapter describes basic operations to start with 32 ENGLISH...

Страница 33: ...nector and insert the plug completely in the correct direction until you hear the side tabs click in place Removing the power cord 1 Confirm that the projector is in standby mode and remove the power...

Страница 34: ...ector is preparing to be switched off The power will be switched off after a while Changes to the standby mode 1 The indicator flashes in the cycle 2 75 seconds light 0 25 seconds off 2 The indicator...

Страница 35: ...early display the menu screen it may be necessary to adjust the focus lever and the zoom lever in the projection lens area of the projector page 19 For details refer to How to adjust the state of the...

Страница 36: ...When the initial setting is complete you can change the setting from the DISPLAY OPTION menu SCREEN SETTING SCREEN FORMAT SCREEN POSITION 1 Press as to select the SCREEN FORMAT 2 Press qw to select t...

Страница 37: ...SETTING screen is displayed after projection starts Refer to When the initial setting screen is displayed page 35 Switching off the projector 2 1 3 2 1 1 Press the power v b button f f The POWER OFF c...

Страница 38: ...ing so may cause the lamp fail to light while you powering on the projector next time or result in premature deterioration of the luminous lamp Note f f If the PROJECTOR SETUP menu INITIAL STARTUP is...

Страница 39: ...PUTER 1 IN terminal COMPUTER 2 COMPUTER 2 Switches the input to COMPUTER 2 Displays the image signals input via the COMPUTER 2 IN 1 OUT terminal VIDEO VIDEO Switches the input to VIDEO Displays the im...

Страница 40: ...input guide is displayed 2 Press the INPUT SELECT button again f f Every time you press the INPUT SELECT button the inputs are switched in the following order COMPUTER1 COMPUTER2 HDMI1 HDMI2 VIDEO COM...

Страница 41: ...n the image projection situation repeat Steps 1 to 3 to adjust to the best projection condition f f Adjust from the POSITION menu SCREEN ADJUSTMENT when the projected image is distorted Adjusting adju...

Страница 42: ...on the desk the projected image will move upward if you turn the vertical lens shift dial clockwise and will move downward if you turn it counterclockwise The following figure shows the adjustment ran...

Страница 43: ...e image and audio turn on Using the mute function This button allows you to turn off the audio output temporarily button 1 Press the MUTE button f f The audio turns off 2 Press the MUTE button again f...

Страница 44: ...or a dark image it may not be able to be adjusted correctly even if the automatic adjustment is performed In this case adjust the following settings g g POSITION menu DOT CLOCK page 61 g g POSITION m...

Страница 45: ...tton Note f f When using the digital zoom function the magnification can be set from 1 0x to 3 0x with 0 1 increments when the D ZOOM button D ZOOM button is pressed f f When the image enlarged to 1 1...

Страница 46: ...number to the remote control The factory default ID number of the projector is set to ALL When using a single projector press the ID ALL button on the remote control Also you can control a projector b...

Страница 47: ...Chapter 4 Settings This chapter describes the settings and adjustments you can make using the on screen menu ENGLISH 47...

Страница 48: ...OFF BLUE DEFAULT LOGO ON SCREEN DISPLAY HDMI SIGNAL LEVEL CLOSED CAPTION SETTING SCREEN SETTING STARTUP LOGO AUTO SETUP SETTING SIGNAL SEARCH BACK COLOR P TIMER OTHER FUNCTIONS 3 Press the ENTER butt...

Страница 49: ...lues to the factory default If the DEFAULT button on the remote control is pressed the values adjusted in the menu items are restored to the factory default settings button 1 Press the DEFAULT button...

Страница 50: ...t depends on the input signal POSITION Sub menu item Factory default Page REALTIME KEYSTONE ON 57 SCREEN ADJUSTMENT 57 SHIFT 60 DOT CLOCK 0 61 CLOCK PHASE 0 61 OVER SCAN 0 1 62 ASPECT NORMAL 1 62 FRAM...

Страница 51: ...81 PASSWORD CHANGE 81 TEXT DISPLAY OFF 82 TEXT CHANGE 82 MENU LOCK OFF 82 MENU LOCK PASSWORD 82 CONTROL DEVICE SETUP 83 NETWORK Sub menu item Factory default Page WIRED LAN 84 PROJECTOR NAME 84 NETWO...

Страница 52: ...for use in a dark room 1 Only for the movie based signals 2 Only for the still image signals CONTRAST You can adjust the contrast of the colors 1 Press as to select CONTRAST 2 Press qw or the ENTER b...

Страница 53: ...individual adjustment screen is displayed 3 Press qw to adjust the level Operation Adjustment Adjustment range Press the w button Contours become sharper 0 15 Press the q button Contours become softer...

Страница 54: ...HT VIEW individual adjustment screen is displayed 3 Press qw to switch the item f f The items will switch each time you press the button ON Corrects the vividness of the image OFF No correction AUTO D...

Страница 55: ...on f f Select among AUTO NTSC NTSC4 43 PAL PAL M PAL N PAL60 and SECAM f f Set it to AUTO normally Setting AUTO will automatically select NTSC NTSC4 43 PAL PAL M PAL N SECAM or PAL60 RGB YCB CR RGB YP...

Страница 56: ...f The selectable items differ depending on the input signal Items Resolution dots Scanning frequency Dot clock frequency MHz Horizontal kHz Vertical Hz 1280x768 60 1 280 x 768 47 7 60 0 80 1 1366x768...

Страница 57: ...2 Press the ENTER button f f The SCREEN ADJUSTMENT screen is displayed 3 Press as to select one item to adjust KEYSTONE Adjusts when the projected image is distorted as trapezoid CORNER CORRECTION Ad...

Страница 58: ...al projection distance by the projection screen width KEYSTONE H V BALANCE Note f f Pressing the ENTER button while the individual adjustment screen is displayed can switch to the individual adjustmen...

Страница 59: ...SCREEN ADJUSTMENT screen is displayed 3 Press as to select CURVED CORRECTION 4 Press the ENTER button f f The CURVED CORRECTION screen is displayed 5 Press as to select the item to adjust 6 Press the...

Страница 60: ...ton while the individual adjustment screen is displayed can switch to the individual adjustment screen of other items SHIFT Only for COMPUTER1 COMPUTER2 signal input Move the image position vertically...

Страница 61: ...least 1 Press as to select DOT CLOCK 2 Press qw or the ENTER button f f The DOT CLOCK individual adjustment screen is displayed 3 Press qw to adjust f f The adjustment values are 32 to 32 Attention f...

Страница 62: ...aspect ratio selected in SCREEN FORMAT the images are displayed with the right and left parts cut off FULL Displays images to the full screen range selected in SCREEN FORMAT If the aspect ratio of the...

Страница 63: ...CK individual adjustment screen is displayed 3 Press qw to switch the item f f The items will switch each time you press the button ON The frame is locked Synchronizes the displayed image to the verti...

Страница 64: ...ECURITY NETWORK ENTER SELECT RETURN ASSIGNED FUNCTION DISABLE 1 2 f f Various menus settings adjustment screens control button names etc are displayed in the selected language f f The language can be...

Страница 65: ...test pattern for the selected color is displayed 6 Press as to select RED GREEN or BLUE f f GAIN can be adjusted when WHITE is selected in Step 4 7 Press qw to adjust f f The adjustment value changes...

Страница 66: ...ted from the adjustment color When correction color green is changed Green is added to or subtracted from the adjustment color When correction color blue is changed Blue is added to or subtracted from...

Страница 67: ...nges 1 Press as to select ON SCREEN DISPLAY 2 Press the ENTER button f f The ON SCREEN DISPLAY screen is displayed 3 Press as to select OSD POSITION 4 Press qw to switch the item f f The items will sw...

Страница 68: ...DMI 1 IN terminal HDMI 2 IN terminal Note f f The optimal setting varies depending on the output setting of the connected external device Refer to the operation instruction of the external device rega...

Страница 69: ...time you press the button Model No SCREEN FORMAT The available items to set when SCREEN POSITION is selected PT VX61K PT VX51K 4 3 Cannot be set 16 10 Three items of CENTER UPPER and LOWER can be sel...

Страница 70: ...e item f f The items will switch each time you press the button BLUE Displays the entire projection area in blue BLACK Displays the entire projection area in black DEFAULT LOGO Displays the Panasonic...

Страница 71: ...ODE is set to COUNT UP f f The start time becomes the value set at TIMER when MODE is set to COUNT DOWN f f The time gauge turns clockwise when COUNT UP is set and turns counterclockwise when COUNT DO...

Страница 72: ...part magnified 1 5 times is displayed and the DIGITAL ZOOM individual adjustment screen is displayed 5 Press qw to adjust the magnification f f The magnification can be adjusted from 1 0 to 3 0 times...

Страница 73: ...amp runtime when LAMP POWER is set to NORMAL f f B The luminous lamp runtime when LAMP POWER is set to ECO1 f f C The luminous lamp runtime when LAMP POWER is set to ECO2 Note f f For the network stat...

Страница 74: ...ection method if the screen display is upside down or inverted 1 Press as to select PROJECTION METHOD 2 Press qw to switch the projection method f f The items will switch each time you press the butto...

Страница 75: ...atically in the following cases g g When the luminous lamp is just turned on or LAMP POWER is just set f f When AUTO POWER SAVE is set to OFF settings of AMBIENT LIGHT DETECTION SIGNAL DETECTION AV MU...

Страница 76: ...use of control commands on a previously purchased Panasonic projector This allows the control software for an existing Panasonic projector to be inherited and used 1 Press as to select EMULATE 2 Pres...

Страница 77: ...ON screen is displayed 3 Press the ENTER button 4 When the confirmation screen is displayed press qw to select OK and press the ENTER button Note f f You can also cancel the assigned settings by displ...

Страница 78: ...he audio output for VIDEO input HDMI1 Set the audio output for HDMI1 input HDMI2 Set the audio output for HDMI2 input 4 Press qw to switch the item f f The sub items will switch each time you press th...

Страница 79: ...t cycle of the air filter FILTER COUNTER RESET Resets the air filter usage time Setting TIMER If you want to regularly clean replace the air filter set its cycle time When the air filter usage time re...

Страница 80: ...s to select INITIALIZE ALL 2 Press the ENTER button 3 When the INITIALIZE ALL screen is displayed press qw to select OK and then press the ENTER button 4 When the power off confirmation screen is disp...

Страница 81: ...t PASSWORD 2 Press qw to switch the item f f The items will switch each time you press the button OFF Disables the security password entry ON Enables the security password entry Note f f The factory d...

Страница 82: ...u operations ON Disables menu operations Note f f The factory default setting or the setting after executing the PROJECTOR SETUP menu INITIALIZE ALL is set to OFF Set it to ON if necessary f f When ME...

Страница 83: ...l buttons DISABLE Disable the operation of all buttons f f When you change ENABLE to DISABLE proceed to Step 5 5 When the confirmation screen is displayed press qw to select OK and then press the ENTE...

Страница 84: ...alternate DNS server address when DHCP is set to OFF 4 After the setting select OK and press the ENTER button Note f f For the setting content of each item consult your network administrator f f When...

Страница 85: ...f The NETWORK STATUS screen is displayed WIRED LAN Displays the network information of the wired LAN that set on the projector DHCP Displays the usage state of the DHCP server IP ADDRESS Displays the...

Страница 86: ...Chapter 5 Operation of Function This chapter describes the operation methods of some functions 86 ENGLISH...

Страница 87: ...rformed from a computer with the PJLink protocol Refer to PJLink protocol x page 114 for details f f Command control Operation or status query of the projector can be performed from a computer with th...

Страница 88: ...00 SUBNET MASK 255 255 255 0 DEFAULT GATEWAY 192 168 10 1 DNS1 DNS2 Blank Operating the computer 1 Turn on the power of the computer 2 Perform the network setting following the instruction of your net...

Страница 89: ...tron Electronics Inc English only URL https www crestron com To download RoomView Express go to the website of Crestron Electronics Inc English only URL https www crestron com resources get roomview C...

Страница 90: ...of computer screens The actual size or display of the screens in this manual may differ depending on the type of the OS the web browser or the computer you use Available functions per account The adm...

Страница 91: ...OR NAME Displays the name set in the projector 3 MAIN VERSION Displays the firmware version of the projector 4 POWER Displays the status of the power 5 PICTURE MODE Displays the status of the picture...

Страница 92: ...environment temperature is too high Use under the proper operating environment temperature 1 EXHAUST AIR TEMPERATURE The environment temperature is too high or the air exhaust port may be blocked Use...

Страница 93: ...projected 2 VOLUME Adjusts the volume level 3 PICTURE MODE Switches the picture mode 4 AV MUTE Switches the status of AV mute ON the AV mute function is enabled OFF the AV mute function is disabled 5...

Страница 94: ...POSITION menu SHIFT x page 60 2 PICTURE Adjusts the image quality related items For details refer to PICTURE menu x page 52 Network config page Click Detailed set up Network config 1 Click Network co...

Страница 95: ...Submit button to update the settings Note f f When you use the Back and Forward functions of the browser a warning message Page has Expired may appear In that case click Network config again since th...

Страница 96: ...he preset E mail addresses up to two addresses Click Detailed set up E mail set up 2 1 4 3 5 6 1 ENABLE Select Enable to use the E mail function 2 SMTP SERVER NAME Enter the IP address or the server n...

Страница 97: ...hrough E mail Authentication set up page Set the authentication items when POP authentication or SMTP authentication is necessary to send an E mail Click Detailed set up Authentication set up 4 5 6 7...

Страница 98: ...eck system FAN OK INTAKE AIR TEMPERATURE OK EXHAUST AIR TEMPERATURE OK LAMP REMAIN TIME OK LAMP STATUS OK APERTURE CONTRAST SHUTTER OK AIR FILTER OK Error code 00 00 00 00 00 00 00 00 Intake air tempe...

Страница 99: ...degF Exhaust air temperature 37 degC 98 degF PROJECTOR RUNTIME 750 H LAMP NORMAL 100 H LAMP ECO1 420 H LAMP ECO2 420 H LAMP REMAIN 4250 H Current status MAIN VERSION 1 00 SUB VERSION 1 00 LAMP STATUS...

Страница 100: ...Displays the account to change 2 Current User name Enter the user name before the change Password Enter the current password 3 New User name Enter the desired new user name Maximum 16 characters in s...

Страница 101: ...nfirm the change of password Note f f To change the account of the administrator you must enter the User name and Password in Current Crestron Connected TM page The projector can be monitored controll...

Страница 102: ...ntrols items related to freeze image quality 7 Back Returns to the previous page Tools page Click Tools on the control page 1 2 3 4 5 1 Control System Set the information required for communicating wi...

Страница 103: ...lays the status of the power 5 Source Displays the selected input 6 Lamp Mode Displays the setting status of LAMP POWER page 74 7 Error Status Displays the error status 8 Exit Returns to the control p...

Страница 104: ...Chapter 6 Maintenance This chapter describes methods of inspection when there are problems maintenance and replacement of the units 104 ENGLISH...

Страница 105: ...lights in green while the projector is in projection mode if there is no notification by lighting or blinking in red Temperature indicator TEMP Indicator status Lighting in red Blinking in red Blinki...

Страница 106: ...e Air filter unit This section describes the maintenance of the air filter unit that is installed as standard on the projector The air filter unit is the same as the optional Replacement Filter Unit M...

Страница 107: ...lfunction Performing maintenance of the air filter unit Fig 1 Fig 2 1 Wash the air filter unit Fig 1 i Soak the air filter unit in cold or warm water and then lightly rinse it f f Do not use cleaning...

Страница 108: ...menu screen is displayed 3 Press as to select PROJECTOR SETUP 4 Press the ENTER button f f The PROJECTOR SETUP screen is displayed 5 Press as to select FILTER COUNTER 6 Press the ENTER button f f The...

Страница 109: ...s over time it is necessary to replace the lamp unit regularly The estimated duration before replacement is 5 000 hours but the lamp may go off before reaching to 5 000 hours depending on the characte...

Страница 110: ...p unit while paying attention to the insertion position f f If it is difficult to install the lamp unit remove and reinstall it The connector part may be damaged if it is pressed by force 5 Use a Phil...

Страница 111: ...air filter counter f f Refer to Resetting the air filter counter page 108 Attention f f When switching on the projector make sure that the air filter unit is attached If it is not attached the projec...

Страница 112: ...7 29 31 Remote control does not work f f Are the batteries depleted f f Is the polarity of the batteries set correctly 22 f f Are there any obstructions between the remote control and the remote contr...

Страница 113: ...Chapter 7 Appendix This chapter describes specifications for the projector ENGLISH 113...

Страница 114: ...dicates lamp errors and returns 0 2 3rd byte Indicates temperature errors and returns 0 2 4th byte Returns 0 5th byte Indicates filter errors and returns 0 2 6th byte Indicates other errors and return...

Страница 115: ...ponse during protect mode random number section is undefined value NTCONTROL 1 23181e1e CR 3 Generate a 32 byte hash value from the following data using MD5 algorithm f f xxxxxx yyyyy zzzzzzzz xxxxxx...

Страница 116: ...t value 1024 of the projector and make a request for connection to the projector f f Acquire the IP address from the menu screen of the projector and the port number from the WEB control page IP addre...

Страница 117: ...end it For details see Communication flow between the server and the client x page 117 Communication flow between the server and the client When sending receiving commands via LAN refer to the communi...

Страница 118: ...rder Add parameters according to the details of control STX A D I1 I2 C1 C2 C3 P1 P2 Pn ETX ID designate ZZ 01 to 06 Start 1 byte 2 ID characters 2 bytes Semi colon 1 byte 3 command characters 3 bytes...

Страница 119: ...the projector is ALL f f STX and ETX are character codes STX shown in hexadecimal is 02 and ETX shown in hexadecimal is 03 Cable specifications 1 NC NC 1 2 2 3 3 4 NC NC 4 5 5 6 NC NC 6 7 7 8 8 9 NC N...

Страница 120: ...MENU LOCK PASSWORD operations To initialize your password consult your distributor 120 ENGLISH Chapter 7 Appendix Technical information...

Страница 121: ...28 1 50 0 74 3 R Y H l 1080 24p 1 920 x 1 080 27 0 24 0 74 3 R Y H l 1080 24sF 1 920 x 1 080i 27 0 48 0 74 3 R Y H 1080 25p 1 920 x 1 080 28 1 25 0 74 3 R Y H 1080 30p 1 920 x 1 080 33 8 30 0 74 3 R...

Страница 122: ...1920 x 1080 50 1 920 x 1 080 55 6 49 9 141 5 R H 1920 x 1080 60 4 66 6 59 9 138 5 R H 1920 x 1080 60 5 67 2 60 0 173 0 R 1920 x 1200 50 1 920 x 1 200 61 8 49 9 158 3 R H 1920 x 1200 60 4 74 0 60 0 15...

Страница 123: ...0 cm round x 1 Maximum usable volume output 10 W monaural Power cord length 2 0 m 78 3 4 Outer case Molded plastic Outer color White Dimensions Width 389 mm 15 5 16 Height 125 mm 4 29 32 with legs at...

Страница 124: ...x 2 L R 0 5 V rms input impedance 22 k and more VARIABLE AUDIO OUT 1 set M3 stereo mini jack monitor output and stereo compatible 0 V rms to 2 0 V rms variable output impedance 2 2 k and less SERIAL...

Страница 125: ...Dimensions Unit mm inch 104 6 4 1 8 63 8 2 1 2 332 0 13 1 16 389 0 15 5 16 250 0 9 27 32 125 0 4 29 32 337 0 13 9 32 Actual dimension may differ by product ENGLISH 125 Chapter 7 Appendix Dimensions...

Страница 126: ...onic Connect Co Ltd or the inappropriate choice of location for installation even if the warranty period of the projector has not expired f f Unused products must be removed promptly by a qualified te...

Страница 127: ...n Projector body 20 Installation mode 25 IRIS 54 L Lamp indicator 20 105 LAMP POWER 74 LANGUAGE 64 List of compatible signals 121 M Main menu 49 Maintenance replacement 106 MENU button Projector body...

Страница 128: ...Information for Commercial Use Electrical Communication product This electromagnetic compatible product Class A is only for commercial use in which case that the dealers environment WARNING This is a...

Отзывы: