background image

EN - 47

EN - 46

ENGLISH

Error Code

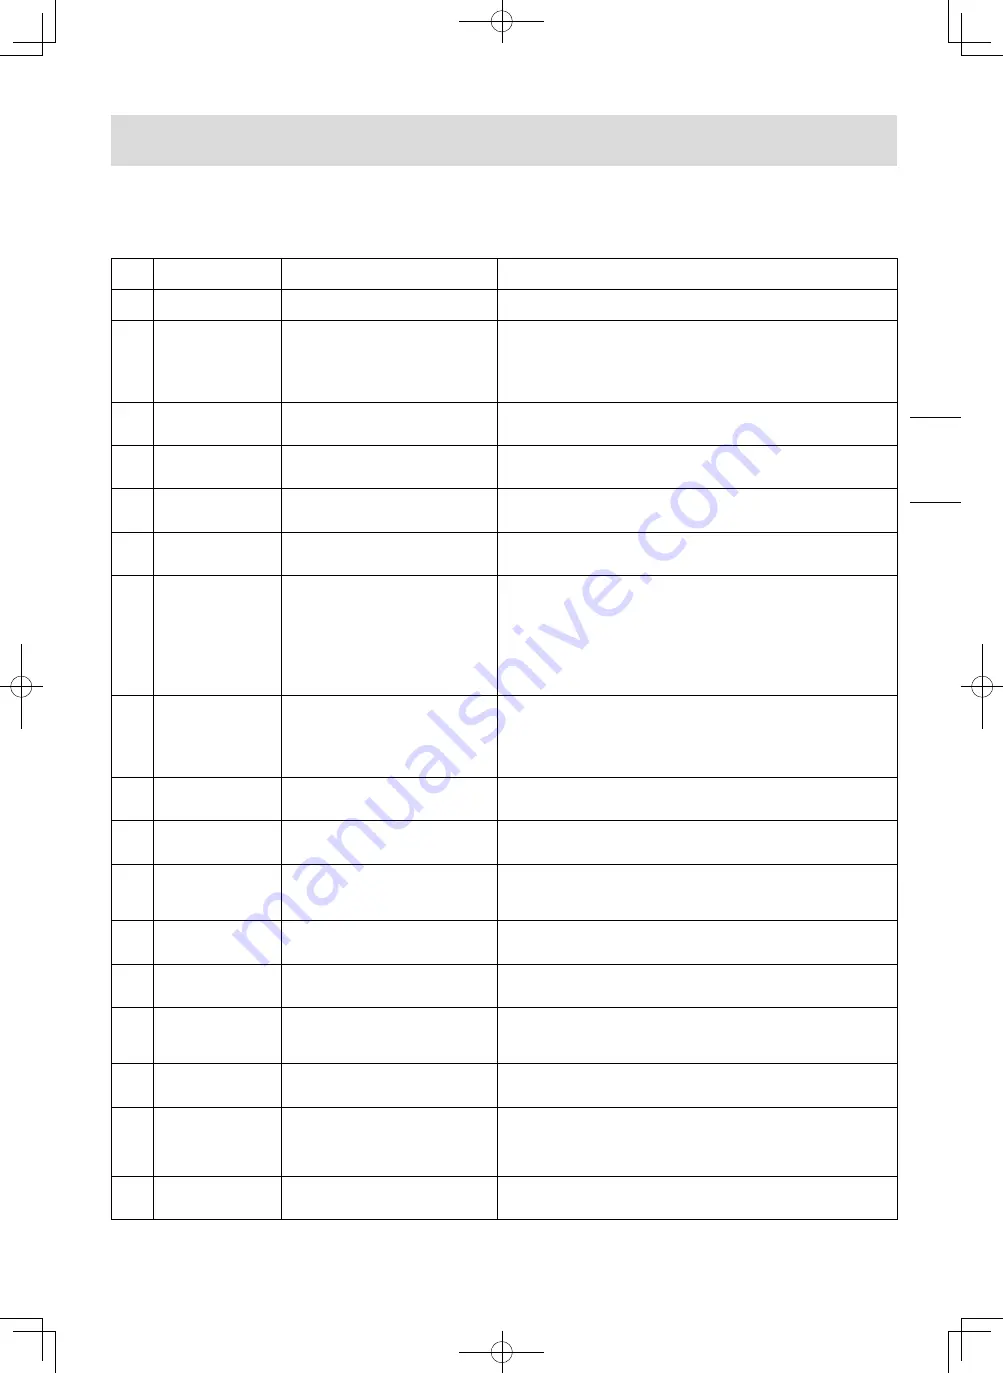
(1)  When the rotary switch (knob) is at [OPERATION] position, the digital display on the control PCB alternately 

displays low pressure, high pressure and error code (E ***).

< Error Code Table >

Error 

code

Meaning

Cause

Correction method

E011 High pressure 

anomaly (7th incident)

Increased high pressure caused a high 

pressure anomaly.

(1) Investigate the cause of high pressure anomaly.

(2) Check for the presence of any anomalies of the high pressure sensor.

E031

Discharge gas 

temperature anomaly 

(3rd incident)

Abnormal stop caused by increased 

discharge temperature to 118°C or 

higher occurred three times in two 

hours.

Follow the procedure shown in “Failure Diagnosis at the time of Abnormal 

Discharge Gas Temperature.”

(1) Search for the cause of increasing discharge gas temperature.

(2) Check the connection of control PCB “2P4 discharge 1 connector.”

(3) Check the resistance value of the discharge gas temperature sensor 

(Refer to “Method of Checking Sensor Characteristics”).

E041

Discharge gas 

temperature sensor 

anomaly

Discharge gas temperature sensor 

became abnormal (open circuit 

condition).

(1) Check the connection of control PCB “2P4 discharge 1 connector.”

(2) Check the resistance value of the discharge gas temperature sensor 

(Refer to “Method of Checking Sensor Characteristics”).

E05 Low pressure sensor 

anomaly

Low pressure sensor became 

abnormal (open circuit condition).

(1) Check the connection of control PCB “3P1 low pressure connector.”

(2) Check the output voltage of the low pressure sensor (Refer to “Method 

of Checking Sensor Characteristics”).

E06 High pressure sensor 

anomaly

High pressure sensor became 

abnormal (open circuit condition).

(1) Check the connection of control PCB “3P3 high pressure connector.”

(2) Check the output voltage of the high pressure sensor (Refer to 

“Method of Checking Sensor Characteristics”).

E07

Suction gas 

temperature sensor 

anomaly

Suction gas temperature sensor 

became abnormal (open circuit 

condition).

(1) Check the connection of control PCB “2P9 U inlet connector.”

(2) Check the resistance value of the suction gas temperature sensor 

(Refer to “Method of Checking Sensor Characteristics”).

E091 Oil level anomaly

Low oil level condition continued for 

10 min.

(1) Investigate the cause of oil level anomaly.

(2) Check the connection of control PCB “6P11 electronic expansion valve 

1 connector.”

(3) Check the coil attachment condition and resistance value of the oil 

control electronic expansion valve (MOV1).

  When checking, refer to “Method of Checking the Resistance of 

Electronic Expansion Valve Coil and Oil Level Switch.”

(4) Check the oil level and add oil according to the “Oil Level Control 

Method.”

E101

Discharge gas 

temperature anomaly 

(1st to 2nd incident)

Discharge gas temperature increased 

to 118°C or higher and generated 

an abnormal stop. Or discharge gas 

temperature sensor shorted.

Comply with the “Failure Diagnosis at the time of Abnormal Discharge 

Gas Temperature.”

(1) Search for the cause of increasing discharge gas temperature.

(2) Check the connection of control PCB “2P4 discharge 1 connector.”

(3) Check the resistance value of the discharge gas temperature sensor 

(Refer to “Method of Checking Sensor Characteristics”).

E181, 

E183

Inverter 

communication 

anomaly

No serial communication signal 

between “control PCB” and “Inverter”

Check the communication line between control PCB “5P1 connector” and 

Inverter A1000/V1000 connector.”

E19

Controller 

communication 

anomaly

No controller signal exists in 

communication.

(1) Check the communication line (control PCB “5P4, 5P5 connector”).

(2) Set the communicating refrigeration unit No. to a value other than “0.”

E201

Radiator temperature 

anomaly

Inverter radiator temperature increased 

to 100°C or higher and stopped 

abnormally.

(1) Investigate the cause of the increasing radiator temperature.

(2) Check the connection of control PCB “2P31 Cooler 1 connector.”

(3) Check the resistance value of the radiator temperature sensor (Refer 

to “Method of Checking Sensor Characteristics”).

E221

Radiator temperature 

sensor anomaly

Radiator temperature sensor became 

abnormal (open circuit condition).

(1) Check the connection of control PCB “2P31 Cooler 1 connector.”

(2) Check the resistance value of the radiator temperature sensor (Refer 

to “Method of Checking Sensor Characteristics”).

E23 Ambient temperature 

sensor anomaly

Ambient temperature sensor became 

abnormal (open circuit condition).

(1) Check the connection of control PCB “2P8 ambient air connector.”

(2) Check the resistance value of the ambient temperature sensor (Refer 

to “Method of Checking Sensor Characteristics”).

E271 Gas cooler fan motor 

anomaly

Gas cooler fan motor became 

abnormal. (The fan rotation speed 

significantly deviated from the set 

rotation speed.)

(1) Check for the presence of a fan lock, fan dislocation, etc.

E311

High pressure 

anomaly (1st to 6th 

incident)

Increased high pressure caused a high 

pressure anomaly.

(1) Investigate the cause of high pressure anomaly.

(2) Check for the presence of any anomalies of the high pressure sensor.

E32 Refrigerant flood back 

alarm

Suction gas superheat (difference 

between “suction gas temperature” and 

“evaporating temperature calculated 

from low pressure”) became 1 K or 

below continuously for 2 min.

Check the cause of refrigerant flood back operation.

E36

Intermediate pressure 

anomaly (1st to 6th 

incident)

Increased intermediate pressure 

caused an abnormal intermediate 

pressure.

(1) Investigate the cause of intermediate pressure anomaly.

(2) Check for the presence of any anomalies of the intermediate pressure 

sensor.

Failure Diagnosis

01_OCU-CR1000VF8A.indd   47

2019/08/27   10:56:09

Содержание OCU-CR1000VF8A

Страница 1: ... Setting and Indication 29 33 Control Functions 34 36 Adjustment during Operation 36 37 Oil Level Control Method 38 41 About Alarms 41 43 Maintenance and Inspection 44 Actions at the time of Failure 45 46 Failure Diagnosis 47 53 Makings for Directive 2014 68 EU PED 54 Model No OCU CR1000VF8A OCU CR1000VF8ASL Thank you very much for purchasing Panasonic products this time Please read this instructi...

Страница 2: ... personnel or similarly skilled person Incorrect installation work may lead to malfunction such as abnormal vibration and generates refrigerant gas leak electrical shock or fire Do not use other than the designated refrigerant for charging adding or recharging Non designated refrigerant may cause equipment failure or burst or injury Appliances employing R744 refrigeration system System contains re...

Страница 3: ...ious accidents such as equipment failure and rupture of the refrigerant cycle Electrical Work Always use a dedicated circuit and install a ground fault protector Incorrect electrical work may lead to current leak and fire or electrical shock Wiring work should conform to the installation instructions Grounding Work Lack of grounding work may lead to electrical shock caused by current leak Securely...

Страница 4: ...ck For the purpose of controlling concentration of refrigerant gas install a leak detector and mechanical ventilation equipment in the refrigerant handling facility inside the room Refrigerant gas leak may cause suffocation Restriction on use of equipment The appliance is not to be used by persons including children with reduced physical sensory or mental capabilities or lack of experience and kno...

Страница 5: ...ad to current leak or short circuit and may cause fire or electrical shock Specified components must be used for repair Use of non specified components may cause failure of the safety stop function and lead to burst or fire Consult with the distributor Stop the compressor before disconnecting the refrigerant piping Disconnecting the piping while the compressor is in operation would cause abnormall...

Страница 6: ...nd moss thus causing slipping on the floor Install in a place without air stagnation Leak of refrigerant gas may cause insufficient oxygen and harm human health Install in a place with good ventilation Request a specialty operator for moving the refrigeration unit Incorrect moving may cause falling or dropping of the refrigeration unit and cause injury Refrigeration unit is a heavy item Always con...

Страница 7: ...ock interference with the moving mechanism and heat generation thereby leading to injury and skin burn Periodically check operation of the ground fault protector Failed interrupter does not operate safety stop function and may lead to fire or electrical shock Do not touch the fin of the gas cooler Touching the fin and sliding along the fin may cause skin cut by the fin edge Do not ride on the refr...

Страница 8: ...documents means that used electrical and electronic products must not be mixed with general household waste For proper treatment recovery and recycling of old products please take them to applicable collection points in accordance with your national legislation By disposing of them correctly you will help to save valuable resources and prevent any potential negative effects on human health and the...

Страница 9: ...iate pressure sensor Balance pressure solenoid valve EV2 Low pressure service valve High pressure service valve Compressor Oil level switch Electronic expansion valve for pressure reduction MOV5 Listed from the back High pressure sensor High pressure switch Electronic expansion valve for gas return MOV6 Oil service valve Ambient temperature sensor Flash chamber Unit outlet pressure sensor Split he...

Страница 10: ...nt temperature 10 K or above Ambient temperature 15 C to 43 C Gas cooler intake air temperature Power source 3N 50 Hz 380 V 400 V 415 V Within 10 of Rate Voltage Installation inclination angle 1 or below ON OFF cycle period 10 minutes or longer for ON OFF cycle Oil return shall be ensured Installation Outdoor The foundation shall be rigid enough Climatic class 0 1 2 3 4 6 8 Please see below CLIMAT...

Страница 11: ... 200 7 200 7 200 6 500 6 500 6 500 kW COP COPB 2 11 2 11 2 11 1 29 1 29 1 29 15 C Cooling capacity PC 15 600 15 600 15 600 8 600 8 600 8 600 kW Power input DC 5 600 5 600 5 600 5 600 5 600 5 600 kW COP COPC 2 79 2 79 2 79 1 54 1 54 1 54 5 C Cooling capacity PD 15 800 15 800 15 800 8 600 8 600 8 600 kW Power input DD 4 550 4 550 4 550 5 550 5 550 5 550 kW COP COPD 3 47 3 47 3 47 1 55 1 55 1 55 43 C...

Страница 12: ...eration cycle be sure to install the included filter dryer at the liquid line of the refrigeration unit 6 Gas leak detector used for airtight test should be foaming liquid or soap water Do not use kitchen detergent Kitchen detergent may corrode metals For Economically Using the Refrigeration Unit For the purpose of using the refrigeration unit economically consider the following Cooling capacity l...

Страница 13: ...ry compressor consists of high precision components Use caution during piping work to avoid contamination of dust metal powder or oxide scale etc Initial Oil Quantity Model No Compressor Oil separator OCU CR1000VF8A SL 1 800 mL 3 000 mL Oil type PZ 68S When adding oil or changing oil be sure to use our specified oil General Cautions Each unit of the equipment should be placed by selecting the most...

Страница 14: ... accumulation Installation in a cold weather location should avoid snow accumulation and attachment of frost or freezing by furnishing a roof Direction for avoiding strong wind Install the refrigeration unit with its blow out side facing perpendicular to the wind direction Carry in Operation 1 Carry the refrigeration unit gently by keeping the vertical position as much as possible 2 Absolutely avo...

Страница 15: ...ndation work when the pipe is extended downward Form an elevated foundation with vertical columns Place an anti vibration pad thickness of 8 to 15 mm on the entire surface of the foundation and secure it with anchor bolts 3 Anchor bolts Use M8 size anchor bolts and buried at least 100 mm on the concrete foundation Fix unit with double nut and plain washer 28 mm O D minimum External Dimensions 270m...

Страница 16: ...ace Right side service space 1 5 m or more When a wall exists on one side When a wall exists on two sides When a wall exists on four sides When a wall exists on three sides Serial installation Left side service space Left side service space Left side service space Left side service space Left side service space Left side service space Left side service space Left side service space Front surface s...

Страница 17: ... flow speed and making sure no problem occurs in the cooling capacity and oil return As refrigeration unit using CO2 refrigerant incurs pressure higher than when using HFC refrigerant it is necessary to choose adequate materials Model No Suction line Unit inlet Liquid line Unit outlet OCU CR1000VF8A SL Ø19 05 mm 3 4 Ø15 88 mm 5 8 Note Welding is outer diameter welding Piping material should be sea...

Страница 18: ...per pipe Airtight Test Pressure testing should only be carried out by personal companies who have necessary certification Consider carefully local regulations and EN378 Outer side Inner side 8MPa 8MPa Caution for Gas Leak Gas leak may lead to excessive heat operation of compressor and air mixed operation thus causing compressor failure Securely execute airtight test Piping Direction The pipe can b...

Страница 19: ...ckness When the evaporator is located lower Height difference 20 m or below To promote good oil return in the suction line piping size and trap need to be considered The suction line should ideally slope gently towards the unit Recommendation slope is 1 200 1 250 Refrigerant pipe should be covered with heat insulation material on both suction line and liquid line Since liquid line becomes approx 0...

Страница 20: ...n Suction gas temperature sensor Oil lebel switch Low pressure service port Discharge gas temperature sensor Ambient temperature sensor Intermediate pressure sensor TS Balance pressure solenoid valve EV2 MOV1 PS TS TS 2nd stage discharge Gas return electronic expansion valve Low pressure sensor Gas cooler outlet temperature sensor Liquid return electronic expansion valve Split outlet temperature s...

Страница 21: ...cU is indicated in the 7 segment LED 7 segment LED shall indicate Low Pressure High Pressure Unit outlet Pressure uAcU Low Pressure Check Operation Switch S1 is ON If yes the unit is confirmed to enter Vacuum Mode even though 7 segment LED is showing uAcU the unit is not in the Vacuum Mode if S1 is OFF In the Vacuum Mode all electronic expansion and solenoid valves open 3 Evacuation Connect the va...

Страница 22: ...provided by Panasonic The below can be referenced in addition to above In the case of a refrigeration showcase 825 g m x showcase length m 90 g m x piping length one way m Note 1 Do not absolutely charge liquid refrigerant from the low pressure side low pressure service port 2 To avoid overcharging charging rate should be around 20 g per 5 sec 3 If it is difficult to adjust refrigerant charging ra...

Страница 23: ...piping etc and any metal edge Selection of a Ground Fault Protector and Wiring Model No Ground fault protector Power line thickness for wiring length mm2 Grounding wire cross sectional area mm2 Control circuit cross sectional area mm2 Rated current Detected current 10 m 20 m 30 m 50 m OCU CR1000VF8A SL 30 A 30 mA 5 5 5 5 8 14 2 5 1 0 Notes 1 Wiring and cabling quality need to follow local standard...

Страница 24: ...eration signal Power source Power source terminal block Cabtyre cable 1 Shielded cable 2 Showcase Operation signal Non Voltage Contact STP cable Shielded Twisted Pair 3 STP cable Shielded Twisted Pair 3 User System User System D D GND D D GND User System External alarm Shielded cable 2 Communication Line Ground fault protector 50 Hz 380 400 415V 3N Shielded cable 2 Coil for Back up solenoid valve ...

Страница 25: ...wer cable grounding wire communication wires etc and eliminate slack in wires by using the bundling wire located at the wire guide opening of the electrical box Power line and communication line connect to Refrigeration Unit through conduit When the panel attachment after work is incomplete penetration of rainwater is possible Securely fasten the panels after work Electrical box Unit base Left sid...

Страница 26: ...erature sensor Suction gas temperature sensor Discharge gas temperature sensor Low pressure sensor Intermediate pressure sensor High pressure sensor Oil level switch High pressure switch Input Output Unit outlet pressure sensor Abnormal stop signal 5V 12V RELAY 24V FAN 24V MOV Black Red Green Blue Yellow Power source 380V 400V 415V F600 Power source terminal block Grounding screw Black White Black...

Страница 27: ...c valve signal output terminal base Buzzer silencing switch Grounding screw Grouding screw Control terminal base Power source terminal base Showcase operation terminal base Reactor 1 Inverter A1000 Reactor 2 Inverter V1000 Left side of refrigeration unit Front of refrigeration unit CR2 EN PCB CR2D EN PCB External alarm terminal base Liquid tube electromagnetic valve terminal base External communic...

Страница 28: ...ase heater must be turned ON for 6 hours or longer before operating the compressor for avoiding oil forming at starting With the operation switch on the refrigeration unit side OFF and the ground fault protector ON wait for 6 hours or longer before turning ON the operation switch Turning the ground fault protector ON causes power to be applied to the crankcase heater Do not touch by hand Protectio...

Страница 29: ...r when any abnormality occurs in the refrigeration unit an alarm LED Red lights up or blinks and the cause of abnormality is displayed digitally by an error code Switch and Indication CRD2 EN PCB Slide switch SW14 AUTO FORCED Slide switch SW15 CONTROL CHECK 8P DIP switch SW13 Rotary switch SW11 7 segment LED CHECK Yellow LED ALARM Red LED Lights up or blinks when abnormality alarm is activated UP ...

Страница 30: ... DIP switch SW13 setting is also required 3 8P DIP switch SW13 The following functions can be selected Change setting as required Switch setting at factory shipment is No 2 ON other No 1 No 3 No 8 OFF SW13 Function with ON Remarks No 1 Evacuation No 3 4 5 6 7 8 OFF SW15 CHECK 2 Always ON 3 Always OFF 4 5 6 7 Back mode 2 No 1 3 4 5 6 8 OFF 8 Back mode 1 No 1 3 4 5 6 7 OFF CONTROL CHECK AUTO FORCED ...

Страница 31: ...2 62 3 Meat fish 5 to 0 12 2 60 2 48 0 24 2 24 4 Freezer ice 30 to 22 35 1 36 1 24 0 12 1 12 Lim value Lowest low pressure to cause the compressor to stop Lim value OFF value Diff value 4 Target Low Pressure confirm and adjustment Turn ON the 8P DIP switch SW13 No 8 Turn OFF the 8P DIP switch SW13 No 1 and No 3 No 7 Set the rotary switch SW11 to ON The 7 segment LED displays ON value To change the...

Страница 32: ...gh 4 below 1 Normal operation During normal operation the display alternates between low pressure MPa High pressure MPa Unit outlet pressure MPa Indicates Lo when low pressure is below 0 00 For identification purposes H is added to the end of high pressure and o to the end of unit outlet pressure E g 3 sec 3 sec 3 sec Lo pres Hi pres Unit outlet pres 2 When an alarm condition is generated The disp...

Страница 33: ...a change FREQ FREQUENCY Compressor Rotational Speed s 1 Ex In the case of 10 s 1 xx 0 In the case of less than 10 s 1 x 00 SUC SUCTION Suction gas temperature C pressing Suction heating rate K pressing Unit outlet temperature C DIS DISCHARGE Discharge gas temperature C ALM HISTORY Alarm history error code display E Error code Latest 50 items Older data erased pressing Older data pressing Newer dat...

Страница 34: ...xpansion valve opening display Pressure reduction Gas return Liquid return MOV5 5 step MOV6 6 step MOV7 7 step FREQ FREQUENCY Compressor current A SUC SUCTION Gas cooler fan speed rpm DIS DISCHARGE pressing Software Version pressing Erase Alarm history ALM HISTORY Ambient temperature C Low Pressure Control Method Compressor capacity is controlled by changing the inverter frequency based on the dif...

Страница 35: ...ure intermediate pressure sensor unit outlet pressure sensor high pressure sensor Compressor stops with an error indication For the method of resuming resetting compressor operation refer to the Description of Abnormality Alarm in About Alarms 2 Open condition of discharge gas temperature sensor gas cooler outlet temperature sensor unit outlet temperature sensor and ambient temperature sensor Comp...

Страница 36: ...ent position of the compartment temperature sensor cold air blow directly hit the sensor would become a problem in addition to the above Review the sensor position Checking the Operation Condition of the Refrigeration Unit 1 Check abnormal vibration of the refrigeration unit and piping 2 Check insufficient or excessive charging of refrigerant Check gas cooler outlet temperature and high pressure 3...

Страница 37: ...perature Evaporating temperature 20 C Evaporating temperature 20 C High pressure High pressure 0 C or below 3 4MPa 3 4MPa 5 C 3 9MPa 3 9MPa 10 C 4 4MPa 4 4MPa 15 C 5 0MPa 5 0MPa 20 C 5 6MPa 5 8MPa 25 C 7 5MPa 8 0MPa 30 C 8 5MPa 9 0MPa 35 C 9 1MPa 9 6MPa Table 3 Determination criteria of refrigerant quantity Gas cooler outlet temperature High pressure Less than Ambient temperature 2 K Ambient tempe...

Страница 38: ...ropriate by checking the oil level indicated by the digital display Exclude the initial start up time Correct operation The oil level generally stays between Lower limit Mid level Upper limit and no Oil level anomaly E391 is occurred E g 1 Changing as Lower Mid level Upper Mid level Lower Mid level 2 Changing as Lower Mid level Upper Mid level Upper Mid level Note The time of change varies accordi...

Страница 39: ...lve opening stays around the large opening 480 steps 2 The electronic expansion valve opening frequently reaches the large opening 480 steps 3 Oil level anomaly E391 occurs Stop the compressor 3 Adding oil Add oil when the following condition is confirmed 1 When the oil level checked by the item 1 Checking the change of oil level stays near the lower limit 2 When the electronic expansion valve ope...

Страница 40: ... the electronic expansion valve and solenoid valve will open 4 Set the high pressure low pressure service valves slowly open the joint valve attached to the service piping to release the refrigerant in the refrigerant circuit After releasing the refrigerant connect an extension pipe copper pipe or charging hose to the joint valve of the oil service valve When setting each service valve to the fron...

Страница 41: ... purge valve of the manifold gauge set to release the remaining refrigerant in the service piping and manifold gauge set 10 After completely releasing the refrigerant in the pipes remove the service piping and attach a nut at the access port fastening torque 13 1 N m At the end of operations check for a loose gland nut fastening torque 10 1 N m at each service valve and fasten again and then attac...

Страница 42: ...ut Radiator temperature anomaly None lighting E221 output output Ambient temperature sensor anomaly None lighting E23 output output Gas cooler fan motor anomaly None OFF E271 none none 4 Refrigerant flood back alarm None OFF E32 none none 5 Intermediate pressure anomaly 6 blinking E36 none none lighting E46 output output Unit outlet pressure anomaly 6 blinking E37 none none lighting E47 output out...

Страница 43: ...one E733 lighting output output Motor Overload oL1 A1000 E601 blinking none none E701 lighting output output V1000 E603 blinking none none E703 lighting output output Drive Overload oL2 A1000 E641 blinking none none E741 lighting output output V1000 E643 blinking none none E743 lighting output output Overtorque Detection 1 oL3 A1000 E601 blinking none none E701 lighting output output V1000 E603 bl...

Страница 44: ...ning 2 Scheduled inspection 3 System maintenance etc Inspection items Replacement parts Inspection content Replacement guideline System overall Each part temperature 1 Pressure condition should match the cooling temperature 2 Temperature of each part must be normal 3 No abnormality exists in the installed condition Compressor Abnormal sound abnormal vibration No abnormal sound or abnormal vibratio...

Страница 45: ...pply nitrogen blow to eliminate refrigeration oil remaining in the refrigerant circuit At such time also remove the expansion valve electronic expansion valve 4 When replacing the compressor do not apply power to the crankcase heater while it is removed from the compressor Be sure to shut off the power It may lead to fire 5 To avoid current leak accident install the components cover electric parts...

Страница 46: ... specified position tightly contacting the compressor 4 Apply evacuation from both the high pressure and low pressure service valves Method of Clearing Alarm History Operate the rotary switch knob and DIP switch 1 Align the rotary switch knob with DIS Discharge gas temperature is displayed 2 Turn ON the DIP switch SW13 7 3 Press button Entire content of ALM HISTORY is cleared 4 Turn OFF the DIP sw...

Страница 47: ...t to 2nd incident Discharge gas temperature increased to 118 C or higher and generated an abnormal stop Or discharge gas temperature sensor shorted Comply with the Failure Diagnosis at the time of Abnormal Discharge Gas Temperature 1 Search for the cause of increasing discharge gas temperature 2 Check the connection of control PCB 2P4 discharge 1 connector 3 Check the resistance value of the disch...

Страница 48: ...ocked 6 Check if inverter A1000 output is connected to compressor 7 Check if inverter V1000 output is connected to fan motor E80 Split cycle outlet temperature sensor anomaly Split cycle outlet temperature sensor became abnormal open circuit condition 1 Check the connection of control PCB 2P7 S outlet connector 2 Check the resistance value of the split cycle outlet temperature sensor Refer to Meth...

Страница 49: ...the operation current value normal 3 Is the temperature of cooled load no problem 4 Is any other abnormal point detected Control Component Check 1 Mounted condition of the discharge gas temperature sensor Sensor body connector on the control PCB Failure Diagnosis of Gas Cooler Fan 1 When the ground fault protector shuts OFF 1 Check the insulation resistance between each terminal of the power suppl...

Страница 50: ...calculation 3 Discharge gas temperature sensor Measure the resistance while the connector is disconnected from the control PCB and check if the temperature is normal by using the following table Relationship between sensor temperature and resistance value Temperature C 20 30 40 50 60 70 80 90 100 110 120 Resistance value kΩ 70 13 45 05 29 67 20 00 13 79 9 71 6 97 5 09 3 77 2 84 2 16 In the table a...

Страница 51: ... Ω shorted 2 When a motion failure of an electronic expansion valve is questioned always check the resistance value of the electronic expansion valve before replacing the control PCB 2 Oil level switch Measure the resistance while the connector is disconnected from the control PCB and check if the contacts are normal in the table below Measurement position Normal condition resistance value Abnorma...

Страница 52: ...1000 Replace the Inverter V1000 or Inverter A1000 Be sure to eliminate the cause of the failure before supplying the power turning the ground fault protector ON Failure Diagnosis of Inverter Unit When performing an inspection or replacement make sure to start working after the high voltage danger indication red light on the inverter V1000 and inverter A1000 has been turned off Approx 5 minutes are...

Страница 53: ...wer voltage to the refrigeration unit is in the range of 380 V 38 V 400 V 40 V 415 V 41 V Execute maintenance of the power supply facility Failure of the Inverter A1000 and Inverter V1000 When the supplied voltage to the refrigeration unit is in the range of 380 V 38 V 400 V 40 V 415 V 41 V check if any abnormality exists in the appearance of the Inverter A1000 and Inverter V1000 Replace the Inver...

Страница 54: ...ollowing pressure equipment covered by WHS regulation Plant Name Hazard Level AS 4343 Design Registration No Issued By Compressor D PV 6 231198 19 SafeWork NSW Intermediate Cooler D PV 6 236505 19 SafeWork NSW Oil Separator D PV 6 230383 19 SafeWork NSW Design Registration No for WHS regulation Australian regulation 01_OCU CR1000VF8A indd 54 2019 08 27 10 56 10 ...

Страница 55: ...EN 55 NOTE 01_OCU CR1000VF8A indd 55 2019 08 27 10 56 10 ...

Страница 56: ...rporation Website www panasonic europe com Printed in Japan D0519 20807 80264179414002 Sales company in EU Panasonic Appliances Air Conditioning Europe PAPAEU Panasonic Marketing Europe GmbH Hagenauer Str 43 65203 Wiesbaden Germany Authorized representative in EU Panasonic Testing Centre Panasonic Marketing Europe GmbH Winsbergring 15 22525 Hamburg Germany Sales company in Australia Hussmann Austr...

Отзывы: