background image


4


  PRECAUTIONS FOR SAFE OPERATION 


Do not use the unit outdoors.

    Current leakage or electric shock may result if the unit is exposed to 

rain water.


Only qualified engineers or service personnel should install the unit.

  The installation by 

unqualified personnel may cause electric shock or fire. 
 

Install the unit on a sturdy floor and take an adequate precaution to prevent the unit from 
turning over.

    If the floor is not strong enough or the installation site is not adequate, this may result 

in injury from the unit falling or tipping over.


Never install the unit in a humid place or a place where it is likely to be splashed by water.


Deterioration of the insulation may result which could cause current leakage or electric shock.


Never install the unit in a flammable or volatile location.

 This may cause explosion or fire.


Never install the unit where acid or corrosive gases are present

 as current leakage or electric 

shock may result due to corrosion.


Always ground (earth) the unit to prevent electric shock.  

If the power supply outlet is not 

grounded, it will be necessary to install a ground by qualified engineers. 


Never ground the unit through a gas pipe, water main, telephone line or lightning rod.

    Such 

grounding may cause electric shock in the case of an incomplete circuit. 


Connect the unit to a power source as indicated on the rating label attached to the unit.   

Use of 

any other voltage or frequency other than that on the rating label may cause fire or electric shock. 


Never store volatile or flammable substances

 in this unit if the container cannot be sealed.    These 

may cause explosion or fire.


Do not insert metal objects such as a pin or a wire into any vent, gap or any outlet


on the unit.


This may cause electric shock or injury by accidental contact with moving parts.


Use this unit in safe area when treating the poison, harmful or radiate articles.

  Improper use 

may cause bad effect on your health or environment. 
 

Turn off the power switch (if provided) and disconnect the power supply to the unit prior to any 
repair or maintenance 

of the unit in order to prevent electric shock or injury.


Do not touch any electrical parts (such as power supply plug) or operate switches with a wet 
hand.

    This may cause electric shock. 


WARNING


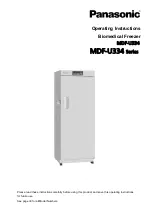
Содержание MDF-U334 Series

Страница 1: ...lease read these instructions carefully before using this product and save this operating instructions for future use See page 33 for all Model Numbers MDF U537 U537D MDF U334 Biomedical Freezer Opera...

Страница 2: ...ALARM TEMPERATURE SETTING P 15 SETTING OF ALARM RESUME TIME P 17 ALARMS SAFETY FUNCTIONS P 18 ROUTINE MAINTENANCE P 19 Cleaning of cabinet P 19 Defrosting P 19 TROUBLESHOOTING P 20 DISPOSAL OF UNIT P...

Страница 3: ...ctions will be subjected to change without notice due to the improvement of performance or functions Contact our sales representative or agent if any page of the operating instructions is lost or page...

Страница 4: ...s caution this symbol means an action is prohibited this symbol means an instruction must be followed Be sure to keep this operating instructions in a place accessible to users of this unit Some warni...

Страница 5: ...wer supply outlet is not grounded it will be necessary to install a ground by qualified engineers Never ground the unit through a gas pipe water main telephone line or lightning rod Such grounding may...

Страница 6: ...nction Disconnect the power supply plug if there is something wrong with the unit Continued abnormal operation may cause electric shock or fire When removing the plug from the power supply outlet grip...

Страница 7: ...cause a heat or ignition Never store corrosive substances such as acid or alkali in this unit if the container cannot be sealed These may cause corrosion of inner components or electric parts Check t...

Страница 8: ...40 o C Maximum relative humidity 80 for temperature up to 31 o C decreasing linearly to 50 relative humidity at 40 o C Mains supply voltage fluctuations up to 10 of the nominal voltage Transient overv...

Страница 9: ...8 FREEZER COMPONENTS 2 11 3 9 8 7 6 4 1 5 12 Hole of Padlock Back side 15 14 13 N C COM N O 10...

Страница 10: ...areful not to damage the container by a metal scraper at the time of defrosting WARNING Fix the storage container securely Incomplete installation may cause injury or damage Never touch the storage it...

Страница 11: ...s flashed Pressing this key again after setting desired temperature the setting is stored into computer memory If there is no key operation for ninety seconds during the temperature setting mode the t...

Страница 12: ...y cause vibration or noise WARNING Install the unit on a sturdy floor If the floor is not strong enough or the installation site is not adequate this may result in injury from the unit falling or tipp...

Страница 13: ...contact them to the floor Ensure the unit is level 3 Fixing the unit Two fixtures are attached to the rear of the frame Fix the frame to the wall with these fixtures and rope or chain 4 Ground earth...

Страница 14: ...SETTING Table 1 shows the basic procedure for setting the chamber temperature Perform key operations in the sequence indicated in the table The example in the table is based on the assumption that the...

Страница 15: ...ent chamber temperature is displayed The key lock only works with the chamber temperature setting and the defrost key DEF REMOTE ALARM TERMINAL WARNING Always disconnect the power supply cord before c...

Страница 16: ...alarm can activate when the chamber temperature is 5 o C lower than the set temperature Table 3 Procedure for setting high temperature alarm Description of operation Key operated Indication after oper...

Страница 17: ...of settable digit increases 4 Press set key SET The right digit is flashed 5 Set the temperature to 05 with the digit shift key and numerical value shift key Pressing the key shifts the digit which c...

Страница 18: ...3 Set the figure to F25 with the digit shift key and numerical value shift key Pressing the key shifts the digit which can be set When pressed the figure of settable digit increases 4 Press set key S...

Страница 19: ...cted Alarm lamp is flashed E05 and chamber temp Are displayed alternately Intermittent tone Remote alarm Normal operation If the compressor protection temperature sensor is short circuited Alarm lamp...

Страница 20: ...nical parts are completely sealed This unit requires absolutely no lubrication Defrosting Defrost the freezer whenever one of the defrost marks shown by 12 in the figure on page 9 is hidden by frost U...

Страница 21: ...sunlight There is any heating source near the freezer A rubber cap and insulation for the access port are not set correctly You put too many unfrozen articles into the freezer compartment When the uni...

Страница 22: ...s remove doors to prevent accidents such as suffocation Recycle of battery The unit contains a rechargeable battery The battery is recyclable At the end of it s useful life check with you local solid...

Страница 23: ...pose of them correctly at your local community waste collection recycling centre Please help us to conserve the environment we live in German F r EU Staaten Das Symbol und das erw hnte Wiederverwertun...

Страница 24: ...es de mani re inappropri e peuvent s av rer potentiellement dangereuses pour la sant humaine et pour l environnement Cependant ces mati res sont n cessaires au bon fonctionnement de votre appareil ou...

Страница 25: ...m recolha de lixo local Por favor ajude nos a conservar o ambiente Italian PER UTENTI UE Il simbolo e i sistemi di riciclaggio descritti di seguito si applicano esclusivamente ai paesi dell UE Questo...

Страница 26: ...en bij uw plaatselijk afvalinzameling recyclingcentrum in uw buurt Help ons het milieu waarin wij leven in stand te houden Swedish F R ANV NDARE INOM EU Den symbolm rkning och de tervinningssystem som...

Страница 27: ...and disconnect the power supply plug 2 Remove six screws fixing the top cover with a screw driver and remove the top cover Fig 1 3 Remove two screws fixing the battery mounting plate Fig 2 and discon...

Страница 28: ...l freezer as the optional component The type of the temperature recorder is MTR G85A MTR G85C and MTR 4015LH For the attachment the recorder fixing is necessary Following shows the combination of reco...

Страница 29: ...b counterclockwise See Fig 2 3 As shown in Fig 3 insert the recording paper with the begin tab placed in the cartridge Check that the printed side is facing out 4 Place the recording paper beneath the...

Страница 30: ...paper has been fed into the used recording paper compartment send all the recording paper in the compartment first turning the gear Battery replacement To replace the battery turn the knob countercloc...

Страница 31: ...rows to open the head clamp at A and B See to Fig 2 illustration 1 4 Position the ink pen so that the guide pins fit into the guide holes on the pen arm See to Fig 2 illustration 2 5 Press the two sid...

Страница 32: ...nter of the recording paper is divided into thirty two equal sections The lines extending from these lines serve as the thirty two day time scale Fig 4 Stopping recording 1 Turn OFF the power switch 2...

Страница 33: ...8 o C and 35 o C Temperature display Digital display between 50 o C and 50 o C Temperature sensor Thermistor sensor Temperature alarm Flash of digital indicator and alarm lamp Buzzer Remote alarm Acce...

Страница 34: ...ature 35 o C no load Temperature control range 20 o C to 30 o C Rated voltage AC 110 V AC 115 V AC 220 V AC 220 V AC 220 V 230 V 240 V Rated frequency 60 Hz 60 Hz 50 Hz 60 Hz 50 Hz Rated power consump...

Страница 35: ...he unit Unit interior No contamination Decontaminated Contaminated Others 3 Instructions for safe repair maintenance of the unit a The unit is safe to work on b There is some danger see below Procedur...

Страница 36: ...Printed in Japan 7FB6P151619001 S0412 10412 1 1 1 Sakata Oizumi Machi Ora Gun Gunma 370 0596 Japan Panasonic Healthcare Co Ltd 2012...

Отзывы: