background image

4-150

DPT Features

4.3

Operator Service Features

Standard Operation

Setting / Cancelling

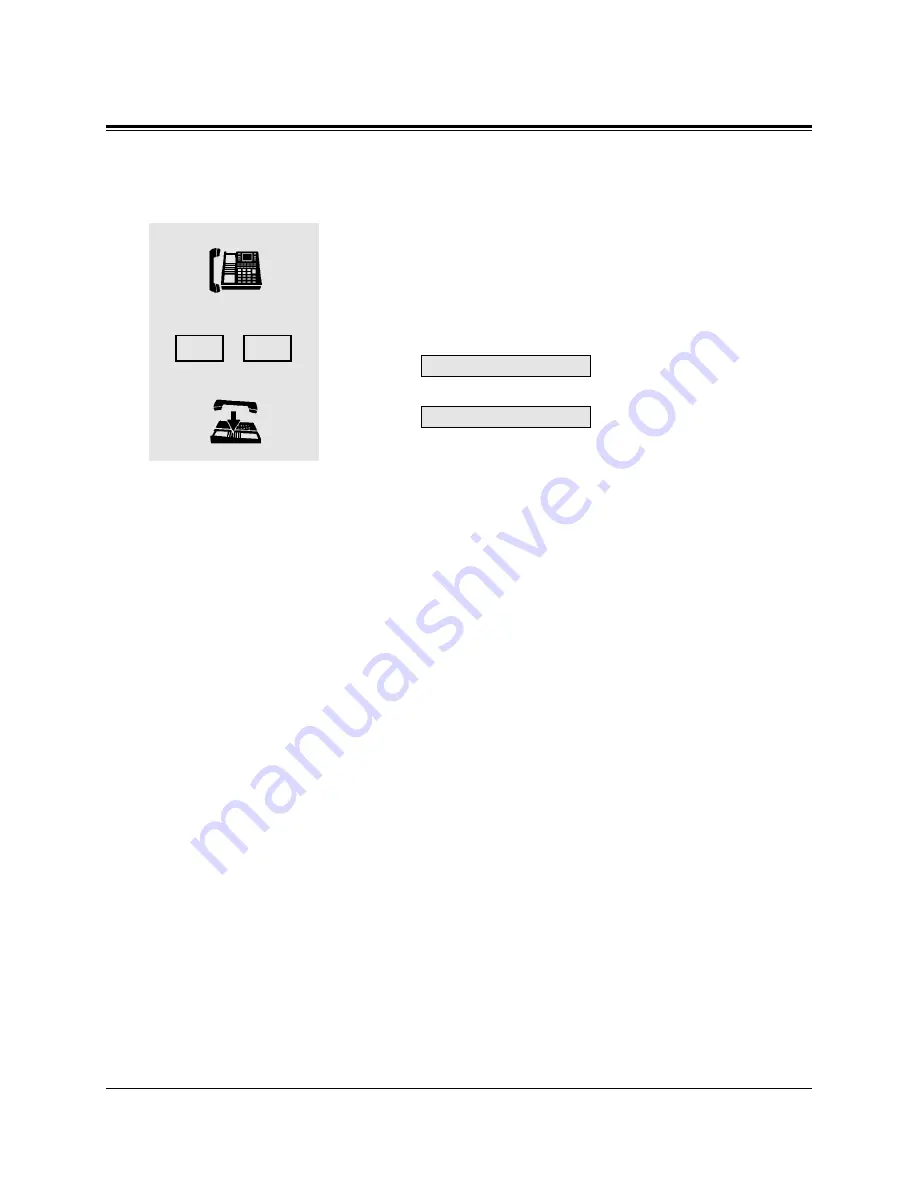
1. Lift the handset or press the SP-PHONE/MONITOR button.

2. Dial the feature number (65).

• The display shows either of the following depending on

whether the BGM is on or off:

or

• You hear a confirmation tone; the music starts or stops. 

3. Hang up or press the SP-PHONE/MONITOR button.

Conditions

• You must connect an external music source, such as radio, to the system.

• Default is “External BGM Off.”

• BGM is only sent to the programmed external pager.

• Access priority to the external pager is: (1) TAFAS; (2) Paging; (3) BGM

Higher priorities will override BGM.

Programming References

• System Programming — Installation Manual

[803] Music Source Use

[804] External Pager BGM

[990] System Additional Information, Field (20)

External BGM On

External BGM Off

1

2

3

5

6

Содержание KX-TD1232E

Страница 1: ...ybrid System Please read this manual before using the Digital Super Hybrid System MODEL KX TD816E KX TD1232E D1232 DIGITAL SUPER HYBRID SYSTEM Panasonic Panasonic D816 DIGITAL SUPER HYBRID SYSTEM KX TD816E KX TD1232E ...

Страница 2: ...h 6 line Display KX T7220E Digital Proprietary Telephone KX T7230E Digital Proprietary Telephone with 2 line Display KX T7235E Digital Proprietary Telephone with 6 line Display KX T7250E Digital Proprietary Telephone KX TD7500CE DECT Portable Station KX T7440E Digital DSS Console KX T7441E Digital DSS Console KX T7240E Digital DSS Console Single Line Telephones Description Model No Service Unit Te...

Страница 3: ...tal Super Hybrid System and the Internal extension wiring Keep the unit away from heating appliances and electrical noise generating devices such as fluorescent lamps and motors The unit should be kept free of dust moisture and vibration and should not be exposed to direct sunlight Do not use benzine thinner or the like or any abrasive powder to clean the cabinet Wipe it with a soft cloth Do not u...

Страница 4: ...elephones DPTs KX T7420 KX T7425 KX T7431 KX T7433 KX T7436 KX T7220 KX T7230 KX T7235 KX T7250 DECT Portable Station PS KX TD7500 Digital DSS Console KX T7440 KX T7441 KX T7240 Single Line Telephones SLTs and their features The step by step procedures required to activate each feature are discussed in detail Illustrations of the KX TD816 and the KX TD1232 systems and the required System Programmi...

Страница 5: ...on the DPT features and lists the steps required to activate each feature Section 5 DECT Portable Station Features Provides background information on the DECT Portable Station features and lists the steps required to activate each feature Section 6 DSS Console Features Provides configuration information on the DSS Console It gives background information on the DSS Console features and provides the...

Страница 6: ...X T7235 and KX T7436 Doorphone and Door Opener Option enables the conversation between you and a visitor at door You can also unlock the door a few seconds from your phone Message Waiting allows you to leave a message notification for another extension The message waiting lamp MESSAGE indicator gives a visual indication that a message notification has been received Even if the MESSAGE button is no...

Страница 7: ...ection 9 If you use a dial pulse DP type standard telephone It is not possible to access features that have or in their feature numbers Illustrations All illustrations of DPTs used in the operating instructions are the KX T7235 Tones Various tone types such as Confirmation tone Dial tone Call Waiting tone etc are explained in the Appendix Section 9 Displays The display examples are in each operati...

Страница 8: ...nging tone of CO buttons Intercom calls 1 22 Volume Control Handset Receiver Headset Ringer Speaker 1 23 LED Indication 1 25 Section 2 Station Programming 2 1 2 1 Station Programming Instructions 2 2 2 2 Station Programming 2 6 Call Waiting Tone Type Assignment 2 6 Charge Fee Reference 2 7 Extension Charge Fee Reference 2 7 CO Line Charge Fee Reference 2 9 Account Code Charge Fee Reference 2 10 To...

Страница 9: ... Mode Set 2 34 Phantom Extension Bell On Off Set 2 35 Preferred Line Assignment Incoming 2 36 No Line Preference Incoming 2 36 Ringing Line Preference Incoming 2 36 Prime Line CO Line Preference Incoming 2 37 Preferred Line Assignment Outgoing 2 38 No Line Preference Outgoing 2 38 Idle Line Preference Outgoing 2 39 Prime Line CO Line Preference Outgoing 2 39 Prime Line INTERCOM Preference Outgoing...

Страница 10: ...eatures 4 5 A Absent Message Capability 4 5 Account Code Entry 4 9 Alternate Calling Ring Voice 4 13 Answering Direct CO Line 4 14 Automatic Callback Busy Camp On 4 15 B Background Music BGM 4 17 Busy Station Signalling BSS 4 18 C Call Forwarding SUMMARY 4 19 Call Forwarding All Calls 4 21 Call Forwarding Busy 4 22 Call Forwarding No Answer 4 23 Call Forwarding Busy No Answer 4 24 Call Forwarding ...

Страница 11: ...ing Call Information Log 4 52 CO Incoming Call Information Log Lock 4 55 CO Incoming Call Information Log Mode 4 57 Conference 4 58 Connected Line Identification Restriction COLR 4 60 D Display Call Information 4 61 Do Not Disturb DND 4 62 Do Not Disturb for Direct Dialling In Calls 4 64 Do Not Disturb DND Override 4 65 Doorphone Call 4 66 E Electronic Station Lockout 4 68 Emergency Call 4 69 Exte...

Страница 12: ...l 4 99 Outward Dialling Line Access SUMMARY 4 100 Line Access Automatic 4 101 Line Access CO Line Group 4 102 Line Access Individual 4 103 P Paging SUMMARY 4 104 Paging All 4 105 Paging External 4 105 Paging Group 4 107 Paging ANSWER 4 109 Paging DENY 4 110 Paging and Transfer 4 111 Parallelled Telephone Connection 4 114 Phantom Extension 4 116 Pickup Dialling Hot Line 4 118 Predial Preparation 4 ...

Страница 13: ...rom Any Station TAFAS 4 138 Two Way Recording into the Voice Mail 4 139 U Uniform Call Distribution UCD 4 140 V Voice Mail Integration 4 141 Voice Mail Transfer 4 143 W Whisper OHCA 4 144 4 3 Operator Service Features 4 146 Alert Indication 4 146 Automatic Overflow and Hurry Up Transfer 4 147 Background Music BGM External 4 148 Class of Service COS Switch 4 151 CO Incoming Call Information Log Loc...

Страница 14: ...e Batteries 5 7 Initial Settings 5 9 Installing the Handset Clip 5 10 5 2 DECT Portable Station Features 5 11 Basic Operations 5 11 Making Intercom Calls 5 11 Making Outside Calls 5 12 Redialling a Number in the Call Log 5 14 Answering Calls 5 15 Call Hold 5 16 Key Lock Setting 5 17 Call Directory 5 18 Call Directory Number Name Assignment 5 20 Call Directory Dialling 5 26 Call Directory Data Clea...

Страница 15: ...ension Number Assignment 6 5 One Touch Dialling Assignment 6 6 One Touch Access Assignment for System Features 6 6 Direct Station Dialling 6 9 One Touch Dialling 6 9 One Touch Access for System Features 6 9 Call Transfer 6 10 ANSWER RELEASE Button Operation KX T7441 only 6 11 Section 7 SLT and ISDN Telephone Features 7 1 7 1 Basic Operations 7 2 Making Calls 7 2 Intercom Calling 7 2 Outward Dialli...

Страница 16: ...l Hold Retrieve 7 23 Calling Connected Line Identification Presentation CLIP COLP 7 24 Calling Line Identification Restriction CLIR 7 25 Call Park 7 26 Call Pickup CO Line 7 27 Call Pickup Directed 7 28 Call Pickup Group 7 29 Call Pickup Deny 7 30 Call Splitting 7 31 Call Transfer to CO Line 7 32 Call Transfer to Extension 7 33 Call Waiting 7 35 Conference 7 37 Connected Line Identification Restri...

Страница 17: ...OHCA 7 58 Operator Call 7 59 Outward Dialling Line Access SUMMARY 7 60 Line Access Automatic 7 61 Line Access CO Line Group 7 62 P Paging SUMMARY 7 63 Paging All 7 64 Paging External 7 64 Paging Group 7 66 Paging ANSWER 7 68 Paging and Transfer 7 69 Parallelled Telephone Connection 7 72 Pickup Dialling Hot Line 7 73 Pulse to Tone Conversion 7 75 Q Quick Dialling 7 76 R Redial Last Number 7 77 ...

Страница 18: ...TAFAS 7 86 U Uniform Call Distribution UCD 7 87 V Voice Mail Integration 7 88 7 3 ISDN Telephone Features 7 90 Section 8 Quick Reference 8 1 Basic Operations 8 2 Station Programming 8 2 User Programming Manager Programming 8 9 DPT Features 8 10 Operator Service Features 8 22 Special Display Features 8 25 DECT Portable Station Features 8 31 DSS Console Features 8 35 SLT and ISDN Telephone Features ...

Страница 19: ...ion 1 2 Location of Controls 1 3 Feature Buttons 1 12 Initial Settings for the KX T7400 Series 1 18 Initial Settings for the KX T7200 Series 1 22 LED Indication 1 25 Note All illustrations used in the initial setting are based on the model KX T7235 ...

Страница 20: ... T7425 None Yes 24 KX T7431 16 char line 1 line LCD Yes 12 KX T7433 Tilt up 16 char line 3 line LCD Yes 24 KX T7436 Tilt up 24 char line 6 line LCD Yes Soft Buttons and Function Buttons None None None 3 Soft Buttons 3 Soft Buttons 10 Function Buttons 24 KX T7200 Series Display Speakerphone CO Buttons Fixed Feature Buttons Refer to the Fixed Buttons in this section KX T7220 None Yes 24 KX T7230 16 ...

Страница 21: ...Volume Selector Used to adjust the ringer volume AUTO ANSWER MUTE Button FLASH RCL Button Jog Dial REDIAL Button HOLD Button SP PHONE Button Microphone PROGRAM Button FWD DND Button CONF Button INTERCOM Button Flexible CO Buttons CO lines 01 through 12 MESSAGE Button PAUSE Button TRANSFER Button ...

Страница 22: ...ector Used to adjust the ringer volume AUTO ANSWER MUTE Button FLASH RCL Button Jog Dial REDIAL Button HOLD Button SP PHONE Button Microphone PROGRAM Button FWD DND Button CONF Button INTERCOM Button Flexible CO Buttons CO lines 01 through 24 MESSAGE Button PAUSE Button TRANSFER Button ...

Страница 23: ...crophone Flexible CO Buttons CO lines 01 through 12 PROGRAM Button FWD DND Button CONF Button INTERCOM Button SELECT Button MODE Button MESSAGE Button PAUSE Button TRANSFER Button Display Liquid Crystal Display With 16 character 1 line readout Shows the date time dialed number or name call duration time etc In Programming mode it shows the programming messages ...

Страница 24: ... Buttons S1 through S3 SHIFT Button MESSAGE Button PAUSE Button TRANSFER Button Display Liquid Crystal Display With 16 character 3 line readout Shows the date time dialed number or name call duration time etc In Programming mode it shows the programming messages KX T7433 To lift or set down the display To lift the display 1 Press the LCD ADJ button 2 Lift up the display To set down the display 1 P...

Страница 25: ... Buttons S1 through S3 Function Buttons F6 through F10 MESSAGE Button SHIFT Button PAUSE Button TRANSFER Button Display Liquid Crystal Display With 24 character 6 line readout Shows the date time dialed number or name call duration time etc In Programming mode it shows the programming messages KX T7436 To lift or set down the display To lift the display 1 Press the LCD ADJ button 2 Lift up the dis...

Страница 26: ...Button AUTO DIAL STORE Button AUTO ANSWER MUTE Button MESSAGE Button FWD DND Button CONF Button INTERCOM Button REDIAL Button RECALL Button HOLD Button Microphone SP PHONE Button Panasonic RINGER Volume Selector Used to adjust the ringer volume Flexible CO Buttons Outside lines 01 through 24 ...

Страница 27: ...e lines 01 through 24 MESSAGE Button FWD DND Button CONF Button INTERCOM Button REDIAL Button RECALL Button HOLD Button Microphone SP PHONE Button SHIFT Button Soft Buttons S1 through S3 Display Liquid Crystal Display with 16 characters 2 line readout Shows the date time dialed number or name call duration time etc In Programming mode it shows the Programming instructions Panasonic ...

Страница 28: ...utton SHIFT Button Function Buttons F6 through F10 Soft Buttons S1 through S3 Flexible CO Buttons Outside lines 01 through 12 Display Liquid Crystal Display with 24 characters 6 line readout Shows the date time dialed number or name call duration time etc In Programming mode it shows the Programming instructions To lift or set down the display To lift the display 1 Press the LCD ADJ button 2 Lift ...

Страница 29: ... TRANSFER Button Flexible CO Buttons Outside lines 01 through 06 INTERCOM Button REDIAL Button RECALL Button HOLD Button MONITOR Button Memory Card Pull out the card and write down the names or phone numbers associated with automatic dialing numbers RINGER Volume Selector Used to adjust the ringer volume ...

Страница 30: ...ned to them These default function assignments cannot be changed The following table lists the fixed buttons located on each DPT model indicates the button is available Feature Button AUTO ANSWER MUTE AUTO DIAL STORE CONF FLASH RCL Function buttons FWD DND HOLD INTERCOM Jog Dial MESSAGE MODE MONITOR PAUSE PROGRAM RECALL REDIAL SELECT SHIFT Soft buttons SP PHONE TRANSFER VOLUME T7420 T7425 T7431 T7...

Страница 31: ...m the corresponding displayed function or operation FWD DND Call Forwarding Do Not Disturb Button Used to program the Call Forwarding feature or set the Do Not Disturb DND feature HOLD Button Used to place a call on hold INTERCOM Button Used to make or receive extension calls Jog Dial Used to adjust the volume of the handset receiver headset ringer and speaker It also adjusts the display contrast ...

Страница 32: ...hout hanging up REDIAL Button Used for Last Number or Automatic Redialling SELECT Button Used to select the displayed function or to call the displayed phone number SHIFT Button Used to access the second and third level of Soft Button functions Soft S1 through S3 Buttons Used to perform the function or operation that appears on the bottom line of the display SP PHONE Speakerphone Button Used for a...

Страница 33: ...The following table outlines the features that can be assigned to the Flexible Buttons indicates that the feature is available Available when the Digital Super Hybrid System is connected to a Digital Proprietary Telephone capable Panasonic Voice Processing System one that supports digital proprietary telephone integration e g KX TVP100 Feature Buttons Single CO S CO Group CO G CO Loop CO L CO Aler...

Страница 34: ... lines CO line group can be assigned to a CO button This button is referred to as Group CO G CO button Any incoming calls from any CO line in the CO line group arrive at the G CO button To make a CO call you can access an idle CO line in the group by simply pressing the assigned G CO button Conditions It is possible to assign the same line to an S CO button G CO button and L CO button It is necess...

Страница 35: ...n System Programming 005 Installation Manual can be used for this assignment Feature References Flexible Buttons Section 1 1 Configuration Outward Dialling Line Access Line Access Automatic Single CO S CO button A S CO button is a CO line access button This allows you to access a specific line by pressing a S CO button An incoming call can be directed to a S CO button Conditions Only one S CO butt...

Страница 36: ... KX T7433 and KX T7436 users are used to adjust the display contrast The contrast level is indicated on the display KX T7431 While on hook 1 Press the MODE button six times The display shows Example contrast volume level 3 2 Rotate the Jog Dial in the desired direction KX T7433 and KX T7436 While on hook or during a conversation 1 Press the CONT S1 button 2 Rotate the Jog Dial in the desired direc...

Страница 37: ...s or Ringing Tone Selection for Intercom Calls in Station Programming Section 2 Volume Control Handset Receiver Headset Ringer Speaker Allows you to adjust the following volumes as required Handset Receiver volume levels 1 through 4 Headset volume levels 1 through 4 Ringer volume levels 0 through 3 Speaker volume levels 1 through 12 If your digital proprietary telephone is provided with a display ...

Страница 38: ...ne is idle and on hook 1 Press the RING S2 button The telephone will ring 2 Rotate the Jog Dial in the desired direction The telephone will stop ringing in about 4 seconds When the volume level is 0 the display shows RNGOFF KX T7431 While the telephone is idle and on hook 1 Press the MODE button five times The display shows Example volume level 3 2 Rotate the Jog Dial in the desired direction The ...

Страница 39: ...sired direction The display shows Example volume level 12 You may also adjust the speaker volume while listening to background music BGM On mode receiving a voice call or receiving a page Conditions If the ringer volume of the KX T7431 is set to OFF the display while on hook is as follows By pressing the display changes to show your extension number and name SP 12 1 2 1 OFF HIGH LOW Ring Off 12 00...

Страница 40: ...g the headset The Panasonic Digital Super Hybrid System supports the use of a headset with a proprietary telephone PT When you use the headset optional you should switch the selection mode first Selection is explained in the Handset Headset Selection in Station Programming Section 2 To change to the headset mode Press PROGRAM 9 9 9 2 STORE PROGRAM Changing the ringing tone of CO Buttons Intercom c...

Страница 41: ...ble with the KX T7220 and KX T7250 To adjust the handset receiver volume 1 Lift the handset 2 Press the VOLUME UP DOWN Control button The display shows Example volume level 3 You may also adjust the handset receiver volume during a conversation using the handset receiver To adjust the headset volume Be sure the headset is connected 1 Press the SP PHONE button 2 Press the VOLUME UP DOWN Control but...

Страница 42: ...OFF KX T7220 and KX T7250 1 Adjust the RINGER Volume Selector lever to the desired setting OFF LOW HIGH To adjust the speaker volume 1 Press the SP PHONE or MONITOR button 2 Press the VOLUME UP DOWN Control button The display shows Example volume level 12 You may also adjust the speaker volume while listening to the background music BGM On mode receiving a voice call or receiving a page SP 12 SP P...

Страница 43: ...rns Slow flash 60 flash min Moderate flash 120 flash min Rapid flash 240 flash min LED Indication on INTERCOM Button The table below shows the lighting patterns and the intercom line conditions LED Indication on CO Button The table below shows the lighting patterns and the CO line conditions INTERCOM button Off Green On Green slow flash Green moderate flash Green rapid flash Intercom Line Conditio...

Страница 44: ......

Страница 45: ...ection 2 Station Programming Contents 2 1 Station Programming Instructions 2 2 2 2 Station Programming A Z 2 6 Note All illustrations used in these operating instructions are based on the KX T7235 model ...

Страница 46: ...n we note the display example at the programming steps if required You can also refer to Display Examples in the Appendix Section 9 To enter the Station Programming mode Be sure the telephone is idle and on hook 1 Press the PROGRAM button 2 Dial 99 If 99 is not dialled within 5 seconds of pressing the PROGRAM button the Station Programming mode is cancelled The display shows initial programming di...

Страница 47: ...perator only 03 Live Call Screening Password Control Operator only Station Programming Data Default Set 1 Live Call Screening Mode Setting The display shows the programmed data Example When you press 5 the display shows Call Waiting tone is now programmed to Tone 1 2 Press the HOLD END button The display shows the initial programming mode To exit from Station Programming mode Press PROGRAM or lift...

Страница 48: ...data follow the programming procedure explained in this section To clear the data on the Flexible button Be sure that you are in the Station Programming mode Press PROGRAM 9 9 1 Press the desired Flexible CO DSS PF button that you wish to clear 2 Dial 2 3 Press the STORE button The STORE indicator light turns on The display shows the initial programming mode To exit from Station Programming mode P...

Страница 49: ...Assignment for KX T7235 and KX T7436 Preferred Line Assignment Outgoing Preferred Line Assignment Incoming Full One Touch Dialling Assignment Intercom Alerting Assignment Call Waiting Tone Type Assignment Self Extension Number Confirmation Charge Fee Reference Handset Headset Selection Remote Station Lock Control Call Log Lock Control Incoming Live Call Screening Password Control Live Call Screeni...

Страница 50: ...e display shows the current tone type 2 Dial 1 or 2 1 for selecting Call Waiting Tone 1 2 for selecting Call Waiting Tone 2 3 Press the STORE button The STORE indicator light turns on The display shows the initial programming mode To exit from Station Programming mode Press PROGRAM or lift the handset Conditions The tone type patterns are described in the Appendix Section 9 Default is Tone 1 mode ...

Страница 51: ...o see charges The first display format Pulse or Pound is selected by System Programming This can be switched manually at each extension You may use the overlay while programming In this case the HOLD button becomes the END button and the REDIAL button becomes the PREV button The currency denomination is programmable by System Programming Programming References System Programming Installation Manua...

Страница 52: ...of the displayed extension number STORE button To print out the total meter and charge of the displayed extension number NEXT S3 button To advance to the extension number that is assigned at the next jack number REDIAL PREV button To return to the extension number that is assigned at the previous jack number 6 Press the HOLD END button The display returns to step 4 7 Press the HOLD END button The ...

Страница 53: ...ple If you assign the CO line number 08 5 Press the SEL S1 button The display shows the meter in Pounds Example Pressing each button corresponds to the following operations CLR S2 button To clear the meter and charge of the displayed CO line number STORE button To print out the total meter and charge of the displayed CO line number NEXT S3 button To advance to the next CO line number REDIAL PREV b...

Страница 54: ...S1 button The display shows the charge in Pounds Example Pressing each button corresponds to the following operations CLR S2 button To clear the meter and charge of the displayed location number STORE button To print out the total meter and charge of the displayed location number NEXT S3 button To advance to the next location number REDIAL PREV button To return to the previous location number 6 Pr...

Страница 55: ...ple 4 Press the SEL S1 button The display shows the total extension charge in Pounds Example Pressing each button corresponds to the following operations CLR S2 button To clear the meter and charge of all extension number STORE button To print out the total meter and charge of all extension numbers and the individual charges for each extension number 5 Press the HOLD END button The display returns...

Страница 56: ...4 Press the SEL S1 button The display shows the total CO line charge in Pounds Example Pressing each button corresponds to the following operations CLR S2 button To clear the meter and charge of all CO line number STORE button To print out the total meter and charge of all CO line numbers and the individual charges for each CO line number 5 Press the HOLD END button The display returns to step 3 6...

Страница 57: ...Example 4 Press the SEL S1 button The display shows the total account code charge in Pounds Example Pressing each button corresponds to the following operations CLR S2 button To clear the meter and charge of all account codes STORE button To print out the total meter and charge of all account codes and the individual charges for each account code 5 Press the HOLD END button The display returns to ...

Страница 58: ...he display shows Not Stored 5 Press the CLR S2 button The message of the display disappears 6 Dial the new account code 5 digits The display shows xx location number aaaaa account code number To erase an incorrect entry press the CLR S2 button 7 Press the STORE button The display shows the new account code 8 Press the HOLD END button The display returns to step 3 9 Press the HOLD END button again ...

Страница 59: ...n Assignment in System Programming program address 005 can be used for this assignment Account Button Assignment Allows you to assign a Flexible CO DSS PF button as an Account button Be sure that you are in the Station Programming mode Press PROGRAM 9 9 1 Press the desired Flexible CO DSS PF button which you wish to assign as the Account button 2 Dial 6 The display shows 3 Press the STORE button T...

Страница 60: ... To exit from Station Programming mode Press PROGRAM or lift the handset Conference CONF Button Assignment Allows you to assign a Flexible CO DSS PF button as a Conference CONF button Be sure that you are in the Station Programming mode Press PROGRAM 9 9 1 Press the desired Flexible CO DSS PF button which you wish to assign as the Conference button 2 Dial 7 The display shows 3 Press the STORE butt...

Страница 61: ...xxxx extension number To erase an incorrect entry press the CLR S2 button or the TRANSFER CLEAR button The TRANSFER button becomes the CLEAR button when using the overlay 4 Press the STORE button The STORE indicator light turns on The display shows the initial programming mode To exit from Station Programming mode Press PROGRAM or lift the handset Conditions DSS buttons are provided on the DSS Con...

Страница 62: ...p CO G CO Button Assignment Allows you to assign a Flexible CO button as a Group CO button Be sure that you are in the Station Programming mode Press PROGRAM 9 9 1 Press the Flexible CO button which you wish to assign as a G CO button 2 Dial The display shows 3 Enter the CO line group number 1 through 8 To erase an incorrect entry press the CLR S2 button or the TRANSFER CLEAR button The TRANSFER b...

Страница 63: ...n The STORE indicator light turns on The display shows the initial programming mode To exit from Station Programming mode Press PROGRAM or lift the handset Conditions You cannot enter a non existent extension numbers Hurry Up button can be used only by the operator Live Call Screening LCS Button Assignment Allows you to assign a Flexible CO DSS button as a Live Call Screening button Be sure that y...

Страница 64: ...ncel button 2 Dial 86 The display shows 3 Press the STORE button The STORE indicator light turns on The display shows the initial programming mode To exit from Station Programming mode Press PROGRAM or lift the handset Log In Log Out Button Assignment Allows you to assign a Flexible CO button as the Log In Log Out button Be sure that you are in the Station Programming mode Press PROGRAM 9 9 1 Pres...

Страница 65: ... the initial programming mode To exit from Station Programming mode Press PROGRAM or lift the handset Message Waiting MESSAGE Button Assignment Allows you to assign a Flexible CO DSS button as the Message Waiting MESSAGE button Be sure that you are in the Station Programming mode Press PROGRAM 9 9 1 Press the desired Flexible CO DSS button which you wish to assign as the Message Waiting button 2 D...

Страница 66: ...tion Programming mode Press PROGRAM 9 9 1 Press the desired Flexible CO DSS button you wish to assign as the Night button 2 Dial 8 The display shows 3 Press the STORE button The STORE indicator light turns on The display shows the initial programming mode To exit the Station Programming mode Press PROGRAM or lift the handset Condition Class of Service programming determines the extensions that can...

Страница 67: ...rns on The display shows the initial programming mode To exit from Station Programming mode Press PROGRAM or lift the handset Conditions The number can be an extension number a telephone number or a feature number Up to sixteen digits can be stored on an One Touch Dialling button To store the telephone number of an outside party the line access code 9 or 81 through 88 must be stored as the leading...

Страница 68: ... you are in the Station Programming mode Press PROGRAM 9 9 1 Press the desired Flexible CO DSS PF button you wish to assign as an One Touch Dialling with Auto Hold button 2 Dial 8 3 Dial the desired number Up to 16 digits can be stored To erase an incorrect entry press the CLR S2 button or the TRANSFER CLEAR button The TRANSFER button becomes the CLEAR button when using the overlay 4 Press the STO...

Страница 69: ...hows the initial programming mode To exit the Station Programming mode Press PROGRAM or lift the handset Conditions The phantom extension number must be assigned in program 130 Phantom Extension Number Assignment before assigning the Phantom Extension button A DSS button can be assigned as the Phantom Extension button so that the operator can use it for transferring a call If you assigned the Phan...

Страница 70: ... Station Programming mode Press PROGRAM 9 9 1 Press the desired Flexible CO DSS PF button which you wish to assign as the SAVE button 2 Dial 5 The display shows 3 Press the STORE button The STORE indicator light turns on The display shows the initial programming mode To exit from Station Programming mode Press PROGRAM or lift the handset 1 2 3 AUTO DIAL STORE 5 Save ...

Страница 71: ... 54 if you are connected to the KX TD1232 The display shows xx CO line number To erase an incorrect entry press the CLR S2 button or the TRANSFER CLEAR button The TRANSFER button becomes the CLEAR button when using the overlay 4 Press the STORE button The STORE indicator light turns on The display shows the initial programming mode To exit from Station Programming mode Press PROGRAM or lift the ha...

Страница 72: ... Station Programming mode Press PROGRAM 9 9 1 Press the desired Flexible CO DSS PF button which you wish to assign as the Terminate button 2 Dial 9 The display shows 3 Press the STORE button The STORE indicator light turns on The display shows the initial programming mode To exit from Station Programming mode Press PROGRAM or lift the handset 1 2 3 AUTO DIAL STORE 9 Terminate ...

Страница 73: ...x VM extension number To erase an incorrect entry press the CLR S2 button or the TRANSFER CLEAR button The TRANSFER button becomes the CLEAR button when using the overlay 4 Press the STORE button The STORE indicator light turns on The display shows the initial programming mode To exit from Station Programming mode Press PROGRAM or lift the handset Conditions You cannot enter a non existent extensi...

Страница 74: ...xxx VM extension number To erase an incorrect entry press the CLR S2 button or the TRANSFER CLEAR button The TRANSFER button becomes the CLEAR button when using the overlay 4 Press the STORE button The STORE indicator light turns on The display shows the initial programming mode To exit from Station Programming mode Press PROGRAM or lift the handset Conditions You cannot enter a non existent exten...

Страница 75: ...omes the CLEAR button when using the overlay 4 Press the STORE button The STORE indicator light turns on The display shows the initial programming mode To exit from Station Programming mode Press PROGRAM or lift the handset Conditions You cannot enter a non existent extension or a floating number Through System Programming VM command DTMF Set and Station Hunting Type must be programmed to match th...

Страница 76: ...ton The STORE indicator light turns on The display shows the initial programming mode To exit from Station Programming mode Press PROGRAM or lift the handset Conditions Default is On mode Handset Headset Selection Allows you to select the handset mode or headset mode Be sure that you are in the Station Programming mode Press PROGRAM 9 9 1 Dial 9 The display shows the current status 2 Dial 1 or 2 1...

Страница 77: ...e current status When Ring Calling Tone Call mode is selected When Voice Calling mode is selected 2 Dial 1 or 2 1 for selecting Ring Calling Tone Call mode 2 for selecting Voice Calling mode 3 Press the STORE button The STORE indicator light turns on The display shows the initial programming mode To exit from Station Programming mode Press PROGRAM or lift the handset Conditions Default is Ring Cal...

Страница 78: ...t in speaker Hands free mode while incoming callers are leaving a message Be sure that you are in the Station Programming mode Press PROGRAM 9 9 1 Dial 1 The display shows the current status When Hands free mode is selected When Private mode is selected 2 Dial 1 or 2 1 for selecting Hands free mode 2 for selecting Private mode 3 Press the STORE button The STORE indicator light turns on The display...

Страница 79: ...tom extension Be sure that you are in the Station Programming mode Press PROGRAM 9 9 1 Press the Phantom Extension button 2 Press the same Phantom Extension button again 3 Dial 1 or 2 1 Ring off 2 Ring on 4 Press the STORE button The STORE indicator light turns on To exit the Station Programming mode Press PROGRAM or lift the handset 1 2 3 1 2 or 4 AUTO DIAL STORE ...

Страница 80: ...ay shows the current status 2 Dial 1 The display shows 3 Press the STORE button The STORE indicator light turns on The display shows the initial programming mode To exit from Station Programming mode Press PROGRAM or lift the handset Ringing Line Preference Incoming Assignment When you go off hook you answer any call ringing at your telephone Be sure that you are in the Station Programming mode Pr...

Страница 81: ...he display shows the current status 2 Dial 3 3 Dial the CO line number as follows 01 through 08 if you are connected to the KX TD816 01 through 24 if you are connected to the KX TD1232 The display shows CO line number xx is selected 4 Press the STORE button The STORE indicator light turns on The display shows the initial programming mode To exit from Station Programming mode Press PROGRAM or lift ...

Страница 82: ...e Preference it is not possible to have access to any DPT features after going off hook To access these DPT features press the INTERCOM button before or after going off hook No Line Preference Outgoing Assignment When you go off hook you are not connected to any line You must make a choice Be sure that you are in the Station Programming mode Press PROGRAM 9 9 1 Dial 1 The display shows the current...

Страница 83: ...Preference Outgoing Assignment When you go off hook you are connected to the pre assigned line Be sure that you are in the Station Programming mode Press PROGRAM 9 9 1 Dial 1 The display shows the current status 2 Dial 3 3 Dial the CO line number as follows 01 through 08 if you are connected to the KX TD816 01 through 24 if you are connected to the KX TD1232 The display shows xx CO line number xx ...

Страница 84: ...GRAM 9 9 1 Dial 1 The display shows the current status 2 Press the INTERCOM button The display shows 3 Press the STORE button The STORE indicator light turns on The display shows the initial programming mode To exit from Station Programming mode Press PROGRAM or lift the handset 2 40 Station Programming 2 2 Station Programming 2 3 AUTO DIAL STORE 1 1 INTERCOM Pref Out ICM ...

Страница 85: ...t status 3 Enter the tone type number 1 through 8 The display shows the selected tone type number and you hear the selected tone until the STORE button is pressed x tone type number If you want to change the tone type enter another tone type number in succession 4 Press the STORE button The STORE indicator light turns on The display shows the initial programming mode To exit from Station Programmi...

Страница 86: ...nt status 3 Enter the tone type number 1 through 8 The display shows the selected tone type number and you hear the selected tone until the STORE button is pressed x tone type number If you want to change the tone type enter another tone type number in succession 4 Press the STORE button The STORE indicator light turns on The display shows the initial programming mode To exit the Station Programmi...

Страница 87: ...ogrammable items to their default settings a Call Waiting Tone Type Assignment default Tone 1 b Full One Touch Dialling Assignment default On c Handset Headset Selection default Handset d Intercom Alerting Assignment default Ring Calling e Live Call Screening Mode Set default Hands free f Preferred Line Preference Incoming default Ringing Line g Preferred Line Preference Outgoing default INTERCOM ...

Страница 88: ...ess PROGRAM 9 9 1 Press a Function button F1 through F10 The STORE indicator light turns off The display shows the current status Example The outside call 431 2111 is now programmed 2 Enter the desired number up to sixteen digits 0 through 9 RECALL or FLASH RCL PAUSE INTERCOM or secret and CONF hyphen can be used To store the telephone number of an outside party the line access code 9 or 81 throug...

Страница 89: ...ton F1 through F10 The STORE indicator light turns off The display shows the current status 2 Press the NEXT S3 button The display shows the current status Example The name is now programmed 3 Enter the name Refer to the Combination Table on pages 2 48 and 2 49 on how to enter each character 4 Press the STORE button The STORE indicator lights The display shows the initial programming mode To exit ...

Страница 90: ...n digits 0 through 9 RECALL or FLASH RCL PAUSE INTERCOM or secret and CONF hyphen can be used To store the telephone number of an outside party the line access code 9 or 81 through 88 must be the leading digit To erase the entry press the CLR S2 button or TRANSFER button CLR S2 button for KX T7433 users TRANSFER button for KX T7431 users 4 Press the STORE button The STORE indicator lights The disp...

Страница 91: ... programmed 3 Press the NEXT S3 button or MODE button to store a name NEXT S3 button for KX T7433 users MODE button for KX T7431 users 4 Enter the name Refer to the Combination Table on pages 2 48 and 2 49 on how to enter each character 5 Press the STORE button The STORE indicator lights The display shows the initial programming mode To exit the Station Programming mode Press PROGRAM or lift the h...

Страница 92: ...ft button S1 through S3 instead of the SELECT button Combination Table 2 shows the combination of keys and the number of pulses to move the Jog Dial click tones to the right To enter a character find the key and number pulses to rotate the Jog Dial Press the corresponding key first then rotate the Jog Dial the required number of times Or if you keep rotating the Jog Dial after pressing any diallin...

Страница 93: ...7235 See Combination Table 1 1 Press 6 and then press the SELECT button once to enter M 2 Press 4 and then press the SELECT button six times to enter i 3 Press 5 and then press the SELECT button four times to enter k 4 Press 3 and then press the SELECT button four times to enter e Using the SHIFT button and a Soft button With a KX T7433 KX T7436 KX T7235 See Combination Table 1 1 Press 6 and then ...

Страница 94: ...og Dial until e appears Notes Pressing the SHIFT button alternates between capital and lower case letters Once this button is pressed that letter SHIFT mode remains until SHIFT is pressed again To erase the last word to backspace press the CONF button The CONF button becomes the backspace key when using the overlay To erase all of the data press the CLR S2 button If you keep rotating the Jog Dial ...

Страница 95: ...Section 3 User Programming Manager Programming Contents 3 1 User Programming Instructions 3 2 General Programming Instructions 3 2 Programming Ways 3 5 3 2 User Programming Manager Programming 3 7 ...

Страница 96: ...ring the programming mode your telephone is put in a busy condition to outside caller If you want to make a normal call handling operation you should finish the programming mode Default Setting This system has a default factory setting Any required changes can be written on Programming Tables Required Telephone Set One of the following telephone sets is required for User Programming Manager Progra...

Страница 97: ...WXYZ OPER PQRS SHIFT Soft 1 Soft 2 Soft 3 SECRET PAUSE PROGRAM CLEAR STORE FLASH SELECT END PREV NEXT ABC DEF JKL MNO GHI TUV WXYZ OPER PQRS SHIFT Soft 1 Soft 2 Soft 3 Using the Overlay A programming overlay is packed with the main unit at the factory This overlay should be used at all times while in programming mode since the functions of the telephone keys change during programming Location of C...

Страница 98: ...lephone can be in programming mode at any one time The User Password is not shown on the display The password can be changed by System Programming Programming References System Programming Installation Manual 120 User Password In this section programs 000 through 004 are described Please refer to the Installation Manual or consult your dealer when you need to change the following programs 005 Flex...

Страница 99: ...sed to move from jack to jack as required Example 01 1 01 2 02 1 02 2 Note The first part of a jack is for a DPT of a XDP assigned jack The second part is for a single line device Program 600 EXtra Device Port assigns which jacks are XDP Entering Characters You can enter characters to store names for speed dial numbers extension numbers etc by using the dialling key pad and buttons Each of the twe...

Страница 100: ...an go to another program with either of the following two methods 1 To go to the next larger program address Press Soft 1 SKP or VOLUME DOWN To go to the next smaller program address Press SHIFT Soft 1 SKP or VOLUME UP 2 To go to a specific program address Press END then enter the program address Going back to the operation mode Two ways are available to go back to the operation mode 1 Lift the ha...

Страница 101: ...urrent data and time Selection Day 1 through 31 Month Jan through Dec Year 00 through 99 Day of the week SUN MON TUE WED THU FRI SAT Hour 00 through 12 Minute 00 through 59 AM PM Default 1 Jan 94 SAT 12 00 AM Programming 1 Enter 000 Display Day Time Set 2 Press NEXT Display example 1 Jan 94 SAT 3 Enter the day To change the current entry press CLEAR and the new day 4 Press 5 Keep pressing SELECT u...

Страница 102: ...ess END Conditions After changing an entry you can press STORE You do not have to perform all of the rest of the steps To go back to the previous field press at steps 4 through 9 and steps 13 through 14 If you hear the alarm after pressing STORE check that the date is valid The clock starts immediately after the STORE button is pressed You cannot leave the entry empty The time is adjusted automati...

Страница 103: ...00 Not Stored 4 Enter a telephone number To delete the current entry press CLEAR To change the current entry press CLEAR and the new number 5 Press STORE 6 To program another speed dial number press NEXT or PREV or SELECT and the desired speed dial number 7 Repeat steps 4 through 6 8 Press END Conditions There is a maximum of 500 speed dial numbers Each speed dial number has a maximum of 24 digits...

Страница 104: ... the account code before the line access code Refer to the Installation Manual Section 3 Account Code Entry If you are storing a number for CO Incoming Call Information Display with name enter hyphen after the line access code The system starts to compare the calling party s number with the System Speed Dialling Number stored after Example 9 12345678 Refer to the Installation Manual Section 3 CO I...

Страница 105: ...d dial number 000 you can also press NEXT Display example 000 Not Stored 4 Enter a name For entering characters see Station Speed Dialling Number Name Assignment in Section 2 2 Station Programming To delete the current entry press CLEAR To change the current entry press CLEAR and the new name 5 Press STORE 6 To program another speed dial number press NEXT or PREV or SELECT and the desired speed di...

Страница 106: ...rough 364 Programming 1 Enter 003 Display EXT Number Set 2 Press NEXT Display Jack NO 3 Enter a jack number To enter jack number 01 you can also press NEXT To select the second part 2 press NEXT after entering a jack number Display 01 1 EXT201 4 Enter an extension number To change the current entry press CLEAR and the new number 5 Press STORE 6 To program another jack press NEXT or PREV or SELECT ...

Страница 107: ...s Two extension numbers can be assigned per jack If XDP is disabled for the jack in program 600 EXtra Device Port the extension number of the second part XX 2 is not available XX jack number For an explanation of jack numbering see Rotation of jack number on page 3 5 Double entry or incompatible entry is invalid including the assignment of programs 012 ISDN Extension Number 127 Voice Mail Extensio...

Страница 108: ...nter 004 Display EXT Name Set 2 Press NEXT Display Jack NO 3 Enter a jack number To enter jack number 01 you can also press NEXT To select the second part 2 press NEXT after entering a jack number Display 01 1 Not Stored 4 Enter a name For entering characters see Station Speed Dialling Number Name Assignment in Section 2 2 Station Programming To delate the current entry press CLEAR To change the c...

Страница 109: ...f 10 characters Program 003 Extension Number Set is used to assign extension numbers In case of KX TD1232 Jack numbers 01 through 32 are for the Master System and 33 through 64 are for the Slave if available For an explanation of jack numbering see Rotation of jack number on page 3 5 Feature References Extension Dialling 4 4 Special Display Features Intercom Calling 4 2 DPT Features 7 2 SLT and IS...

Страница 110: ...e Preference it is not possible to have access to any DPT features after going off hook To access DPT features press the INTERCOM button after going off hook or press the INTERCOM button directly without going off hook In this manual the default feature numbers are used to describe each operation and illustration Use newly programmed numbers if you have changed the number by System Programming All...

Страница 111: ...you to make a call to an outside party using one of the following line access methods 1 Line Access Automatic 2 Line Access CO Line Group 3 Line Access Individual 1 Lift the handset or press the SP PHONE MONITOR button 2 Dial the line access code 9 or 81 through 88 or press a CO button 9 Line Access Automatic 81 88 Line Access CO Line Group CO Line Access Individual 3 Dial the phone number 1 2 ext...

Страница 112: ...1 KX T7433 or KX T7436 you can execute the Intercom Calling feature to extensions by using the Extension Dialling display feature Helpful hints for Handsfree speakerphone operation are noted in the Handsfree Operation feature Programming References Station Programming Section 2 Preferred Line Assignment Outgoing Feature References Extension Dialling 4 4 Special Display Features Handsfree Operation...

Страница 113: ...Line Prime CO Line Ringing Line Each preference can be selected by Station Programming Helpful hints for Handsfree speakerphone operation are noted in the Handsfree Operation feature Programming References Station Programming Section 2 Preferred Line Assignment Incoming System Programming Installation Manual 400 CO Line Connection Assignment 603 604 DIL 1 N Extension and Delayed Ringing Day Night ...

Страница 114: ... or Cancelling a message can be done by individual extension users If required messages 7 8 and 9 can be programmed through System Programming Setting Message 1 Will Return Soon 1 Lift the handset or press the SP PHONE MONITOR button 2 Dial the feature number 750 and 1 You hear a confirmation tone and then a dial tone 3 Hang up or press the SP PHONE MONITOR button Note indicates the digit where yo...

Страница 115: ...OR button 2 Dial the feature number 750 and 3 3 Dial the extension number where you are You hear a confirmation tone and then a dial tone 4 Hang up or press the SP PHONE MONITOR button Message 4 Back at time 1 Lift the handset or press the SP PHONE MONITOR button 2 Dial the feature number 750 and 4 3 Enter the hour 00 through 23 and the minute 00 through 59 You hear a confirmation tone and then a ...

Страница 116: ...g 1 Lift the handset or press the SP PHONE MONITOR button 2 Dial the feature number 750 and 6 You hear a confirmation tone and then a dial tone 3 Hang up or press the SP PHONE MONITOR button Message 7 8 and 9 Programmable 1 Lift the handset or press the SP PHONE MONITOR button 2 Dial the feature number 750 and a desired message number 7 through 9 3 Enter the parameters extension number time day mo...

Страница 117: ...ore than three characters refer to System Programming to change the setting 2 If the extension number you want to dial has less than three characters dial or to make it up to three characters A maximum of seven parameters characters can be stored per message You can enter 0 through 9 and for the parameters With the KX T7235 KX T7431 KX T7433 and KX T7436 you can execute this feature with the displ...

Страница 118: ...can override toll restriction Option mode You may enter any account code One mode is selected for each extension on a Class of Service 1 basis Soft Button Operation Entering account codes before dialling 1 Lift the handset or press the SP PHONE button 2 Press the ACCNT S3 button You hear an intermittent tone 2 The display shows 3 Enter the account code and You hear a dial tone 4 Press a CO button ...

Страница 119: ...he corresponding indicator light turns off when using the Account button You hear confirmation tone and then dial tone 4 Press a CO button or dial the line access code 9 or 81 through 88 and dial Entering account codes during or after a conversation While having a conversation or hearing reorder tone after the other party hangs up within 15 seconds 1 Press the flexible button which is assigned as ...

Страница 120: ...digits 0 through 9 RECALL FLASH RCL PAUSE etc are not allowed After entering an account code the delimiter or 99 must be entered An account code can be stored into Memory Dialling Notebook Function One Touch Dialling Pickup Dialling Hot Line System Station Speed Dialling Call Forwarding to CO Line The sequence to enter an account code into Memory Dialling is Feature Number Account Code Line Access...

Страница 121: ... Entry Mode 601 Class of Service Feature References Station Message Detail Recording SMDR see Installation Manual Toll Restriction Override by Account Code Entry 1 Class of Service COS is used to define the features which are allowed for a group of extension Refer to the Installation Manual for programming and more details 2 One of the dial tones Refer to Tone List in the Appendix Section 9 3 Call...

Страница 122: ...Voice Calling mode you hear a confirmation tone 1 Press the Tone S2 button You hear a ringback tone when it is changed to Ring Calling mode Standard Operation Alternating to Voice Calling mode If the called extension is set to Ring Calling mode you hear a ringback tone 1 Press You hear a confirmation tone when it is changed to Voice Calling mode Alternating to Ring Calling mode If the called exten...

Страница 123: ...h is flashing red rapidly The indicator light turns green and handsfree conversation is established Conditions Just specify the line that is to be connected when multiple incoming outside calls arrive at the same time There are three types of CO buttons Group CO G CO button Loop CO L CO button and Single CO S CO button These can be assigned on flexible buttons by Station Programming Programming Re...

Страница 124: ...up or press the SP PHONE button Wait until the telephone rings back Standard Operation Setting If you make a call and hear a busy tone 1 Dial 6 You hear a confirmation tone and then a reorder tone The display shows Example Extension number 2 Hang up or press the SP PHONE MONITOR button Wait until the telephone rings back Answering an intercom recall If you hear the telephone ringing The display sh...

Страница 125: ...ncelling 1 Lift the handset or press the SP PHONE MONITOR button 2 Dial the feature number 46 3 Hang up or press the SP PHONE MONITOR button Conditions If you do not answer before four callback ring signals within 10 seconds this feature will be automatically cancelled If the called party becomes busy again after the callback ringing starts ringing stops but this feature will be executed again whe...

Страница 126: ...the BGM S3 button To turn off the BGM press this button again Standard Operation Setting Cancelling When the handset is on the cradle and the SP PHONE MONITOR button is off 1 Press the HOLD button The display shows as following for five seconds depending on whether BGM is on or off or Conditions To set or cancel this feature you can also use the TRANSFER button instead of the HOLD button Programmi...

Страница 127: ...eration If you make an intercom call and hear a busy tone 1 Dial 2 Wait for an answer and talk Conditions To answer the signal from the calling extension see Call Waiting in this manual This feature is only available to those extensions that have the Call Waiting feature assigned If the called party is provided with Off Hook Call Announcement OHCA function the caller can announce through the speak...

Страница 128: ...ption Call Forwarding All Calls All incoming calls are forwarded to another extension Call Forwarding Busy Call Forwarding No Answer Call Forwarding Busy No Answer Call Forwarding to CO Line Call Forwarding Follow Me All incoming calls are forwarded to another extension when your extension is busy All incoming calls are forwarded to another extension when you do not answer the call All incoming ca...

Страница 129: ...tion tone 2 two beeps is sent when the previously programmed data is same as the new data If it is not confirmation tone 1 one beep is sent Refer to Tone List in the Appendix Section 9 A flexible button on the KX T7250 no FWD DND button provided can be assigned as the FWD DND button With the KX T7235 and KX T7436 you can set or cancel the Call Forwarding features using the display operation Progra...

Страница 130: ...D DND button You may dial the feature number 710 instead 3 Dial 2 4 Dial the extension number to which you wish to forward the call You hear a confirmation tone and then a dial tone The display shows Extension number to which the call is to be forwarded The FWD DND indicator light flashes red slowly 5 Hang up or press the SP PHONE MONITOR button FWD All Extxxxx 1 4 extension number 2 3 FWD DND 2 5...

Страница 131: ...e FWD DND button You may dial the feature number 710 instead 3 Dial 3 4 Dial the extension number to which you wish to forward the call You hear a confirmation tone and then a dial tone The display shows Extension number to which the call is to be forwarded The FWD DND indicator light flashes red slowly 5 Hang up or press the SP PHONE MONITOR button 1 4 extension number 2 3 FWD DND 3 FWD BSY Extxx...

Страница 132: ...dial the feature number 710 instead 3 Dial 4 4 Dial the extension number to which you wish to forward the call You hear a confirmation tone and then a dial tone The display shows Extension number to which the call is to be forwarded The FWD DND indicator light flashes red slowly 5 Hang up or press the SP PHONE MONITOR button Programming References System Programming Installation Manual 202 Call Fo...

Страница 133: ...ess the SP PHONE MONITOR button 2 Press the FWD DND button You may dial the feature number 710 instead 3 Dial 5 4 Dial the extension number to which you wish to forward the call You hear a confirmation tone and then a dial tone The display shows Extension number to which the call is to be forwarded The FWD DND indicator light flashes red slowly 5 Hang up or press the SP PHONE MONITOR button Progra...

Страница 134: ...umber to which you wish to forward the call 6 Dial You hear a confirmation tone and then a dial tone Example When entered 2011234 at step 5 the display shows The FWD DND indicator light flashes red slowly 7 Hang up or press the SP PHONE MONITOR button Conditions Up to sixteen digits line access code is included can be programmed Class of Service programming determines the extension that can perfor...

Страница 135: ...r press the SP PHONE MONITOR button 2 Press the FWD DND button You may dial the feature number 710 instead 3 Dial 7 4 Dial your own extension number You hear a confirmation tone and then a dial tone The display shows Your extension number The FWD DND indicator light flashes red slowly at your own extension 5 Hang up or press the SP PHONE MONITOR button Conditions This feature can be cancelled at y...

Страница 136: ...ompany assigns Call Forwarding Busy CFB An incoming call to an extension is transferred by the ISDN line when the extension is busy Setting 1 Lift the handset or press the SP PHONE button 2 Press the FWD DND button You may dial the feature number 710 instead 3 Dial 921 931 or 941 921 CFU 931 CFB 941 CFNR 4 Dial your multi subscriber number MSN and press 5 Dial the telephone number where the call i...

Страница 137: ...y shows as follows when an error is caused by the system when an error is caused by the network Programming References Station Programming Section 2 Flexible Button Assignment FWD DND Button System Programming Installation Manual 518 CFU CFB CFNR Assignment Not Valid Not Accepted ...

Страница 138: ... and then a dial tone The display shows The FWD DND indicator light turns off 4 Hang up or press the SP PHONE MONITOR button Cancelling Call Forwarding at the destination extension Follow Me All Calls only 1 Lift the handset or press the SP PHONE MONITOR button 2 Press the FWD DND button You may dial the feature number 710 or press the flexible button assigned as the FWD DND button 3 Dial 8 4 Dial...

Страница 139: ...n 1 Lift the handset or press the SP PHONE MONITOR button 2 Press the FWD DND button You may dial the feature number 710 instead 3 Dial 920 930 940 or 90 920 CFU 930 CFB 940 CFNR 90 all 4 Dial your multi subscriber number MSN and press You hear a confirmation tone and then a dial tone The display shows the assignment example 5 Hang up or press the SP PHONE MONITOR button ...

Страница 140: ...owly The CO or INTERCOM indicator light turns steady green Conditions To retrieve a call on hold at another extension refer to Call Hold Retrieve in this manual If a held call is not retrieved within the specific period of time default 60 sec Hold Recall occurs If an outside call is placed on hold and not retrieved in thirty minutes it is automatically disconnected Outside calls and one intercom c...

Страница 141: ...rieving a call on exclusive hold 1 Press the CO or INTERCOM button which is on exclusive hold The CO or INTERCOM indicator light turns steady green The held call is released Conditions If a held call is not retrieved within the specific period of time default 60 sec Hold Recall occurs and turns exclusive hold into simple hold If an outside call is placed on hold and not retrieved in thirty minutes...

Страница 142: ...the SP PHONE MONITOR button 2 Dial the feature number 53 3 Dial the held CO line number as follows 01 through 08 if you are connected to the KX TD816 01 through 24 if you are connected to the KX TD1232 You hear a confirmation tone optional Retrieving an intercom call on hold at another extension 1 Lift the handset or press the SP PHONE MONITOR button 2 Dial the feature number 51 3 Dial the holding...

Страница 143: ...entation CLIP COLP Allows you to show the calling party s number on the display of the called party s telephone when making a call CLIP or allows you to show the called party s number on the display of the calling party s telephone when answering a call COLP Condition The number sent to the other party is assigned by system programming Programming References System Programming Installation Manual ...

Страница 144: ...andset or press the SP PHONE MONITOR button 2 Dial the feature number 59 3 Dial 2 or 0 2 to restrict On 0 to allow Off You hear a confirmation tone and then a dial tone The display shows when restrict or when allow 4 Hang up or press the SP PHONE MONITOR button To change the current setting for your next call only 1 Lift the handset or press the SP PHONE MONITOR button 2 Dial the feature number 59...

Страница 145: ...umber 0 through 9 You hear a confirmation tone and then a dial tone when the call is parked The display shows Parking zone number 0 through 9 If you hear a busy tone that indicates the specified parking zone is unavailable The display shows It is not necessary to redial the feature number to change the parking zone Just enter the parking zone number while hearing a busy tone Call Parked at X 3 Par...

Страница 146: ...tside call it is possible to select whether the Call Park Recall will go to the initiating extension or to the operator through System Programming If a parked call is an intercom call the Call Park Recall will return to the initiating extension If a Call Park Recall is not retrieved within thirty minutes it is automatically disconnected A confirmation tone is audible when the parked call is retrie...

Страница 147: ...al the feature number 4 You hear a confirmation tone optional You can talk to the caller Conditions It is not possible to answer Call Waiting calls A confirmation tone is audible when the call is picked up Eliminating the tone is programmable Programming References System Programming Installation Manual 990 System Additional Information Field 16 Feature References Call Pickup Deny Call Waiting 1 2...

Страница 148: ...call is ringing You hear a confirmation tone optional You can talk to the caller Conditions Doorphone calls can be picked up from extensions that are not programmed to answer doorphone calls A confirmation tone is audible when the call is picked up Eliminating the tone is programmable Programming References System Programming Installation Manual 990 System Additional Information Field 16 Feature R...

Страница 149: ... or doorphone call It is not possible to answer Call Waiting calls A confirmation tone is audible when the call is picked up Eliminating the tone is programmable With the KX T7235 KX T7431 KX T7433 and KX T7436 you can execute this feature using a display operation Programming References System Programming Installation Manual 602 Extension Group Assignment 990 System Additional Information Field 1...

Страница 150: ... handset or press the SP PHONE MONITOR button 2 Dial the feature number 720 3 Dial 1 or 0 1 to set 0 to cancel You hear a confirmation tone and then a dial tone The display shows when setting when cancelling 4 Hang up or press the SP PHONE MONITOR button Feature References Call Pickup CO Line Call Pickup Directed Call Pickup Group C Pickup Deny C Pickup Allow 1 2 3 1 0 or 4 7 2 0 ...

Страница 151: ...nversation while having another intercom call on hold 1 Press the HOLD button Pressing this button alternates between the callers Having a conversation while having another call on exclusive hold 1 Press the HOLD button 2 Press the CO or INTERCOM button of the first held call Repeating these operations steps 1 and 2 alternates between the callers Conditions This feature does not work during doorph...

Страница 152: ...nnounce 5 Hang up or press the SP PHONE button The call is transferred Conditions Pressing the Terminate button while dialling allows you to disconnect the line After an internal dial tone is heard you can try again If you want to return to the held call press the TRANSFER or INTERCOM button before the destination party answers Class of Service programming determines the extensions that can perfor...

Страница 153: ...al tone 2 Dial the extension number where the call is to be transferred You hear a ringback tone 3 Wait for an answer and announce 4 Hang up or press the SP PHONE button The call is transferred Unscreened Call Transfer While having a conversion 1 Press the TRANSFER button The other party is placed on hold You hear a confirmation tone and then a dial tone 2 Dial the extension number where the call ...

Страница 154: ...ng a conversation 1 Press the TRANSFER button 2 Press the desired flexible button which is assigned as the DSS button Conditions Pressing the Terminate button while dialling allows you to disconnect the line and try again If you want to return to the held call press the TRANSFER button or corresponding CO or INTERCOM button before the destination extension answers If the destination extension does...

Страница 155: ...on Assignment DSS Button System Programming 005 Installation Manual can be used for this assignment System Programming Installation Manual 108 One Touch Transfer by DSS Button 201 Transfer Recall Time 990 System Additional Information Fields 1 11 Feature References Transfer Recall see Installation Manual ...

Страница 156: ...up or press the SP PHONE MONITOR button To talk to the new party by terminating the current call While hearing the Call Waiting tone 1 Press the flashing CO or INTERCOM button The current call is disconnected You can talk to the new caller To talk to the new party by holding the current call While hearing the Call Waiting tone and the CO or INTERCOM indicator is flashing rapidly 1 Press the HOLD b...

Страница 157: ...f the called party has a telephone which can activate Off Hook Call Announcement OHCA this feature is overridden Setting Data Line Security temporarily cancels this feature You can change the desired Call Waiting tone Tone 1 or Tone 2 Programming References Station Programming Section 2 Call Waiting Tone Type Assignment Feature References Busy Station Signaling BSS Data Line Security see Installat...

Страница 158: ...INFO S1 button The display changes as shown to the left 3 Press the LOG S2 button if you want to record the information The ISDN line with CLIP feature provides you with the caller s information such as his her name and telephone number on the CO line assigned to receive ISDN service calls Refer to the Added and Changed features for the Installation Manual CONT EFA ACCNT F2 F1 F3 F4 F5 F7 F6 F8 F9...

Страница 159: ... information The ISDN line with CLIP feature provides you with the caller s information such as his her name and telephone number on the CO line assigned to receive ISDN service calls Refer to the Added and Changed features for the Installation Manual Conditions The SHIFT indicator light may turn on when receiving a call Pressing this button provides you with more information about the caller The ...

Страница 160: ...Programming Installation Manual 001 System Speed Dialling Number Set 002 System Speed Dialling Name Set System Programming Installation Manual 622 Incoming Call Display Feature References CO Incoming Call Information Log CO Incoming Call Information Log Lock CO Incoming Call Information Log Mode ...

Страница 161: ...ed 3 Lift the handset or press the SP PHONE button if you want to call back the party on the display 4 Press the CALL S1 button You hear a dial tone Line Access Automatic You may press the CO button first to select the specified CO line Display Operation for KX T7230 KX T7433 1 Press the OLD S1 or NEW S2 button to see the CO incoming call information OLD Information that you have already confirmed...

Страница 162: ...display 4 Press the CALL S1 button You hear a dial tone Line Access Automatic You may press the CO button first to select the specified CO line Conditions If you do not answer a call your extension automatically records the caller s information To clear the displayed information press the CLR S1 button You can modify the displayed telephone number before dialling Dialled number appears from the fi...

Страница 163: ...3 001 System Speed Dialling Number Set 002 System Speed Dialling Name Set System Programming Installation Manual 622 Incoming Call Display Feature References CO Incoming Call Information Log Lock CO Incoming Call Information Log Mode 4 54 DPT Features C 4 2 DPT Features ...

Страница 164: ...er 57 3 Dial the lock code 000 through 999 4 Dial the same lock code again You hear a confirmation tone and then a dial tone The display shows Lock code 5 Hang up or press the SP PHONE button Unlocking 1 Lift the handset or press the SP PHONE button 2 Dial the feature number 57 3 Dial the same lock code as you used to lock the extension You hear a confirmation tone and then a dial tone The display...

Страница 165: ...ur extension with new lock code You must unlock your extension before locking with new lock code You cannot enter as a part of a lock code When you unlock the extension using the lock code which is different from previous entering lock code you hear a reorder tone While in locking status if you press OLD S1 or NEW S2 button the display shows Feature References CO Incoming Call Information Log CO I...

Страница 166: ... If you cancel this mode new CO incoming call information is not memorised on your extension Setting Cancelling 1 Lift the handset or press the SP PHONE button 2 Dial the feature number 56 3 Dial 1 or 0 1 for setting On 0 for cancelling Off You hear a confirmation tone and then a dial tone The display shows when setting or when cancelling 4 Hang up or press the SP PHONE button Feature References C...

Страница 167: ... outside party 3 Press the CONF button after the third party answers You hear a confirmation tone optional The CONF indicator light turns steady red The corresponding CO or INTERCOM indicator light turns green To leave the conference 1 Hang up or press the SP PHONE button The other two parties may continue their conversation If the other two parties are both CO lines they will be disconnected To t...

Страница 168: ...utton Pressing a CO button which is not in the conference allows you to exit from the conference leaving the two parties connected unless they are both CO lines If the other parties are both CO lines they will be disconnected A flexible button on the KX T7250 no CONF button provided can be assigned as the CONF button When a two party call is changed to a three party call and vice versa a confirmat...

Страница 169: ...allow the presentation of your number to the calling party 1 Lift the handset or press the SP PHONE MONITOR button 2 Dial the feature number 58 3 Dial 1 or 0 1 to restrict On 0 to allow Off You hear a confirmation tone and then a dial tone The display shows when restrict or when allow 4 Hang up or press the SP PHONE MONITOR button Programming References System Programming Installation Manual 419 S...

Страница 170: ...e meter Example 2 Press the CO button again The display returns to the telephone number that you are calling or the duration of a telephone call Conditions Whenever you press the CO button the display changes the phone number or the duration of a telephone call the meter the phone charge in circular way If you do not pay the telephone charge your display does not change even if you press the CO bu...

Страница 171: ... the desired number as follows extension number for the backup station 0 to operator backup station no backup You hear a confirmation tone and then a dial tone The display shows Extension number 5 Hang up or press the SP PHONE MONITOR button The FWD DND indicator light turns on Cancelling 1 Lift the handset or press the SP PHONE MONITOR button 2 Press the FWD DND button You may dial the feature nu...

Страница 172: ...ferred to an operator If the operator is not assigned an incoming call will be transferred to the IRNA When this feature is set Call Forwarding and Do Not Disturb for Direct Dial In Calls features are cancelled A calling extension that has Do Not Disturb DND Override enabled can override your extension when it is set to Do Not Disturb DND mode If the destination extension has DND activated then DS...

Страница 173: ...ton Conditions When this feature is set an incoming call directed by Intercept Routing or DIL 1 1 DIL 1 N can be answered Even if this feature is set your extension does not deny DDI calls if their destination extension is in the Hunting group If the operator is assigned different from Day mode and Night mode DDI calls will be transferred to an operator If the operator is not assigned Direct Diall...

Страница 174: ...answer Standard Operation If you make an intercom call and hear a Do Not Disturb DND tone The display shows Example 1 Dial 2 Wait for an answer Conditions If you hear a reorder tone after dialling 2 this means the Do Not Disturb DND Override feature is not set at your extension Class of Service programming determines the extensions that can perform this feature Programming References System Progra...

Страница 175: ...nsion 1 Lift the handset or press the SP PHONE button Calling a doorphone 1 Lift the handset or press the SP PHONE MONITOR button 2 Dial the feature number 61 3 Dial a doorphone number as follows 1 or 2 if you are connected to the KX TD816 1 through 4 if you are connected to the KX TD1232 You can talk after you hear a confirmation tone The display shows Doorphone number 1 through 4 To unlock the d...

Страница 176: ...can receive calls from each doorphone for day and night mode Class of Service programming determines the extension that can unlock the door It is possible for any extension user to originate a call to a doorphone The door opener 1 through 4 can be unlocked using the feature number while the doors which are paired with the doorphone 1 through 4 can be unlocked while talking to the doorphone The doo...

Страница 177: ... Dial the same lock code again You hear a confirmation tone and then a dial tone The display shows Lock code 5 Hang up or press the SP PHONE MONITOR button Unlocking 1 Lift the handset or press the SP PHONE MONITOR button 2 Dial the feature number 77 3 Dial the same lock code as you used to lock the extension You hear a confirmation tone and then a dial tone The display shows 4 Hang up or press th...

Страница 178: ...res Emergency Call Allows you to make an emergency call without dial restriction You can store up to ten emergency numbers 999 and 112 are the default settings and the others can be stored through System Programming Dialling 1 Lift the handset or press the SP PHONE MONITOR button You hear a dial tone 2 Press a CO button or dial the line access code 9 or 81 through 88 3 Dial the desired emergency n...

Страница 179: ...ode for the desired service Using the feature number While having a conversation with an outside party 1 Press the TRANSFER button The current call is placed on hold 2 Dial the feature number 64 3 Dial the code for the desired service Conditions The Register Recall Signal must be assigned as required by the Centrex host PBX or CO line A RECALL or FLASH RCL stored in System Speed Dialling Station S...

Страница 180: ...t turns red The CO or INTERCOM indicator light turns green Conditions DSS buttons on a DSS Console can also activate this feature This feature must be initially assigned through Station Programming Programming References Station Programming Section 2 Flexible Button Assignment DSS Button One Touch Dialling Button SAVE Button System Programming 005 Installation Manual can be used for this assignmen...

Страница 181: ...ble for KX T7400 series telephone users Setting During a conversation using the handset 1 Press the AUTO ANSWER MUTE button The AUTO ANSWER MUTE indicator light flashes red slowly Canceling When handset microphone mute is established 1 Press the AUTO ANSWER MUTE button The AUTO ANSWER MUTE indicator light turns off Conditions This feature is only available during a conversation with the handset 1 ...

Страница 182: ...O ANSWER MUTE indicator light turns off Conditions This feature overrides the Alternate Calling Ring Voice feature Handsfree conversation mode is established as soon as a confirmation tone is sent This feature does not work for incoming outside calls or doorphone calls When an outside call is transferred to your extension this feature is overridden and a ringing tone is heard This feature is not a...

Страница 183: ...ration Use this unit in a quiet room for best performance If the other party has difficulty hearing you decrease the volume If you and the other party speak at the same time parts of your conversation will be lost To avoid this speak alternately Handsfree mode is cancelled if you do not start dialling within ten seconds The KX T7250 has a MONITOR button instead of a SP PHONE button It can be used ...

Страница 184: ... No 6 through No 9 can be printed out Example Message 7 Cleaned up 1 Lift the handset or press the SP PHONE MONITOR button 2 Dial the feature number 750 and 7 3 Hang up or press SP PHONE MONITOR button Example Message 8 Minibar 1 Lift the handset or press the SP PHONE MONITOR button 2 Dial the feature number 750 and 8 3 Enter the minibar charge 4 Hang up or press SP PHONE MONITOR button 8 7 1 2 3 ...

Страница 185: ...e Absent Message feature It is necessary to assign 990 System Additional Information Field 34 through System Programming beforehand Programming References System Programming Installation Manual 008 Absent Messages 990 System Additional Information Field 34 Date Time Ext CO Dial Number Duration Cost Acc Code CD 24 03 95 14 09 221 Cleaned up 24 03 95 10 23 230 Minibar 535 5 ...

Страница 186: ...l the extension number 3 Start talking 4 Hang up after completion of the conversation Using the Speakerphone 1 Press the SP PHONE MONITOR or INTERCOM button 2 Dial the extension number 3 Start talking 4 Press the SP PHONE button after completion of the conversation 1 SP PHONE INTERCOM or 4 SP PHONE 1 4 2 extension number 3 2 extension number 3 ...

Страница 187: ...gh programming After dialling an extension number you will hear one of the following tones Ringback tone Indicates that the destination extension is being called Confirmation tone Indicates that you can perform voice calling Busy tone Indicates that the destination extension is busy Do Not Disturb DND tone Indicates that the destination extension has been set the Do Not Disturb DND feature Program...

Страница 188: ...gn the Live Call Screening LCS button Station Programming Select the mode either Hands free or Private Station Programming Set the Password Set the LCS feature Flowchart of the Live Call Screening LCS Feature Hang up Press the FLASH or the LCS Cancel button Press the LCS or the SP PHONE button Lift the handset Call Waiting Tone To hold the current call temporarily press the HOLD button To return t...

Страница 189: ...word 5 Hang up or press the SP PHONE MONITOR button To change your password you must follow the instructions below for Cancelling the password Cancelling the password 1 Lift the handset or press the SP PHONE MONITOR button 2 Dial the feature number 799 3 Enter the password 000 through 999 You hear a confirmation tone and then a dial tone The display shows 4 Hang up or press the SP PHONE MONITOR bu...

Страница 190: ...ox message recording is monitored automatically through your extension speaker While monitoring in the Hands free mode the Live Call Screening indicator light flashes green slowly Having a conversation with the party 1 Lift the handset or press the SP PHONE MONITOR button or press the Live Call Screening button The Live Call Screening indicator light turns steady red from slow green flashing In Ke...

Страница 191: ...ng button or INTERCOM button When using a single line telephone which is connected with a proprietary telephone in parallel only the handset is available The Live Call Screening indicator light flashes green slowly To stop monitoring lift the handset The RECALL or FLASH RCL button or the Live Call Screening Cancel button can be also used to stop monitoring The Live Call Screening indicator light t...

Страница 192: ...NITOR button An alert tone is sent 2 Lift the handset or press the SP PHONE MONITOR button Monitoring starts Having a conversation with the party 1 Press the flashing Live Call Screening button If you want to hold the current call Monitoring 1 Press the HOLD button 2 Hang up or press the SP PHONE MONITOR button An alert tone is sent 3 Lift the handset or press the SP PHONE MONITOR button Monitorin...

Страница 193: ...an clear the password at any extension in Station Programming While in Keep Recording mode if you want to stop recording the conversation press the Two Way Recording button Programming References Station Programming Section 2 Flexible Button Assignment Live Call Screening LCS Button Live Call Screening LCS Cancel Button Two Way Record Button System Programming 005 can be used for this assignment L...

Страница 194: ...tton which is assigned as the Log In Log Out button Log In mode The indicator light is off Log Out mode The indicator light is steady red Calls in the UCD queue The indicator light is flashing red moderately 3 Hang up or press the SP PHONE MONITOR button Log In Log Out Using the feature number 1 Lift the handset or press the SP PHONE MONITOR button 2 Dial the feature number 45 3 Dial 1 or 0 1 for ...

Страница 195: ...ast one extension that is in log in mode Only one log in extension cannot be set in log out mode Programming References Station Programming Section 2 Flexible Button Assignment Log In Log Out Button System Programming 005 Installation Manual can be used for this assignment Feature References Uniform Call Distribution UCD Station Hunting see Installation Manual ...

Страница 196: ...ne and then a dial tone 4 Hang up or press the SP PHONE MONITOR button If the called extension is busy or does not answer 1 Press the MESSAGE button or dial 4 You hear a confirmation tone and then a dial tone 2 Hang up or press the SP PHONE MONITOR button Cancelling 1 Lift the handset or press the SP PHONE MONITOR button 2 Dial the feature number 70 and 0 3 Dial the extension number where you left...

Страница 197: ...the message sender 1 Lift the handset or press the SP PHONE MONITOR button You hear a dial tone 4 2 Press the MESSAGE button or dial the feature number 70 and 2 If you have more than one message at your extension the line is connected to the message sender which you select 3 Start talking The message is cleared after the conversation Clearing all messages by the message receiver 1 Lift the handset...

Страница 198: ...r If you select a specific message to call back calling back is executed in the cyclic order starting with the selected one With the KX T7235 KX T7431 KX T7433 and KX T7436 you can set or cancel this feature using the display operation Programming References Station Programming Section 2 Flexible Button Assignment Message Waiting MESSAGE Button System Programming 005 Installation Manual can be use...

Страница 199: ...O ANSWER MUTE indicator light flashes red slowly Cancelling When microphone mute is established 1 Press the AUTO ANSWER MUTE button The AUTO ANSWER MUTE indicator light turns off Conditions This feature is effective for the microphone only your voice will only be muted during a handsfree conversation This feature is not available with the KX T7250 because it is not provided with the AUTO ANSWER MU...

Страница 200: ...mber 1 Lift the handset or press the SP PHONE MONITOR button 2 Dial the feature number 78 3 Dial 0 or 1 0 from Night mode to Day mode 1 from Day mode to Night mode You hear a confirmation tone The display shows or 4 Hang up or press the SP PHONE MONITOR button Switching mode using the Night button 1 Lift the handset or press the SP PHONE MONITOR button 2 Press the flexible button which is assigned...

Страница 201: ...of Service programming determines the extensions that can perform this feature The Day Night mode is automatically switched at a predetermined time default 9 00 a m for all days of the week 5 00 p m for all nights of the week if automatic switching mode is selected in System Programming A flexible CO and DSS button can be assigned as the Night button With the KX T7235 KX T7431 KX T7433 and KX T743...

Страница 202: ...signment Outgoing see Installation Manual Direct In Lines DIL see Installation Manual Doorphone Call Intercept Routing see Installation Manual Ringing Delayed see Installation Manual System Feature Access Menu 4 4 Special Display Features Toll Restriction see Installation Manual ...

Страница 203: ...ned as the SAVE button Dialling When you want to dial the stored number 1 Lift the handset or press the SP PHONE MONITOR button 2 Press the flexible button which is assigned as the SAVE button The CO indicator light turns green Conditions When you dial the stored telephone number of an outside party you do not need to dial 9 or 81 through 88 as the leading digit The same CO line is selected when r...

Страница 204: ...ve OHCA 1 Lift the handset or press the SP PHONE MONITOR button 2 Enter the feature number 731 3 Dial 2 or 0 2 to set 0 to cancel You hear a confirmation tone and then a dial tone 4 Hang up or press the SP PHONE MONITOR button Soft Button Operation Executing If you make an intercom call and hear a busy tone 1 Press the BSS S1 button You can talk after you hear a confirmation tone Standard Operatio...

Страница 205: ...current call If you hear two beeps and voice announcement 1 Press the HOLD button The current call is placed on hold The INTERCOM indicator light flashes green slowly Conditions Class of Service programming determines which extensions can perform this This feature works when the called party is off hook and the telephone INTERCOM button is idle You can select to receive a Call Waiting tone OHCA Wh...

Страница 206: ...ing a handset 1 Press the SP PHONE button The SP PHONE indicator light turns on and the other party s voice is heard through the built in speaker Cancelling When the off hook monitor mode is established 1 Press the SP PHONE button The SP PHONE indicator light turns off and the other party s voice is heard through the handset Conditions This feature is only available during a conversation with the ...

Страница 207: ... numbers refer to the Station Programming The destination numbers are stored through Station Programming You may press a CO button to select a desired CO line directly before pressing the One Touch Dialling button Speed Dialling One Touch Dialling Redial Last Number Saved Number and manual dialling can be used together It is possible to store a number consisting of seventeen digits or more by divi...

Страница 208: ...handset or press the SP PHONE MONITOR button 2 Dial the feature number 0 Specific call 1 Lift the handset or press the SP PHONE MONITOR button 2 Dial the operator call number for each operator Conditions If you generate the General call for two operators Operator 2 will receive your call if Operator 1 is busy If an operator is not assigned this feature is not available you will hear the reorder to...

Страница 209: ...er tone 1 Indicates that the CO line you have attempted to access is not assigned is shown on the display 2 Indicates that access to CO lines is denied is shown on the display may be shown on the display for the following reasons The extension has been locked by the owner Electronic Station Lockout or the operator Remote Station Lock Control The extension is restricted by the account code mode Ver...

Страница 210: ...gnment Day Night Feature References Account Code Entry Electronic Station Lockout Remote Station Lock Control 4 3 Operator Service Features Toll Restriction see Installation Manual Line Access Automatic Allows you to select an available CO line automatically 1 Lift the handset or press the SP PHONE MONITOR button 2 Dial the feature number 9 You hear a dial tone The selected CO indicator light turn...

Страница 211: ...e SP PHONE MONITOR button 2 Dial the feature number 8 3 Dial a CO line group number 1 through 8 You hear a dial tone The selected CO indicator light turns green 4 Dial the phone number The display shows the phone number 5 Start talking 6 Hang up or press the SP PHONE button after completion of the conversation Conditions You may press the G CO button directly instead of steps 1 2 and 3 1 4 phone n...

Страница 212: ...dset or press the SP PHONE MONITOR button 2 Press the CO button You hear a dial tone The CO indicator light turns green 3 Dial the phone number The display shows the phone number 4 Start talking 5 Hang up or press the SP PHONE button after completion of the conversation Condition You may skip step 1 and press CO button directly 1 4 2 3 phone number 5 CO ...

Страница 213: ...re the voice announcement Eliminating the tone is programmable A confirmation tone is audible before making the voice announcement Eliminating the tone is programmable With the KX T7235 KX T7431 KX T7433 and KX T7436 you can execute Paging feature using the display operation Programming References System Programming Installation Manual 602 Extension Group Assignment Used for Paging Group only 805 ...

Страница 214: ...r 62 or 63 and You hear a confirmation tone optional The display shows 3 Make the announcement 4 Wait for an answer and talk Paging External Allows you to make a voice announcement over external pagers To access all external pagers 1 Lift the handset or press the SP PHONE MONITOR button 2 Dial the feature number 62 and 0 You hear a confirmation tone optional The display shows 3 Make the announceme...

Страница 215: ...ows External pager number 4 Make the announcement 5 Wait for an answer and talk Conditions If the designated pager is being used a busy tone is heard The paging priorities are as follows 1 TAFAS Trunk CO Line Answer From Any Station 2 Paging External 3 Background Music BGM External If a higher priority page is requested when a lower priority page is active the higher priority overrides the lower o...

Страница 216: ... press the SP PHONE MONITOR button 2 Dial the feature number 63 and 00 You hear a confirmation tone optional The display shows 3 Make the announcement 4 Wait for an answer and talk To access a particular group of extensions 1 Lift the handset or press the SP PHONE MONITOR button 2 Dial the feature number 63 3 Dial the extension group number 01 through 16 You hear a confirmation tone optional The d...

Страница 217: ...DPT Features P 4 2 DPT Features 4 Make the announcement 5 Wait for an answer and talk Conditions There is a maximum of 16 extension groups Paging Group to different groups can be performed simultaneously 4 5 ...

Страница 218: ...ternal pager number as follows 1 or 2 if you are connected to the KX TD816 1 through 4 if you are connected to the KX TD1232 You hear a confirmation tone optional You can start talking Conditions Only extensions within the paged group can answer Paging Group A confirmation tone is audible when the page is answered Eliminating the tone is programmable With the KX T7235 KX T7431 KX T7433 and KX T743...

Страница 219: ...ancelling 1 Lift the handset or press the SP PHONE MONITOR button 2 Dial the feature number 721 3 Dial 1 or 0 1 to set 0 to cancel You hear a confirmation tone and then a dial tone The display shows when setting or when cancelling 4 Hang up or press the SP PHONE MONITOR button Paging Deny On Paging Deny Off 1 2 3 1 0 or 4 7 1 2 ...

Страница 220: ...arty to answer You hear a confirmation tone optional 5 Hang up or press the SP PHONE button The held party and the paged extension are connected and can start conversation Using Paging External to all external pagers While having a conversation 1 Press the TRANSFER button You hear a dial tone The other party is placed on hold 2 Dial the feature number 62 and 0 3 Make the announcement after hearing...

Страница 221: ...hear a confirmation tone optional 6 Hang up or press the SP PHONE button The held party and the paged extension are connected and can start conversation Using Paging Group to all extension groups While having a conversation 1 Press the TRANSFER button You hear a dial tone The other party is placed on hold 2 Dial the feature number 63 and 00 3 Make the announcement after hearing a confirmation tone...

Страница 222: ...tional 5 Wait for the other party to answer You hear a confirmation tone optional 6 Hang up or press the SP PHONE button The held party and the paged extension are connected and can start conversation Conditions A confirmation tone is audible before making the voice announcement Eliminating the tone is programmable Programming References System Programming Installation Manual 602 Extension Group A...

Страница 223: ...SP PHONE MONITOR button Conditions The default is Parallel Off No ring The PT can be used to perform normal operations whether or not the SLT is set to ring When receiving a call If SLT is set to ring then both the PT and the standard telephone will ring except when the PT is in Handsfree Answerback mode or Voice Calling mode with the Alternate Calling Ring Voice feature If SLT is not set to ring ...

Страница 224: ...re References Alternate Calling Ring Voice EXtra Device Port XDP see Installation Manual Handsfree Answerback System Feature Access Menu 4 4 Special Display Features XDP eXtra Device Port expands the number of telephones available in the system by allowing an extension port to contain two telephones For more details please consult with your dealer ...

Страница 225: ...om Extension indicator light turns red steady To transfer a call to a phantom extension During a conversation with an outside party 1 Press the flexible button which is assigned as the Phantom Extension button You may dial the phantom extension number after pressing the TRANSFER button instead To answer a phantom extension call While the Phantom Extension button indicator light is flashing green 1...

Страница 226: ...r to transfer the call to a phantom extension by the Phantom Extension button on the DSS Console An incoming call cannot be received at the Phantom Extension button on the DSS Console only the indicator turns red Programming References Station Programming Section 2 Flexible Button Assignment Phantom Extension Button Phantom Extension Ringing On Off Set System Programming Installation Manual 130 Ph...

Страница 227: ...mber 74 and 2 3 Dial the phone number and You hear a confirmation tone and then a dial tone 4 Hang up or press the SP PHONE MONITOR button Setting Cancelling 1 Lift the handset or press the SP PHONE MONITOR button 2 Dial the feature number 74 3 Dial 1 or 0 1 to set 0 to cancel You hear a confirmation tone and then a dial tone 4 Hang up or press the SP PHONE MONITOR button 1 2 4 7 4 2 3 phone numbe...

Страница 228: ...ieve a call on hold Up to sixteen digits consisting of 0 through 9 and can be stored cannot be stored During the waiting time after going off hook you can dial another party and override this feature You can modify the waiting time between going off hook and connecting with the called line through System Programming Programming References System Programming Installation Manual 204 Pickup Dial Wait...

Страница 229: ...andset or press the SP PHONE button or press the CO button The system hunts the CO line and sends the dialled number Conditions Pressing CO button will cancel this feature if entered number does not have line access code 9 or 81 through 88 If you press or as a first digit of the phone number this feature does not work This feature will be cancelled if you do the following operation during entering...

Страница 230: ...ange from Pulse to Tone dialling mode so that you can access services such as Voice Mail that require tones 1 Dial the phone number Pulse mode 2 Dial and 3 Dial the phone number Tone mode Conditions You cannot change from Tone to Pulse dialling mode 2 3 phone number 1 phone number ...

Страница 231: ...ty quick dial numbers can be stored by System Programming You must assign a feature number first in program 104 Quick Dial Assignment and then a quick dial number in program 009 Quick Dial Number Set in order for Quick Dial to be effective For example Quick Dialling is convenient for room service calls in a hotel Programming References System Programming Installation Manual 009 Quick Dial Number S...

Страница 232: ...r FLASH RCL button You hear a dial tone 2 Dial the phone number Conditions Disconnection signal must be selected by System Programming in order to execute this feature during an outside call Programming References System Programming Installation Manual 414 Disconnect Time 990 System Additional Information Fields 3 15 Feature References External Feature Access 2 phone number 1 or RECALL FLASH RCL ...

Страница 233: ...nitiated at two minutes intervals Redialling times can be changed 1 through 12 by System Programming If there is an incoming call during redialling the redialling process will be delayed until the termination of the incoming call If any key operation is done during Automatic Redial this function is cancelled This feature is not available with the KX T7250 because it is not provided with the SP PHO...

Страница 234: ...not include the CO line access code PAUSE and INTERCOM for secret dialling are counted as one digit If you hear a busy tone when attempting to redial select another line and press the REDIAL button The memorised telephone number is replaced by a new one if at least one digit to be sent to a CO line is dialled Dialling a CO line access code alone does not change the memorised number Certain types o...

Страница 235: ...e SP PHONE MONITOR button 2 Press the flexible button which is assigned as the SAVE button Conditions Up to twenty four digits can be stored and redialled this does not include the CO line access code PAUSE and INTERCOM for secret dialling are counted as one digit Certain types of proprietary telephones allow multiple redialling automatically Redial Automatic A flexible button can be assigned as t...

Страница 236: ...sing the INTERCOM button is counted as one digit You can conceal one or more digits of a telephone number If the phone number 9 1 201 431 2111 has been stored the display shows the following when the call is made You can select whether the concealed part will be printed out by SMDR through System Programming Programming References Station Programming Section 2 Flexible Buttons Assignment One Touch...

Страница 237: ...Information Log i Connected Line Identification Restriction COLR j Do Not Disturb DND k Log In l Message Waiting All messages will be removed m Paging DENY n Parallelled Telephone Connection o Pickup Dialling Hot Line The stored telephone number will be removed p Timed Reminder Clearing current feature setting 1 Lift the handset or press the SP PHONE MONITOR button 2 Dial the feature number 790 Yo...

Страница 238: ... PHONE MONITOR button 2 Dial the feature number 60 3 Dial the Station Speed Dial number 0 through 9 4 Dial the desired number and You hear a confirmation tone 5 Hang up or press the SP PHONE MONITOR button Dialling 1 Lift the handset or press the SP PHONE MONITOR button 2 Dial the feature number 6 3 Dial the Station Speed Dial number 0 through 9 1 4 desired number and 2 5 6 0 3 Station Speed Dial ...

Страница 239: ...y manual dialling to supplement the dialled digits With the KX T7235 KX T7431 KX T7433 and KX T7436 you can store not only phone numbers but names as well Moreover you can execute this feature using the display operation Programming References Station Programming Section 2 Flexible Button Assignment One Touch Dialling Button System Programming 005 Installation Manual can be used for this assignmen...

Страница 240: ...use of a speed dial number is possible if the number is divided to store Example If the number is divided and stored in System Speed Dial numbers 001 and 002 Press AUTO DIAL STORE 0 0 1 AUTO DIAL STORE 0 0 2 The dialled number appears on the display You may press a CO button to select a desired CO line before pressing the AUTO DIAL STORE button Calls originated by System Speed Dialling are restric...

Страница 241: ...number 794 3 Dial 1 or 0 1 print out the data 0 clear the data You hear a confirmation tone The display shows when printing out when clearing 4 Lift the handset or press SP PHONE MONITOR button Conditions You must connect the printer to the system when you print out the data Programming References System Programming Installation Manual 806 807 EIA RS 232C parameters Port 1 Port 2 Feature Reference...

Страница 242: ... number Conditions When you dial the telephone number of an outside party you must dial the line access code 9 or 81 through 88 as the leading digit Pressing the Terminate button disconnects the conversation and outputs an SMDR record The Terminate button can be assigned to a flexible CO button Programming References Station Programming Section 2 Flexible Button Assignment Terminate Button System ...

Страница 243: ...arm setting 1 or dial 1 for a daily alarm setting 2 1 You hear an alarm ringing at the preset time and then the setting is cleared 2 You hear an alarm ringing at the preset time every day until the setting is changed or cancelled 6 Hang up or press the SP PHONE MONITOR button Cancelling 1 Lift the handset or press the SP PHONE MONITOR button 2 Dial the feature number 76 and 0 You hear a confirmati...

Страница 244: ... The system clock must be set before the alarm is set The alarm ringing continues for thirty seconds If an alarm time has not been set the display shows the following If you are receiving an incoming call during the alarm ringing starts after the alarm stops If you are having a conversation at the time the alarm is set to sound the alarm starts after the conversation Programming References User Pr...

Страница 245: ...gned restriction levels from 3 through 8 Levels 1 and 2 are not changed A Class of Service which is assigned Account Code Entry Verified Toll Restriction Override mode permits the class members to override their toll restrictions Up to forty account codes can be programmed for Verified mode If you do not enter an account code or you enter an invalid account code standard toll restriction is in eff...

Страница 246: ...ed by System Speed Dialling are restricted depending on the extension s toll restriction level Programming References System Programming Installation Manual 509 510 Toll Restriction Level for System Speed Dialling Day Night Feature References System Speed Dialling Toll Restriction see Installation Manual ...

Страница 247: ...n In this case all the incoming calls on the specified line are signalled b The floating number of an external device is assigned as the Intercept Routing destination In this case incoming calls redirected to the destination are signalled c The floating number of an external pager is dialled as the Direct Dialling In DDI destination A confirmation tone is audible before being connected to the call...

Страница 248: ... another mailbox While having a conversation 1 Press the flexible button which is assigned as the Two Way Transfer button The Two Way Transfer indicator light turns red 2 Enter an extension number or press the desired DSS button Stopping recording 1 Press the flexible button which is assigned as the Two Way Transfer button The Two Way Transfer indicator light turns off Conditions A flexible CO and...

Страница 249: ...ination c The floating number of UCD is dialled from the extension d The floating number of UCD is dialled as the DDI destination The floating number can be assigned on a hunting group basis and UCD group is based on the hunting group UCD call can arrive at the extension in log in mode within the UCD group and cannot arrive at the extensions in log out mode You can assign the log in or log out on ...

Страница 250: ...al the extension number of the Voice Mail You hear a confirmation tone and then a dial tone 5 Hang up or press the SP PHONE MONITOR button Calls directed to you are automatically forwarded to your mailbox Callers can leave their messages in the mailbox according to the Voice Mail guidance Listening to a stored message You can listen to the messages stored in your mailbox with ease There are two op...

Страница 251: ... you do not set a Call Forwarding function The call will return to the operator Then the operator transfers the call to the Voice Mail A flexible button can be assigned as the MESSAGE or FWD DND button A Voice Mail can be assigned as the destination of the following features a Call Forwarding All Calls b Call Forwarding Busy c Call Forwarding No Answer d Call Forwarding Busy No Answer e Intercept ...

Страница 252: ...ension number The call will be forwarded to the Voice Mail The caller can leave the message according to the Voice Mail guidance Conditions A flexible button can be assigned as the Voice Mail VM Transfer button A user s Voice Mail number password etc can be assigned as a Voice Mail Access Code Through System Programming VM Command DTMF Set and Station Hunting Type must be programmed to match the o...

Страница 253: ...firmation tone and then a dial tone 4 Hang up or press the SP PHONE button Soft Button Operation Executing If you make an intercom call and hear a busy tone 1 Press the BSS S1 button You can talk after you hear a confirmation tone Standard Operation Executing If you make an intercom call and hear a busy tone 1 Enter 2 You can talk after you hear a confirmation tone To talk to the third party by te...

Страница 254: ...cement may be heard by the other party The receiving mode may shift depending on the settings on each telephone or the telephone type Example If the user selects 3 Whisper OHCA mode If using a KX T7436 handset Whisper OHCA If using a KX T7436 SP PHONE Call Waiting Other Call Waiting It is possible to enable the Whisper OHCA by any type of telephones by system programming However it may not work pr...

Страница 255: ...ler The system supports up to two operators Any extension except for ISDN telephones can be appointed as an operator System Programming is necessary to appoint operators The extension assigned as an operator has the ability to perform the following features 1 Alert Indication Operator 1 only 2 Automatic Overflow and Hurry Up Transfer Operator 1 only 3 Background Music BGM External 4 CO Incoming Ca...

Страница 256: ...ows No call in the queue The indicator light is off More than one call in the queue The indicator light is steady red More than assigned number in the queue The indicator light is flashing red rapidly Executing the Hurry Up Transfer While having a conversation 1 Press the flexible button which is assigned as the Hurry Up button The first call in the queue will be transferred to the pre assigned ex...

Страница 257: ... following depending on whether BGM is on or off or You hear a confirmation tone the music starts or stops 4 Hang up or press the SP PHONE button Display Operation KX T7433 KX T7436 Setting Cancelling 1 Press the SHIFT button repeatedly until the S3 button is changed to FEAT The bottom line of the display shows The KX T7436 user can also press the Feature F4 button instead In this case skip step 2...

Страница 258: ...e SP PHONE button Display Operation KX T7431 Setting Cancelling 1 Press the MODE button repeatedly until Feature Access is displayed The display shows 2 Rotate the Jog Dial until Ext BGM On Off is displayed 3 Press the SELECT button Pressing this button alternates between the On and Off modes The display shows either of the following depending on whether BGM is on or off or You hear a confirmation...

Страница 259: ...or stops 3 Hang up or press the SP PHONE MONITOR button Conditions You must connect an external music source such as radio to the system Default is External BGM Off BGM is only sent to the programmed external pager Access priority to the external pager is 1 TAFAS 2 Paging 3 BGM Higher priorities will override BGM Programming References System Programming Installation Manual 803 Music Source Use 80...

Страница 260: ...OS Secondary 4 Dial the extension number You hear a confirmation tone The display shows xxxx extension number or xxxx extension number 5 Hang up or press the SP PHONE button Display Operation KX T7433 KX T7436 Switching mode 1 Press the SHIFT button repeatedly until the S3 button is changed to FEAT The bottom line of the display shows The KX T7436 user can also press the Feature F4 button instead ...

Страница 261: ...umber or xxxx extension number 6 Hang up or press the SP PHONE button Display Operation KX T7431 Switching mode 1 Press the MODE button repeatedly until Feature Access is displayed The display shows 2 Rotate the Jog Dial until COS Primary or COS Second is displayed 3 Press the SELECT button 4 Dial the extension number You hear a confirmation tone The display shows xxxx extension number or xxxx ext...

Страница 262: ...imary 3 secondary 4 Dial the extension number You hear a confirmation tone and then a dial tone The display shows xxxx extension number or xxxx extension number 5 Hang up or press the SP PHONE MONITOR button Programming References System Programming Installation Manual 601 Class of Service 991 COS Additional Information xxxx Secondary xxxx Primary 1 4 extension number 2 5 7 9 3 1 3 or ...

Страница 263: ...o the Station Programming mode The display shows 3 Dial 02 4 Dial the extension number or extension number to clear one extension to clear all extensions 5 Press the STORE button The STORE indicator light turns on 6 Press the PROGRAM button or lift the handset to exit from the Station Programming mode Feature References CO Incoming Call Information Log Lock 1 2 4 PROGRAM PROGRAM or 3 5 2 0 9 9 AUT...

Страница 264: ...ndicates the check in room in stead of BLF Display Operation KX T7235 KX T7436 Check In 1 Press the Hotel F10 button 2 Press the Check In F1 button DSS indicator in check in mode turns red 3 Dial the extension number or press the DSS button that you want to check in 4 Press the NEXT S3 button If the extension number is already in check in mode this will be cancelled If you want to exit press END S...

Страница 265: ...ge the charge Press the appropriate button F2 through F4 and enter the charge If you want to print out the charge 7 Press the PRINT S3 button 8 Press the END S1 button 9 Press the YES S1 button or NO S3 button YES The check in extension s charge counter is left alone and the secondary COS is activated The display returns to the initial display NO The display returns to step 2 F2 F1 F3 F4 F5 F7 F6 ...

Страница 266: ...n The LCD displays the telephone including the margin You can enter the margin through System Programming The entered Minibar charge and Others charge do not remain in the system after completing check out A new page will be ready after each printout Programming References System Programming Installation Manual 010 Budget Management 011 Charge Margin and Tax Rate 123 Hotel Application 990 System A...

Страница 267: ...ear the notification 2 Press the CLR S2 button If you want to go to the next unanswered extension 3 Press the NEXT S3 button If you want to exit 4 Press the MENU S1 button Programming References Station Programming Section 2 Flexible Button Assignment Alert Button System Programming 005 Installation Manual can be used for this assignment Feature References Hotel Application Timed Reminder Remote W...

Страница 268: ...rent time is displayed If not the time is blank 5 Enter the hour 01 through 12 and minute 00 through 59 6 Dial 0 to enter AM or 1 to enter PM 7 Dial 0 for one time alarm setting 1 or dial 1 for a daily alarm setting 2 You hear a confirmation tone 1 You hear an alarm ringing at the preset time and then the setting is cleared 2 You hear an alarm ringing at the preset time every day until the setting...

Страница 269: ...ng time 1 Press the Hotel F10 button 2 Press the Wake up F3 button 3 Dial the extension number or press the DSS button 4 Press the NEXT S3 button The setting time is displayed 5 Press the END S1 button 1 2 4 F3 Check in Check out Wake up F10 Hotel 3 extension number or 5 S 1 S 2 S 3 CLR 1 2 4 F3 Check in Check out Wake up 3 extension number or 5 S 1 S 2 S 3 END F10 Hotel S 1 S 2 S 3 NEXT Wake up R...

Страница 270: ...alarm ringing at the preset time and then the setting is cleared 2 You hear an alarm ringing at the preset time every day until the setting is changed or cancelled 7 Hang up or press the SP PHONE MONITOR button Cancelling 1 Lift the handset or press the SP PHONE MONITOR button 2 Dial the feature number 7 and 0 3 Dial the desired extension number or DSS button on which you have set the Timed Remind...

Страница 271: ...ure number 7 and 2 3 Dial the desired extension number or DSS button on which you have set the Timed Reminder Example If 10 10 has been set the display shows only one time or everyday 4 Hang up or press the SP PHONE button Conditions The system clock must be set beforehand Feature References Timed Reminder Alarm 10 10AM Alarm 10 10AM 1 4 2 3 extension number or 7 ...

Страница 272: ...d you may ask the operator to clear the password for you 1 Press the PROGRAM button 2 Dial 99 You enter into the Station Programming mode The display shows 3 Dial 03 4 Dial the extension number or extension number to clear the password of the extension to clear the password of all extensions The display shows Example 5 Press STORE button The STORE indicator light turns on 6 Press the PROGRAM butto...

Страница 273: ...k The display shows Example If you dial extension number 1234 and then dial 2 6 Press the STORE button The STORE indicator light turns on 7 Press the PROGRAM button or lift the handset to exit from the Station Programming mode Conditions This feature supersedes the Electronic Station Lockout feature If Electronic Station Lockout has already been set by the extension user and this feature is set th...

Страница 274: ...lay Feature Call Forwarding Do Not Disturb CO Incoming Call Information Log 1 CO Outgoing Call Log Extension Dialling Hotel Application operator only 2 Station Speed Dialling System Speed Dialling System Feature Access Menu KX T7230 KX T7235 KX T7431 KX T7433 KX T7436 indicates the features is available 1 Please refer to the corresponding feature in Section 4 2 DPT Features 2 Please refer to the c...

Страница 275: ... Operation Display KX T7431 While idle the display changes as follows by pressing the MODE button The Jog Dial operation is available for the second through seventh displays Initial Display MODE Seventh Display MODE Second Display Third Display Forth Display Fifth Display Sixth Display Seventh Display 1 Jan 3 00PM System Speed Station Speed Extension Feature Access Ringer 3 Contrast 3 MODE MODE MO...

Страница 276: ...display The third display appears by pressing the SHIFT button as follows Conditions The sixth and seventh displays of the KX T7431 are used for the ringer volume and display contrast adjustments For details refer to the Initial Settings for the KX T7400 Series Section 1 1 Configuration RING BGM CONT Initial Display Second Display Third Display NEW9 OLD6 EXT FEAT STA SHIFT SHIFT SHIFT Initial Disp...

Страница 277: ...turb DND Rejects incoming calls A backup station can be set if required Press the NEXT S3 button to go to the next display Call Forwarding Sets forwarding all incoming calls to another extension when busy or when you do not answer FWD DND Cancel Cancels the Call Forwarding and Do Not Distub DND features at your extension FWD DND Dial the destination extension number On hook On hook On hook Off hoo...

Страница 278: ...xtension Call Forwarding Busy No Answer Sets forwarding incoming calls to another extension when busy or you do not answer Call Forwarding to Outside Line Sets forwarding all incoming calls to an external party Dial your extension number On hook PREV NEXT MENU Answer GRP Page Dial the destination extension number On hook Dial the line access code 9 or 81 through 88 Dial the destination phone numbe...

Страница 279: ... RING BGM CONT WED JAN01 03 00P Extension STA Speed Features SYS Speed Call Log NEXT MENU 1234567890 111 0987654 000111222333 100200300400500 MENU CLR Example To select 111 Making a call using the call log 1 Press the Call Log F5 button 2 Press the Function button which is next to the desired number Note To delete all numbers press the CLR S2 button To return to the initial display press the MENU ...

Страница 280: ...Function button which is next to the desired name Initial Display RING BGM CONT 1 Jan 3 00PM Extension STA Speed Features SYS Speed Call Log MENU AB KL C MN DE OPQR FG S HIJ T Z NEXT MENU Adam Bob Alice Carol Ann Parker Casey Ben Johns Ched Ely Beth Chris PREV NEXT MENU Example To select Beth KX T7235 1 Press the MODE button repeatedly until Extension is displayed 2 Rotate the Jog Dial until the d...

Страница 281: ...isplay RING BGM CONT 1 Jan 3 00PM or Example To select Bob Jones KX T7233 1 Press the Extension F3 button or the EXT S2 button The S2 button can be changed to EXT by pressing the SHIFT button repeatedly 2 Rotate the Jog Dial until the desired name is at the arrow 3 Press the CALL S3 button or go off hook Third Display EXT FEAT STA Initial Display RING BGM CONT 1 Jan 3 00PM Extension STA Speed Feat...

Страница 282: ...select the desired letter Example Press 2 two times to display B items The KX T7436 user can press the Function button F1 through F10 on the same line of the desired item instead of the CALL S3 button Programming References User Programming Section 3 System Programming Installation Manual 003 Extension Number Set 004 Extension Name Set ...

Страница 283: ... 2 Press the Function button which is next to the desired name or number To alternate the display between name and number press the NEXT S3 button Initial Display RING BGM CONT 1 Jan 3 00PM Extension STA Speed Features SYS Speed Call Log MENU NEXT Bob KME soft Jim Kopp Panasonic Ronald Police Zangril Louisa Nancy Home NEXT MENU 9 123 4567 9 987 6543 9111111 9 5555555 93333333 9 999 97777777 9 4444...

Страница 284: ...e STA S1 button The S1 button can be changed to STA by pressing the SHIFT button repeatedly 2 Rotate the Jog Dial until the desired name or number is at the arrow 3 Press the CALL S3 button or go off hook Third Display EXT FEAT STA Initial Display RING BGM CONT 1 Jan 3 00PM Extension STA Speed Features SYS Speed Call Log NEXT MENU Ann Parker Beth Bob Jones Carol Chris MENU CALL or Example To selec...

Страница 285: ...ly You can make a call to a party stored in the system using the directory Only items which have a name assigned are displayed in alphabetical order 1 Press the SYS Speed F9 button 2 Press the Function button which is next to the desired letter 3 Press the Function button which is next to the desired name Initial Display RING BGM CONT 1 Jan 3 00PM Extension STA Speed Features SYS Speed Call Log ME...

Страница 286: ...ms The KX T7436 user can press the Function button F1 through F10 on the same line of the desired item instead of the CALL S3 button Programming References User Programming Section 3 System Programming Installation Manual 001 System Speed Dialling Number Set 002 System Speed Dialling Name Set 1 Press the SYS Speed F9 button or press the SHIFT button repeatedly until the Jog Dial operation display ...

Страница 287: ...bility Background Music External operator only Call Park Call Pickup Group Class of Service COS Switch operator only Message Waiting Night Service On Off operator only Paging External Paging Group Paging ANSWER Paralleled Telephone Connection The following shows the operating procedures with an example Please refer to the System Feature List for feature descriptions and required parameters Example...

Страница 288: ... 0 9 COS Primary ext NEXT MENU Extrn BGM On Off Message Off ext Message On ext Night On Off 1 0 Page Ext Answer 1 4 PREV NEXT MENU Enter the extension number If a parameter is required the parameter will flash KX T7235 1 Press the Features F4 button 2 Press the NEXT S3 button until Message On is displayed 3 Press the Function button which is next to Message On 4 Enter the extension number 5 On hoo...

Страница 289: ...Mode 1 0 MENU SEL Initial Display RING BGM CONT 1 Jan 3 00PM If a parameter is required the feature name and parameter will flash KX T7433 KX T7436 1 Press the SHIFT button repeatedly until the Jog Dial operation display appears 2 Press the FEAT S3 button 3 Rotate the Jog Dial until MSG On is at the arrow 4 Press the SEL S3 button 5 Enter the extension number 6 On hook 1 Press the Features F4 butt...

Страница 290: ... Cancels a notification Message Waiting Leaves a notification so that the called party may call you back Message Waiting Changes the Day Off Night On mode Night Service Answers a page through a speaker Paging ANSWER Answers a page through a telephone in the same extension group Paging ANSWER Pages through the speaker Paging External System Feature List You can access the following features which a...

Страница 291: ...y to select the desired letter Example Press 2 two times to display B items Paging Group 00 16 Page GRP 00 16 Parallel On Off 1 0 Parallel 1 0 Pages to all or a particular extension group Paging Group Sets whether a single line telephone connected in parallel will ring On or not Off when receiving a call Paralleled Telephone Connection 00 All extension groups 01 16 Extension group number 1 On 0 Of...

Страница 292: ...Portable Station Features Contents 5 1 DECT Portable Station Overview 5 2 5 2 DECT Portable Station Features 5 11 5 3 PS Programming 5 46 5 4 PBX Programming 5 55 5 5 Troubleshooting 5 60 5 6 Safety Instructions 5 62 ...

Страница 293: ...ybrid System KX TD816 KX TD1232 One KX TD144 supports up to two Cell Stations KX TD142 and four wired exten sions One KX TD144 can be installed to the KX TD816 and up to two KX TD144s can be installed to the KX TD1232 Cell Station KX TD142 This unit determines the range of the supporting PSs Up to four calls can be made at the same time in the range For more details about the KX TD144 and KX TD142...

Страница 294: ...calls or exit the directory or Function mode Talk Button Used to make receive or end calls Auto OK Button Used for System Speed Dialling and storing program changes Hold Button Used to place a call on hold Function Button Used to enter into the Function mode or access features by pressing additional keys INT C OK CLR F1 F3 INT F1 F2 F3 CLR ABC DEF GHI JKL MNO PQRS TUV WXYZ C OK Pause Button Used t...

Страница 295: ...e Station Features 5 1 DECT Portable Station Overview INT F1 F2 F3 ABC DEF GHI JKL MNO PQRS TUV WXYZ CLR C OK ON OFF Headset Jack Power Switch Microphone Charge Contacts Charge Indicator Charge Contacts Charger KX A275 ...

Страница 296: ...CS Flashing Battery strength Fully charged Medium Low The battery needs to be charged About the LCD Liquid Crystal Display The display has two lines with 16 characters per line and related symbols to show infor mation for call activities as shown below In the Directory or Programming mode In the Function mode In off hook status Message Waiting notification Someone is waiting for your call ...

Страница 297: ...can be displayed on the bottom line Selecting the Standby Display default Off Consult with your dealer The Call Forwarding feature has been set The Do Not Disturb DND feature has been set The key lock mode has been set to ON To cancel the mode press Function for 2 seconds Your PS is not registered in the system Your PS is out of range Programming References PS Programming Section 5 3 PS Programmin...

Страница 298: ...replace with a fully charged optional spare battery Standard Battery Life If your Panasonic battery is fully charged provided 25 C 77 F Note The battery is used while the portable station s power is ON Battery life may vary depending on usage conditions and ambient temperature Please use only a Panasonic battery Installing a Battery 1 Hook the bottom of the battery on the portable station and plac...

Страница 299: ...ge from orange to green Conditions Do not let the charged battery s electrodes touch metallic objects The terminal may short and overheat causing burns Clean the charge contacts on both the portable station and the charger with a soft cloth once a month or the battery may not charge properly The portable station can receive calls even while charging You need not worry about overcharging Cord Holde...

Страница 300: ...n the portable station is ringing 1 Press the VOLUME UP Down Control button In addition to the ringer patterns above there are several com binations of vibration and ring types Refer to Selecting the Vibration and Ring Type in Section 5 3 PS Programming The portable station will ring for an incoming call while charging even if it is set to vibrate Receiver Volume Adjustment The receiver volume has...

Страница 301: ...5 10 DECT Portable Station Features 5 1 DECT Portable Station Overview Handset Clip Installing the Handset Clip You can hang the PS on your belt or pocket by attaching the handset clip ...

Страница 302: ...ns Predialling is also possible In this case reverse steps 1 and 2 If you misdial while predialling press Clear to clear a digit from the left and enter the number again You can also finish the conversation by placing the PS on the charger or pressing Talk If flashes move towards the Cell Station and try again CLR C INT Handover Even if you move during a conversation the linking CS will automatica...

Страница 303: ...s Talk 2 Enter the line access code 9 Automatic 81 through 88 CO Line Group 3 Enter the phone number The dialled number is displayed The display starts counting the call duration or charge if programmed If you misdial press Flash and enter the number again 4 Talk after the called party answers 5 Press Cancel after the conversation is finished Conditions Predialling is also possible In this case pr...

Страница 304: ...lay starts counting the call duration or charge if programmed If you misdial press Flash and enter the number again 3 Talk after the called party answers 4 Press Cancel after the conversation Conditions Predialling is also possible In this case reverse steps 1 and 2 You can also finish the conversation by placing the PS on the charger or pressing Talk If flashes move towards the Cell Station and t...

Страница 305: ... log number Redialling 1 Press Redial repeatedly until the desired log number is displayed You can also search by pressing Next or Previous 2 Press Talk or Flexible CO Clearing all of the numbers in the call log 1 Press Redial 2 Press Clear Conditions Extension numbers cannot be logged You can also execute redialling or clearing the call log operation after going off hook CLR F1 F3 01234567 012345...

Страница 306: ... The display starts counting the call duration or charge if programmed 2 To hang up press Cancel or Talk or place the PS on the charger If a headset is connected to the PS You can select the answering mode by PS Programming as follows OFF default Answers using a normal operation Refer to the operations above INT CO Automatically receives all incoming calls INT ONLY Automatically receives incoming ...

Страница 307: ...owly Placing a call on exclusive hold 1 Press Hold twice during a conversation Retrieving a call on exclusive hold 1 Press Flexible CO or Intercom which is flashing green moderately Retrieving an outside call on hold at another extension 1 Press Flexible CO which is flashing red slowly Retrieving an intercom call on hold at another extension 1 Dial 2 Enter the holding extension number When the hol...

Страница 308: ...ey Lock Setting You can lock the dialling buttons Incoming calls can be answered but outgoing calls cannot be dialled Setting While on hook 1 Press Function for 2 seconds Cancelling While on hook 1 Press Function for 2 seconds KEY KEYPAD LOCKED PRESS F FOR 2SEC 1 JAN 13 00 ...

Страница 309: ...e Set PBX Extension Dialling Directory You can make a call via the system by selecting system assigned extension names To store names refer to system programs 004 Extension Name Set and 653 PS Extension Name Set PBX Station Speed Dialling Directory You can make a call via the system by selecting privately assigned names and phone numbers 10 max You can store edit or delete the PS Dialling Director...

Страница 310: ...s PS NEW ENTRY PS EDIT KEY MODIFY BOOK Deleting the PS Dialling Directory items PS DELETE Storing or editing the PBX Station Speed Dialling Directory items Deleting the PBX Station Speed Dialling Directory items PBX STA EDIT PBX STA DELETE Only displayed when registered to a Panasonic Digital Super Hybrid System It is not displayed when out of range ...

Страница 311: ...ook You can also search by pressing Next or Previous 3 Press OK 4 Press OK The number of stored items and remaining capacity are displayed 5 Enter the name up to 16 characters For entering characters refer to the Combination Table on page 5 29 If you only want to store a phone number skip this step 6 Press OK 7 Enter the phone number up to 32 digits The CO line access code is not required 8 Press ...

Страница 312: ...earch by pressing Next or Previous 4 Press OK 5 Press OK The number of stored items and remaining capacity are displayed 6 Enter the name up to 16 characters For entering characters refer to the Combination Table on page 5 29 If you only want to store a phone number skip this step 7 Press OK 8 Press OK again OK OK OK OK 0987654321 KEY MODIFY BOOK PS NEW ENTRY ENTER NAME 1 99 REMAINS Panasonic SCD ...

Страница 313: ...g Next or Previous 7 Press OK 8 Edit the name For entering characters refer to the Combination Table on page 5 29 If you only want to edit the phone number skip this step 9 Press OK 10 Edit the number If you only want to edit the name skip this step OK OK OK OK Panasonic 0123456789 Panasonic 0123456789 Panasonic 0123456789 KEY MODIFY BOOK PS NEW ENTRY PS EDIT P Panasonic 0123456789 5 22 DECT Porta...

Страница 314: ...Station Features 11 Press OK You can store edit or delete directory items continu ously Conditions If you misdial press Clear to clear a digit from the left and enter the number again Press Cancel to exit the Directory mode C CLR OK STORED PS EDIT Example ...

Страница 315: ...ssing Next or Previous 5 Press OK 6 To store an item for the first time press Book repeatedly to select the blank display To edit an item press Book repeatedly until the desired item is displayed You can also search by pressing Next or Previous 7 Press OK 8 Enter edit the name up to 10 characters For entering characters refer to the Combination Table on page 5 29 If you only want to edit a phone n...

Страница 316: ... code can be stored If you only want to edit a name skip this step 11 Press OK You can store edit or delete directory items continu ously Conditions If you misdial press Clear to clear a digit from the left and enter the number again Press Cancel to exit the Directory mode C CLR OK OK Panasonic 0123456789 Panasonic 0987654321 STORED PS EDIT Example 1 ...

Страница 317: ... a non Panasonic Digital Super Hybrid System or when out of range In this case the directory item e g the dis play in step 2 in Dialling by selecting the name appears after pressing Book You can transfer a call to a number stored in the directory In this case press Transfer during a conversation and then dial by selecting the directory item See page 5 27 to select an entry CLR C PS Dialling Direct...

Страница 318: ... or Previous repeatedly until the desired item is displayed 6 Press Talk Intercom or Flexible CO Dialling by selecting the entry 1 Press Book repeatedly until the desired directory feature is displayed 2 Press OK 3 Press the Next or Previous repeatedly until the desired item is displayed 4 Press Talk Intercom or Flexible CO F1 F3 INT OK F1 F3 INT OK OK P Panasonic SCD 0123456789 Panasonic SCD 0123...

Страница 319: ...ETE PBX Station Speed Dialling Directory You can also search by pressing Next or Previous 5 Press OK 6 Press Book repeatedly until the desired item that you want to delete is displayed You can also search by pressing Next or Previous 7 Press OK You can store edit or delete directory items continu ously Conditions You cannot delete the items in the PBX System Speed Dialling or PBX Extension Diallin...

Страница 320: ... characters the cursor will flash on the display Number of pressing times Keys 1 2 3 4 5 6 7 8 9 0 1 Ä A D G J M P T W space 2 ä a d g j m p t w 3 Ö B E H K N Q U X 4 ö b e h k n q u x 5 Ü C F I L O R V Y 6 ü c f i l o r v y 7 1 2 3 4 5 6 S 8 Z 8 s z 0 9 7 9 Combination Table Conditions If you misdial press Clear to clear a digit from the left and enter the number again Use or to move the cursor f...

Страница 321: ...ss six times 3 Press to move the cursor to the right 4 Press two times 5 Press to enter a blank 6 Press 7 Press six times 8 Press to move the cursor to the right 9 Press four times 10 Press four times 11 Press eight times PQRS DEF MNO MNO JKL MNO MNO TUV T To To Tom Tom Tom J Tom Jo Tom Jo Tom Jon Tom Jone Tom Jones ...

Страница 322: ... Press Function 2 Press OK 3 Press Book repeatedly until the desired button is displayed You can also search by pressing Next or Previous 4 Press OK 5 Continue with the required operations Conditions These buttons can also be activated using a combination of buttons For descriptions and button combinations refer to Location of Controls in Section 5 1 DECT Portable Station Overview OK OK KEY PAUSE ...

Страница 323: ...ne is busy you cannot make a call from the other telephone The Call Forwarding All feature for the wired telephone can also be set from the paired PS so that all incoming calls to the wired telephone will be forwarded to the desired destination Setting 1 Press Talk 2 Dial the feature number 481 3 Enter the wired extension number You hear a confirmation tone and then a dial tone 4 Press Cancel Canc...

Страница 324: ...l Setting the Call Forwarding All feature for the paired telephone 1 Press Talk 2 Dial the feature number 4842 3 Enter the destination extension number You hear a confirmation tone and then a dial tone 4 Press Cancel Cancelling the Call Forwarding All feature for the paired telephone 1 Press Talk 2 Dial the feature number 4840 You hear a confirmation tone and then a dial tone 3 Press Cancel C C C ...

Страница 325: ...elephone This feature can be set from a PS The wired telephone can enable or disable this feature by System Programming Programming References System Programming Installation Manual 654 SXDP Assignment 5 34 DECT Portable Station Features 5 2 DECT Portable Station Features ...

Страница 326: ...ing LCS Microphone Mute Off Hook Monitor Paging Deny Paralleled Telephone PT and SLT Phantom Extension Redial Automatic Operator Service Features Conditions For more details please refer to the corresponding features in Section 4 2 DPT Features For buttons which are not provided on the PS refer to Key Operation or PBX Programming While in on hook status the LED Light Emitting Diode button indicato...

Страница 327: ...er party hangs up Dial 49 or press the Account button Enter the account code Alternate Calling Ring Voice You can select ring or voice calling when mak ing an intercom call to a proprietary telephone PT user In the Voice Calling mode you can announce to the other party immediately after the confirmation tone If the called extension has set the Ring Calling mode Press when hearing the ringback tone...

Страница 328: ...sion to ISDN Line Calls are forwarded to an ISDN line if your extension is in one of the following conditions unconditional no reply busy Setting except for to ISDN Line Off hook Dial 710 or press the FWD DND button Dial as follows 2 extension number All Calls 3 extension number Busy 4 extension number No Answer 5 extension number Busy No Answer 6 line access code 9 81 88 phone number to CO Line 7...

Страница 329: ...al 52 the parking zone number Call Pickup CO Line You can answer an incoming outside call ring ing at another extension Off hook Dial 4 Call Pickup Directed You can answer an incoming call ringing at any other extension Off hook Dial 41 the extension number Call Pickup Group You can answer an incoming call ringing at another extension within your extension group Off hook Dial 40 Call Pickup Deny Y...

Страница 330: ...inate the cur rent call While hearing a Call Waiting tone Press the CO or INT button To talk to the new caller hold the current call While hearing a Call Waiting tone Press the Hold button Press the CO or INT button Conference You can make a three party conversation During a conversation Press the Conference button Dial the third party Talk to the third party Press the Conference button Conference...

Страница 331: ...ot Disturb Override You can call an extension even though Do Not Disturb is set Dial 2 while hearing the Do Not Disturb tone Doorphone Call You can answer or make a doorphone call Moreover you can unlock the door Answering a doorphone call Off hook Calling a doorphone Off hook Dial 61 Dial the doorphone number as follows 1 2 if connected to a KX TD816 1 4 if connected to a KX TD1232 To unlock the ...

Страница 332: ...p tem porarily preventing hunting calls from being sent to your extension Using the Log In Log Out button Off hook Press the Log In Log Out button Log In the indicator light is off Log Out the indicator light is red A confirmation tone is audible On hook Using the feature number Off hook Dial 45 Dial 1 or 0 1 Log In 0 Log Out A confirmation tone is audible On hook Message Waiting You can leave a m...

Страница 333: ...mber Press the Save button Dialling Off hook Press the Save button Off Hook Call Announcement OHCA You can make a voice call to a busy extension which has set to receive OHCA While hearing a busy tone Dial 2 Wait for an answer One Touch Dialling You can make a call or access a system feature with a touch of a button after going off hook Off hook Press a One Touch Dialling button Operator Call You ...

Страница 334: ...external pager number or 43 42 external pager number To answer Paging External 43 To answer Paging Group in the same extension group Paging and Transfer You can transfer a call to the paged person Press the Transfer button before dialling the paging feature number 62 or 63 Check the feature number you want to use in the Paging section Pickup Dialling Hot Line You can make a call by simply going of...

Страница 335: ...mation tone is audible On hook Dialling Off hook Dial 6 the station speed dial number System Speed Dialling The system supports 500 speed dial numbers which are available to all extension users Off hook Press the Auto OK button Dial the system speed dial number 000 through 499 Terminate You can disconnect the current call and origi nate another call without going off hook While hearing any tone di...

Страница 336: ...tton Dial the extension number or press the desired DSS button Stopping recording into another mailbox Press the Two Way Transfer button Voice Mail Integration When you are busy or away from your desk your calls can be forwarded to a mailbox in the Voice Processing System Setting the Call Forwarding destination to Voice Mail VM Off hook Dial 710 or press the FWD DND button Dial the Call Forwarding...

Страница 337: ...OGRAMMING PS Programming PBX Programming Registration This program is used to register your PS in the system and deter mine its extension number For more details please consult with your dealer If the DECT System Lock is set this display will not appear To cancel the DECT System Lock refer to Setting the DECT System Lock in PS programming PS PROGRAM PBX PROGRAM REGISTRATION ...

Страница 338: ...ired Level 2 A System Lock password is required The combination of the passwords are as follows The possible programming items and their password levels and displays are shown below in the order they are displayed Setting the Keypad Backlight Mode Level 0 You can turn off the keypad lights to save electricity Default ON Setting the Key Tone Level 0 You can select whether the button on your PS soun...

Страница 339: ...guage English German French Italian Spanish or Dutch Default AUTO English If you are connected to a Panasonic Digital Super Hybrid System DSHS while the default setting is AUTO the language displayed will depend on the system setting Default English Controlling the Directory Lock Level 1 You can lock ON or unlock OFF the PS Dialling Directory Default OFF Setting the Quick Answering Mode Level 0 Yo...

Страница 340: ... changing the selection it may take a few seconds for the set ting to be completed This program is only displayed when more than two fixed ter minals are connected Selecting the Standby Display Level 0 You can select the number extension number EXT DECT system number DECT SYS NO or DECT system and exten sion number DECT SYS NO EXT which is displayed in the Standby mode You can also select not disp...

Страница 341: ...ther than a Panasonic Digital Super Hybrid System Cancelling the PS Registration Level 2 To cancel your PS registration use system program 651 PS Termination If Rejected or Time Out is displayed in pro gram 651 delete the PS again by PS programming It may take a few seconds for the cancel to be completed For System Programming please consult with your dealer Setting the Guidance Menu Level 0 You c...

Страница 342: ...ectory lock Clearing the settings in memory Setting the PS programming password Default DISABLE Setting the DECT System Lock Level 2 You can enable or disable the DECT System Lock If enabled you must enter your password when entering the PS Programming mode in order to display the following programs Selecting the DECT system Cancelling the PS registration Setting the DECT system lock Default DISAB...

Страница 343: ...s OK 4 Press OK 5 Press Next or Previous repeatedly until the desired program item is displayed 6 Press Book repeatedly until the desired selec tion is displayed This step is not necessary for clearing settings in memory 7 Press OK 8 Repeat steps 5 through 7 if you want to program other items 9 To exit the PS Programming mode press Cancel C OK OK OK 5 52 DECT Portable Station Features 5 3 PS Progr...

Страница 344: ...Lock dis play Refer to steps 1 through 6 on page 5 52 2 Press Book to select ENABLE 3 Press OK 4 Enter the password 4 digits 5 Press OK 6 Enter the same password again 7 Press OK 8 To exit the PS Programming mode press Cancel C OK OK OK PS PASSWORD DISABLE PS PASSWORD ENABLE ENTER PASSWORD ENTER PASSWORD Example REENTER PASSWORD REENTER PASSWORD Example Example ...

Страница 345: ...amming Password DECT System Lock Password 1 Search for the PS Password or DECT System Lock dis play Refer to steps 1 through 6 on page 5 52 2 Press Book to select DISABLE 3 Press OK 4 To exit the PS Programming mode press Cancel C OK PS PASSWORD ENABLE PS PASSWORD DISABLE Example ...

Страница 346: ...n Assignment Account Button Conference Button DSS Button FWD DND Button Group CO Button Log In Log Out Button Loop CO Button Message Button One Touch Dialling Button One Touch Dialling with Auto Hold Button Save Button Single CO Button Terminate Button Two Way Record Button Two Way Transfer Button Voice Mail VM Transfer Button Charge Fee Reference Preferred Line Assignment Outgoing Self Extension ...

Страница 347: ...or Previous 3 Press OK 4 Press Book You can also search by pressing Next or Previous 5 Press OK The Intercom flashes green To exit from the PBX Programming mode 1 Press Cancel Conditions For more details about these programs please refer to the corresponding programs in Section 2 2 Station Programming The fol lowing PS buttons replace the buttons on a proprietary telephone PT C INT OK OK KEY PROGR...

Страница 348: ...e charge Enter the programming mode Dial 8 Enter the ID Code Dial 3 location number 01 through 40 Press the Book button Press the Clear or OK button if required Clear To clear the meter and charge OK To print out the total meter and charge Press the Hold END button three times Exit the programming mode Total Extension Charge Fee Reference Provides you with a display of the total exten sion charge ...

Страница 349: ...xit the programming mode Conference Button Enter the programming mode Press the desired Flexible CO button Dial 7 Press the Book button Exit the programming mode DSS Button Enter the programming mode Press the desired Flexible CO button Dial 1 extension number Press the Book button Exit the programming mode FWD DND Button Enter the programming mode Press the desired Flexible CO button Dial 4 Press...

Страница 350: ...rogramming mode Press the desired Flexible CO button Dial 83 the Voice Mail extension number Press the Book button Exit the programming mode Two Way Transfer Button Enter the programming mode Press the desired Flexible CO button Dial 84 the Voice Mail extension number Press the Book button Exit the programming mode Voice Mail VM Transfer Button Enter the programming mode Press the desired Flexible...

Страница 351: ...OFF or VIBRATION The PS is out of range or the Cell Station CS is busy The radio channel is busy or a radio communication error occurred Try again later The number which you dialled is restricted by the sys tem The key lock mode is set To cancel the mode press Function for about 2 seconds The radio channel is busy or a radio communication error occurred Try again later Set the PS and CS away from ...

Страница 352: ...iving a weak radio signal Turn the power switch OFF and ON Then try again Re insert the battery and try again You moved to a busy CS or are out of range You moved while not having a conversation e g while hearing a busy tone The radio channel is busy or a radio communication error occurred Normally the PS user can make a call even with a status In this case the current linked CS is still con necte...

Страница 353: ... battery specified 2 Do not dispose of the battery in a fire It may explode Check with local waste management codes for special disposal instructions 3 Do not open or mutilate the battery Released electrolyte is corrosive and may cause burns or injury to the eyes or skin The electrolyte may be toxic if swallowed 4 Exercise care in handling the battery in order not to short the battery with conduct...

Страница 354: ...nterfere with your telephone calls In particular high metal shelves or rein forced concrete walls will shorten your operat ing range 3 A PS may not work if used in places that are too far from the CS depending on the structure of the building Noise Occasional noise or interference may occur due to other sources of electromagnetic radiation such as refrigerators microwave ovens faxes TVs radios or ...

Страница 355: ......

Страница 356: ...res 6 5 Station Programming 6 5 Direct Station Dialling 6 9 One Touch Dialling 6 9 One Touch Access for System Features 6 9 Call Transfer 6 10 ANSWER RELEASE Button Operation KX T7441 only 6 11 Note All illustrations of the DPT paired digital proprietary telephone used in these operating instructions are based on model KX T7235 ...

Страница 357: ...cess to a system feature One Touch Access for System Features Easy transfer to an extension Call Transfer The above functions are enabled simply by pressing buttons on the console which are pre programmed as function buttons through Station Programming There are three DSS Console models Conditions The DSS Console and the Digital Proprietary Telephone DPT should be placed side by side on your desk ...

Страница 358: ...trols KX T7440 KX T7240 KX T7441 PF Programmable Feature Buttons 01 through 16 DSS Buttons with Busy Lamp Field BLF 01 through 32 DSS Buttons with Busy Lamp Field BLF 01 through 48 DSS Buttons with Busy Lamp Field BLF 01 through 66 ANSWER Button RELEASE Button ...

Страница 359: ...e BLF indicates the busy or idle status of each extension in the system These buttons can also be changed to other function buttons PF Programmable Feature Buttons These buttons are provided with no default settings With a paired telephone you can program the buttons as other function buttons ANSWER Button Used to answer an incoming call RELEASE Button Used to disconnect the line ...

Страница 360: ...ne number or feature number through Station Programming Extension Number Assignment You can assign the desired extension number to a DSS button Be sure that you are in the Station Programming mode Press PROGRAM 9 9 1 Press the desired DSS button on the console 2 Dial 1 on the paired telephone 3 Enter the desired extension number on the paired telephone 4 Press the STORE button on the paired teleph...

Страница 361: ...ou must dial the line access code first 4 Press the STORE button on the paired telephone Repeat steps 1 through 4 to program numbers on other DSS or PF buttons To exit from the Station Programming mode Press PROGRAM or lift the handset One Touch Access Assignment for System Features You can assign the desired feature number to a DSS or PF button Be sure that you are in the Station Programming mode...

Страница 362: ...rror while programming 1 Press the CLR button S2 or the TRANSFER CLEAR button on the paired telephone and complete programming The TRANSFER button becomes the CLEAR button when using the overlay To erase after programming 1 Press the DSS or PF button you wish to erase on the console 2 Press 2 on the paired telephone 3 Press the STORE button on the paired telephone The number is erased AUTO DIAL ST...

Страница 363: ...tons through Station Programming a Account Button b Conference CONF Button c FWD DND Button d One Touch Dialling Button e SAVE Button f Voice Mail VM Transfer Button When the STORE button is pressed after programming you will hear beep tones as follows One beep The entry is changed from one that was stored previously Two beeps The entry is the same as one stored previously Programming References S...

Страница 364: ...on Dialling An extension can be called and accessed simply by pressing a DSS button The BLF shows if the extension is engaged 1 Lift the handset or press the SP PHONE MONITOR button on the paired telephone 2 Press the desired DSS button on the console One Touch Dialling The stored number is dialled automatically by pressing a programmed DSS or PF button 1 Lift the handset or press the SP PHONE MON...

Страница 365: ... console One Touch Transfer An outside call can be transferred to an extension with an one touch operation The One Touch Transfer function must be set through System Programming During a conversation 1 Press the desired DSS button on the console The other party is placed on hold and the destination extension is called immediately Programming References System Programming Installation Manual 108 Au...

Страница 366: ...adset or handsfree mode 1 Press the TRANSFER button on the paired telephone 2 Press the desired DSS button on the console or dial the desired number at the paired telephone 3 Press the RELEASE button after the party answers One Touch Transfer An outside call can be transferred to an extension with the one touch operation The One Touch Transfer function must be set by System Programming During a co...

Страница 367: ......

Страница 368: ...res which have or in their feature numbers When the Pickup Dialling Hot Line feature is set on your telephone your dialling sequence should be done within a certain period of time Pickup Dial Waiting Time default 1 sec after lifting the handset To change the time refer to the System Programming in the Installation Manual In this manual the default feature numbers are used to describe each operatio...

Страница 369: ... you to make a call to an outside party using one of the following line access methods 1 Line Access Automatic 2 Line Access CO Line Group 1 Lift the handset 2 Dial the line access code 9 or 81 through 88 9 Line Access Automatic 81 88 Line Access CO Line Group 3 Dial the phone number Feature References Intercom Calling Outward Dialling Line Access extension number 1 2 line access code phone number...

Страница 370: ...SLT and ISDN Telephone Features 7 3 7 1 Basic Operations Receiving Calls 1 Lift the handset 1 ...

Страница 371: ... messages Only one message can be selected at a time Setting or Cancelling a message can be done by individual extension users If required messages 7 8 and 9 can be programmed through System Programming Note indicates the digit where you enter the desired parameter Setting Message 1 Will Return Soon 1 Lift the handset 2 Dial the feature number 750 and 1 You hear a confirmation tone and then a dial...

Страница 372: ...At Ext extension number 1 Lift the handset 2 Dial the feature number 750 and 3 3 Dial the extension number where you are You hear a confirmation tone and then a dial tone 4 Hang up Message 4 Back at time 1 Lift the handset 2 Dial the feature number 750 and 4 3 Enter the hour 00 through 23 and the minute 00 through 59 You hear a confirmation tone and then a dial tone 1 2 3 1 2 3 extension number 4 ...

Страница 373: ...number 750 and 5 3 Enter the day 01 through 31 and the month 01 through 12 You hear a confirmation tone and then a dial tone 4 Hang up Message 6 In a Meeting 1 Lift the handset 2 Dial the feature number 750 and 6 You hear a confirmation tone and then a dial tone 3 Hang up Message 7 8 and 9 Programmable 1 Lift the handset 4 1 2 3 month and day 4 1 2 3 1 ...

Страница 374: ...re number 750 and 0 You hear a confirmation tone and then a dial tone 3 Hang up Conditions Regarding Message 3 1 If the extension number you want to dial has more than three characters refer to System Programming to change the setting 2 If the extension number you want to dial has less than three characters dial or to make it up to three characters A maximum of seven parameters characters can be s...

Страница 375: ...t code so that you can override toll restriction Option mode You may enter any account code One mode is selected for each extension on a Class of Service basis Entering account codes 1 Lift the handset 2 Dial the feature number 49 No tone is returned 3 Dial the account code and You may dial 99 instead of You hear a confirmation tone and then a dial tone 4 Dial the line access code 9 or 81 through ...

Страница 376: ...ccount code into Memory Dialling is Feature Number Account Code Line Access Code Phone Number or Feature Number Account Code 99 Line Access Code Phone Number If an entered account code does not match a stored account code when making an outside call a reorder tone is returned If an entered account code matches a pre assigned account code when making an outside call the charge fee of the account co...

Страница 377: ... called extension is set to Ring Calling mode you hear a ringback tone 1 Press You hear a confirmation tone when it is changed to Voice Calling mode Alternating to Ring Calling mode If the called extension is set to Voice Calling mode you hear a confirmation tone 1 Press You hear a ringback tone when it is changed to Ring Calling mode Conditions Default is Ring Calling mode You can switch the desi...

Страница 378: ...usy tone 1 Dial 6 You hear a confirmation tone and then a reorder tone 2 Hang up Wait until the telephone rings back Answering an intercom recall If you hear the telephone ringing 1 Lift the handset You hear a ringback tone and the called extension rings automatically Answering a CO line recall If you hear the telephone ringing 1 Lift the handset You hear a dial tone 2 Dial the phone number of the...

Страница 379: ...Busy Station Signalling BSS The busy extension that you called hears three beeps and knows that you are waiting If you make an intercom call and hear a busy tone 1 Dial 2 Wait for an answer and talk Conditions To answer the signal from the calling extension see Call Waiting in this manual This feature is only available to those extensions that have the Call Waiting feature assigned If the called p...

Страница 380: ... Yes No Type Description Call Forwarding All Calls All incoming calls are forwarded to another extension Call Forwarding Busy Call Forwarding No Answer Call Forwarding Busy No Answer Call Forwarding to CO Line Call Forwarding Follow Me All incoming calls are forwarded to another extension when your extension is busy All incoming calls are forwarded to another extension when you do not answer the c...

Страница 381: ... party while he she is absent will not be forwarded back to the original extension Confirmation tone 2 two beeps is sent when the previously programmed data is same as the new data If it is not confirmation tone 1 one beep is sent Refer to Tone List in the Appendix Section 9 Feature References Call Forwarding CANCEL Do Not Disturb DND Voice Mail Integration Call Forwarding All Calls You can re dir...

Страница 382: ...h you wish to forward the call You hear a confirmation tone and then a dial tone 4 Hang up Call Forwarding No Answer Your calls are forwarded to another extension when you do not answer the telephone within a pre determined time Setting 1 Lift the handset 2 Dial the feature number 710 and 4 3 Dial the extension number to which you wish to forward the call You hear a confirmation tone and then a di...

Страница 383: ...s to another extension when your extension is busy or when you do not answer the telephone within a pre determined time Setting 1 Lift the handset 2 Dial the feature number 710 and 5 3 Dial the extension number to which you wish to forward the call You hear a confirmation tone and then a dial tone 4 Hang up Programming References System Programming Installation Manual 202 Call Forwarding No Answer...

Страница 384: ...al the line access code 9 or 81 through 88 4 Dial the phone number to which you wish to forward the call 5 Dial You hear a confirmation tone and then a dial tone 6 Hang up Conditions Up to sixteen digits line access code is included can be programmed Class of Service programming determines the extension that can perform this feature Programming References System Programming Installation Manual 504...

Страница 385: ...lls before you leave your desk Setting at the destination extension 1 Lift the handset 2 Dial the feature number 710 and 7 3 Dial your own extension number You hear a confirmation tone and then a dial tone 4 Hang up Conditions This feature can be cancelled at your extension or at the destination extension Programming References System Programming Installation Manual 991 COS Additional Information ...

Страница 386: ... extension is transferred to an ISDN line when the extension does not answer before a time that a telephone company assigns Call Forwarding Busy CFB An incoming call to an extension is transferred to an ISDN line when the extension is busy Setting 1 Lift the handset 2 Dial the feature number 710 3 Dial 921 931 or 941 921 CFU 931 CFB 941 CFNR 4 Dial your multi subscriber number MSN and press 5 Dial...

Страница 387: ...pt to ISDN Line 1 Lift the handset 2 Dial the feature number 710 and 0 You hear a confirmation tone and then a dial tone 3 Hang up Cancelling Call Forwarding at the destination extension Follow Me All Calls only 1 Lift the handset 2 Dial the feature number 710 and 8 3 Dial your extension number You hear a confirmation tone and then a dial tone 4 Hang up 1 2 3 1 2 3 your extension number 4 Programm...

Страница 388: ...orwarding to ISDN Line at your original extension 1 Lift the handset 2 Dial the feature number 710 3 Dial 920 930 940 or 90 920 CFU 930 CFB 940 CFNR 90 all 4 Dial your multi subscriber number MSN and press You hear a confirmation tone and then a dial tone 5 Hang up 5 1 2 3 4 your MSN or or or ...

Страница 389: ...ft the handset 2 Dial the feature number 50 Conditions To retrieve a call on hold at another extension refer to Call Hold Retrieve in this manual If a held call is not retrieved within the specific period of time default 60 sec Hold Recall occurs If an outside call is placed on hold and not retrieved in thirty minutes it is automatically disconnected Either one outside or intercom call can be plac...

Страница 390: ...u are connected to the KX TD1232 You hear a confirmation tone optional Retrieving an intercom call on hold at another extension 1 Lift the handset 2 Dial the feature number 51 3 Dial the holding extension number You hear a confirmation tone optional Conditions Call Park cannot be retrieved by this feature A confirmation tone is audible when the call is retrieved Eliminating the tone is programmabl...

Страница 391: ...when making a call CLIP or allows you to show the called party s number on the display of the calling party s telephone when answering a call COLP Condition The number sent to the other party is assigned by system programming Programming References System Programming Installation Manual 622 CLIP COLP Number Assignment Feature References Calling Line Identification Restriction CLIR Connected Line I...

Страница 392: ...entation of your number to the called party 1 Lift the handset 2 Dial the feature number 59 3 Dial 2 or 0 2 to restrict 0 to allow You hear a confirmation tone and then a dial tone 4 Hang up To change the current setting at just time you make a call 1 Lift the handset 2 Dial the feature number 59 and 1 3 Dial the line access code 9 or 81 through 88 4 Dial the phone number Programming References Sy...

Страница 393: ...ou hear a confirmation tone and then a dial tone when the call is parked If you hear a busy tone that indicates the specified parking zone is unavailable It is not necessary to redial the feature number to change the parking zone Just enter the parking zone number while hearing a busy tone Retrieving a parked call 1 Lift the handset 2 Dial the feature number 52 3 Dial the parking zone number 0 thr...

Страница 394: ...ne is audible when the parked call is retrieved Eliminating the tone is programmable Programming References System Programming Installation Manual 201 Transfer Recall Time 990 System Additional Information Fields 11 16 Call Pickup CO Line Allows you to answer an incoming outside call that is ringing at another extension 1 Lift the handset 2 Dial the feature number 4 You hear a confirmation tone op...

Страница 395: ...a call is ringing You hear a confirmation tone optional You can talk to the caller Conditions Doorphone calls can be picked up from extensions that are not programmed to answer doorphone calls A confirmation tone is audible when the call is picked up Eliminating the tone is programmable Programming References System Programming Installation Manual 990 System Additional Information Field 16 Feature...

Страница 396: ...onal You can talk to the caller Conditions You can pick up an incoming outside intercom or doorphone call It is not possible to answer Call Waiting calls A confirmation tone is audible when the call is picked up Eliminating the tone is programmable Programming References System Programming Installation Manual 602 Extension Group Assignment 990 System Additional Information Field 16 Feature Referen...

Страница 397: ... extension from picking up your calls with the Call Pickup feature Setting Cancelling 1 Lift the handset 2 Dial the feature number 720 3 Dial 1 or 0 1 to set 0 to cancel You hear a confirmation tone and then a dial tone 4 Hang up Feature References Call Pickup Directed Call Pickup Group Call Pickup Outside Line 1 2 4 3 or ...

Страница 398: ...he other party Having a conversation while having another call on hold temporarily Consultation Hold 1 Press the Register Recall button The first held call is released Pressing this switch alternates between the callers Conditions This feature does not work during doorphone call or paging Feature References Call Hold Consultation Hold see Installation Manual Consultation Hold makes a call placed o...

Страница 399: ...e line access code 9 or 81 through 88 3 Dial the phone number where calls will be transferred 4 Wait for an answer and announce 5 Hang up The call is transferred Conditions If you want to return to the held call press the Register Recall button before the destination party answers Class of Service programming determines the extensions that can perform this feature Programming References System Pro...

Страница 400: ...then a dial tone 2 Dial the extension number where the call will be transferred You hear a ringback tone 3 Wait for the answer and announce 4 Hang up The call is transferred Unscreened Call Transfer While having a conversation 1 Press the Register Recall button The other party is placed on hold You hear a confirmation tone and then a dial tone 2 Dial the extension number where the call will be tra...

Страница 401: ...nsfer Recall occurs If the transferred call is an outside call it is possible to select whether the Transfer Recall will go to the initiating extension or to the operator through System Programming If there is no answer for thirty minutes after the Transfer Recall starts the line will be disconnected Programming References System Programming Installation Manual 201 Transfer Recall Time 990 System ...

Страница 402: ...connecting or placing the current call on hold Setting Cancelling 1 Lift the handset 2 Dial the feature number 731 3 Dial 1 or 0 1 to set 0 to cancel You hear a confirmation tone and then a dial tone 4 Hang up To talk to the new caller by terminating the current call While hearing a Call Waiting tone 1 Hang up The current call is disconnected 2 Lift the handset You can talk to the new caller 1 2 1...

Страница 403: ...old You hear a dial tone 3 Hang up 4 Lift the handset You can talk to the new caller Conditions A Call Waiting tone is generated at the extension in the following conditions 1 When an outside call comes in 2 When a Doorphone call comes in 3 When another extension executes the Busy Station Signalling BSS feature Setting Data Line Security cancels this feature Feature References Busy Station Signall...

Страница 404: ...l button The other party is placed on hold 2 Dial the phone number of the third party 3 Press the Register Recall button after the third party answers 4 Dial 3 You hear a confirmation tone optional A three party conference is now established To leave the conference 1 Hang up The other two parties may continue their conversation If the other two parties are both CO lines they will be disconnected T...

Страница 405: ... by pressing the Register Recall button Up to six conference calls are allowed simultaneously When a two party call is changed to a three party call and vice versa a confirmation tone is sent to all three parties Eliminating the tone is programmable Programming References System Programming Installation Manual 990 System Additional Information Field 13 ...

Страница 406: ...ling party not to see your number on the display This feature is an ISDN service To restrict or allow the presentation of your number to the calling party 1 Lift the handset 2 Dial the feature number 58 3 Dial 1 or 0 1 to restrict 0 to allow You hear a confirmation tone and then a dial tone 4 Hang up Programming References System Programming Installation Manual 419 Subscriber Number Assignment 517...

Страница 407: ...ide call to the assigned extension Setting 1 Lift the handset 2 Dial the feature number 710 and 1 3 Dial the desired number as follows extension number for the backup station 0 to operator backup station no backup You hear a confirmation tone and then a dial tone 4 Hang up Cancelling 1 Lift the handset 2 Dial the feature number 710 and 0 You hear a confirmation tone and then a dial tone 3 Hang up ...

Страница 408: ...s you cannot set this feature and when you set this feature you hear a reorder tone While the operator is set as the destination of the Do Not Disturb DND feature even if the operator is different from Day mode and Night mode an incoming call will be transferred to an operator If the operator is not assigned an incoming call will be transferred to the IRNA A calling extension that has Do Not Distu...

Страница 409: ... confirmation tone and then a dial tone 4 Hang up Conditions When this feature is set an incoming call directed by Intercept Routing or DIL 1 1 DIL 1 N can be answered Even if this feature is set your extension does not deny DDI calls if the destination of DDI calls is in the Hunting group When you set this feature Call Forwarding and Do Not Disturb DND features will be cancelled While you set thi...

Страница 410: ...sturb DND tone 1 Dial 2 Wait for an answer Conditions If you hear a reorder tone after dialling 2 this means the Do Not Disturb DND Override feature is not set at your extension You must dial 2 within ten seconds after hearing a Do Not Disturb DND tone Class of Service programming determines the extensions that can perform this feature Programming References System Programming Installation Manual ...

Страница 411: ... Lift the handset Calling a doorphone 1 Lift the handset 2 Dial the feature number 61 3 Dial a doorphone number as follows 1 or 2 if you are connected to the KX TD816 1 through 4 if you are connected to the KX TD1232 You can talk after you hear a confirmation tone To unlock the door from an assigned extension 1 Lift the handset 2 Dial the feature number 55 3 Dial a door opener number as follows 1 ...

Страница 412: ... programming determines the extension that can unlock the door It is possible for any extension users to originate a call to a doorphone The door opener 1 through 4 can be unlocked using the feature number while the doors which are paired with the doorphone 1 through 4 can be unlocked while talking to the doorphone The door opener 1 and 2 and the doorphone 1 and 2 are related to the master cabinet...

Страница 413: ...Locking 1 Lift the handset 2 Dial the feature number 77 3 Dial the lock code 000 through 999 4 Dial the same lock code again You hear a confirmation tone and then a dial tone 5 Hang up Unlocking 1 Lift the handset 2 Dial the feature number 77 3 Dial the same lock code as you used to lock the extension You hear a confirmation tone and then a dial tone 4 Hang up 1 2 3 4 lock code 5 lock code 1 2 3 4...

Страница 414: ...erator Service Features Emergency Call Allows you to make an emergency CO call without dial restriction You can store up to ten emergency numbers 999 and 112 are the default settings and the others can be stored through System Programming Dialling 1 Lift the handset You hear a dial tone 2 Dial the line access code 9 or 81 through 88 3 Dial the desired emergency number Conditions The emergency call...

Страница 415: ...uring an outside call While having a conversation with an outside party 1 Press the Register Recall button The current call is placed on hold 2 Dial the feature number 64 3 Dial the code for the desired service Conditions The Register Recall Signal must be assigned as required by the Centrex host PBS or CO line Programming References System Programming Installation Manual 413 Register Recall Signa...

Страница 416: ...ing status of the room and the total of the minibar charge with a telephone in each room Messages No 6 through No 9 can be printed out Example Message 7 Cleaned up 1 Lift the handset 2 Dial the feature number 750 and 7 3 Hang up Example Message 8 Minibar 1 Lift the handset 2 Dial the feature number 750 and 8 3 Enter the minibar charge 4 Hang up 1 2 3 1 2 3 minibar charge 4 ...

Страница 417: ...e feature It is necessary to assign 990 System Additional Information Field 34 through System Programming beforehand Programming References User Programming Manager Programming Section 3 008 Absent Messages System Programming Installation Manual 008 Absent Messages 990 System Additional Information Field 34 Date Time Ext CO Dial Number Duration Cost Acc Code CD 24 03 95 14 09 221 Cleaned up 24 03 ...

Страница 418: ...will hear one of the following tones Ringback tone Indicates that the destination extension is being called Confirmation tone Indicates that you can perform voice calling Busy tone Indicates that the destination extension is busy Do Not Disturb DND tone Indicates that the destination extension has been set the Do Not Disturb DND feature Programming References User Programming Section 3 System Prog...

Страница 419: ...hunting or UCD group When in the log out mode you can leave the group temporarily preventing the hunting calls being sent to your extension Log In Log Out 1 Lift the handset 2 Dial the feature number 45 3 Dial 1 or 0 1 for Log In mode 0 for Log Out mode You hear a confirmation tone and then a dial tone 4 Hang up Conditions Default is Log In mode There should be at least one extension that is in lo...

Страница 420: ...d dial tone dial tone 4 to indicate that a message has been received Setting 1 Lift the handset 2 Dial the feature number 70 and 1 3 Dial the extension number where calls will be left You hear a confirmation tone and then a dial tone 4 Hang up If the called extension is busy 1 Dial 4 You hear a confirmation tone and then a dial tone You must dial 4 within 5 seconds after dialling extension number ...

Страница 421: ... 4 2 Dial the feature number 70 and 2 If you have more than one message at your extension the line is connected to the message sender which you select 3 Start talking The message is cleared after the conversation Clearing all messages by the message receiver 1 Lift the handset You hear a dial tone 4 2 Dial the feature number 70 and 0 3 Dial your message receiver s extension number All messages are...

Страница 422: ... times at 5 second intervals after which there is an interval of programmable length The length of this programmable interval can be set by System Programming If you set the length of the interval to zero the special ringing tone doesn t ring If you hear dial tone 4 after going off hook there is a message at your extension One of the dial tones Refer to Tone List in the Appendix Section 9 Programm...

Страница 423: ...ht mode to Day mode 1 from Day mode to Night mode You hear a confirmation tone 4 Hang up Conditions The following items have separate day and night programming 1 Outgoing Permitted CO Line Assignment 2 Direct In Lines DIL 3 Doorphone Ringing Assignment 4 Intercept Routing 5 Ringing Delayed 6 Toll Restriction Level 7 Toll Restriction for System Speed Dialling 8 Operator Assignment Class of Service ...

Страница 424: ...Switching Mode 102 Day Night Service Starting Time 513 Night Service Access 601 Class of Service Feature References CO Line Connection Assignment Outgoing see Installation Manual Direct In Lines DIL see Installation Manual Doorphone Call Intercept Routing see Installation Manual Ringing Delayed see Installation Manual Toll Restriction see Installation Manual ...

Страница 425: ...after you hear a confirmation tone Conditions This feature is only effective to extensions that have set to receive the OHCA The calling mode varies depending on the setting of the called party s extension as follows OHCA Your voice is received through the built in speaker Call Waiting A Call Waiting tone is received Busy Station Signalling BSS Whisper OHCA Your voice is received through the hands...

Страница 426: ...re assigned operator call number General call 1 Lift the handset 2 Dial the feature number 0 Specific call 1 Lift the handset 2 Dial the operator call number for each operator Conditions If you generate the General call for two operators Operator 2 will receive your call if Operator 1 is busy If an operator is not assigned this feature is not available you will hear the reorder tone Programming Re...

Страница 427: ...by the owner Electronic Station Lockout or the operator Remote Station Lock Control The extension is restricted by the account code mode Verified All Calls or Verified Toll Restriction Override The extension is restricted from making toll calls Toll Restriction Programming References System Programming Installation Manual 103 Automatic Access CO Line Group Assignment Used for Line Access Automatic...

Страница 428: ...Features O Line Access Automatic Allows you to select an available CO line automatically 1 Lift the handset 2 Dial the feature number 9 You hear a dial tone 3 Dial the phone number 4 Start talking 5 Hang up after completion of the conversation 1 2 phone number 4 3 5 ...

Страница 429: ...hin the designated CO line group Through programming CO lines can be divided into eight line groups 1 Lift the handset 2 Dial the feature number 8 3 Dial a CO line group number 1 through 8 You hear a dial tone 4 Dial the phone number 5 Start talking 6 Hang up after completion of the conversation 1 2 CO line group number 3 4 5 phone number 6 ...

Страница 430: ... in speakers and external pagers Paging through all the external pagers simultaneously Paging to a specific external pager Paging to all groups all extensions simultaneously Paging to a particular group of extensions using the built in speakers Conditions To answer the page refer to Paging ANSWER The paged extension users hear a confirmation tone before the voice announcement The confirmation tone...

Страница 431: ...ephones PT and external pagers 1 Lift the handset 2 Dial the feature number 62 or 63 and You hear a confirmation tone optional 3 Make the announcement 4 Wait for an answer and talk Paging External Allows you to make a voice announcement over external pagers To access all external pagers 1 Lift the handset 2 Dial the feature number 62 and 0 You hear a confirmation tone optional 3 Make the announcem...

Страница 432: ...a confirmation tone optional 4 Make the announcement 5 Wait for an answer and talk Conditions If the designated pager is being used a busy tone is heard The paging priorities are as follows 1 TAFAS Trunk CO Line Answer From Any Station 2 Paging External 3 Background Music BGM External If a higher priority page is requested when a lower priority page is active the higher priority overrides the lowe...

Страница 433: ...ugh the built in speakers of extensions To access all groups simultaneously 1 Lift the handset 2 Dial the feature number 63 and 00 You hear a confirmation tone optional 3 Make the announcement 4 Wait for an answer and talk To access a particular group of extensions 1 Lift the handset 2 Dial the feature number 63 3 Dial the extension group number 01 through 16 You hear a confirmation tone optional ...

Страница 434: ...N Telephone Features 7 67 7 2 SLT and ISDN Telephone Features P 5 Wait for an answer and talk Conditions There is a maximum of 16 extension groups Paging Group to different groups can be performed simultaneously 5 ...

Страница 435: ...ger 1 Lift the handset 2 Dial the feature number 42 3 Dial the corresponding external pager number as follows 1 or 2 if you are connected to the KX TD816 1 through 4 if you are connected to the KX TD1232 You hear a confirmation tone optional You can start talking Conditions Only extensions within the paged group can answer Paging Group A confirmation tone is audible when the page is answered Elimi...

Страница 436: ...e number 62 or 63 and The feature number can be the one for either group or external paging 3 Make the announcement after hearing a confirmation tone optional 4 Wait for the other party to answer You hear a confirmation tone optional 5 Hang up The held party and the paged extension are connected and can start conversation Using Paging External to all external pagers While having a conversation 1 P...

Страница 437: ...r While having a conversation 1 Press the Register Recall button You hear a dial tone The other party is placed on hold 2 Dial the feature number 62 3 Dial an external pager number as follows 1 or 2 if you are connected to the KX TD816 1 through 4 if you are connected to the KX TD1232 4 Make the announcement after hearing a confirmation tone optional 5 Wait for the other party to answer You hear a...

Страница 438: ...nal 5 Hang up The held party and the paged extension are connected and can start conversation Using Paging Group to a particular extension group While having a conversation 1 Press the Register Recall button You hear a dial tone The other party is placed on hold 2 Dial the feature number 63 3 Dial a paging group number 01 through 16 4 Make the announcement after hearing a confirmation tone optiona...

Страница 439: ...lt is Parallel Off When receiving a call If SLT ringing is enabled then both the PT and the SLT ring except when the PT is in Handsfree Answerback mode or Voice Calling mode with the Alternate Calling Ring Voice feature If SLT ringing is disabled then the PT rings but the SLT does not However the SLT can answer the call If you go off hook while your parallelled telephone is in use the call will sw...

Страница 440: ...the feature number 74 and 2 3 Dial the phone number and You must dial the line access code 9 or 81 through 88 as a leading digit when calling an outside party You hear a confirmation tone and then a dial tone 4 Hang up Setting Cancelling 1 Lift the handset 2 Dial the feature number 74 3 Dial 1 or 0 1 to set 0 to cancel You hear a confirmation tone and then a dial tone 4 Hang up 1 2 3 4 phone numbe...

Страница 441: ...call on hold Up to sixteen digits consisting of 0 through 9 and can be stored cannot be stored During the waiting time after lifting the handset you can dial another party and override this feature You can modify the waiting time between picking up the handset and connecting with the called line through System Programming Programming References System Programming Installation Manual 204 Pickup Dia...

Страница 442: ...on Allows you to change from Pulse to Tone dialling mode so that you can access services such as Voice Mail that require tone 1 Dial the phone number Pulse mode 2 Dial and 3 Dial the phone number Tone mode Conditions You cannot change from Tone to Pulse dialling mode 1 2 3 phone number phone number ...

Страница 443: ...hty quick dial numbers can be stored by System Programming You must assign a feature number first in program 104 Quick Dial Assignment and then a quick dial number in program 009 Quick Dial Number Set in order for Quick Dial to be effective For example Quick Dialling is convenient for room service calls in a hotel Programming References System Programming Installation Manual 009 Quick Dial Number ...

Страница 444: ...e same outgoing call again 1 Lift the handset 2 Dial Conditions Up to twenty four digits can be stored and redialled this does not include the CO line access code and are counted as one digit The memorised telephone number is replaced by a new one if at least one digit to be sent to a CO line is dialled Dialling a CO line access code alone does not change the memorised number 1 2 ...

Страница 445: ...p Deny e Call Waiting f Calling Line Identification Restriction CLIR g CO Incoming Call Information Log h Connected Line Identification Restriction COIR i Do Not Disturb DND j Log In k Message Waiting All messages will be removed l Pickup Dialling Hot Line The stored telephone number will be removed m Timed Reminder Clearing current feature setting 1 Lift the handset 2 Dial the feature number 790 ...

Страница 446: ...ur extension only Storing the phone number 1 Lift the handset 2 Dial the feature number 60 3 Dial the Station Speed Dial number 0 through 9 4 Dial the desired number and You hear a confirmation tone 5 Hang up Dialling 1 Lift the handset 2 Dial the feature number 6 3 Dial the Station Speed Dial number 0 through 9 1 2 3 4 5 Station Speed Dial number desired number and 1 2 3 Station Speed Dial number...

Страница 447: ...mber a telephone number or a feature number of up to sixteen digits To store the telephone number of an outside party the line access code 9 or 81 through 88 must be stored as the leading digit Valid digits are 0 through 9 and Station Speed Dialling can be followed by manual dialling to supplement the dialled digits ...

Страница 448: ...al numbers must be stored either through User Manager or System Programming System Speed Dialling can be followed by manual dialling to supplement the dialled digits Calls originated by System Speed Dialling are restricted depending on the extension s toll restriction level Toll Restriction Override for System Speed Dialling Programming References User Programming Section 3 System Programming Inst...

Страница 449: ...0 through 59 4 Dial 0 to enter AM or dial 1 to enter PM 5 Dial 0 for a one time alarm setting 1 or dial 1 for a daily alarm setting 2 1 You hear an alarm ringing at the preset time and then the setting is cleared 2 You hear the alarm ringing at the preset time every day until the setting is changed or cancelled 6 Hang up Cancelling 1 Lift the handset 2 Dial the feature number 76 and 0 You hear a c...

Страница 450: ...or thirty seconds If you receive an incoming call during the alarm ringing starts after the alarm stops If you are having a conversation at the time the alarm is set to sound the alarm starts after the conversation Programming References User Programming Section 3 System Programming Installation Manual 000 Day and Time Set Feature References Hotel Application Timed Reminder Remote 4 3 Operator Ser...

Страница 451: ...he toll restriction level to level 2 This can be used by extension users assigned restriction levels from 3 through 8 Levels 1 and 2 are not changed A Class of Service which is assigned Account Code Entry Verified Toll Restriction Override mode permits the class members to override their toll restrictions Up to forty account codes can be programmed for Verified mode If you do not enter an account ...

Страница 452: ...ling Calls originated by System Speed Dialling are restricted depending on the extension s toll restriction level Programming References System Programming Installation Manual 509 510 Toll Restriction Level for System Speed Dialling Day Night Feature References System Speed Dialling Toll Restriction see Installation Manual ...

Страница 453: ...ion In this case all the incoming calls on the specified line are signalled b The floating number of an external pager is dialled as the Direct Dialling In DDI destination c The floating number of an external pager is assigned as the Intercept Routing destination In this case incoming calls redirected to the destination are signalled A confirmation tone is audible before being connected to the cal...

Страница 454: ...cept Routing destination c The floating number of UCD is dialled from the extension d The floating number of UCD is dialled as the DDI destination The floating number can be assigned on a hunting group basis and UCD group is based on the hunting group UCD call can arrive at the extension in log in status within the UCD group and cannot arrive at the extensions in log out status You can assign the ...

Страница 455: ...to the following services 2 Call Forwarding All Calls 3 Call Forwarding Busy 4 Call Forwarding No Answer 5 Call Forwarding Busy No Answer 3 Dial the extension number of the Voice Mail You hear a confirmation tone and then a dial tone 4 Hang up Calls directed to you are automatically forwarded to your mailbox Callers can leave their messages in the mailbox according to the Voice Mail guidance Liste...

Страница 456: ...il The call will be forwarded to the Voice Mail automatically If you do not set a Call Forwarding function The call will return to the operator Then the operator transfers the call to the Voice Mail A Voice Mail can be assigned as the destination of the following features a Call Forwarding All Calls b Call Forwarding Busy c Call Forwarding No Answer d Call Forwarding Busy No Answer e Intercept Rou...

Страница 457: ...DN telephone Features Features unavailable for ISDN telephones Account Code Entry Dialling 99 instead of as the delimiter makes this feature available Alternate Calling Ring Voice Automatic Callback Busy Camp On Call Forwarding Call Hold Call Pickup Group Call Waiting Conference Do Not Disturb DND Do Not Disturb DND Override Doorphone Call To unlock the door while talking to the doorphone Log In L...

Страница 458: ...g 8 2 User Programming Manager Programming 8 9 DPT Features 8 10 Operator Service Features 8 22 Special Display Features 8 25 DECT Portable Station Features 8 31 DSS Console Features 8 35 SLT and ISDN Telephone Features 8 36 Section 8 Quick Reference ...

Страница 459: ... 1 or 2 1 Call Waiting Tone 1 2 Call Waiting Tone 2 Press STORE button Exit the programming mode Off hook Lift the handset or press the SP PHONE MONITOR button On hook Hang up or press the SP PHONE MONITOR button This list is divided into the following eight sections Refer to each section as needed 1 Basic Operations 2 Station Programming 3 User Programming Manager Programming 4 DPT Features 5 Ope...

Страница 460: ... desired button CLR STORE NEXT or PREV if required Press HOLD END button three times Exit the programming mode Total Extension Charge Fee Reference Enter the programming mode Dial 8 Enter ID Code Dial 4 Press SEL S1 button Press the desired button CLR or STORE if required Press HOLD END button twice Exit the programming mode Total CO Line Charge Fee Reference Enter the programming mode Dial 8 Ente...

Страница 461: ...lexible button Dial 4 Press STORE button Exit the programming mode Group CO G CO Button Enter the programming mode Press the desired CO button Dial CO line group number 1 through 8 Press STORE button Exit the programming mode Hurry Up Button Enter the programming mode Press the desired CO button Dial 81 extension number Press STORE button Exit the programming mode Live Call Screening LCS Button En...

Страница 462: ...ming mode Press the desired Flexible button Dial 5 Press STORE button Exit the programming mode Single CO S CO Button Enter the programming mode Press the desired CO button Dial 0 Dial CO line number as follows 01 16 if connected to the KX TD816 01 54 if connected to the KX TD1232 Press STORE button Exit the programming mode Terminate Button Enter the programming mode Press the desired Flexible bu...

Страница 463: ...on button again Dial 1 or 2 1 Ring off 2 Ring on Press the STORE button Exit the programming mode Preferred Line Assignment Incoming Enter the programming mode Dial 2 Dial 1 2 or 3 CO line number 1 No Line Preference 2 Ringing Line Preference 3 CO line number Prime Line CO Line Preference Press STORE button Exit the programming mode Preferred Line Assignment Outgoing Enter the programming mode Dia...

Страница 464: ...the programming mode Press a Function button F1 through F10 Dial the desired number Press STORE button Exit the programming mode To store a name Enter the programming mode Press a Function button F1 through F10 Press NEXT S3 button Enter the name See the Combination Tables for information on how to enter each character Press STORE button Exit the programming mode When using a KX T7431 or KX T7433 ...

Страница 465: ...HIFT SHIFT S1 SHIFT SHIFT S2 S3 Combination Table 1 Keys 0 1 2 3 4 5 6 7 8 1 1 Q q R r S s T t 2 2 A a B b C c D d 3 3 D d E e F f G g 4 4 G g H h I i J j 5 5 J j K k L l M m 6 6 M m N n O o P p 7 7 P p Q q R r S s 8 8 T t U u V v W w 9 9 W w X x Y y Z z 0 0 A a Rotating Jog Dial Times Combination Table 2 Example for entering characters To enter the letter K Press 5 SELECT SELECT SELECT OR Press 5...

Страница 466: ...eed dial number 4 Enter a telephone number 5 Press STORE 6 Press NEXT PREV or SELECT and desired speed dial number 7 Repeat steps 4 through 6 8 Press END 3 User Programming Manager Programming 002 System Speed Dialling Name Set 1 Enter 002 2 Press NEXT 3 Enter a speed dial number 4 Enter a name 5 Press STORE 6 Press NEXT PREV or SELECT and desired speed dial number 7 Repeat steps 4 through 6 8 Pre...

Страница 467: ... a conversation While having a conversation or hearing a reorder tone after the other party hangs up Press Account button Enter account code 4 DPT Features OR When using a KX T7230 KX T7235 KX T7433 or KX T7436 Press ACCNT S3 button Enter account code Alternate Calling Ring Voice Alternating If the called extension is set to Ring Calling mode Dial when hearing a ringback tone A confirmation tone i...

Страница 468: ...hook Press HOLD button OR When using a KX T7230 KX T7235 KX T7433 or KX T7436 Press BGM S3 button Busy Station Signalling BSS While hearing a busy tone Dial 2 Wait for an answer OR When using a KX T7230 KX T7235 KX T7433 or KX T7436 Press BSS S1 button while hearing a busy tone Call Forwarding Setting All Calls Off hook Press FWD DND button Dial 2 extension number On hook Busy Off hook Press FWD D...

Страница 469: ...30 or 940 920 CFU 930 CFB 940 CFNR 90 all Dial your MSN On hook Call Hold While having a conversation Press HOLD button Retrieving a call on hold at the holding extension Press CO or INTERCOM button flashing green slowly Call Hold Exclusive While having a conversation Press HOLD button HOLD button Retrieving At the holding extension only Press CO or INTERCOM button flashing green moderately Call H...

Страница 470: ...another call on hold temporarily Press TRANSFER button Pressing this button alternates between the callers Having a conversation while having an intercom call on hold Press HOLD button Pressing this button alternates between the callers Having a conversation while having another call on hold Press HOLD button Press CO or INTERCOM button flashing red moderately Pressing this button alternates betwe...

Страница 471: ...og Lock Locking Off hook Dial 57 lock code 000 through 999 Dial the same lock code again A confirmation tone is audible On hook Unlocking Off hook Dial 57 lock code A confirmation tone is audible On hook CO Incoming Call Information Log Mode Setting Cancelling Off hook Dial 56 Dial 1 or 0 1 for setting 0 for cancelling A confirmation tone is audible On hook Conference While having a conversation P...

Страница 472: ...ation tone is audible On hook Unlocking Off hook Dial 77 lock code A confirmation tone is audible On hook Emergency Call Off hook Press a CO button Dial the desired emergency number Do Not Disturb DND Setting Off hook Press FWD DND button Dial 1 Dial the extension number 0 or extension number backup station 0 operator backup station no backup A confirmation tone is audible On hook Cancelling Off h...

Страница 473: ...ng Off hook Dial the extension number Live Call Screening LCS Setting the password Off hook Dial 799 Enter the password Enter the same password again On hook Cancelling the password Off hook Dial 799 Enter the password On hook Setting Live Call Screening Press LCS button Enter the password Cancelling Live Call Screening Press LCS button In the Hands free mode Having a conversation with the party O...

Страница 474: ... Cancelling Off hook Dial 700 extension number A confirmation tone is audible On hook Checking and Selecting a message by the receiver Press MESSAGE button repeatedly until the desired message appears Calling back the message sender Off hook Press MESSAGE button or dial 702 Clearing all messages by the message receiver Off hook Dial 700 your extension number Microphone Mute Setting Cancelling Whil...

Страница 475: ...udible Talk OR When using a KX T7230 KX T7235 KX T7433 or KX T7436 Press BSS S1 button while hearing a busy tone Off Hook Monitor Setting Cancelling During a conversation using a handset Press SP PHONE button One Touch Dialling Off hook Press an One Touch Dialling button Operator Call General Call Off hook Dial 0 Specific Call Off hook Dial the operator call number Outward Dialling Line Access Aut...

Страница 476: ...r To answer a page sent to the external pager TAFAS 43 To answer a page sent to the built in speaker Paging DENY Setting Cancelling Off hook Dial 721 Dial 1 or 0 1 for setting 0 for cancelling A confirmation tone is audible On hook Paging and Transfer To transfer Press TRANSFER button before dialling the paging feature number 62 or 63 Check the feature number you wish to use in the Paging section ...

Страница 477: ...uick Dialling Off hook Dial the quick dial number Recall To make another call without hanging up Press RECALL or FLASH RCL button Dial the phone number Redial Last Number Off hook Press REDIAL button Saved Number Storing While having a conversation or hearing a busy tone Press AUTO DIAL STORE button Press SAVE button Dialling Off hook Press SAVE button Station Feature Clear Off hook Dial 790 A con...

Страница 478: ...irmation tone is audible On hook Checking the setting time Off hook Dial 762 Trunk CO Line Answer From Any Station TAFAS Off hook Dial 42 Dial external pager number as follows 1 2 if connected to the KX TD816 1 4 if connected to the KX TD1232 Two Way Recording into the Voice Mail Recording into your mailbox Press Two Way Record button Stopping recording Press Two Way Record button Recording into a...

Страница 479: ...rry Up Transfer While having a conversation Press Hurry Up button Background Music BGM External Setting Cancelling Off hook Dial 65 On hook OR When using a KX T7235 Press Features F4 button Press NEXT S3 button repeatedly until Extrn BGM On Off is displayed Press the Function button which is next to the message displayed On hook OR When using a KX T7433 or KX T7436 Press Features F4 or FEAT S3 but...

Страница 480: ...n If you want to clear the notification Press CLR S2 button If you want to go to the next unanswered extension Press NEXT S3 button If you want to exit Press MENU S1 button Class of Service COS Switch Primary switch Off hook Dial 79 Dial 1 or 3 1 for primary 3 for secondary Dial the extension number On hook OR When using a KX T7235 Press Features F4 button Press NEXT S3 button repeatedly until COS...

Страница 481: ...EXT S3 button Enter hour and minute Dial 0 or 1 0 for AM 1 for PM Dial 0 or 1 0 for a one time setting 1 for a daily setting Press PROG S3 button Cancelling Press Hotel F10 button Press Wake up F3 button Dial the extension number or DSS button Press NEXT S3 button Press CLR S2 button Checking the setting time display DPT only Off hook Dial 7 2 Dial desired extension number or DSS button On hook OR...

Страница 482: ...k No Answer Off hook Press FWD DND button Press FWD No Answer F5 button Dial the extension number On hook Busy No Answer Off hook Press FWD DND button Press NEXT S3 button Press FWD BSY NA F1 button Dial the extension number On hook to Outside Line Off hook Press FWD DND button Press NEXT S3 button Press FWD CO Line F2 button Dial the line access code 9 or 81 through 88 Dial the phone number On ho...

Страница 483: ...g a KX T7235 Press Extension F3 button Press the desired Function button Example To select B press F1 Press the desired Function button Example To select Beth press F5 F2 F1 F3 F4 F5 F7 F6 F8 F9 F10 S2 S3 S1 AB KL C MN DE OPQR FG S HIJ T Z MENU F2 F1 F3 F4 F5 F7 F6 F8 F9 F10 S2 S3 S1 Adam Alice Ann Parker Ben Johns Beth MENU PREV NEXT Bob Carol Casey Ched Ely Chris Do Not Disturb DND Setting Cance...

Страница 484: ...1 9 123 4567 9 987 6543 9111111 95555555 93333333 9 999 97777777 Not Stored 100 9 1000001 NEXT MENU To toggle the display between the name and number press the NEXT S3 button System Speed Dialling When using a KX T7235 Press SYS Speed F9 button Press the desired Function button Example To select J press F5 Press the desired Function button Example To select Jack press F6 F2 F1 F3 F4 F5 F7 F6 F8 F9...

Страница 485: ...ss SELECT button KX T7433 Select ABST MSG Off and press SEL S3 button KX T7436 Select Absent MSG Off and press SEL S3 button System Feature Access Menu To use the System Feature Access Menu follow the steps below When using a KX T7235 Press Features F4 button Press NEXT S3 repeatedly until the desired feature message is displayed Press the desired Function button which is next to the message Enter...

Страница 486: ...ess SELECT button KX T7433 Select MSG Off and press SEL S3 button KX T7436 Select Message Off and press SEL S3 button Dial the extension number Night Service On Off operator pre assigned extension only KX T7235 Press the Function button which is next to Night On Off KX T7431 Select Night Mode and press SELECT button KX T7433 Select Night Mode and press SEL S3 button KX T7436 Select Night On Off an...

Страница 487: ...which is next to Paging Ext Answer KX T7431 Select Page E ANS and press SELECT button KX T7433 Select Page E ANS and press SEL S3 button KX T7436 Select Paging Ext Answer and press SEL S3 button Dial external pager number as follows 1 2 if connected to a KX TD816 1 4 if connected to a KX TD1232 To answer Paging Group KX T7235 Press the Function button which is next to Paging GRP Answer KX T7431 Se...

Страница 488: ...on twice during a conversation Retrieving a call on exclusive hold Press a Flexible CO or Intercom button which is flashing green moderately Retrieving an outside call on hold at another extension Press a Flexible CO button which is flashing red slowly Retrieving an intercom call on hold at another extension Dial 51 Enter the holding extension number Key Lock Setting Setting Cancelling while on ho...

Страница 489: ...dly until the desired item is displayed Press OK button Enter or edit the name up to 10 characters See the Combination Table for information on how to enter each character Press OK button Enter or edit the phone number up to 16 digits including the CO line access code Press OK button On hook Call Directory Dialling Dialling by selecting the name Press Book button repeatedly until the desired direc...

Страница 490: ...tion Features Key Operations Press Function button Press OK button Press Book repeatedly until the desired button is displayed Press OK button On hook Super EXtra Device Ports SXDP Setting Off hook Dial 481 Enter the wired extension number A confirmation tone is audible On hook Cancelling Off hook Dial 480 A confirmation tone is audible On hook Keys 1 2 3 4 5 6 7 8 9 1 Ä ä Ö ö Ü ü 1 2 A a B b C c ...

Страница 491: ... Function button Press Book button twice to select PROGRAMMING Press OK button Press OK button to select PS PROGRAM Press Next or Previous button repeatedly to select PS PASSWORD or DECT SYS LOCK Press Book button repeatedly to select ENABLE Press OK button Enter the password 4 digits Press OK button Enter the same password again Press OK button On hook Cancelling the PS Programming DECT System Lo...

Страница 492: ...s RELEASE button on the console The DSS Console must always be paired with a PT for proper operation System programming is required For programming instructions please consult with your dealer Station Programming Extension Number Assignment Press PROGRAM button dial 99 Press the desired DSS button Dial 1 Dial the desired extension number Press STORE button Press PROGRAM button One Touch Dialling A...

Страница 493: ...y 01 through 31 Out Until date 6 In a Meeting 7 through 9 Programmable On hook Cancelling Off hook Dial 7500 On hook Account Code Entry Off hook Dial 49 account code up to five digits Alternate Calling Ring Voice Alternating If the called extension is set to Ring Calling mode Dial when hearing a ringback tone A confirmation tone is audible Voice Calling mode is active If the called extension is se...

Страница 494: ... 50 A confirmation tone is audible On hook Retrieving at the holding extension Off hook Dial 50 Call Forwarding Setting All Calls Off hook Dial 7102 extension number On hook Busy Off hook Dial 7103 extension number On hook No Answer Off hook Dial 7104 extension number On hook Busy No Answer Off hook Dial 7105 extension number On hook to CO Line Off hook Dial 7106 line access code 9 or 81 through 8...

Страница 495: ...ark Setting While having a conversation Press Register Recall button A confirmation tone is audible Dial 52 parking zone number 0 through 9 A confirmation tone is audible On hook Retrieving Off hook Dial 52 parking zone number Call Pickup CO Line Off hook Dial 4 Directed Off hook Dial 41 extension number Group Off hook Dial 40 Call Pickup Deny Setting Cancelling Off hook Dial 720 Dial 1 or 0 1 for...

Страница 496: ...ing In Calls Setting Cancelling Off hook Dial 54 Dial 1 or 0 1 for setting 0 for cancelling On hook Do Not Disturb Override Dial 2 while hearing a Do Not Disturb tone Call Transfer to Extension Screened Call Transfer While having a conversation Press Register Recall button Dial the extension number Wait for an answer and announce On hook Unscreened Call Transfer While having a conversation Press R...

Страница 497: ...k Electronic Station Lockout Locking Off hook Dial 77 lock code 000 through 999 Dial the same lock code again A confirmation tone is audible On hook Unlocking Off hook Dial 77 lock code A confirmation tone is audible On hook Emergency Call Off hook Dial the line access code 9 or 81 through 88 Dial the desired emergency number External Feature Access While having a conversation Press Register Recal...

Страница 498: ... Call Announcement OHCA While hearing a busy tone Dial 2 A confirmation tone is audible Talk Operator Call General Off hook Dial 0 Specific call Off hook Dial the operator call number Outward Dialling Line Access Automatic Off hook Dial 9 phone number Line Access CO Line Group Off hook Dial 8 CO line group number 1 through 8 Dial the phone number Paging All Off hook Dial 62 or 63 A confirmation to...

Страница 499: ...nd Transfer To transfer Press Register Recall button before dialling the paging feature number 62 or 63 Check the feature number you wish to use in the Paging section Pickup Dialling Hot Line Programming the phone number Off hook Dial 742 phone number A confirmation tone is audible On hook Setting Cancelling Off hook Dial 74 Dial 1 or 0 1 for setting 0 for cancelling A confirmation tone is audible...

Страница 500: ...a daily setting On hook Cancelling Off hook Dial 760 A confirmation tone is audible On hook Trunk CO Line Answer From Any Station TAFAS Answering the external pager Off hook Dial 42 Dial external pager number as follows 1 2 if connected to the KX TD816 1 4 if connected to the KX TD1232 Voice Mail Integration Setting Call Forwarding destination to Voice Mail Off hook Dial 710 Call Forwarding number...

Страница 501: ......

Страница 502: ...Contents Display Examples 9 2 Feature Number List 9 9 Tone List 9 12 Troubleshooting 9 14 Section 9 Appendix ...

Страница 503: ...or remote access Class of Service COS Switch is set to primary status Class of Service COS Switch is set to secondary status Called by the ISDN line with the CLIP feature phone number CLIP Provides you with a caller s information such as his her name and telephone number on the CO line assigned to receive ISDN service calls For more details please consult with your dealer Called by the ISDN line w...

Страница 504: ...ete to set Camp On Complete to set Camp On Complete to set Camp On Complete to set Camp On when there is no idle CO line Complete to set Call Forwarding to ISDN Line CFB Cancel Call Forwarding to ISDN Line CFB Complete to set Call Forwarding to ISDN Line CFNR Cancel Call Forwarding to ISDN Line CFNR Complete to set Call Forwarding to ISDN Line CFU Cancel Call Forwarding to ISDN Line CFU Cancel Cal...

Страница 505: ...status Cancel Night mode Night Service Complete to set Do Not Disturb DND Complete to set Do Not Disturb for Direct Dialling In Call Cancel Do Not Disturb for Direct Dialling In Call Confirm key programming on the FWD DND button Complete to open the door Make or receive a doorphone call Conference with an extension and CO line Conference with two extensions Pressing Account Button Account Code Ent...

Страница 506: ... Not Disturb DND Absent Message 2 Access to Paging Group to a particular extension group Access to Paging Group to all extensions Volume Control handset on handset mode Volume Control headset on headset mode Absent Message 6 Complete to set CO Incoming Call Information Log Mode Cancel CO Incoming Call Information Log Mode Complete to set Live Call Screening LCS Cancel Live Call Screening LCS Compl...

Страница 507: ...d Telephone Connection Not complete to set Call Park Entered the Station Programming mode Complete to set the LCS password Live Call Screening LCS Cancel the LCS password Live Call Screening LCS Called by transfer recall with name Call Transfer Called by transfer recall without name Call Transfer An outgoing call is restricted Volume Control ringer on idle status Volume Control speaker on handsfre...

Страница 508: ...on is assigned Total CO line meter is assigned Total CO line charge in Pounds is assigned Total extension meter is assigned Total extension charge in Pounds is assigned Complete to lock the other extension Remote Station Lock Control An extension is not locked The display of an extension is not locked All extensions are not locked The display of all extensions are not locked DSS or Phantom Extensi...

Страница 509: ...le Line Preference Outgoing Select No Line Preference Outgoing SAVE button is assigned Terminate button is assigned Select Ring Calling mode Select ringing tone for a CO button or intercom calls Group CO G CO button is assigned Voice Mail VM Transfer button is assigned Select Voice Calling mode Two Way Record button is assigned Two Way Transfer button is assigned One Touch Dialling button is assig...

Страница 510: ...de 1 0 1 0 1 EXTN 1 0 1 0 1 0 1st hundred extension block 2nd hundred extension block 3rd through 16th hundred extension block Absent Message Capability set cancel Account Code Entry Automatic Callback Busy Camp On cancel Background Music BGM External on off Call Forwarding All Calls Busy No answer Busy No answer set cancel Call Forwarding to CO Line set cancel Call Forwarding Follow Me set cancel...

Страница 511: ...l Feature Access Live Call Screening Password set cancel Log In Log Out Message Waiting set cancel callback Night Service night mode day mode Off Hook Call Announcement OHCA set cancel Operator Call General call Operator Call Specific call Outward Dialling Line Access Automatic LCR Outward Dialling Line Access CO Line Group Paging All Paging External Paging External Answer TAFAS Answer Paging Grou...

Страница 512: ...is on hook Day Night mode display Time display date display switching Default 6 2 2 2 2 99 3 5 Conditions Extension numbers can be two to four digits in length Any number can be set as the leading first or second digit Flexible feature numbers can only be dialled during dial tone When or are included in a feature number it will not be possible for users of loop disconnect LD telephones to access t...

Страница 513: ...Appendix 1 sec Confirmation Tone 1 Confirmation Tone 2 Confirmation Tone 3 Confirmation Tone 4 Dial Tone 1 Dial Tone 2 Dial Tone 4 Busy Tone Ringback Tone Do Not Disturb DND Tone Reorder Tone Dial Tone 3 TONE Tone List ...

Страница 514: ...ONE Call Waiting Tone 1 RING TONE 1 sec Outside Calls Outside Hold Recall Intercom Calls Intercom Hold Recall Doorphone Calls Timed Reminder Callback Ringing Camp on Recall Hold Tone 5 sec Call Waiting Tone 2 intercom Call Waiting Tone 2 CO 4 sec ...

Страница 515: ...enter Troubleshooting Set Time Date 1 Jan 12 00AM 1 Jan 1994 SAT If a power failure should happen Your system enables conversations between specific CO lines and extensions Power Failure Transfer and supports system data backup Power Failure Transfer SLT are automatically connected straight to specific CO lines This provides CO line conversations between SLTs and the following CO lines Up to three...

Страница 516: ......

Страница 517: ...Panasonic Business Systems U K Panasonic House Willoughby Road Bracknell Berkshire RG12 4FP Printed in the United Kingdom PSQX1048VA KS1198MT0 ...

Страница 518: ...To expand the sub menu left click the mouse on the symbol located to the left of the selected text for version 3 Adobe Reader for version 4 Adobe Reader ...

Отзывы: