7. Answering Machine
70
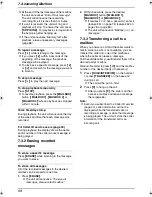
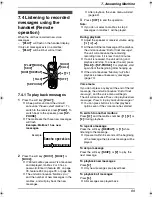
To stop playback temporarily
Press
{
9
}
.
L
To resume operation, enter a remote
command within 15 seconds, or the voice
menu will start (page 69).
To turn OFF the AUTO ANSWER mode
Press
{
0
}
.
L
The receiving mode will be set to TEL mode.
To turn ON the AUTO ANSWER mode
Press
{
8
}
.
L
When AUTO ANSWER is turned ON, the
receiving mode will be set to FAX ONLY or
TAM/FAX mode, depending on the setting of
feature #77 (page 80).
For Caller ID service users (page 43)
During playback, the display shows the name
and/or number of the caller whose message is
being played.
To call the displayed number:
1.
Press the soft key (
{
CALL
}
).
L
The unit stops playback.
L
If you need to edit the phone number to
call back, see page 45.
2.
Press the soft key (
{
CALL
}
),
{
TALK
}
, or
{
SP-PHONE
}
.
L
The unit dials the phone number.
7.4.2 Erasing recorded
messages
To erase a specific message
Press
{*}{
4
}
while listening to the message you
want to erase.
L
A short beep will sound and the next
message will be played.
To erase all messages
Press
{*}{
5
}
while listening to a message.
L
A long beep will sound and the unit will
announce
“Mailbox (no.), no messages.”
.
Memo Message
7.5 Leaving a message for
others or yourself
You can record a voice memo to leave a private
message for yourself or someone else.
L
Keep the front cover page open for button
locations.
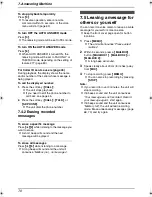
1
Press
{
MEMO
}
.
L
The unit will announce
“Please select
mailbox.”
.
2
Within 5 seconds, press a
{
MAILBOX
}
button (
{
MAILBOX 1
}
,
{
MAILBOX 2
}
or
{
MAILBOX 3
}
).
L
A long beep will sound.
3
Speak clearly about 20 cm (8 inches) away
from
{
MIC
}
.
4
To stop recording, press
{
MEMO
}
.
L
You can also stop recording by pressing
{
STOP
}
.
Note:
L
If you record for over 3 minutes, the unit will
stop recording.
L
If 6 beeps sound and the unit announces
“Your message was not recorded. Record
your message again.”
, start again.
L
If 6 beeps sound and the unit announces
“Memory full”
, the unit will exit recording
mode. Erase unnecessary messages (page
68, 70) and try again.
FPG391_en.book Page 70 Friday, July 16, 2004 5:38 PM
Содержание KX-FPG391 - Fax / Copier
Страница 123: ...13 Index 121 W Wall mounting 21 ...
Страница 124: ...122 ...
Страница 125: ...123 ...


