background image

- 84 -

Change the thumbnail display

While the thumbnail is displayed, the thumbnail display changes in 
the following order if the zoom lever or the sub zoom lever is 
operated to 

 side or 

 side.

* Detailed information of the scene is displayed when playing back motion pictures. Following 

information is displayed.
START TC and DURATION are displayed only for AVCHD scenes.

j

START TC

j

DATE

j

TIME ZONE

j

DURATION

j

REC MODE

j

FORMAT

If you press the THUMBNAIL button to switch between Recording Mode and Playback Mode, the 
thumbnails of 9 scenes will be displayed.

By displaying in 1 scene, recording date and time are displayed when playing back motion 
pictures, and recording date and file number when playing back still pictures.

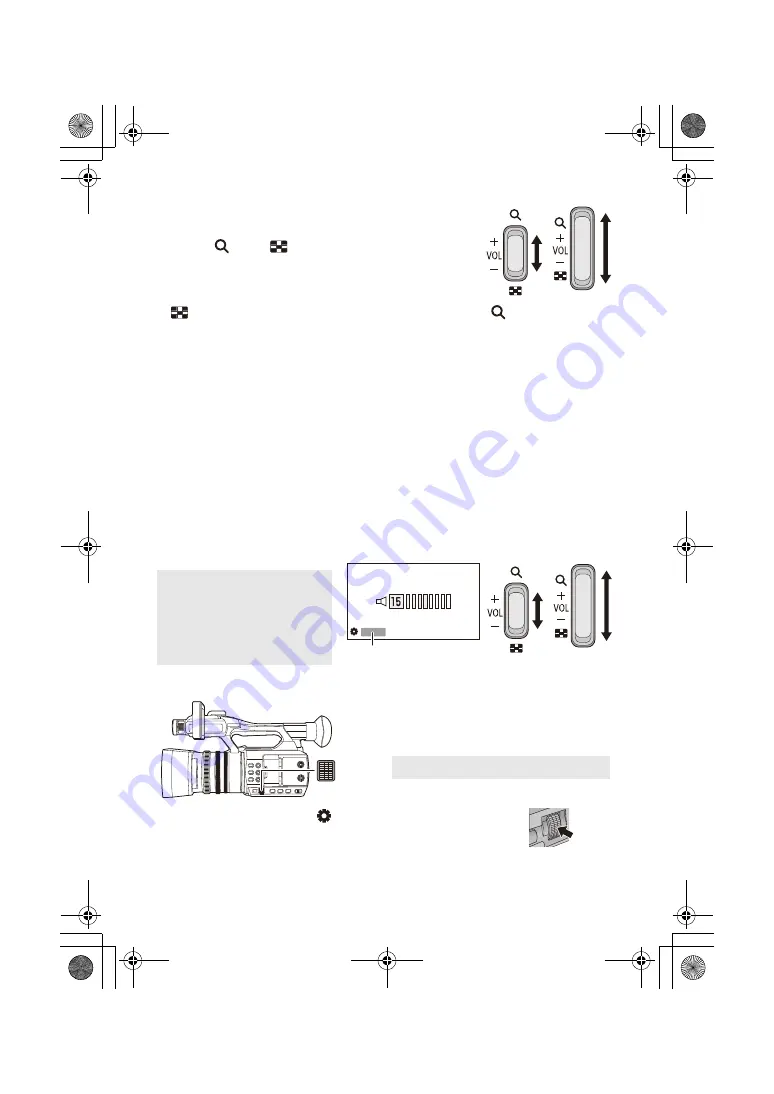
Speaker/Headphone volume adjustment

Operate the volume lever, sub zoom lever or jog dial to adjust the speaker/headphone volume 
during Motion Picture Playback Mode.

Adjusting the volume with the volume lever/sub zoom lever

Adjusting the volume with the jog dial

1

Push the jog dial while [

VOLUME] is displayed.

(

 side)

(

 side)

20 scenes 

() 

9 scenes 

() 

1 scene 

()

 Scene information display

*

T

T

W

W

T

T

W

W

W

W

Towards “

r

”:

Increases the volume

Towards “

s

”:

Decreases the volume

A

[VOLUME]

T

T

W

W

T

T

W

W

W

W

A

Jog dial

SEL/

PUSH

SET

HC-PV100_GC_GW_SQW0750-1_mst.book  84 ページ  2018年11月16日 金曜日 午後5時14分

Содержание HC-PV100

Страница 1: ...Instructions High Definition Video Camera Model No HC PV100 Please read these instructions carefully before using this product and save this manual for future use SQW0750 2 HC PV100_GC_GW_SQW0750 2_e...

Страница 2: ...t is well ventilated Do not obstruct this unit s ventilation openings with newspapers tablecloths curtains and similar items Do not place sources of naked flames such as lighted candles on this unit T...

Страница 3: ...ment and Batteries Only for European Union and countries with recycle systems These symbols are only valid in the European Union and countries with recycle systems If you wish to discard this product...

Страница 4: ...ser s ears Make sure to use the supplied cords and cables If you use optional accessories use the cords and the cables supplied with them Do not extend the cords and the cables Do not spray insecticid...

Страница 5: ...emperature and the effect increases the more the temperature rises or falls In cold areas the full charge indication may not appear or the low battery indication may appear about 5 minutes after start...

Страница 6: ...or the temperature of the battery is too high or low It can be charged but it may take a few hours to complete the charging normally Once normal charging starts the charging lamp lights up green Howev...

Страница 7: ...sing a soft cloth such as a lens cloth Do not touch the LCD monitor with your finger nails or rub or press with strong force It may become hard to see or hard to recognize the touch when the LCD prote...

Страница 8: ...When the difference in temperature is severe place the unit in a plastic bag or the like remove air from the bag and seal the bag When condensation has occurred remove the battery and or the AC adapt...

Страница 9: ...2 Setting date and time 33 Using the menu screen 34 Recording Before recording 35 Selecting a media to record 35 Formatting media 36 Recording motion picture 37 Recording still pictures 38 Intelligent...

Страница 10: ...ting to a PC 100 About the PC display 101 Copying playing back with an external media device 103 Preparing for copying playing back 103 Copy once 105 Copy selected files 106 Playing back the External...

Страница 11: ...ways use A HC PV100GW D K2CP2YY00083 AV cable K2KYYYY00048 Eye cup l 20 SYA0019 Lens cap l 19 SYA0073 Lens hood 1 l 19 SYK1497 SYA0021 Microphone holder l 21 VYC1146 INPUT terminal cap 2 caps 2 l 21 V...

Страница 12: ...or to the front side of the lens Optional accessories Unidirectional microphone AG MC200G Battery pack VW VBD58 AG VBR59 AG VBR89 Battery charger AG BRD50 Filter kit VW LF49N Attaching the Filter Kit...

Страница 13: ...to perform nonlinear editing on another device PC etc This unit supports USB 2 0 1 SD cards are optional and not supplied with this unit 2 A USB 2 0 cable is not supplied with this unit Use a commerci...

Страница 14: ...HDMI cable If possible we recommend using a cable with a length of 3 m or less USB Host Mode Refer to the following support site for information about an external media device http panasonic jp suppor...

Страница 15: ...on REC CHECK l 62 67 11 Status indicator l 27 12 Power switch l 27 13 Recording start stop button l 37 14 DC input terminal DC IN l 23 15 Charging lamp CHG l 23 16 Camera remote terminal CAM REMOTE l...

Страница 16: ...button LCD EVF l 62 30 User 2 button B LIGHT l 62 31 User 3 button O I S l 62 32 Focus ring l 44 33 Zoom ring l 42 34 Iris ring l 51 35 Ring LED l 134 36 Menu button MENU l 34 37 Jog dial SEL PUSH SET...

Страница 17: ...lamp card 1 l 26 49 Card slot 1 l 26 50 Access lamp card 2 l 26 51 Card slot 2 l 26 52 INPUT1 INPUT2 switches l 56 53 CH1 CH2 switches l 56 54 AUDIO LEVEL CH1 AUDIO LEVEL CH2 knobs l 58 55 LCD monito...

Страница 18: ...1 66 Sub recording start stop button l 121 This button functions in the same manner as the recording start stop button 67 LED LIGHT switch l 43 Turns on off the built in LED light 68 Thumbnail button...

Страница 19: ...icks into place Depending on the various filters or the MC protector attached to the front side of this unit s lens you may not be able to attach the lens hood Attaching removing the lens cap Protect...

Страница 20: ...rusion at the inside of the eye cup The illustration below is an example of attaching the eye cup to use it with your right eye If you rotate the eye cup to the left by 180 before attaching it you can...

Страница 21: ...o the microphone holder and tighten the microphone holder screw 3 Connect the external microphone to the AUDIO INPUT1 terminal XLR 3 pin When wiring the microphone cable use the cable clamper of this...

Страница 22: ...l protection to meet the requirements of appropriate safety standards There is a possibility that these battery packs may lead to fire or explosion Please be advised that we are not liable for any acc...

Страница 23: ...o direct sunlight for a long period of time with doors and windows closed When this unit is purchased the battery is not charged Charge the battery fully before using this unit for the first time 1 Co...

Страница 24: ...turning the unit on off moving the zoom lever etc The batteries heat up after use or charging This is not a malfunction Batteries that support quick charging For quick charging of a battery AG VBR59...

Страница 25: ...to 32 GB SDXC Memory Card 48 GB to 128 GB When using an SDHC Memory Card SDXC Memory Card with other equipment check the equipment is compatible with these Memory Cards We do not guarantee the operati...

Страница 26: ...ard j Turn the unit off j Insert and remove the USB Cable j Expose the unit to vibrations or shock Performing the above while the lamp is on may result in damage to data SD card or this unit Do not ex...

Страница 27: ...cording start stop button or sub recording start stop button in Playback Mode the mode will be switched to Recording Mode and recording will start Preparation Turning the unit on off Preparation Selec...

Страница 28: ...efault Please refer to page 62 for details about setting the USER button When the recording screen is displayed press the USER button to which LCD EVF OUTPUT is registered Switches the setting each ti...

Страница 29: ...act part A and extract the LCD monitor until it clicks into position 2 Rotate to the position that is easy to view To retract the LCD monitor Retract as shown in the figure with the LCD facing downwar...

Страница 30: ...with hard pointed tips such as ball point pens LCD monitor adjustment These settings will not affect the images actually recorded This makes it easier to view the LCD monitor in bright places includi...

Страница 31: ...y 1 Adjust the viewfinder to suit your vision so that you can see the display images clearly Be careful not to trap your fingers when moving the viewfinder The viewfinder can be lifted vertically up t...

Страница 32: ...de Displaying during the recording yourself can be switched by setting SELF SHOOT l 132 Only some indications will appear on the screen when the SELF SHOOT is set to MIRROR When appears return the dir...

Страница 33: ...or or attach a charged battery to this unit Leave the unit as it is for approx 24 hours and the battery will maintain the date and time for approx 6 months The battery is still being recharged even if...

Страница 34: ...the MENU button 2 Touch the top menu A 3 Touch the submenu B Next Previous page can be displayed by touching 4 Touch the desired item to enter the setting 5 Touch EXIT to exit the menu setting Prepara...

Страница 35: ...media is selected separately for motion pictures or still pictures and is then highlighted in yellow 3 Touch EXIT to complete the setting In the following situation if you start recording with normal...

Страница 36: ...two SD cards format both SD cards 1 Select the menu 2 Touch SD CARD 1 or SD CARD 2 When formatting is complete touch EXIT to exit the message screen Do not turn this unit off or remove the SD card whi...

Страница 37: ...ording start stop button to start recording and pressing it again to pause recording become one scene Recording Recording motion picture ON OFF REC TC 00 00 00 00 TC 00 00 00 00 TC 00 00 00 00 50 00i...

Страница 38: ...utton icons refer to page 62 When still pictures are being recorded the remaining recordable number of still pictures and the still picture indication are displayed About the screen indications while...

Страница 39: ...es that can be displayed is 9999 If the number of recordable pictures exceeds 9999 R 9999 is displayed The number will not change when the picture is taken until the number of recordable pictures is 9...

Страница 40: ...uto Mode Image Stabilizer will be set to ON l 77 If you set the Image Stabilizer to setting canceled in Manual Mode and then switch to Intelligent Auto Mode the Image Stabilizer setting that is select...

Страница 41: ...ind dirty or dusty window j Recording a subject that is surrounded by objects with glossy surfaces or by highly reflective objects Camera controls that are disabled in Intelligent Auto Mode The follow...

Страница 42: ...the zoom lever during zoom operation the operation sound may be recorded When returning the zoom lever to the original position move it quietly The sound of the zoom mechanism becomes louder than usua...

Страница 43: ...t Using the diffusion filter The supplied diffusion filter softens the light by reducing its glare Use the diffusion filter when the built in LED light is too bright Using the color conversion filter...

Страница 44: ...pprox the unit switches to the macro range and or The unit may switch to the macro range even when the distance to the subject is 1 5 m or more depending on the subject Depending on the zoom magnifica...

Страница 45: ...ode once the image is focused or a certain time has elapsed One Push AF does not work in following cases j When Auto Focus is used Push AF If you press and hold the USER button to which PUSH AF is reg...

Страница 46: ...s set to BOTH FOCUS ASSIST 2 is not available In addition the USER button to which FOCUS ASSIST 2 is registered is disabled Selecting a Focus Assist method SW SETUP FOCUS ASSIST 1 desired setting EXPA...

Страница 47: ...level You can adjust the magnification from 3k to 10k Moving the magnified area Touch or slide the screen while touching it to move the magnified area To change the peaking settings If you set Focus A...

Страница 48: ...a TV Freeze Frame is not available when you use Focus Assist l 68 Peaking may not be displayed when you use Digital Zoom l 66 To zoom in and use peaking at the same time we recommend increasing the ma...

Страница 49: ...ent Auto Mode 2 You can set this mode with a USER button Recording White Balance Mode Settings ATW ATW 1 It will automatically adjust in accordance with the recording condition LOCK ATW Lock 2 It will...

Страница 50: ...which ATW LOCK is registered or touch the applicable USER button icon To cancel ATW Lock press the USER button or touch the USER button icon again Canceling ATW Lock will return the White Balance mode...

Страница 51: ...alance Auto Black Balance cannot be performed an error message WB SET NG or BB SET NG is displayed on the screen In such case use other mode Settings assigned to Ach or Bch can be finely adjusted in A...

Страница 52: ...cklight Compensation If you enable BACKLIGHT COMPENS in Auto Iris Mode automatic iris control will be activated for backlight compensation brightening the screen image by preventing subjects from appe...

Страница 53: ...a setting in SCENE MODE is enabled l 111 j During Freeze Frame l 68 If the gain value is increased the noise on the screen increases In Auto Iris Mode or Auto Shutter Mode the screen brightness may n...

Страница 54: ...touch the applicable USER button icon To cancel Super gain press the USER button or touch the USER button icon again To change the gain value of Super Gain Select the menu Super Gain is not available...

Страница 55: ...bject that is shining very bright or highly reflective During normal playback image movement may not look smooth If you record an extremely bright object or record under indoor lighting color and scre...

Страница 56: ...Switching Audio Input Using the built in microphone Audio is recorded with the built in microphone 2 ch when the CH1 switch is set to INT L and the CH2 switch is set to INT R Recording Audio Input Rec...

Страница 57: ...d to channel 1 4 Use the CH2 switch to select the input signal to be recorded to audio channel 2 INT R Audio from the built in microphone R right ch is recorded to audio channel 2 INPUT1 Audio from a...

Страница 58: ...CH2 1 Select the menu 2 If you have set to MANUAL Adjust the input level operating the AUDIO LEVEL CH1 AUDIO LEVEL CH2 knobs Adjust confirming the audio level meter Remove while pushing on the PUSH s...

Страница 59: ...en ALC works for either of the audio channels it will also work for the other audio channel 1 Set AUDIO LEVEL CH1 AUDIO LEVEL CH2 to MANUAL l 58 2 Set AUDIO ALC CH1 AUDIO ALC CH2 to ON 3 Select the me...

Страница 60: ...ly selected during PRE REC l 72 124 It is automatically set to REC RUN in following cases j During Super Slow Recording l 73 j During the Interval Recording l 123 Recording Counter display Counter dis...

Страница 61: ...nute second When REC COUNTER is set to TOTAL SCN 0 00 00 hour minute second When REC COUNTER is set to SCENE Select the counting method during the recording Select the menu To reset the Recording Coun...

Страница 62: ...default settings Performing YES in INITIAL SET restores these default settings l 135 Using the USER button To use the function assigned to a USER button or USER button icon press the applicable USER...

Страница 63: ...Select the menu Check the setting of the USER buttons Functions of the USER button List of USER button functions USER6 USER7 USER8 USER9 USER SW USER BUTTON DISPLAY ON or OFF To check the USER button...

Страница 64: ...the Focus Assist method in FOCUS ASSIST 2 in the SW SETUP menu When FOCUS ASSIST 1 in the SW SETUP menu is set to BOTH the USER button is disabled REC CHECK REC C Recording Check LAST SCN DEL LstDel L...

Страница 65: ...de to a USER button l 62 Fade in fade out effect white can be added to the video and audio that is being recorded Press USER button or touch USER button icon in the recording screen Fade out will star...

Страница 66: ...ng When using Digital Zoom the larger you set the zoom magnification the lower the picture quality becomes Digital Zoom is not possible in following cases j During Freeze Frame l 68 j When using Area...

Страница 67: ...Check is not possible in following cases j When the unit is turned on off j When the THUMBNAIL button is pressed j When the SD card is inserted removed j When the setting of REC FORMAT is changed l 1...

Страница 68: ...will be recorded You can perform the following camera operations during Freeze Frame Other camera operations will be disabled j Recording motion pictures j Canceling Freeze Frame This function is not...

Страница 69: ...the USER button With a USER button icon 1 Touch and hold the recording screen to display operation icons 2 Touch the USER button icon To change the size of the area frame You can rotate the jog dial t...

Страница 70: ...he luminance level will not be displayed if AREA MODE is set to FOCUS IRIS or FOCUS IRIS Register Push AF to a USER button l 62 You can use One Push AF and Push AF l 45 Register Capture to a USER butt...

Страница 71: ...ing this unit up or down at an angle closer to perpendicular Register Level Shot Function to a USER button l 62 This function detects the horizontal tilt of the unit and automatically corrects it to t...

Страница 72: ...ress the recording start stop button AVCHD scenes will be recorded from approximately 3 seconds before the operation while MOV MP4 will be recorded from approximately 4 seconds before the operation P...

Страница 73: ...button or touch USER button icon Frame rates and their effects The slow motion speed during playback varies depending on the frame rate in REC FORMAT This function can also be set from the menu RECOR...

Страница 74: ...start stop button as soon as recording has started it may take some time until the recording stops The maximum continuous recordable time for one scene in Super Slow Recording varies depending on the...

Страница 75: ...erformed with the external device press the applicable USER button or touch the applicable USER button icon again When is displayed signals will be transmitted prompting the external device to stop th...

Страница 76: ...one display l 139 Touch To cancel this display mode touch again To display the Mode Information If you touch and hold a list of functions assigned to the USER buttons USER1 to USER5 and the settings o...

Страница 77: ...g l 73 The setting of this function cannot be changed during Freeze Frame l 68 Stabilization may not be possible under strong shaking conditions When using a tripod we recommend that you set the Image...

Страница 78: ...es the adjustment of the brightness of the object easier by checking the luminance level of the object when recording same object in different surroundings Luminance level C is displayed between 0 and...

Страница 79: ...Example When adjusting the brightness for LCD SET 1 Rotate the jog dial to move the cursor to the value display A Push the jog dial to select the value display 2 Rotate the jog dial to adjust the set...

Страница 80: ...ance mode SHUTTER Shutter speed l 55 Adjusts the shutter speed AREA Area Mode l 69 Changes the area frame setting ASSIST Focus Assist l 46 Changes the magnification level of the magnified display VOLU...

Страница 81: ...128 1 Connect headphones to the headphone terminal 2 Rotate the jog dial to adjust the volume Actual volume to be recorded does not change 3 Push the jog dial to finish the adjustment You can also ad...

Страница 82: ...nes recorded in FHD 1920k1080 If you touch the recording format option ALL all scenes of the same recording mode in the selected media are displayed The thumbnails of scenes recorded on other devices...

Страница 83: ...screen while an operation icon is being displayed or do not touch the icon for a certain period it will disappear To display again touch the screen Motion picture playback Still picture playback 1 Pl...

Страница 84: ...enes will be displayed By displaying in 1 scene recording date and time are displayed when playing back motion pictures and recording date and file number when playing back still pictures Speaker Head...

Страница 85: ...proceed normally or may not be possible Please check compatibility in the instruction manual of your device Motion pictures recorded with devices other than this unit are not supported by this unit St...

Страница 86: ...e the display is touched and held Normal playback is restored when you touch For slow rewind playback the intervals between frames and the display time per frame vary depending on the type of the scen...

Страница 87: ...For information on how to register functions to the USER buttons refer to page 62 It is convenient to use Pause Slow motion Playback and Frame by frame Playback Date of the motion picture was recorded...

Страница 88: ...still pictures l 83 Resuming the previous playback If playback of a scene was stopped halfway the playback can be resumed from where it was stopped Select the menu If playback of a motion picture is...

Страница 89: ...added after the date j When the number of scenes exceeds 99 j When the number of still pictures exceeds 999 j When you change the REC FORMAT setting l 115 j When you set REC MODE to AVCHD and set Inte...

Страница 90: ...is selected in Step 1 Touch the scene still picture to be deleted 3 When MULTI is selected in Step 1 Touch Delete To continuously delete other scenes still pictures repeat Steps 2 3 When you stop dele...

Страница 91: ...ed to the scenes still pictures may be deleted When still pictures recorded on an SD card by other products are deleted a still picture other than JPEG that cannot be played back on this unit may be e...

Страница 92: ...3 Touch desired items following the screen display It will return to the previous step by touching Return When SELECT SCENES is selected When touched the scene still picture is selected and the indica...

Страница 93: ...een recorded on another device may not be copied Data recorded on a PC cannot be copied The settings for the copied motion pictures and still pictures will be cleared if the protected motion pictures...

Страница 94: ...mm diameter super mini jack allows you to remotely control the zoom and start stop recording Do not connect any device other than a remote control to the CAM REMOTE terminals Doing so may change the...

Страница 95: ...depending on the connected TV Check the input setting input switch and the audio input setting on the TV For more information please read the operating instructions for the TV 3 Play back the recorde...

Страница 96: ...ppear on the screen Change the menu setting to display the images correctly Check the TV setting Select the menu This item is fixed to SQUEEZE in the following cases j When REC FORMAT is set to SA 576...

Страница 97: ...he operating instructions for the TV external device DOWN CONV outputs images in standard picture quality Select DOWN CONV when connecting with the AV cable supplied When REC FORMAT is set to SA 576 5...

Страница 98: ...EO OUT terminal FHD 1920k1080 50 00p PS 1080 50 00p SYSTEM 1080 50 00p s 1080p 1080i 1080 50 00i DOWN CONV 576 50 00p 576 50 00i FHD 1920k1080 50 00i PH 1080 50 00i HA 1080 50 00i HE 1080 50 00i SYSTE...

Страница 99: ...not be used The USB equipment operates with the driver installed as standard in the OS If using Windows Operation is not guaranteed in the following cases j Operation on an upgraded OS j Operation on...

Страница 100: ...n other than PC reconnect the USB Cable When using the battery the LCD monitor turns off after about 5 seconds Touch the screen to turn the LCD monitor on A USB 2 0 cable is not supplied with this uni...

Страница 101: ...able battery or AC adaptor while the access lamp is on or card access icon appears on the unit screen If the screen does not change when the unit is operated while connected to a PC disconnect the bat...

Страница 102: ...essive recording MP4 and LPCM is stored Do not delete the SD card s folders on a PC Doing so may make the SD card unusable in this unit When data not supported by this unit has been recorded on a PC i...

Страница 103: ...nal media device is in a format other than FAT32 or exFAT j When connected by using a USB hub FAT32 is a format used for SDHC Memory Cards exFAT is a format used for SDXC Memory Cards You cannot copy...

Страница 104: ...hen there are many scenes If you copy protected scenes or still pictures the protection setting of the copied scenes or still pictures are canceled The order in which the scenes were copied cannot be...

Страница 105: ...ng media information The used space of the external media device can be checked Connect this unit to the external media device and touch Playback from External Media Select the menu If you touch CHANG...

Страница 106: ...ed the scene still picture is selected and the indication appears on the thumbnail Touch the scene still picture again to cancel the operation When SELECT DATE is selected When touched the date is sel...

Страница 107: ...ed back and then play it back The playback operation is performed the same as when playing back motion pictures or still pictures l 82 86 To terminate the connection between this unit and the external...

Страница 108: ...re quality To dub Equipment with SD card slot High definition picture quality Insert the SD card directly l 108 Equipment with USB terminal High definition picture quality Connect with the USB 2 0 cab...

Страница 109: ...through operations on the Blu ray disc recorder Do not touch CHANGE MEDIA on the screen of the unit during dubbing A USB 2 0 cable is not supplied with this unit Use a commercially available double sh...

Страница 110: ...stop recording dubbing stop playback on this unit after stopping recording on the recorder To play back scenes that are not found in the recording format option SA 576 50 00i set RESOLUTION to DOWN CO...

Страница 111: ...e Sports Mode does not function The Sports display flashes Portrait j Color and screen brightness may change under indoor lighting Menu Using the Menu CAMERA SETUP desired setting SCENE MODE OFF Cance...

Страница 112: ...ion in images Switch to Manual Mode l 40 1 Touch SHARPNESS 2 Touch to adjust settings You can select a value between s5 and r5 3 Touch EXIT to exit the menu screen The default setting is 0 Adjusts col...

Страница 113: ...Touch to adjust settings of color You can select a value between s5 and r5 3 Touch EXIT to exit the menu screen The default setting is 0 Switches to automatic iris control to compensate the backlight...

Страница 114: ...he noise reduction setting 1 Touch NR CONTROL 2 Touch to adjust settings You can select a value between s5 and r5 Adjusting the setting in the minus s direction weakens the noise reduction effect ther...

Страница 115: ...Bit rate Excluding the REC FORMAT settings that are available when REC MODE is set to AVCHD A Size B Vertical resolution C Frame rate D Bit rate Smoother motion picture can be recorded with the higher...

Страница 116: ...where the desired function cannot be used or selected Recording format Size Picture size Frame rate Bit rate VBR FHD 1080 50 00p 50M FHD 1920k1080 50 00p Average 50 Mbps FHD 1080 25 00p 50M 25 00p FHD...

Страница 117: ...ber for this unit 1 Touch CAMERA NUMBER SET 2 Touch to change the Camera Number Numbers between 0 and 9 can be set 3 Touch RETURN Touch EXIT to exit the menu screen This function s default setting is...

Страница 118: ...SER3 O I S j USER4 FOCUS ASSIST 1 j USER5 REC CHECK Register functions to USER button icons l 62 For the functions of the USER button that can be registered refer to page 63 The default settings are a...

Страница 119: ...aximum possible gain value for Auto Gain Mode l 53 Switch to Manual Mode l 40 You can set the Hybrid Optical Image Stabilizer l 77 SW SETUP desired setting IRIS RING DOWN OPEN Iris will open when it i...

Страница 120: ...t method for the FOCUS ASSIST button and the USER button to which FOCUS ASSIST 1 is registered l 46 Sets the Focus Assist method for the USER button to which FOCUS ASSIST 2 is registered l 46 This ite...

Страница 121: ...rsa Changes the zoom magnification setting of Digital Zoom l 66 You can zoom in while maintaining the beauty of high definition picture quality up to a magnification of 40k This function is not availa...

Страница 122: ...ding starts will disappear from the location and instead be displayed beside the other SD card display Even after switching of the recording media you can replace the SD card that ran out of space wit...

Страница 123: ...us recording will not be performed for still pictures When performing simultaneous recording even in the case where an error has occurred in one of the SD cards and recording has stopped recording can...

Страница 124: ...s may not be adjusted automatically depending on light sources or scenes If so manually adjust these settings l 44 49 We recommend connecting the AC adaptor to this unit when recording images for a lo...

Страница 125: ...d of the audio recording level for audio channel 1 l 58 Switches the adjustment method of the audio recording level for audio channel 2 l 58 If you set this item to ON when ALC works for either of the...

Страница 126: ...ted to AUDIO INPUT1 terminal XLR 3 pin Sets the input level of the audio equipment connected to AUDIO INPUT2 terminal XLR 3 pin Sets the input level of the external microphone connected to AUDIO INPUT...

Страница 127: ...bles a function that controls recording performed with an external device connected to the unit When ON is selected you can control recording performed with this unit and an external device using the...

Страница 128: ...to RECORDING When ON is selected you can adjust the headphone volume in Recording Mode with the jog dial l 81 Selects the test tone output when color bars are displayed l 77 This sets how to turn on...

Страница 129: ...e setting This function s default setting is 80 Selects the brightness level of the right leaning zebra patterns on the screen 1 Touch ZEBRA DETECT 2 Touch SET 2 Touch to adjust settings You can selec...

Страница 130: ...nal monitor safety zone A can be switched When REC FORMAT is set to SA 576 50 00i and ASPECT CONVERT is set to SIDE CROP l 115 117 The safety zone is not displayed on the images that is actually recor...

Страница 131: ...display the audio level meter In Playback Mode Touch the play mode select icon and set this unit to Motion Picture Playback Mode l 82 Display relating to lens can be switched Zoom Display Optical Imag...

Страница 132: ...OUR 0 j BRIGHTNESS 0 j CONTRAST 0 Brightness of the viewfinder can be switched l 31 Switches the mirror function of the LCD monitor when recording yourself l 32 The image on the LCD monitor is display...

Страница 133: ...PC etc l 100 The used space and remaining recordable time of the SD card can be checked Touching CHANGE MEDIA switches the unit between the display for the SD card 1 and the display for the SD card 2...

Страница 134: ...t to OFF this item cannot be set The unit is put into recording pause approx 1 second when the unit is turned on Depending on the recording conditions start time may be longer than 1 second In the Qui...

Страница 135: ...B Cable will be connected can be switched Switch the terminal according to the shape of the USB Cable s plug you intend to connect to the unit The menu settings is reset to the default Settings for CL...

Страница 136: ...version of the firmware of this unit is displayed The firmware of this unit is updated It is also possible to downgrade the firmware to older versions Settings are automatically reset to the default...

Страница 137: ...r playback of the last scene finishes when set to ON l 88 If playback of a scene was stopped halfway the playback can be resumed from where it was stopped when set to ON l 88 Scenes can be protected s...

Страница 138: ...Copy Press the THUMBNAIL button to switch this unit to the Playback Mode This copies all scenes and still pictures recorded with this unit that have never been copied to another device to the external...

Страница 139: ...g to card possible motion picture Green Card is being recognized motion picture R 1h20m Remaining time for motion picture recording l 37 Card slot selected for motion picture recording during normal r...

Страница 140: ...enabled l 59 When AUDIO ALC CH1 AUDIO ALC CH2 AUDIO ALC LINK are enabled l 59 When AUDIO ALC CH1 AUDIO ALC CH2 and AUDIO ALC LINK are enabled and audio cannot be recorded l 73 Audio level meter l 58 S...

Страница 141: ...older file name Protected motion pictures still pictures l 91 Recording mode When thumbnails are displayed l 82 Recording format When thumbnails are displayed l 82 115 10 Scene Number In 9 scene displ...

Страница 142: ...CONTROL DATA The content versions do not match This is displayed when the SD card contains scenes recorded with another device for example Match the device and content version ERROR OCCURRED RECORDING...

Страница 143: ...RROR HAS BEEN DETECTED SD CARD Defective management information has been found The management information will be automatically recovered after this message is displayed SUPER SLOW MODE NO AUDIO RECOR...

Страница 144: ...EASE REFORMAT This is displayed when the SD card cannot be formatted Check the SD card Replace the SD card in the card slot at which the error has occurred UNABLE TO FORMAT Formatting is not possible...

Страница 145: ...l media device During copying between SD cards or copying to an external media device Display Description Behavior and cause PLEASE CHECK THE EXTERNAL MEDIA Copying cannot be performed due to for exam...

Страница 146: ...Meaning of the warning The battery is depleted Recording playback The operation stops This unit turns off automatically Solution Charge or replace the battery Connect the AC adaptor to cancel the warn...

Страница 147: ...hes red Meaning of the warning The battery will be depleted soon Recording playback The operation continues Solution Charge or replace the battery as needed Connect the AC adaptor to cancel the warnin...

Страница 148: ...If the operating time is still too short even after the battery is fully charged the battery has worn out and needs to be replaced This unit cannot be operated though it is turned on This unit does n...

Страница 149: ...d a scene which is hard to bring into focus in Auto Focus Mode use the Manual Focus Mode to adjust the focus l 41 44 Audio is not recorded Super Slow Recording or Interval Recording is enabled l 73 12...

Страница 150: ...corded on the SD card is erased and cannot be recovered Back up important data on a PC etc With other products Problem Check points Although this unit is correctly connected to a TV images cannot be s...

Страница 151: ...the USB Cable Select another USB terminal on the PC Check the operating environment l 99 Connect the USB Cable again after restarting the PC and turning on this unit again When the USB Cable is disco...

Страница 152: ...repair the data If recovery fails it will not be possible to play back scenes recorded before the unit turned off When data recorded on another device is recovered it may not be possible to play back...

Страница 153: ...r countries Microsoft product screen shot s reprinted with permission from Microsoft Corporation Intel Pentium Celeron and Intel Core are trademarks of Intel Corporation in the U S and or other countr...

Страница 154: ...FITNESS FOR A PARTICULAR PURPOSE Refer to the detailed terms and conditions thereof which can be accessed by selecting SOFTWARE INFO in Other Functions as described in Using the Menu in the Operating...

Страница 155: ...d Others Recording functions that cannot be used simultaneously Recording function to be set Currently set recording function Interval Rec Super Slow Recording Relay recording Simultaneous recording I...

Страница 156: ...e recordable time may be reduced if recording with a lot of action is recorded or recording of short scene is repeated The recordable times depends on the recording condition or card type to be record...

Страница 157: ...is 9999 or less The number of recordable pictures depends on the recording condition or card type to be recorded The memory capacity indicated on the label of an SD card is the total of the capacity...

Страница 158: ...sign rule for Camera File system based on Exif 2 2 standard Refer to page 157 for picture size of a still picture and number of recordable pictures Recording media SDHC Memory Card 4 GB to 32 GB SDXC...

Страница 159: ...i jack k1 FOCUS IRIS XLR audio input terminals XLR 3 pin k2 INPUT1 INPUT2 LINE 0 dBu 4 dBu switch with the menu MIC j40 dBu j50 dBu j60 dBu switch with the menu USB DEVICE USB terminal Type Micro B Hi...

Страница 160: ...Panasonic Corporation Web site http www panasonic com HC PV100_GC_GW_SQW0750 1_mst book 160...

Отзывы: