16
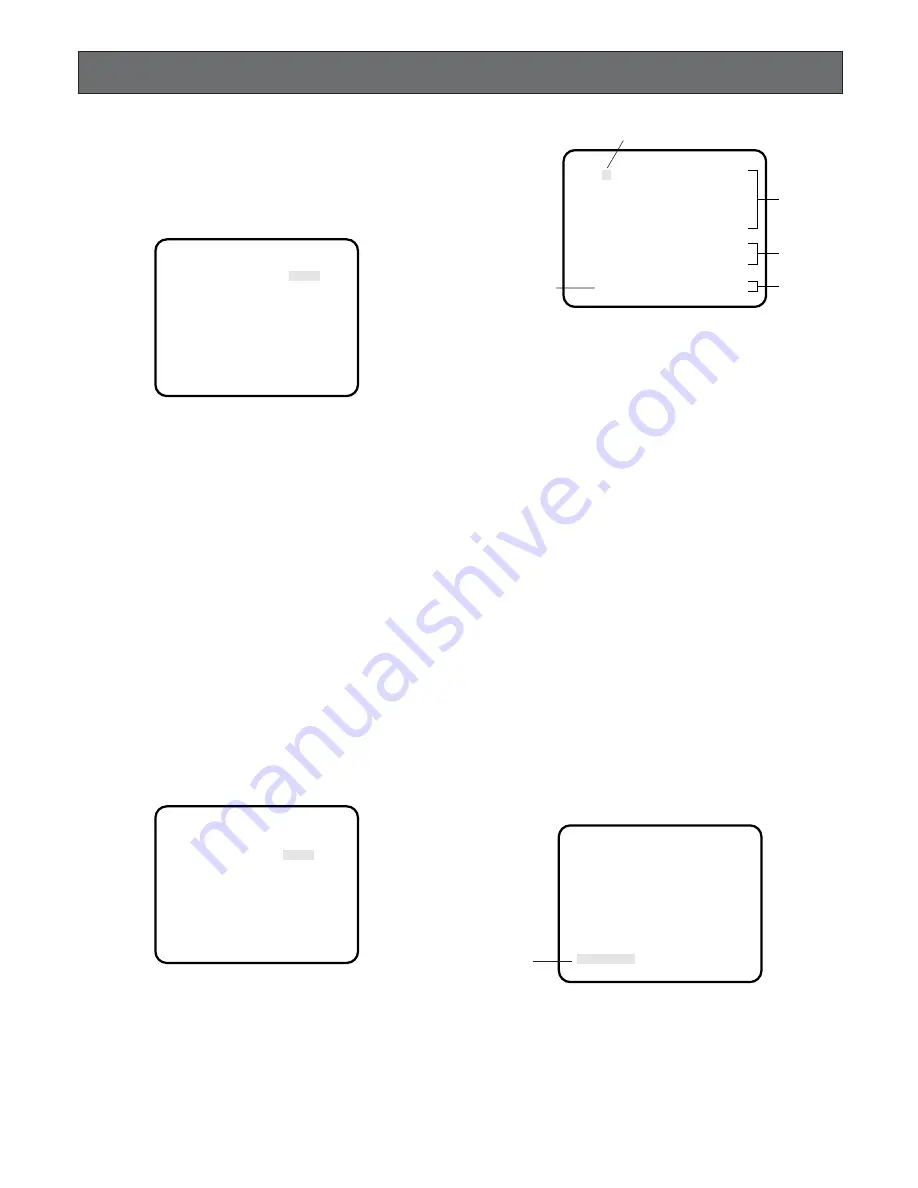
1. Scanning Mode Setting (SCANNING
MODE)
It is possible to switch between interlace drive and progres-
sive drive by setting "SCANNING MODE" when using the
GP-US732H.
1. Move the cursor to the SCANNING MODE parameter.
2. Select "PROG" or "INTR".
3. Move the cursor to "END" at the bottom, and press the
PAGE button to close the SET UP menu.
4. Turn on the power after turning the power off once
using the power ON/OFF switch. The selected drive will
be enabled.
When progressive drive is enabled, output signals provided
at the RGB/YPbPr output connector can be switched
between progressive output signals and interlace output
signals using the Function Setup Switch on the rear panel.
Note:
When using the GP-US522HB, interlace output sig-
nals will be provided automatically.
2. Camera Identification Setting
(CAMERA ID)
You can use the camera identification (CAMERA ID) to
assign a name to the camera. The camera ID consists of up
to 16 alphanumeric characters. You can select whether to
have the camera ID displayed on the monitor screen or not.
To edit the CAMERA ID
1. Move the cursor to the CAMERA ID parameter.
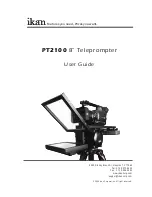
2. Press the PAGE button. The CAMERA ID menu
appears. The cursor on the letter "A" starts blinking.
(Umlaut characters are available only for the GP-
US742CU for PAL system.)
SETTING PROCEDURES
** SET UP ** P1
SCANNING MODE PROG
CAMERA ID *OFF
ELC *OFF
SHUTTER OFF
GAIN AUTO
SENS UP OFF
END
** SET UP ** P1
SCANNING MODE PROG
CAMERA ID *OFF
ELC *OFF
SHUTTER OFF
GAIN AUTO
SENS UP OFF
END
3. Move the character cursor to a character you want by
pressing ITEM,
A
or
B
.
4. After selecting the character, press the PAGE button.
The selected character appears in the editing area.
(The editing cursor in the editing area moves to the
right automatically at this moment.)
5. Repeat the steps above until all characters are edited.
To enter a blank space in the CAMERA ID
Move the character cursor to SPACE and press the PAGE
button.
To edit a specific character in the CAMERA ID
1. Move the character cursor to
←
or
→
then press the
PAGE button to move the editing cursor to the charac-
ter to be edited in the editing area.
2. Move the character cursor to the character area and
select a new character.
3. Press the PAGE button to set the CAMERA ID.
To erase all characters in the editing area
Move the character cursor to RESET and press the PAGE
button. All characters in the editing area disappear.
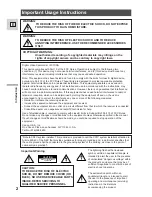
To determine the display position of the CAMERA ID
1. Move the cursor to POSI, and press the PAGE button.
The display shown below appears and the CAMERA ID
starts blinking.
2. Move the CAMERA ID to the desired position by press-
ing
A
,
B
or the ITEM button.
3. Press the PAGE button for 2 seconds or more to fix the
position of the CAMERA ID. The mode returns to the
previous CAMERA ID menu.
ABCDEFGHIJKLM
NOPQRSTUVWXYZ
0123456789
().,'":;&#!?=
+-*/%$ÄÜÖÆÑÀ
←
→
SPACE
*POSI RET END RESET
................
Editing Cursor
Character Cursor
Character
Area
Command
Editing
Area
GP-US742
Blinking
Содержание GP-US522HB
Страница 29: ......


