241
8
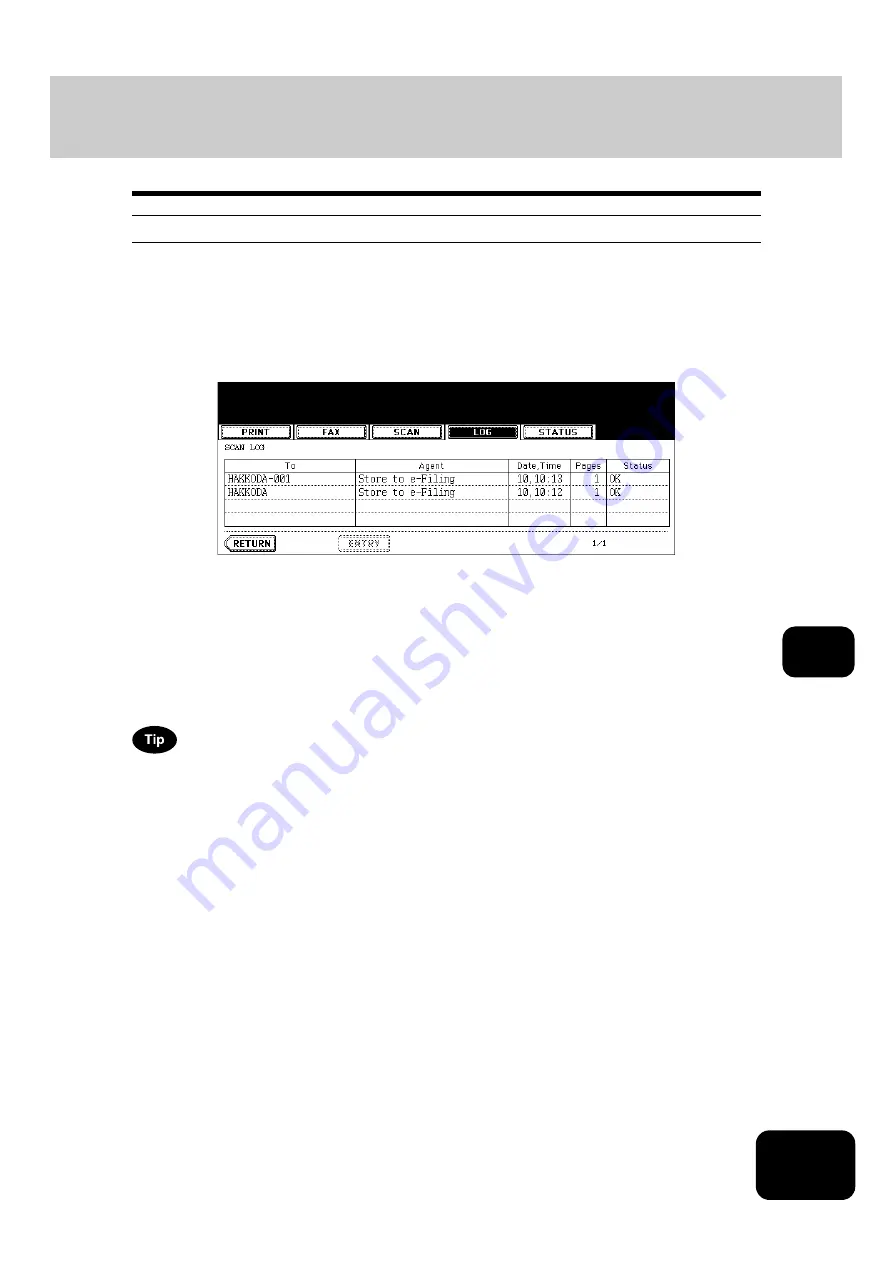
Scan log
When you press the [SCAN] button on the log menu, the histories of the following items are displayed.
•
Job filed in e-Filing by copying
•
Job filed in a shared folder by copying (SAVE AS FILE) (The Printer/Scanner Kit (optional) is neces-
sary.)
•
Job filed in e-Filing or a shared folder by scanning (SCAN TO FILE) (The Printer/Scanner Kit (optional)
is necessary.)
•
Email sent by scanning (SCAN TO E-MAIL) (The Printer/Scanner Kit (optional) is necessary.)
The following information is displayed.
4 jobs are displayed in 1 page. Up to 30 pages (120 jobs) can be displayed. When you want to confirm the
5th and the following jobs, press the [Next] button, and when you want to return to the previous page,
press the [Prev] button.
The following buttons are displayed.
To:
Where the scanned data are to be filed or sent
Agent:
Agent by which performed
Date, Time: Date and time the scan job was performed
Pages:
Number of pages of job scanned or Emailed
Status:
Result is displayed as “OK” or in error codes.
(For the error codes,
[ENTRY]:
Press this button to register unregistered Email addresses on the scan log list into the
address book. (For details,
P.242 “Registering into address book from log lists”.)
[RETURN]: Press this button to return to the log menu.
Содержание DP-8540
Страница 6: ...4 CONTENTS Cont ...
Страница 73: ...71 3 2 Press the APS button 4 Press the START button ...
Страница 109: ...107 4 4 IMAGE ADJUSTMENT 1 Background Adjustment 108 2 Sharpness 109 ...
Страница 112: ...4 110 4 IMAGE ADJUSTMENT ...
Страница 119: ...117 5 4 Press the ENTER button Set Book type original 2 sided copy P 100 in duplex copying as well ...
Страница 151: ...149 5 5 Press the ENTER button Select other copy modes as required 6 Press the START button ...
Страница 153: ...151 5 5 Press the ENTER button Select other copy modes as required 6 Press the START button ...
Страница 178: ...176 6 e FILING 3 Changing Data of User Boxes Cont 6 7 Press the ENTER button The box settings are updated ...
Страница 192: ...6 190 6 e FILING ...
Страница 222: ...7 220 7 TEMPLATE ...
Страница 260: ...8 258 8 JOB STATUS ...
Страница 291: ...289 10 3 Press the GENERAL button 4 Press the TONER NEAR EMPTY DETECTION button 5 Press the YES button ...
Страница 315: ...313 11 11 MAINTENANCE 1 Daily Inspection 314 2 Simple Troubleshooting 315 ...
Страница 320: ...11 318 11 MAINTENANCE ...
Страница 335: ......


