


152
5. USING THE EDITING FUNCTIONS
5
16. ADF / SADF
You can select the paper feeding mode when using the Reversing Automatic Document Feeder.
There are two ways to feed originals.
Continuous feed mode: Originals placed on the Reversing Automatic Document Feeder are continuously
fed in after the [START] button is pressed. It is useful to select this mode for
copying multiple originals at one time. (This is the initial setting at the time of the
installation of the equipment.)
Single feed mode:
An original is automatically pulled in as soon as it is placed. It is recommended to
select this mode for copying originals one by one.
•
In the single feed mode, set the originals one after another. Setting more than one original could cause
a tilted image or a paper jam.
•
To set different size originals,
P.73 “When copying mixed-size originals”.
Continuous feed mode
1
Place paper in the drawer(s).
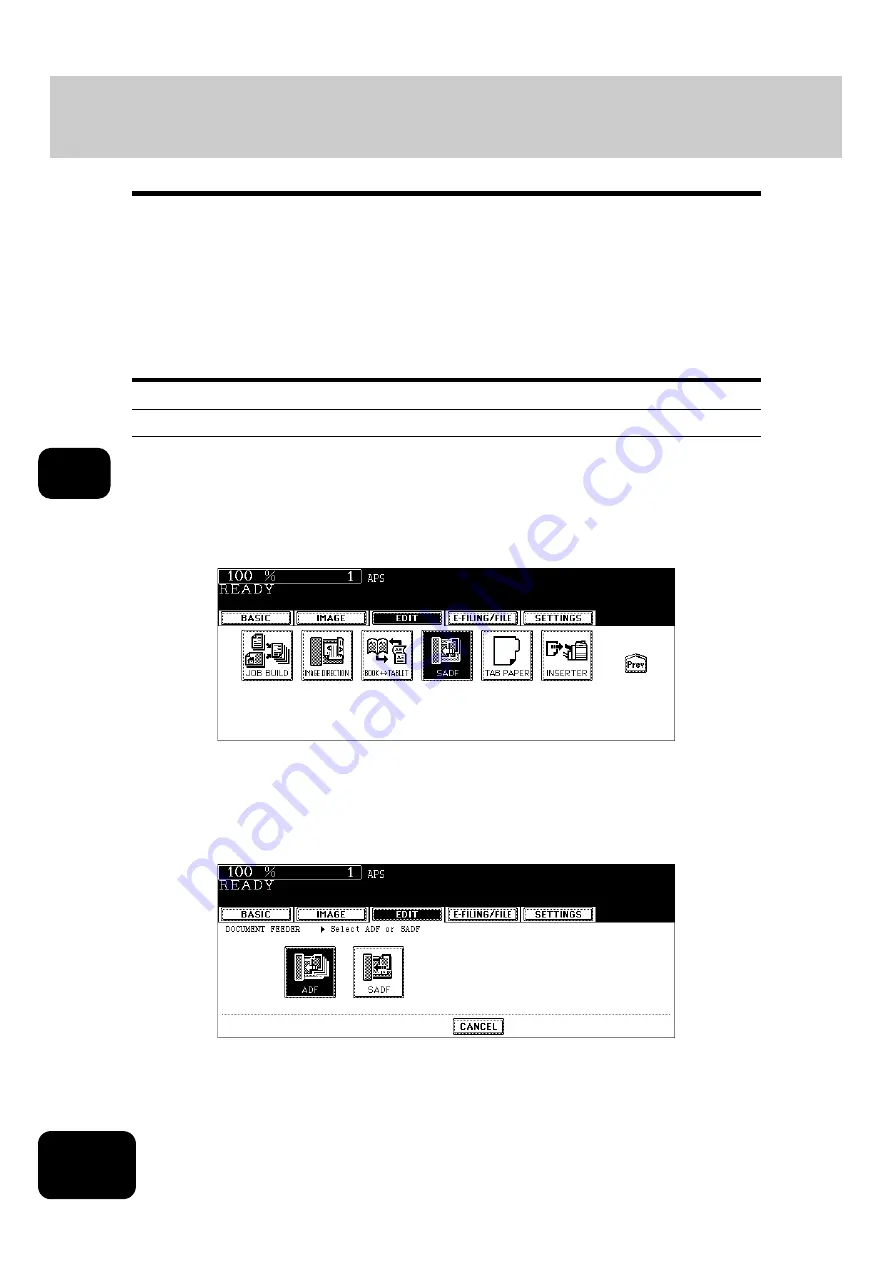
2
Press the [EDIT] button to enter the edit menu, and then press the
[SADF] button.
• If the [ADF] button is already displayed, the continuous feed mode is set. In this case, skip to step 5.
• If the desired function button is not displayed, press the [Prev] or [Next] button to switch the menu.
3
Place the original(s) on the Reversing Automatic Document Feeder.
P.54 “Using the Reversing Automatic Document Feeder”
4
Press the [ADF] button.
• Select other copy modes as required.
5
Press the [START] button.
Содержание DP-8540
Страница 6: ...4 CONTENTS Cont ...
Страница 73: ...71 3 2 Press the APS button 4 Press the START button ...
Страница 109: ...107 4 4 IMAGE ADJUSTMENT 1 Background Adjustment 108 2 Sharpness 109 ...
Страница 112: ...4 110 4 IMAGE ADJUSTMENT ...
Страница 119: ...117 5 4 Press the ENTER button Set Book type original 2 sided copy P 100 in duplex copying as well ...
Страница 151: ...149 5 5 Press the ENTER button Select other copy modes as required 6 Press the START button ...
Страница 153: ...151 5 5 Press the ENTER button Select other copy modes as required 6 Press the START button ...
Страница 178: ...176 6 e FILING 3 Changing Data of User Boxes Cont 6 7 Press the ENTER button The box settings are updated ...
Страница 192: ...6 190 6 e FILING ...
Страница 222: ...7 220 7 TEMPLATE ...
Страница 260: ...8 258 8 JOB STATUS ...
Страница 291: ...289 10 3 Press the GENERAL button 4 Press the TONER NEAR EMPTY DETECTION button 5 Press the YES button ...
Страница 315: ...313 11 11 MAINTENANCE 1 Daily Inspection 314 2 Simple Troubleshooting 315 ...
Страница 320: ...11 318 11 MAINTENANCE ...
Страница 335: ......


