Before Use
- 14 -
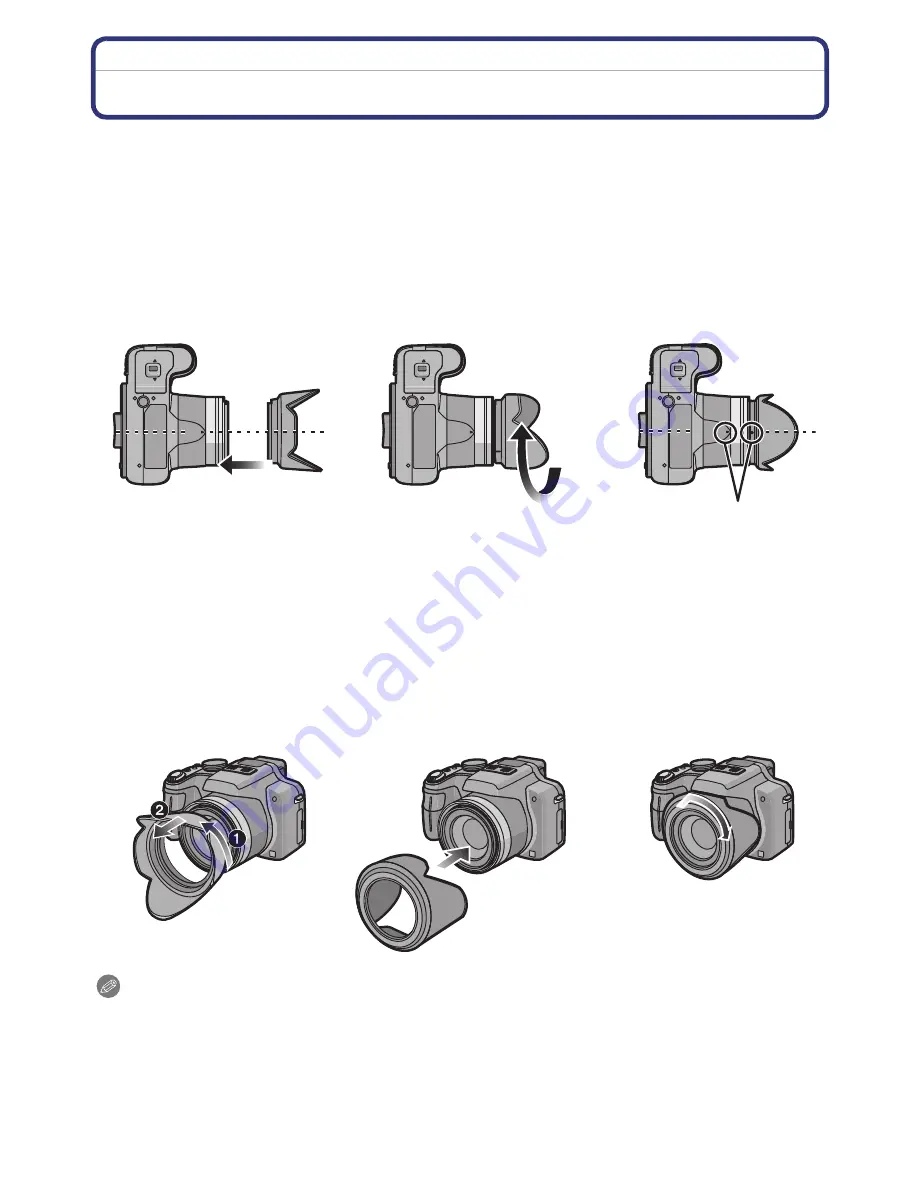
Attaching the Lens Hood
In bright sunlight or backlight, the lens hood will minimize lens flare and ghosting. The lens
hood cuts off excess lighting and improves the picture quality.
•
Check that the camera is turned off.
•
Close the flash.
1
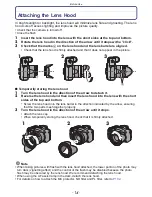
Insert the lens hood into the lens with the short sides at the top and bottom.
2
Rotate the lens hood in the direction of the arrow until it stops with a "click".
3
Check that the marks
A
on the lens hood and the lens barrel are aligned.
•
Check that the lens hood is firmly attached and that it does not appear in the picture.
∫
Temporarily storing the lens hood
1
Turn the lens hood in the direction of the arrow to detach it.
2
Reverse the lens hood and then insert the lens hood into the lens with the short
sides at the top and bottom.
•
Screw the lens hood into the lens barrel in the direction indicated by the arrow, ensuring
that the two parts mesh together properly.
3
Turn the lens hood in the direction of the arrow until it stops.
•
Attach the lens cap.
•
When temporarily storing the lens hood, check that it is firmly attached.
Note
•
When taking pictures with flash with the lens hood attached, the lower portion of the photo may
turn dark (vignetting effect) and the control of the flash may be disabled because the photo
flash may be obscured by the lens hood. We recommend detaching the lens hood.
•
When using the AF assist lamp in the dark, detach the lens hood.
•
For details on how to attach the MC protector, ND filter and PL filter, refer to
P192
.
1
2
3
1
2
3


