background image

- 158 -

Wi-Fi

1

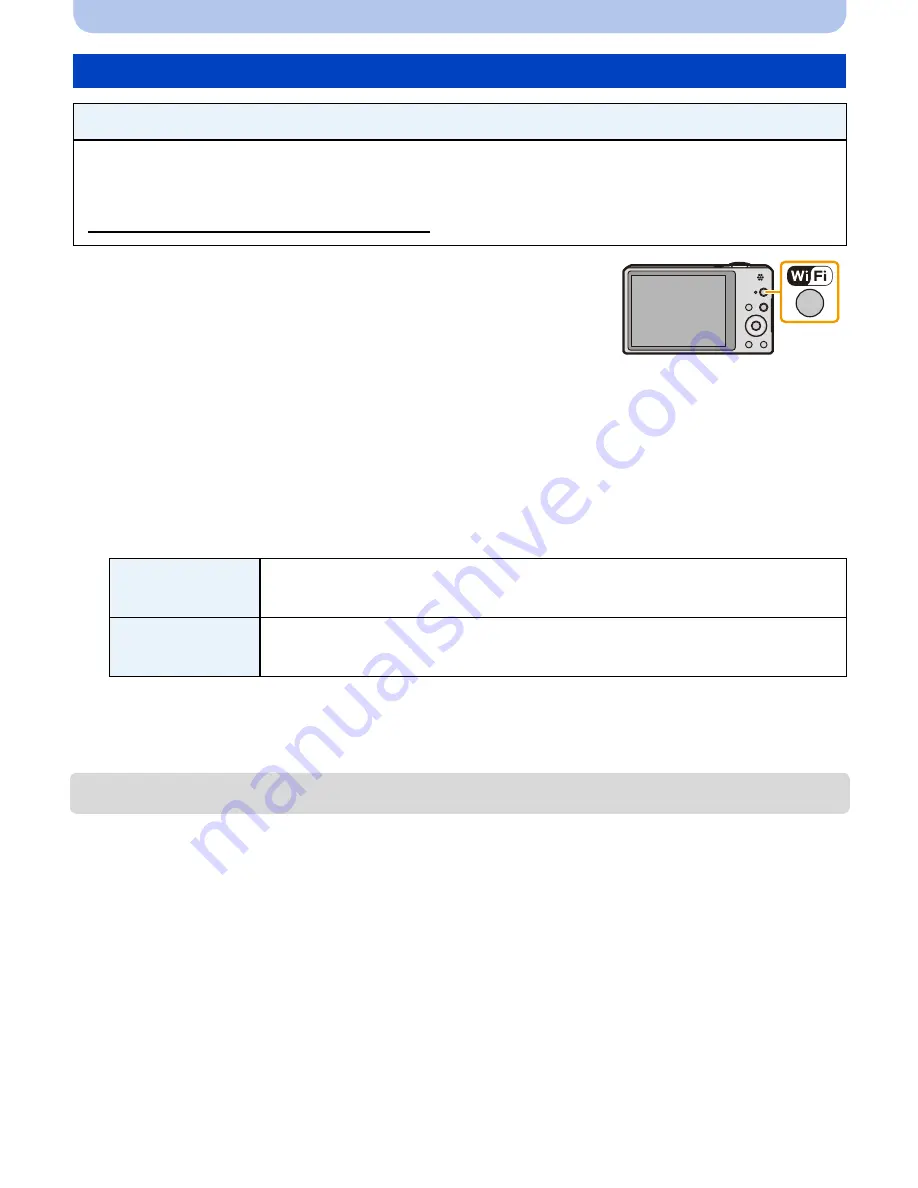
Press [Wi-Fi].

2

Press 

3

/

4

/

2

/

1

 to select [New Connection], and then 

press [MENU/SET].

When connecting with the setting you used before, you can select the connection destination 
from [History Connection] 

(P135)

 or [Favorite Connection] 

(P136)

.

3

Press 

3

/

4

 to select [Send Images Stored in the Camera], and then press [MENU/

SET].

4

Press 

3

/

4

 to select [Printer], and then press [MENU/SET].

5

Press 

3

/

4

 to select connection method, and then press [MENU/SET].

6

Press 

3

/

4

 to select a printer you want to connect, and then press [MENU/SET].

7

Select pictures, and then print. 

(P184)

To change the setting or disconnect, press [Wi-Fi]. 

(P142)

Motion pictures cannot be printed out.

When sending images to Printer

Preparations:

You can print out recorded pictures wirelessly from a PictBridge (wireless LAN-compatible)

¢

 printer.

¢

Compliant with the DPS over IP standards.

See the following website for information on the PictBridge (wireless LAN-compatible) printer.

http://panasonic.jp/support/global/cs/dsc/

 (This Site is English only.)

[Via Network]

When you want to connect to your Printer via a wireless access point. 

(P138)

[Direct]

When you want to directly connect your printer to this unit with [Wi-Fi 
Direct], [WPS Connection], or [Manual Connection]. 

(P140)

Содержание DMC-SZ9

Страница 1: ...d features Digital Camera Model No DMC SZ9 Please read these instructions carefully before using this product and save this manual for future use VQT4S61 F1212MR0 Register online at www panasonic com register U S customers only ...

Страница 2: ...and hold the camera carefully 26 Preventing jitter camera shake 26 Basic Selecting the Recording Mode 27 Taking pictures using the automatic function Intelligent Auto Mode 28 Changing the settings 30 Taking pictures with your favorite settings Normal Picture Mode 32 Focusing 33 Recording Motion Pictures 35 Recording still pictures while recording motion pictures 37 Playing Back 38 Displaying Multi...

Страница 3: ... with different image effects Creative Control Mode 66 Expressive 67 Retro 67 High Key 67 Low Key 67 Sepia 68 Dynamic Monochrome 68 Impressive Art 68 High Dynamic 68 Cross Process 69 Toy Effect 69 Miniature Effect 69 Soft Focus 70 Star Filter 70 One Point Color 70 Taking panorama pictures Panorama Shot Mode 71 Taking pictures that match the scene being recorded Scene Mode 74 Portrait 75 Soft Skin ...

Страница 4: ...et 99 Using the Motion Picture Menu 100 Rec Format 100 Rec Quality 101 Continuous AF 102 Wind Cut 102 Playback Editing Various methods of playback 103 Slide Show 104 Filtering Play 106 Calendar 109 Having Fun with Recorded Pictures Retouch 110 Auto Retouch 110 Beauty Retouch 111 Creative Retouch 113 Using the Playback Menu 114 Location Logging 114 Title Edit 115 Text Stamp 116 Retouch 118 Video Di...

Страница 5: ...TV by playing it back on the camera 141 Send Images While Recording 143 When sending images to smartphone tablet 143 When sending images to PC 146 When sending images to Cloud Sync Service 148 When sending images to WEB Service 149 When sending images to AV device 150 Send Images Stored in the Camera 151 When sending images to smartphone tablet 151 When sending images to PC 154 When sending images...

Страница 6: ...nd motion pictures on your PC 176 About the supplied software 177 Saving still pictures and motion pictures on a Recorder 181 Printing the Pictures 183 Selecting a single picture and printing it 184 Selecting multiple pictures and printing them 184 Print Settings 185 Others Screen Display 188 Cautions for Use 190 Message Display 196 Troubleshooting 200 ...

Страница 7: ...s with a lot of dust water sand etc Liquid sand and other foreign material may get into the space around the lens buttons etc Be particularly careful since it may not just cause malfunctions but it may also become irreparable Places with a lot of sand or dust Places where water can come into contact with this unit such as when using it on a rainy day or at the beach About Condensation When the len...

Страница 8: ...ated as battery pack or battery in the text SD Memory Card SDHC Memory Card and SDXC Memory Card are indicated as card in the text The card is optional You can record or play back pictures on the built in memory when you are not using a card If any accessories are lost customers in the USA and Puerto Rico should contact Panasonic s parts department at 1 800 833 9626 and customers in Canada should ...

Страница 9: ...nection lamp P129 10 Speaker P48 Be careful not to cover the speaker with your finger Doing so may make sound difficult to hear 11 Wi Fi button P133 12 Playback button P38 13 Cursor buttons A 3 Exposure compensation P64 B 4 Macro Mode P62 AF Tracking P87 C 2 Self timer P63 D 1 Flash setting P59 In this owner s manual the cursor buttons are described as shown in the figure below or described with 3...

Страница 10: ...170 179 183 This socket is also used when charging the battery 18 Camera ON OFF button P24 19 Zoom lever P57 20 Microphone 21 Shutter button P28 32 22 Motion picture button P35 23 Tripod mount A tripod with a screw length of 5 5 mm 0 22 inch or more may damage this unit if attached 24 Card Battery door P12 19 25 DC coupler cover When using an AC adaptor optional ensure that the Panasonic DC couple...

Страница 11: ...atteries that you can use with this unit Camera conditions Charge Turned off Turned on It has been found that counterfeit battery packs which look very similar to the genuine product are made available for purchase in some markets Some of these battery packs are not adequately protected with internal protection to meet the requirements of appropriate safety standards There is a possibility that th...

Страница 12: ...rientation securely insert it all the way in and then check that it is locked by the lever A To remove the battery move the lever A in the direction of the arrow 3 1 Close the card battery door 2 Slide the release lever in the direction of the arrow Turn the camera off and wait for the LUMIX display on the LCD monitor to clear before removing the battery Otherwise this unit may no longer operate n...

Страница 13: ... coupler D Align the marks and insert Ensure that only the AC adaptor and DC coupler for this camera are used Using any other equipment may cause damage Always use a genuine Panasonic AC adaptor optional Some tripods cannot be attached when the DC coupler is connected Make sure to unplug the AC adaptor when you open the card battery door If the AC adaptor and DC coupler are not necessary then remo...

Страница 14: ...while charging the battery charging will stop Connecting this camera to a notebook computer that is not connected to a power outlet will cause the notebook computer battery to drain faster Do not leave the camera connected for extended periods of time Be sure to always connect the camera to a computer USB terminal Do not connect the camera to a monitor keyboard or printer USB terminal or a USB hub...

Страница 15: ...hat has not been used for a long time may be longer than normal The charging time when connected to the computer depends on the computer s performance Battery indication The battery indication is displayed on the LCD monitor The indication turns red and blinks if the remaining battery power is low Recharge the battery or replace it with a fully charged battery Lit red Charging Off Charging has com...

Страница 16: ...after charging The camera also becomes warm during use This is not a malfunction The battery can be recharged even when it still has some power left but it is not recommended that the battery charge be frequently topped up while the battery is fully charged Since characteristic swelling may occur If a problem occurs in the power outlet such as a power outage charging may not be completed normally ...

Страница 17: ... of the number of pictures given above based upon one picture taken every 30 seconds Recording motion pictures These times are for an ambient temperature of 23 oC 73 4 oF and a humidity of 50 RH Please be aware that these times are approximate Actual recordable time is the time available for recording when repeating actions such as turning this unit on and off starting stopping recording zoom oper...

Страница 18: ...times will shorten and the number of recordable pictures is reduced In low temperature environments such as on ski slopes When using Monitor Luminance When operations such as flash and zoom are used repeatedly When the operating time of the camera becomes extremely short even after properly charging the battery the life of the battery may have expired Buy a new battery Playback time Approx 150 min...

Страница 19: ... about the direction in which you insert it To remove the card push the card until it clicks then pull the card out upright A Do not touch the connection terminals of the card 3 1 Close the card battery door 2 Slide the release lever in the direction of the arrow Turn the camera off and wait for the LUMIX display on the LCD monitor to clear before removing the card Otherwise this unit may no longe...

Страница 20: ...ot been inserted Pictures can be recorded on the built in memory and played back When a card has been inserted Pictures can be recorded on the card and played back When using the built in memory k ð access indication When using the card access indication The access indication is displayed in red when pictures are being recorded on the built in memory or the card Built in Memory Card Remarks SD Mem...

Страница 21: ...n again Write Protect switch A provided When this switch is set to the LOCK position no further data writing deletion or formatting is possible The ability to write delete and format data is restored when the switch is returned to its original position The data on the built in memory or the card may be damaged or lost due to electromagnetic waves static electricity or breakdown of the camera or th...

Страница 22: ... available recording time etc by pressing DISP P56 A Number of recordable pictures B Available recording time The number of recordable pictures and the available recording time are an approximation These vary depending on the recording conditions and the type of card The number of recordable pictures and the available recording time varies depending on the subjects Picture size Built in Memory App...

Страница 23: ...h MP4 is 29 minutes 59 seconds or up to 4 GB You can check the recordable time on the screen For FHD 30p in MP4 format the file size is large and so the recordable time will drop below 29 minutes 59 seconds The maximum available continuous recording time is displayed on the screen Recording quality setting Built in Memory Approx 60 MB 2 GB 32 GB 64 GB FHD 60i j 14m00s 4h10m 8h27m HD 60p j 14m00s 4...

Страница 24: ...ceed to step 4 2 Press MENU SET 3 Press 3 4 to select the language and press MENU SET 4 Press MENU SET 5 Press 2 1 to select the items year month day hour minute display sequence or time display format and press 3 4 to set A Time at the home area B Time at the travel destination You can cancel without setting the clock by pressing 6 Press MENU SET to set 7 Press MENU SET ...

Страница 25: ...ut the battery Leave the charged battery in the unit for 24 hours to charge the built in battery If the clock is not set the correct date cannot be printed when you order a photo studio to print the picture or when you stamp the date on the pictures with Date Stamp or Text Stamp If the clock is set the correct date can be printed even if the date is not displayed on the screen of the camera Changi...

Страница 26: ... vertically rotated Only when Rotate Disp P54 is set When the camera is held vertically and tilted up and down to record pictures the Direction Detection function may not work correctly Motion pictures taken with the camera held vertically are not displayed vertically When the Jitter alert appears use Stabilizer P98 a tripod or the Self timer P63 Shutter speed will be slower particularly in the fo...

Страница 27: ...rding Mode 3 Press MENU SET Intelligent Auto Mode P28 The subjects are recorded using settings automatically selected by the camera Normal Picture Mode P32 The subjects are recorded using your own settings Creative Control Mode P66 Record while checking the image effect Panorama Shot Mode P71 This mode allows you to take panorama pictures Û Scene Mode P74 This allows you to take pictures that matc...

Страница 28: ...ut Image quality is fixed to A 1 Press MODE A Shutter button 2 Press 3 4 2 1 to select Intelligent Auto and then press MENU SET 3 Press the shutter button halfway to focus The focus indication 1 green lights when the subject is focused The AF area 2 is displayed around the subject s face by the Face Detection function In other cases it is displayed at the point on the subject which is in focus The...

Страница 29: ...ize of the subject the color of the subject the distance to the subject the contrast of the subject when the subject is moving Recording conditions Sunset sunrise under low brightness conditions when the camera is shaken when zoom is used For the best results it is recommended that you take pictures in the appropriate Recording Mode When there is a backlight the subject appears darker and the came...

Страница 30: ...d Nite Shot is set to ON and is detected while taking handheld night shots pictures of the night scenery will be taken at a high burst speed and composed into a single picture This mode is useful if you want to take stunning night shots with minimal jitter and noise without using a tripod If the camera is mounted on a tripod or other type of stand will not be detected It is initially set to ON on ...

Страница 31: ...ing that multiple pictures are to be recorded appears on the screen and burst recording is carried out Note that burst recording will not take place if the camera determines that it can compensate for the difference in contrast without composing the picture from a burst In the case of composition from a burst ghost images may appear if the subject was moving In the following cases a compensated pi...

Страница 32: ...n the Rec menu 1 Press MODE 1 Shutter button 2 Press 3 4 2 1 to select Normal Picture and then press MENU SET 3 Aim the AF area at the point you want to focus on 4 Press the shutter button halfway to focus and then press it fully to take the picture A ISO sensitivity B Aperture value C Shutter speed Aperture value and shutter speed is displayed in red when correct exposure is not achieved Exclude ...

Страница 33: ...yed in red when it is not focused after pressing the shutter button halfway The focus range may change gradually depending on the zoom position e g Range of focus during the Intelligent Auto Mode Focus When the subject is focused When the subject is not focused Focus indication A On Blinks AF area B White Green White Red Sound Beeps 2 times Beeps 4 times 1 60 1 60 1 60 F3 1 F3 1 F3 1 ISO 100 ISO 1...

Страница 34: ...le moving the camera as you compose the picture You can repeatedly retry the actions in step 1 before pressing the shutter button fully Subject and recording conditions which are difficult to focus in Fast moving subjects extremely bright subjects or subjects without contrast When recording subjects through windows or near shiny objects When it is dark or when jitter occurs When the camera is too ...

Страница 35: ... or MP4 formats AVCHD You can record high definition quality images with this format It is suitable for viewing on a large format TV or for saving to disc MP4 This recording format saves a motion picture as a single file which is suitable for editing on a PC or uploading to WEB services About the compatibility of the recorded motion pictures Motion pictures recorded in AVCHD or MP4 may be played b...

Страница 36: ...e settings will be cleared so the shooting range will change dramatically If you operate the zoom etc while recording motion pictures the sound of the operation may be recorded The zoom speed will be slower than usual when recording motion pictures Operating the zoom while recording motion pictures can take time for the image to come into focus If you end motion picture recording after a short tim...

Страница 37: ...a will refocus and the refocus movement will be recorded to the motion picture To prioritize the motion picture image taking still pictures by fully pressing the shutter button is recommended Picture size and number of recordable pictures are displayed by pressing the shutter button halfway Recording of motion picture will continue after taking the still picture Zooming may stop when a picture is ...

Страница 38: ... then press 3 to play back A Motion picture icon B Motion picture recording time If you have filtered images for playback by using Slide Show P104 or Filtering Play P106 the selection screen appears Press 3 4 to select Play Video and then press MENU SET After playback starts the elapsed playback time is displayed on the screen For example 8 minutes and 30 seconds is displayed as 8m30s Some informa...

Страница 39: ...ot comply with the DCF standard cannot be played back Images recorded with other camera may not be able to play back on this unit The lens barrel retracts about 15 seconds after switching from Recording Mode to Playback Mode When using a high capacity card it is possible that fast rewinding may be slower than usual This unit was designed to play motion pictures using the AVCHD MP4 and QuickTime Mo...

Страница 40: ...s 3 4 2 1 to select a picture and then press MENU SET Displaying Multiple Screens Multi Playback Using the Playback Zoom Rotate the zoom lever towards Z T 1k 2k 4k 8k 16k When you rotate the zoom lever towards L W after enlarging the picture the magnification becomes lower When you change the magnification the zoom position indication B appears for about 2 seconds and the position of the enlarged ...

Страница 41: ...he menu after it is executed The picture is saved with the following recording sizes You may not be able to save still pictures from a motion picture taken on other equipment Still pictures created from a motion picture may be coarser than with normal picture quality Creating Still Pictures from a Motion Picture AVCHD Picture size MP4 Picture size FHD 60i HD 60p 2 M 16 9 FHD 30p HD 30p 2 M 16 9 VG...

Страница 42: ...n memory or the card that are being played back will be deleted Pictures that are not in the DCF standard or those that are protected cannot be deleted To delete a single picture Select the picture to be deleted and then press Confirmation screen is displayed Picture is deleted by selecting Yes ...

Страница 43: ...s displayed Pictures are deleted by selecting Yes It is possible to delete all pictures except the ones set as favorite when All Delete Except Favorite is selected with the Delete All set 3 When Delete Multi is selected Press 3 4 2 1 to select the picture and then press DISP to set Repeat this step appears on the selected pictures If DISP is pressed again the setting is canceled 4 When Delete Mult...

Страница 44: ...select menu and then press MENU SET Menu Description of settings Rec P81 to 99 Recording Mode only The menu lets you set the Coloring Sensitivity or Number of pixels etc of pictures you are recording Motion Picture P100 to 102 Recording Mode only This menu lets you set the Rec Format Rec Quality and other aspects for motion picture recording Playback P114 to 127 Playback Mode only This menu lets y...

Страница 45: ... using Quick Menu are determined by the mode or a display style the camera is in 3 Press 3 4 to select the menu item and then press MENU SET A Menu screen page It will switch to the next page when you reach the bottom It will also switch by rotating the zoom lever 4 Press 3 4 to select the setting and then press MENU SET Depending on the menu item its setting may not appear or it may be displayed ...

Страница 46: ...al time If you cannot find the travel destination in the areas displayed on the screen set by the time difference from the home area U Clock Set Setting Date Time World Time Set the time in your home area and travel destination You can display the local times at the travel destinations and record them on the pictures you take After selecting Destination or Home press 2 1 to select an area and pres...

Страница 47: ...VCHD Location cannot be recorded when taking motion pictures Travel Date cannot be set in the Intelligent Auto Mode Setting of other Recording Mode will be reflected Travel Date Departure date and return date of the travel as well as the name of the travel destination can be set You can display the number of days that have passed when playing back the pictures and stamp it on the recorded pictures...

Страница 48: ...e or to a hospital etc set Airplane Mode to ON and turn off the camera because electromagnetic waves etc emitted by the camera may interfere with gauges r Beep This allows you to set the beep and shutter sound r Beep Level Shutter Vol t u s Low High OFF Low High OFF Beep Tone Shutter Tone u Speaker Volume Adjust the volume of the speaker to any of the 7 levels Monitor Display Brightness color or r...

Страница 49: ...lope and the balance of the subject The Pattern setting is fixed to in the Intelligent Auto Mode Guidelines are not displayed in the following cases Panorama Shot Mode Photo Frame Scene Mode Monitor Luminance These menu settings make it easier to see the LCD monitor when you are in bright places or when you are holding the camera high above your head Auto Power Monitor The brightness is adjusted a...

Страница 50: ...recording motion pictures Playback Zoom Photo Frame Scene Mode When HDMI micro cable is connected Calendar Motion picture recording area display is only an approximation Recording area display may disappear when zooming to Tele depending on the picture size setting It will be fixed to OFF during the Intelligent Auto Mode Histogram This allows you to set either to display or not display the histogr...

Страница 51: ... Auto Review does not work when recording motion pictures q Economy The camera is automatically turned off if the camera has not been used for the time selected on the setting Also the battery life is conserved by dimming the LCD monitor p Auto Power Off The camera is automatically turned off if the camera has not been used for the time selected on the setting 2MIN 5MIN 10MIN OFF Monitor Power Sav...

Страница 52: ...y and name settings for Baby1 Baby2 and Pet in Scene Mode The Travel Date setting Departure date return date destination The World Time setting The folder number and the clock setting are not changed Always reset the camera when disposing or selling it to prevent personal information saved within the camera from being misused Always reset the camera after making a copy of personal information when...

Страница 53: ...n be controlled by the remote control of the VIERA by automatically coupling this unit with the VIERA Link compatible equipment using HDMI micro cable optional ON Remote control operation of the VIERA Link compatible equipment is enabled Not all operations are possible The operations you can perform on the camera are limited OFF Operations will be on the camera only 3D Playback Setup the output me...

Страница 54: ...amera again It may take longer to format the built in memory than the card If the built in memory or the card cannot be formatted consult Panasonic If you set a different language by mistake select from the menu icons to set the desired language M Rotate Disp This mode allows you to display pictures vertically if they were recorded holding the camera vertically On Rotate pictures on a TV and the L...

Страница 55: ... and Off every time MENU SET is pressed In Playback Mode Stabilizer Demo cannot be displayed Stabilizer Demo is an approximation Stabilizer Demo Displays the amount of jitter the camera has detected A Amount of jitter B Amount of jitter after correction A B ...

Страница 56: ... in Setup menu is set to ON histogram will be displayed 2 Name of the registered person in Face Recog is displayed when DISP is pressed In Recording Mode B Normal display 1 C Number of recordable pictures D Normal display 1 E Available recording time F No display G No display Recording guideline 1 B D G F In Playback Mode H Normal display I Display with recording information 1 J No display 2 H I J...

Страница 57: ...ens barrel extends or retracts according to the zoom position Be sure not to interrupt the motion of the lens barrel while the zoom lever is rotated For details about using the zoom while recording motion pictures refer to P36 Zooms in without deteriorating the image quality Maximum magnification 10k To make subjects appear further away use Wide Rotate the zoom lever towards Wide To make subjects ...

Страница 58: ...mizing the deterioration of the image quality This will work automatically in Intelligent Auto Mode This function is not available in the following cases Macro Zoom Mode Toy Effect Creative Control Mode Handheld Night Shot High Sens 3D Photo Mode Scene Mode When Burst in the Rec menu is set to or This function works when Digital Zoom P94 in the Rec menu is set to ON Although the image quality dete...

Страница 59: ...o 1 Auto Red Eye 2 The flash is automatically activated when the recording conditions make it necessary It is activated once before the actual recording to reduce the red eye phenomenon eyes of the subject appearing red in the picture and then activated again for the actual recording Use this when you take pictures of people in low lighting conditions Forced Flash On The flash is activated every t...

Страница 60: ...o the settings of Min Shtr Speed and Sensitivity 2 When Min Shtr Speed is set to AUTO Varies according to the Sensitivity setting 3 When in Sensitivity is set 2 3 The shutter speed becomes a maximum of 1 second in the following cases When the Optical Image Stabilizer is set to OFF When the camera has determined that there is very little jitter when the Optical Image Stabilizer is set to ON In Inte...

Страница 61: ...ke a picture even when you press the shutter button fully If recording a subject without sufficient flash the White Balance may not be properly adjusted The effects of the flash may not be adequately achieved under the following conditions When Burst is set to When the shutter speed is too fast It may take time to charge the Flash if you repeatedly take pictures Take a picture after the access ind...

Страница 62: ...ore if the distance between the camera and the subject is far it takes longer to focus on it When you take pictures at close range the resolution of the periphery of the picture may decrease slightly This is not a malfunction It is not possible to set AF Macro Mode in the following cases In all Scene Modes except 3D Photo Mode Macro Zoom cannot be set in the following cases Toy Effect Miniature Ef...

Страница 63: ... the subject We recommend using a tripod when recording with the Self timer The self timer cannot be set when recording motion pictures Item Description of settings 10sec Picture is taken 10 seconds after shutter is pressed 2sec Picture is taken 2 seconds after shutter is pressed When using a tripod etc this setting is a convenient way to avoid the jitter caused by pressing the shutter button OFF ...

Страница 64: ...lue is memorized even if the camera is turned off The compensation range of the exposure will be limited depending on the brightness of the subject You cannot use the Exposure Compensation in following conditions Starry Sky Scene Mode Underexposed Properly exposed Overexposed Compensate the exposure towards positive Compensate the exposure towards negative 1 Press 3 È until Exposure appears 2 Pres...

Страница 65: ...pensation range The exposure may not be compensated with Auto Bracket depending on the brightness of the subject Œ is set for the flash when Auto Bracket is set You cannot use the Auto Bracket in the following conditions Toy Effect Miniature Effect Soft Focus Star Filter Creative Control Mode Handheld Night Shot Starry Sky Photo Frame 3D Photo Mode Scene Mode When recording motion pictures 1st pic...

Страница 66: ...e selected example image will be applied in a preview display A A brief description of selected image effect appears when you press DISP To change the Creative Control Mode press MENU SET select Creative Control using 3 4 2 1 and then press MENU SET The displayed image on the recording screen and the preview of the selected image effect may differ from the actual recorded image The Creative Contro...

Страница 67: ...ct gives a faded image This effect adds a bright airy and soft feel to the overall image This effect adds a dark and relaxing feel to the overall image and enhances bright parts Expressive Retro High Key If you select this effect with Panorama Shot Mode the effect may not be apparent in places with insufficient brightness Low Key ...

Страница 68: ...sive black and white picture This effect gives your photo a dramatic contrast look This effect produces the optimum brightness for both dark and bright parts Sepia Dynamic Monochrome Impressive Art If you select this effect with Panorama Shot Mode seams between pictures may become noticeable High Dynamic ...

Страница 69: ...ect the color tone and press MENU SET Miniature Effect Display of the recording screen will be delayed more than usual and the screen will look as if frames are being dropped No sound is recorded in motion pictures Approximately 1 10 of the time period is recorded If you record for 10 minutes the resulting motion picture recording will be approximately 1 minute long The displayed available recordi...

Страница 70: ...usual and the screen will look as if frames are dropping Star Filter Display of the recording screen will be delayed more than usual and the screen will look as if frames are dropping One Point Color Set the color to leave in 1 Fit the color you want to leave in the frame at the center of the screen and then press MENU SET If you press DISP you will return to step 1 2 Check the color you have set ...

Страница 71: ...d then press MENU SET You can add the same image effect as the Creative Control Mode with the same operation as the mode except for Toy Effect and Miniature Effect Read P67 70 for details on the respective effects During panorama picture recording the following image effects of the Creative Control Mode are not visible on the screen Soft Focus Star Filter If you are not going to add an image effec...

Страница 72: ...ingle panning motion for about 8 seconds Move the camera at a constant speed Pictures may not be able to be recorded properly if the camera is moved too fast or slow A 1 second B 2 seconds C 3 seconds D 4 seconds E Recording direction and panning Guide F Move the camera in the recording direction without shaking it If the camera shakes too much pictures may not be able to be recorded or the record...

Страница 73: ... below A panorama picture may not be able to be created or the pictures may not be combined properly when recording the following subjects or under the recording conditions below Subjects with a single uniform color or repetitive pattern such as the sky or a beach Moving subjects person pet car waves flowers blowing in the breeze etc Subjects where the color or patterns change in a short time such...

Страница 74: ...hue to obtain the desired picture 1 Press MODE 2 Press 3 4 2 1 to select Scene Mode and then press MENU SET 3 Press 3 4 2 1 to select the Scene Mode and then press MENU SET To change the Scene Mode press MENU SET select Scene Mode using 3 4 2 1 and then press MENU SET The following cannot be set in Scene Mode as the camera adjusts automatically Sensitivity i Exposure Min Shtr Speed i Resolution Co...

Страница 75: ...ve when taking pictures of people from the chest up Technique for Soft Skin Mode To make this mode more effective 1 Rotate the zoom lever as far as possible to Tele 2 Move close to the subject to make this mode more effective If a part of the background etc is a color close to skin color this part is also smoothed This mode may not be effective when there is insufficient brightness This allows you...

Страница 76: ...er for taking pictures Shutter speed may slow down up to 4 seconds The shutter may remain closed max about 4 sec after taking the picture because of signal processing This is not a malfunction Noise may become visible when you take pictures in dark places This mode allows you to record multiple pictures of night scenes at high speed which are all combined to make a single picture It will reduce th...

Страница 77: ... automatically 4 Press 4 to select Exit and then press MENU SET to finish To cancel Age and Name Select the OFF setting in step 2 The age and name can be printed out using the PHOTOfunSTUDIO bundled software on the CD ROM supplied If Age or Name is set to OFF even when the birthday or name has been set the age or name will not be displayed Shutter speed may slow down up to 1 second Select this whe...

Страница 78: ...for Starry Sky Mode The shutter opens for 15 or 30 seconds Be sure to use a tripod We also recommend taking pictures with the self timer Objects in the distance are prioritized for focus This mode is ideal for taking pictures of scenery and other landscapes through clear glass such as in vehicles or buildings The camera may focus on the glass if it is dirty or has dust on it The pictures taken may...

Страница 79: ...posure by pressing the shutter button halfway then press the shutter button fully and move the camera When you start recording with the subject slightly to the right of the center the subject will be close to the center in the final picture You cannot record 3D pictures in vertical orientation The 3D pictures are saved in MPO format 3D Zoom position is fixed to Wide The picture size is fixed to 2M...

Страница 80: ...towards Z T to move the cursor The following operations can be performed by moving the cursor to the item and pressing MENU SET 2 Press 3 4 2 1 to move the cursor to Set and then press MENU SET to end text input Text can be scrolled if all of the entered text does not fit on the screen It is displayed in order of title location Name Baby1 Baby2 Pet Name Face Recog Enter a blank Delete Delete a cha...

Страница 81: ...n specific modes Extended Optical Zoom cannot be used and the picture size for is not displayed For details regarding modes in which Extended Optical Zoom cannot be used refer to P58 Pictures may appear mosaic depending on the subject and the recording conditions Picture Size Settings Picture Size 4608k3456 3648k2736 2560k1920 2048k1536 640k480 4608k3072 4608k2592 3456k3456 X Aspect ratio of a 4 3...

Страница 82: ...g the 3D recording Quality Settings Description of settings A Fine When giving priority to the picture quality Standard When using the standard picture quality and increasing the number of pictures to be recorded without changing the number of pixels 3D Fine Both MPO images and fine JPEG images are recorded simultaneously 3D Standard Both MPO images and standard JPEG images are recorded simultaneo...

Страница 83: ...omatically adjusted according to the brightness Maximum 1600 i ISO The ISO sensitivity is adjusted according to the movement of the subject and the brightness Maximum 1600 The shutter speed is not fixed when the shutter button is pressed halfway It is continuously changing to match the movement of the subject until the shutter button is pressed fully 100 200 400 800 1600 3200 The ISO sensitivity i...

Страница 84: ...ite Balance Depending on the conditions prevailing when pictures are taken the pictures may take on a reddish or bluish tinge Furthermore when a multiple number of light sources are being used or there is nothing with a color close to white Auto White Balance may not function properly In this case set the White Balance to a mode other than AWB 1 Auto White Balance will work within this range 2 Blu...

Страница 85: ...lect the White Balance to finely adjust and then press DISP to display WB Adjust 2 Press 2 1 to adjust the White Balance Select 0 to return to the original White Balance 3 Press MENU SET to finish The White Balance icon on the screen turns red or blue The White Balance fine adjustment setting is reflected in the picture when using the flash You can finely adjust the White Balance independently for...

Страница 86: ... Effect Soft Focus Creative Control Mode Panorama Shot Mode B W SEPIA Color Mode AF Mode Settings Description of settings š Face Detection The camera automatically detects the person s face max 15 areas The focus and exposure can then be adjusted to fit that face no matter what portion of the picture it is in AF Tracking Focus can be adjusted to a specified subject Focus will keep on following the...

Страница 87: ...en there is rapid movement When the subject is not a human being When the camera is shaking When Digital Zoom is used If the camera is registering something other than someone s face change the settings to something other than š Setting up AF Tracking Align the subject with the AF tracking frame and then press 4 to lock onto the subject A AF tracking frame AF area will be displayed in yellow when ...

Страница 88: ... This is useful when you do not want to miss a picture taking opportunity Settings ON OFF The battery will be consumed faster than usual Press the shutter button halfway again when it is difficult to focus on the subject It does not operate during AF tracking Quick AF cannot be set in the following cases Night Portrait Night Scenery Handheld Night Shot Starry Sky Scene Mode Quick AF ...

Страница 89: ... can be attached to only the first picture Face Recog will find a face similar to the registered face and does not guarantee secure recognition of a person Face Recognition may take more time to select and recognize distinctive facial features than regular face detection Even when Face Recognition information has been registered pictures taken with Name set to OFF will not be categorized by Face R...

Страница 90: ...nd then press MENU SET 2 Press 3 4 to select MEMORY and then press MENU SET 3 Press 3 4 2 1 to select the Face Recognition frame that is not registered and then press MENU SET 4 Take the picture adjusting the face with the guide Confirmation screen is displayed It is executed when Yes is selected The faces of subjects other than people pets etc cannot be registered When DISP is pressed an explanat...

Страница 91: ...and then press 3 4 to set and then press MENU SET Focus Icon Change the displayed focus icon when the subject is focused Press 3 4 to select the focus icon and then press MENU SET Add Images To add additional face images Add Images 1 Select the unregistered face recognition frame and then press MENU SET 2 Perform step 4 in Face Settings To delete one of the face images Delete Press 2 1 to select t...

Страница 92: ... for registering When it is not recognizing during recording Register the face of same person indoors and outdoors or with different expressions or angles P91 Additionally register at the location of recording When a person who is registered is not recognized correct by re registering Face Recognition may not be possible or may not recognize faces correctly even for registered faces depending on t...

Страница 93: ...1 8 1 4 1 2 1 This should usually be set to AUTO to take pictures When you select a minimum shutter speed other than AUTO appears on the screen Some of the Sensitivity settings may limit the shutter speed to faster speeds When AUTO is selected shutter speed may be set up to 1 second when there is not much jitter to adjust with the Stabilizer or when Stabilizer is set to OFF Setting Min Shtr Speed ...

Страница 94: ...ble modes This can enlarge subjects even more than the Optical Zoom Extended Optical Zoom or i ZOOM Settings ON OFF Refer to P58 for details The setting is fixed to ON in Macro Zoom Mode i Resolution Settings Description of settings ON i Resolution is activated i ZOOM i Resolution is activated and zoom magnification increased to 2 times while limiting deterioration of the picture OFF Digital Zoom ...

Страница 95: ...mal Picture Mode The picture size is fixed to 3M 4 3 2 5M 3 2 2M 16 9 or 2 5M 1 1 The Burst speed changes according to the recording conditions The number of Burst recording pictures may increase when you use a card with fast writing speed or card is formatted The focus zoom exposure White Balance shutter speed and ISO sensitivity are fixed to the settings for the first picture max 100 pictures Fl...

Страница 96: ...ing fast it may have trouble with focusing or it may take time to focus The burst speed pictures second may become slower depending on the recording environment such as in dark places if the ISO sensitivity is high etc If you take pictures in Burst Mode with the built in memory it will take time to write the picture data Burst Mode is not canceled when the camera is turned off Burst cannot be used...

Страница 97: ...ttings ON OFF The effective distance of the assist lamp is a maximum of approximately 1 5 m 4 9 feet When you do not want to use the AF Assist Lamp A e g when taking pictures of animals in dark places set the AF Assist Lamp to OFF In this case it will become more difficult to focus on the subject AF Assist Lamp is fixed to OFF in the following conditions Scenery Night Scenery Handheld Night Shot S...

Страница 98: ...ates the jitter enabling jitter free images to be taken Settings ON OFF The setting is fixed to OFF in the following cases Starry Sky 3D Photo Mode Scene Mode The setting is fixed to ON in the following cases Handheld Night Shot Scene Mode When recording motion pictures The stabilizer function may not be effective in the following cases Be careful of camera jitter when you press the shutter button...

Страница 99: ...rmation The setting is fixed to OFF in the following cases When recording motion pictures When using Auto Bracket 3D Photo Mode Scene Mode When using Burst Text Stamp Resize and Cropping cannot be set for pictures recorded with Date Stamp set Even if you take a picture with Date Stamp set to OFF it is possible to stamp dates onto the recorded pictures using Text Stamp P116 or setup the Date print ...

Страница 100: ...he following cases Soft Focus Star Filter Creative Control Mode 3D Photo Mode Scene Mode Applicable modes This sets up the data format of motion pictures Rec Format Settings Description of settings AVCHD This data format is suitable for when playing back on a high definition TV etc MP4 This data format is suitable for when playing back on a PC etc ...

Страница 101: ...is unit is using the VBR recording method VBR is an abbreviation of Variable Bit Rate and the bit rate volume of data for definite period of time is changed automatically depending on the subject to record Therefore the recording time is shortened when a subject with fast movement is recorded Rec Quality Item Size Frame rate Bit rate Aspect ratio FHD 60i 1920k1080 60i 1 17 Mbps 16 9 HD 60p 1280k72...

Страница 102: ...the position where you started the motion picture recording The setting is fixed to OFF in the following cases Starry Sky Scene Mode Applicable modes This prevents the recording of wind noise automatically Settings AUTO OFF Sound quality will be different than usual when Wind Cut is set It is fixed to OFF in the following case Miniature Effect Creative Control Mode Continuous AF Wind Cut ...

Страница 103: ...ess MODE 3 Press 3 4 2 1 to select item and then press MENU SET Following items can be selected The playback method for the 3D pictures can be switched This menu is only displayed during HDMI output Refer to P174 for details about the playback method All P38 2D 3D Settings Slide Show P104 Filtering Play P106 Calendar P109 ...

Страница 104: ...posed of only still pictures only motion pictures only 3D pictures etc We recommend this feature when you view your pictures by connecting the camera to a TV Operations performed during slide show The cursor displayed during playback is the same as 3 4 2 1 Slide Show Press 3 4 to select Start and then press MENU SET 3 Play Pause 4 Stop 2 Back to previous picture 1 Ahead to next picture W Reduce vo...

Страница 105: ...on of settings Effect This allows you to select the screen effects or music effects when switching from one picture to the next NATURAL SLOW SWING URBAN OFF When URBAN has been selected the picture may appear in black and white as a screen effect Some Effect will not operate when playing back pictures displayed vertically Screen effects do not operate during a 3D Play slide show When Filtering is ...

Страница 106: ...on of settings Picture Only Only still pictures are played back Video Only Only motion pictures are played back 3D Play Only 3D pictures are played back Refer to P174 for the method to play back 3D Play pictures in 3D Category Selection This mode allows you to search images by Scene Mode or other categories such as Portrait Scenery or Night Scenery and sort the pictures into each of the categories...

Страница 107: ...the person to play back and then press MENU SET Sorting by category to play back Category Recording information e g Scene Modes Face Recog Portrait i Portrait Soft Skin Night Portrait i Night Portrait Baby1 Baby2 i Baby Panorama Shot Mode Scenery i Scenery Sunset i Sunset Glass Through Night Portrait i Night Portrait Night Scenery i Night Scenery Handheld Night Shot iHandheld Nite Shot Starry Sky ...

Страница 108: ...lected in the playback screen becomes the date selected when the calendar screen is first displayed If there are multiple pictures with the same recording date the first picture recorded on that day is displayed You can display the calendar between January 2000 and December 2099 If the date is not set in the camera the recording date is set as January 1st 2013 If you take pictures after setting th...

Страница 109: ...el destination in World Time the pictures are displayed by the dates at the travel destination in Calendar Playback Calendar 1 Press 3 4 2 1 to select the date you want to search If there were no pictures recorded during a month that month is not displayed 2 Press MENU SET to display the list of images Pictures are displayed with Multi Playback 30 screens The cursor appears on the picture at the b...

Страница 110: ... images for playback by using Slide Show P104 or Filtering Play P106 the selection screen appears You can proceed to step 2 by selecting Retouch with 3 4 and then pressing MENU SET You can also proceed to step 2 by selecting Retouch from the Playback menu 2 Press 3 4 to select Auto Retouch and then press MENU SET 3 Press 3 4 to select ON and then press MENU SET If you select OFF an image with no e...

Страница 111: ...y a person with an arrow can be selected If only one person is detected press MENU SET 4 Press 3 4 to select the item and then press 1 Select effects from each of the following items 5 Press 3 4 to select the effect To continue to add different effects press 2 and repeat steps 4 and 5 Beauty Retouch Item Description of settings Aesthetic Retouch Displays skin more clearly limits reflections and di...

Страница 112: ...ure that is saved The following pictures cannot be processed Motion pictures Pictures taken in Panorama Shot Mode Pictures taken with 3D Photo Mode in Scene Mode Intended retouching may not be possible when the face detection is not performed properly When a subject is wearing glasses the desired retouch may not be possible When a picture is bright due to reflected light from a flash or the sun th...

Страница 113: ... Monochrome Impressive Art High Dynamic Cross Process Toy Effect Miniature Effect Soft Focus Star Filter One Point Color A brief description of selected image effect appears when you press DISP Read P67 70 for details on the respective effects To set the color you want to keep by using One Point Color move the frame at the center of the screen to the desired color with 3 4 2 1 and then press MENU ...

Страница 114: ...ion Logging on the Playback menu P44 3 Press 3 4 to select Add Location Data and then press MENU SET 4 Press 3 4 to select the period you intend to record location information on pictures then press MENU SET Confirmation screen is displayed It is executed when Yes is selected The location information is recorded onto images Images with location information are indicated with To pause the recording...

Страница 115: ...itle Edit on the Playback menu P44 2 Press 3 4 to select SINGLE or MULTI and then press MENU SET 4 Enter the text P80 Exit the menu after it is set To delete the title erase all the text in the text input screen You can print out texts comments using the PHOTOfunSTUDIO bundled software on the CD ROM supplied You can set up to 50 pictures at one time in MULTI You cannot use Title Edit for the follo...

Страница 116: ...to select Set and then press MENU SET 5 Press 3 4 to select text stamp items and then press MENU SET Text Stamp 3 Select the picture and then press MENU SET to set is displayed on pictures already with date or text stamped MULTI setting Press DISP to set repeat and then press MENU SET to set The setting is canceled when DISP is pressed again SINGLE MULTI Press 2 1 to select the picture Press 3 4 2...

Страница 117: ...ing Date W O TIME Stamp the year month and day WITH TIME Stamp the year month day hour and minutes OFF Name Face Recognition Stamps names registered in name settings for Face Recog Baby Pet Stamps names registered in name settings for Baby1 Baby2 or Pet in Scene Mode OFF Location ON Stamps the travel destination name set under Location OFF Travel Date ON Stamps the travel date set under Travel Dat...

Страница 118: ...aracters may be cut at printing Check before printing When text is stamped onto the 0 3M pictures it is difficult to read it Text and dates cannot be stamped on the pictures in the following cases Motion pictures Pictures taken in Panorama Shot Mode Pictures taken with 3D Photo Mode in Scene Mode Pictures recorded without setting the clock Pictures with date or text stamped Pictures recorded with ...

Страница 119: ...pictures by using Calendar or Video Only in the Filtering Play Motion pictures with a short recording time cannot be divided Video Divide 1 Select Video Divide on the Playback menu P44 2 Press 2 1 to select the motion picture to divide and then press MENU SET 3 Press 3 at the location to divide Motion picture is played back from the same location when 3 is pressed again You can finely adjust the l...

Страница 120: ... in Panorama Shot Mode Pictures taken with 3D Photo Mode in Scene Mode Pictures with date or text stamped Resize 3 Select the picture and size SINGLE setting 1 Press 2 1 to select the picture and then press MENU SET 2 Press 2 1 to select the size and then press MENU SET Confirmation screen is displayed It is executed when Yes is selected Exit the menu after it is executed MULTI setting 1 Press 3 4...

Страница 121: ... is selected Exit the menu after it is executed The picture quality of the cropped picture will deteriorate It may not be possible to crop pictures recorded with other equipment The following images cannot be cropped Motion pictures Pictures taken in Panorama Shot Mode Pictures taken with 3D Photo Mode in Scene Mode Pictures with date or text stamped Information regarding the Face Recognition in t...

Страница 122: ...and then press MENU SET Canceling all the Favorite settings 1 Select Favorite on the Playback menu 2 Press 3 4 to select CANCEL and then press MENU SET Confirmation screen is displayed It is executed when Yes is selected Exit the menu after it is executed You can set up to 999 pictures as favorites You may not be able to set pictures taken with other equipment as favorites Favorite 3 Select the pi...

Страница 123: ...ect Print Set on the Playback menu P44 2 Press 3 4 to select SINGLE or MULTI and then press MENU SET 4 Press 3 4 to set the number of prints and then press MENU SET to set When MULTI has been selected repeat steps 3 and 4 for each picture It is not possible to use the same setting for a multiple number of pictures Exit the menu after it is set Canceling all the Print Set settings 1 Select Print Se...

Страница 124: ...r to the operating instructions for the printer The date cannot be printed on pictures with date or text stamped The number of prints can be set from 0 to 999 Depending on the printer the date print settings of the printer may take precedence so check if this is the case It may not be possible to use the print settings with other equipment In this case cancel all the settings and reset the setting...

Страница 125: ... selected Exit the menu after it is executed The protect setting may not be effective on other equipment Even if you protect pictures in the built in memory or a card they will be deleted if the built in memory or the card is formatted Even if you do not protect pictures on a card they cannot be deleted when the card s Write Protect switch is set to LOCK Protect 3 Select the picture and then press...

Страница 126: ...zed using Face Recognition in Category Selection in Filtering Play You cannot edit the Face Recognition information of protected pictures Face Rec Edit 2 Press 3 4 to select REPLACE or DELETE and then press MENU SET 3 Press 2 1 to select the picture and then press MENU SET 4 Press 2 1 to select the person and then press MENU SET 5 When REPLACE is selected Press 3 4 2 1 to select the person to repl...

Страница 127: ...picture to be copied in the copy destination when is selected a new folder is created and the picture is copied If a picture exists with the same name folder number file number as the picture to be copied in the copy destination when is selected that picture is not copied It may take time to copy the picture data Print Set Protect or Favorite settings will not be copied Perform the settings again ...

Страница 128: ...mera Using the camera near devices such as microwave ovens or cordless telephones that use the 2 4 GHz radio wave band may cause a decrease in performance in both devices Do not connect to the wireless network you are not authorized to use When the camera utilizes its Wi Fi function wireless networks will be searched automatically When this happens wireless networks that you are not authorized to ...

Страница 129: ... played back or sent depending on the device Refer to the manual of the destination equipment or the WEB service for more information on how to playback pictures About the Wi Fi connection lamp Images to send Destination Smart phone PC Cloud Sync Service Web service AV device Printer 1 Home External JPEG MP4 1 AVCHD 1 2 3D A Wi Fi connection lamp Lit blue The Wi Fi connection is on standby Blinkin...

Страница 130: ... flashing red the connection with other equipment may not start or the connection may be disrupted A message such as Communication error is displayed When sending images on a mobile network high packet communication fees may be incurred depending on the details of your contract Pictures may not be completely sent depending on radio wave conditions If the connection is terminated while sending pict...

Страница 131: ...ding the acquired location information to the camera P134 By linking with the DLNA compatible TV you can display pictures on TV right after taking them or display them on TV later by playing them back on the camera Send Images While Recording P143 Send Images Stored in the Camera P151 Every time you take a picture the picture can be automatically sent to a specified location You can play back the ...

Страница 132: ...ng the app on a mobile network high packet communication fees may be incurred depending on the details of your contract Connecting to this unit with Wi Fi Direct requires Android OS 4 0 or higher and Wi Fi DirectTM support Installing the smartphone tablet app Image App For AndroidTM apps For iOS apps Version 1 1 or higher OS Android 2 2 Android 4 2 iOS 4 3 iOS 6 0 Installation procedure 1 Connect ...

Страница 133: ...e connection method press DISP and then select the connection method For details refer to Changing the connection method Connecting to a smartphone tablet Preparations Install the Image App in advance P132 On your smartphone tablet The default connection method is set to Manual Connection 4 On the setting menu of your smartphone tablet turn on the Wi Fi function 5 Select the SSID that matches the ...

Страница 134: ...pp on your smartphone tablet P132 Select on the smartphone tablet The recorded images are saved in the camera Motion pictures cannot be recorded Some settings are not available The screen differs depending on the operating system Select on a smartphone tablet You can save pictures on the smartphone tablet Motion pictures cannot be played back You can send pictures to a WEB service etc The screen d...

Страница 135: ...of January 2013 When using Image App for iOS If you press the Home or On Off button of a smartphone tablet while Rec loc Info is working location information recording is stopped If you want to make a Wi Fi connection with the setting you used before you can select it from the history and connect The number of settings that can be saved in the history is limited It is recommended that you save fre...

Страница 136: ...name For details on how to enter characters refer to Entering Text section on P80 A maximum of 30 characters can be entered Up to 15 characters can be entered for and 1 Press Wi Fi 2 Press 3 4 2 1 to select Favorite Connection and then press MENU SET 3 Select the desired connection setting with 3 4 and then press MENU SET To display the connection detail press DISP To edit the items saved in Favor...

Страница 137: ...e item and press MENU SET Editing the items registered to favorites Item Description of settings Remove from Favorite Change the Order in Favorite Select the destination with 3 4 and then press MENU SET Change the Registered Name For details on how to enter characters refer to Entering Text section on P80 A maximum of 30 characters can be entered Up to 15 characters can be entered for and ...

Страница 138: ... to the wireless access point instruction manual for details Connecting via a wireless access point Connection method Description of settings WPS Push Button Save push button type wireless access point that is compatible with Wi Fi Protected SetupTM with a WPS mark P138 WPS PIN code Save PIN code type wireless access point that is compatible with Wi Fi Protected Setup with a WPS mark P138 Manual C...

Страница 139: ...s point you are connecting to then select Set For details on how to enter characters refer to Entering Text section on P80 3 Press 3 4 to select the network authentication type and press MENU SET For information on network authentication see the manual of the wireless access point 4 Press 3 4 to select the encryption type and press MENU SET The type of settings that can be changed may vary dependi...

Страница 140: ... to and then press MENU SET Read the operating instructions of your device for details WPS Connection WPS Push Button 1 Press 3 4 to select WPS Push Button and then press MENU SET 2 Set the device to WPS mode You can wait longer for a connection by pressing the DISP button on this unit WPS PIN code 1 Press 3 4 to select WPS PIN code and then press MENU SET 2 Enter the PIN code of the device into t...

Страница 141: ... to connect and then press MENU SET When the connection is established the screen is displayed 6 Take or play back pictures on this unit To change the setting or disconnect press Wi Fi P142 Displaying the picture on TV right after taking it Displaying the picture on TV by playing it back on the camera Preparations Set the TV to DLNA waiting Mode Read the operating instructions for your TV For deta...

Страница 142: ... press MENU SET Excluding Playback on TV Send Images Stored in the Camera Printer What you can do with the Wi Fi button when connected to Wi Fi Item Description of settings Terminate the Connection Terminates the Wi Fi connection Change the Destination Terminates the Wi Fi connection and allows you to select a different Wi Fi connection Change Settings for Sending Images Refer to P145 for details ...

Страница 143: ...n and then press MENU SET When connecting with the setting you used before you can select the connection destination from History Connection P135 or Favorite Connection P136 3 Press 3 4 to select Send Images While Recording and then press MENU SET 4 Press 3 4 to select Smartphone and then press MENU SET 5 Selecting the connection method P144 6 Press 3 4 to select a device you want to connect and t...

Страница 144: ...Direct and then press MENU SET For details on the connection methods refer to P140 On your smartphone tablet 2 Start Image App on your smartphone tablet P132 When connecting with Manual Connection On the camera 1 Press 3 4 to select Direct and then press MENU SET 2 Press 3 4 to select Manual Connection and then press MENU SET On your smartphone tablet 3 On the setting menu of your smartphone table...

Страница 145: ... the location information from images before sending them ON Delete the location information then send OFF Keep the location information and send This operation only deletes the location information from the images that are set to be sent The location information will not be deleted from the original images stored in this unit Cloud Limit 3 You can select whether to send images when the Cloud Fold...

Страница 146: ...ss DISP P145 8 Take pictures To change the setting or disconnect press Wi Fi P142 You cannot change the settings while sending pictures Wait until sending is complete Folders sorted by the sent date are created in the specified folder and pictures are saved in those folders If the screen for a user account and password entry appears enter the one you set on your PC When sending images to PC Prepar...

Страница 147: ... the folder select Create manually For details refer to the operating instructions of PHOTOfunSTUDIO PDF When not using PHOTOfunSTUDIO For Windows Supported OS Windows XP Windows Vista Windows 7 Windows 8 Example Windows 7 1 Select a folder you intend to use for receiving then right click 2 Select Properties then enable sharing of the folder For details refer to the operating instructions of your ...

Страница 148: ...rations You need to register to LUMIX CLUB P163 and configure the Cloud Sync setting to send a picture to a Cloud Folder About the images sent to a Cloud Folder by the use of Cloud Sync Service As of January 2013 To send images to a Cloud Folder Cloud Sync setting is required Configure the settings on a PC with PHOTOfunSTUDIO or on a smartphone tablet with Image App If you set the picture destinat...

Страница 149: ...eted with this camera Check images by accessing the WEB Service with your smartphone tablet or computer If sending images fails a report email outlining the failure will be sent to the email address registered with LUMIX CLUB Images may contain personal information that can be used to identify the user such as a title the time and date when the images was taken and the location where the image was...

Страница 150: ... displayed To change the send setting press DISP P145 8 Take pictures To change the setting or disconnect press Wi Fi P142 You cannot change the settings while sending pictures Wait until sending is complete When sending images to AV device Preparations When sending a picture to Home set your device to DLNA waiting mode Read the operating instructions of your device for details When sending images...

Страница 151: ...tting you used before you can select the connection destination from History Connection P135 or Favorite Connection P136 3 Press 3 4 to select Send Images Stored in the Camera and then press MENU SET 4 Press 3 4 to select Smartphone and then press MENU SET 5 Selecting the connection method P152 6 Press 3 4 to select a device you want to connect and then press MENU SET When the connection is comple...

Страница 152: ...Direct and then press MENU SET For details on the connection methods refer to P140 On your smartphone tablet 2 Start Image App on your smartphone tablet P132 When connecting with Manual Connection On the camera 1 Press 3 4 to select Direct and then press MENU SET 2 Press 3 4 to select Manual Connection and then press MENU SET On your smartphone tablet 3 On the setting menu of your smartphone table...

Страница 153: ...onfirmation screen is displayed It is executed when Yes is selected MULTI setting 1 Select the picture and then press DISP to set repeat The setting is canceled when DISP is pressed again 2 Press MENU SET Confirmation screen is displayed It is executed when Yes is selected SINGLE MULTI Press 2 1 to select the picture Press 3 4 2 1 to select the pictures 4 6 2 3 1 5 ...

Страница 154: ...ress DISP P145 8 Press 3 4 to select SINGLE or MULTI and then press MENU SET To change the setting or disconnect press Wi Fi P142 9 Select and send the images P153 Folders sorted by the sent date are created in the specified folder and pictures are saved in those folders If the screen for a user account and password entry appears enter the one you set on your PC When sending images to PC Preparati...

Страница 155: ...ress MENU SET 6 Press 3 4 to select Via Network and then press MENU SET 7 Press 3 4 to select connection method and then press MENU SET P138 8 Check the send setting When the connection is complete the screen is displayed To change the send setting press DISP P145 9 Press 3 4 to select SINGLE or MULTI and then press MENU SET To change the setting or disconnect press Wi Fi P142 10 Select and send t...

Страница 156: ...eted with this camera Check images by accessing the WEB Service with your smartphone tablet or computer If sending images fails a report email outlining the failure will be sent to the email address registered with LUMIX CLUB Images may contain personal information that can be used to identify the user such as a title the time and date when the images was taken and the location where the image was...

Страница 157: ...en is displayed To change the send setting press DISP P145 8 Press 3 4 to select SINGLE or MULTI and then press MENU SET To change the setting or disconnect press Wi Fi P142 9 Select and send the images P153 When sending images to AV device Preparations When sending a picture to Home set your device to DLNA waiting mode Read the operating instructions of your device for details When sending images...

Страница 158: ... press MENU SET 7 Select pictures and then print P184 To change the setting or disconnect press Wi Fi P142 Motion pictures cannot be printed out When sending images to Printer Preparations You can print out recorded pictures wirelessly from a PictBridge wireless LAN compatible printer Compliant with the DPS over IP standards See the following website for information on the PictBridge wireless LAN ...

Страница 159: ...int and set Refer to P138 for details 5 Set the transfer destination 6 Press 3 4 to select Auto Transfer and press MENU SET 7 Press 3 4 to select ON and press MENU SET Only the images you recorded when Auto Transfer is set to ON is transferred Auto Transfer Automatically transfer images during charging P160 Transfer Now Transfer images to the preset destination immediately P160 Set Destination Cha...

Страница 160: ...nsfer may not work When Destination is set to PC images are saved in the folder you have created for receiving P147 If there are images that are not transferred when Auto Transfer is set to OFF the message that confirms whether to transfer these images is displayed Select a desired option Transfer images instantly Preparation Configure Smart Transfer in advance P159 1 Connect the AC adaptor suppli...

Страница 161: ... and set Refer to P138 for details Size Resizes the image to send Original Change You can select the picture size from M or S in Change The aspect ratio does not change Delete Location Data Select whether to delete the location information from images before transferring them ON Delete the location information then transfer OFF Keep the location information and transfer This operation only deletes...

Страница 162: ...ck image transfer history Display Log You can check the date and details of transferred images 1 Select Wi Fi Setup in the Wi Fi menu and press MENU SET P44 2 Press 3 4 to select Smart Transfer and press MENU SET 3 Press 3 4 to select Display Log and press MENU SET Dates and content of transferred images are displayed Exit the menu when you are done viewing Item Description of settings ON Give pri...

Страница 163: ...nection destination 4 Press 3 4 to select Add Change Account and press MENU SET 5 Press 3 4 to select New account and press MENU SET Connect to the network Proceed to the next page by pressing MENU SET A confirmation screen will be displayed if a login ID has already been acquired for the camera Select Yes to acquire a new login ID or No if you do not need to acquire a new login ID 6 Press MENU SE...

Страница 164: ...UB and press MENU SET 3 Press 3 4 to select Add Change Account and press MENU SET 4 Press 3 4 to select Change Login ID and press MENU SET The login ID and password are displayed The password is displayed as Close the menu if only checking the login ID 5 Press 3 4 to select the login ID or password you want to change and press MENU SET The confirmation screen is displayed when changing the login I...

Страница 165: ...is unit to the smartphone tablet P133 2 From the Image App menu set the common login ID The login IDs for this unit and the smartphone tablet become the same After connecting this unit to the smartphone tablet the setup screen for a common login ID may appear when you display the playback screen You can also set a common login ID by following the on screen instructions This operation is not availa...

Страница 166: ...ess MENU SET Exit the menu after it is executed Changes and other actions to login IDs can only be made to the login ID acquired with the camera When sending images to WEB services the WEB service being used must be registered with the LUMIX CLUB Registering multiple WEB services will send images to all services simultaneously Check the FAQ Contact us on the following site for compatible WEB servi...

Страница 167: ...that has already been saved can be changed or deleted 1 Select Wi Fi Setup in the Wi Fi menu and press MENU SET P44 2 Press 3 4 to select External AV device and press MENU SET 3 Press 3 4 to select the AV device you want to change or delete and press MENU SET 4 Select Edit or Delete and press MENU SET Exit the menu after it is executed Configuring the external AV device settings Preparations Check...

Страница 168: ...ange the workgroup For details on how to enter characters refer to Entering Text section on P80 Up to 32 characters can be entered for A a 1 and Smart Transfer LUMIX CLUB Acquires or changes the LUMIX CLUB login ID PC Connection You can set the workgroup To send images to a PC a connection to the same workgroup as the destination PC is required The default setting is WORKGROUP Change Workgroup Nam...

Страница 169: ...egulations is only available on the version DMC SZ9P External AV device Images can be sent to the AV device of relatives and acquaintances via LUMIX CLUB Wi Fi Password To prevent incorrect operation or use of the Wi Fi function by a third party and to protect saved personal information it is recommended that you protect the Wi Fi function with a password Setting a password will automatically disp...

Страница 170: ...on Do not connect devices to incorrect terminals Doing so may cause malfunction To connect with an HDMI micro cable optional Always use a genuine Panasonic HDMI micro cable RP CHEU15 optional Part number RP CHEU15 1 5 m 5 feet Audio will be played back as stereo Some playback functions are restricted Playback menu and Setup menu cannot be used Auto Retouch Beauty Retouch Creative Retouch cannot be...

Страница 171: ...the USB connection cable supplied simultaneously with the HDMI micro cable optional When you play back a picture vertically it may be blurry When pictures are displayed they may not be displayed properly depending on the type of TV No sound is output from the camera speakers Read the operating instructions for the TV The recorded still pictures can be played back on a TV with an SD Memory Card slo...

Страница 172: ...MI HDAVI Control This function allows you to use your remote control for the Panasonic TV for easy operations when this unit has been connected to a VIERA Link compatible device using an HDMI micro cable optional for automatic linked operations Not all operations are possible VIERA Link is a unique Panasonic function built on a HDMI control function using the standard HDMI CEC Consumer Electronics...

Страница 173: ...case use the remote control for the TV to switch the input channel For details on how to switch input please read the operating instructions for the TV If VIERA Link does not work properly refer to page 209 If you are unsure whether or not the TV you are using is compatible with VIERA Link read the operating instructions for the TV Available linked operations between this unit and a Panasonic TV i...

Страница 174: ...pictures recorded in 3D will appear on the thumbnail display at playback Play back as a 3D slide show by selecting only the still pictures recorded in 3D Select 3D Play in Slide Show in the Playback Mode P104 Play back in 3D by selecting only the still pictures recorded in 3D Select 3D Play in Filtering Play in the Playback Mode P106 Switch the playback method for the still pictures recorded in 3D...

Страница 175: ...isplayed for a few seconds when switching playback back and forth from 3D to 2D pictures When you select a 3D picture thumbnail it may take a few seconds for playback to start After playback the thumbnail display may take a few seconds to reappear When viewing 3D pictures your eyes may become tired if you are too close to the television screen If your television does not switch to a 3D picture mak...

Страница 176: ...ed so do not choose to format If the card is not recognized please refer to the below support site http panasonic net avc sdcard information SDXC html PC that can be used The unit can be connected to any PC capable of recognizing a mass storage device Windows support Windows XP Windows Vista Windows 7 Windows 8 Mac support OS X v10 1 v10 8 AVCHD motion pictures may not be imported correctly when c...

Страница 177: ...es LoiLoScope 30 day full trial version Windows XP Vista 7 8 LoiLoScope is a video editing software where that draws out the full power of your PC Creating videos is as easy as organizing cards on top of a desk Use your music picture and video files to create videos to share with your friends and family by burning it to a DVD uploading it to websites or simply share your videos with your friends v...

Страница 178: ...els or more recommended RAM 512 MB or more WindowsR XP Windows VistaR 1 GB or more WindowsR 7 32bit WindowsR 8 32bit 2 GB or more WindowsR 7 64bit WindowsR 8 64bit Free hard disk space 450 MB or more for installing software Refer to the operating instructions of PHOTOfunSTUDIO PDF for further operating environment 2 Insert the CD ROM with the supplied software When you insert the supplied CD ROM t...

Страница 179: ... able to play back or edit If the remaining battery power becomes low while the camera and the PC are communicating the alarm beeps Refer to Disconnecting the USB connection cable safely P180 before disconnecting the USB connection cable Otherwise data may be destroyed Before inserting or removing a card turn the camera off and disconnect the USB connection cable Otherwise data may be destroyed Pr...

Страница 180: ...y displayed on the PC and then click Eject DMC XXX XXX varies by model Depending on your PC s settings this icon may not be displayed If the icon is not displayed check that Access is not displayed on the LCD monitor of the digital camera before removing the hardware Connection in the PTP Mode Set USB Mode to PictBridge PTP Data can now be read only from the card in the PC When there are 1000 or m...

Страница 181: ... a Blu ray Disc or DVD etc See the operating instructions for the recorder about the details about copying and playing back For details on Panasonic devices compatible with the respective file format such as a Blu ray Disc recorder refer to the support sites below http panasonic jp support global cs dsc This Site is English only Some compatible devices may not be sold in certain countries and regi...

Страница 182: ...t this unit with the recording equipment with an AV cable optional 2 Start the playback of this unit 3 Start the recording on the recording equipment When ending the recording copying stop the playback on this unit after stopping the recording of the recording equipment When you play back motion pictures on 4 3 aspect ratio TV you must set TV Aspect P53 on this unit to 4 3 before starting a copy T...

Страница 183: ...battery power becomes low while the camera and the printer are connected the alarm beeps If this happens during printing stop printing at once If not printing disconnect the USB connection cable Do not disconnect the USB connection cable while å Cable disconnect prohibit icon is displayed may not be displayed depending on the type of printer used Before inserting or removing a card turn the camera...

Страница 184: ...press MENU SET Refer to P185 for the items which can be set before starting to print the pictures Disconnect the USB connection cable after printing Selecting multiple pictures and printing them Item Description of settings Multi Select Multiple pictures are printed at one time Press 3 4 2 1 to select the pictures and then press DISP When DISP is pressed again the setting is canceled After the pic...

Страница 185: ...he operating instructions of the printer When Print Set DPOF has been selected the Print with Date and Num of prints items are not displayed If the printer does not support date printing the date cannot be printed on the picture Depending on the printer the date print settings of the printer may take precedence so check if this is the case When printing images with Date Stamp or Text Stamp please ...

Страница 186: ...Item Description of settings Settings on the printer are prioritized L 3 5qk5q 89 mmk127 mm 2L 5qk7q 127 mmk178 mm POSTCARD 100 mmk148 mm 16 9 101 6 mmk180 6 mm A4 210 mmk297 mm A3 297 mmk420 mm 10k15cm 100 mmk150 mm 4qk6q 101 6 mmk152 4 mm 8qk10q 203 2 mmk254 mm LETTER 216 mmk279 4 mm CARD SIZE 54 mmk85 6 mm ...

Страница 187: ...paper set Page Layout to ä and then set Num of prints to 1 for each of the 4 pictures The camera is receiving an error message from the printer when the indication lights orange during printing After finishing printing make sure there are no problems with the printer If the number of prints is high the pictures may be printed several times In this case the remaining number of prints indicated may ...

Страница 188: ...mum shutter speed P93 19 Aperture value P32 20 AF area P33 21 ISO sensitivity P83 22 AF Tracking P87 AF assist lamp P97 23 Exposure compensation P64 24 Number of days that have passed since the departure date P47 Location P47 Name P77 Age P77 Current date and time World Time P46 Zoom P57 25 Elapsed recording time P35 26 Monitor Luminance P49 Monitor power save P51 27 Date Stamp P99 28 Recording st...

Страница 189: ...7 15 Auto Retouch P110 Beauty Retouch P111 Creative Retouch P113 Motion picture playback P38 Play panorama P73 16 Number of days that have passed since the departure date P47 Recorded date and time World Time P46 17 Power Monitor P49 Monitor power save P51 18 Folder File number P180 19 Motion picture recording time P38 20 Recording format P100 Recording Quality P101 21 Built in memory P20 Cable di...

Страница 190: ...ly turn this unit off and remove the battery or disconnect AC adaptor supplied AC adaptor optional Then reinsert the battery or reconnect AC adaptor and turn this unit on Do not use this unit near radio transmitters or high voltage lines If you record near radio transmitters or high voltage lines the recorded pictures and or sound may be adversely affected Always use the supplied cords and cables ...

Страница 191: ...e camera is cold when you turn it on the picture on the LCD monitor will be slightly darker than usual at first However the picture will return to normal brightness when the internal temperature of the camera increases Do not press the lens with excessive force Do not leave the camera with the lens facing the sun as rays of light from the sun may cause it to malfunction Also be careful when placin...

Страница 192: ...y in the camera will damage the camera Do not remove or damage the external label on the battery Using a battery with part or all of the external label removed or using the one with a torn label may result in malfunctions Dispose of unusable battery The battery has a limited life Do not throw the battery into fire because it may cause an explosion The unusable battery should be discarded in accord...

Страница 193: ...contents we recommend taking a break every 30 to 60 minutes Viewing for extended periods may cause eye fatigue Short sighted or long sighted persons those with differences in the sight of their right and left eyes and those with astigmatism are advised to correct their vision by wearing glasses etc Stop viewing if you can clearly see a double image while viewing 3D contents There are differences i...

Страница 194: ...e altered or vanish due to erroneous operation effect of static electricity accident malfunction repair or other handlings Please note in advance that Panasonic is not liable in any way for any direct or indirect damage from the alteration or vanishing of information or personal information When requesting a repair transferring to another party or disposing Reset the settings to protect the person...

Страница 195: ...cabinet Recorded data may be damaged or lost if the camera breaks down due to inappropriate handling Panasonic will not be liable for any damage suffered due to loss of recorded data When you use a tripod make sure the tripod is stable when this unit is attached to it You may not be able to remove the card or the battery when using a tripod or unipod Make sure that the screw on the tripod or unipo...

Страница 196: ...apacity of the card becomes full Some pictures cannot be copied Copy could not be completed The following pictures cannot be copied When a picture with the same name as the picture to be copied exists in the copy destination Only when copying from a card to the built in memory Files not based on the DCF standard Moreover pictures recorded or edited by other equipment may not be copied Built In Mem...

Страница 197: ... has deteriorated so it is recommended to make a backup and then format P54 Depending on the type of the card motion picture recording may stop in the middle Cannot record due to incompatible format NTSC PAL data on this card Format the card after saving necessary data on a PC etc P54 Insert a different card A folder cannot be created A folder cannot be created because there are no remaining folde...

Страница 198: ...nnected Transfer stopped Radio waves from the wireless access point are getting weak Perform the connection closer to the wireless access point There is no reply from the server or it has exceeded the communication processing time Try again after a while Depending on the wireless access point connection may be automatically disconnected after specific time has passed Reconnect the connection again...

Страница 199: ...our smartphone tablet or PC and set the login details of the destination WEB service Both picture and video sharing service cannot be selected together WEB services designed only for pictures and WEB services designed only for motion pictures cannot be selected at the same time Deselect one of the services Cannot get IP address Please set wireless AP s IP address setting to DHCP Turn on DHCP setti...

Страница 200: ...he camera on the battery will be exhausted Turn the camera off frequently by using the Economy P51 If you connect to a TV compatible with VIERA Link with an HDMI micro cable optional and turn the TV off with the remote control for the TV this unit is also turned off If you are not using VIERA Link set VIERA Link to OFF P53 Insert the battery securely all the way in P12 If the problem is not resolv...

Страница 201: ...or Burst P95 of the Rec menu to OFF The focus range varies depending on the Recording Mode Set to the proper mode for the distance to the subject The subject is beyond the focus range of the camera P33 There is camera shake jitter or the subject is moving slightly P26 The shutter speed becomes slower when pictures are taken in dark places so hold the camera firmly with both hands to take the pictu...

Страница 202: ...Depending on the type of the card recording may stop in the middle If motion picture recording stops during use of a card of at least Class 4 or if you use a card that has been formatted on a PC or other equipment the data writing speed is lower In such cases we recommend that you make a backup of the data and then format P54 the card in this unit The recorded picture looks rough Noise appears on ...

Страница 203: ...mera is zoomed or when the camera is moved This is because of operation of the automatic aperture of the camera and it is not a malfunction The LCD monitor may flicker for a few seconds after turning this unit on This is an operation to correct flicker caused by lighting such as fluorescent lights LED lights etc and is not a malfunction Is Monitor Luminance active P49 Perform Monitor Display P48 T...

Страница 204: ...he built in memory or the card The pictures on the built in memory appear when a card is not inserted The picture data on the card appears when a card is inserted Is this a folder or picture which was processed in the PC If it is it cannot be played back by this unit It is recommended to use the PHOTOfunSTUDIO software in the CD ROM supplied to write pictures from PC to card Are you playing back f...

Страница 205: ... pictures may be displayed with a deteriorated picture quality This unit automatically adjusts the aperture during motion picture recording At such times the sound may break up This is not a malfunction Motion pictures recorded in AVCHD or MP4 may be played back with poor picture or sound quality or playback may not be possible even when played back with equipment compatible with these formats Als...

Страница 206: ...ra if it is not compatible When the battery indicator is flashing red the connection with other equipment may not start or the connection may be disrupted A message such as Communication error is displayed Check if the wireless access point to connect is in operating state The camera may not display or connect to a wireless access point depending on the radio wave condition Perform the connection ...

Страница 207: ...g the motion picture with Video Divide P119 It may take longer time to transmit when distance to the wireless access point is far Transmit closer to the wireless access point Upload may not complete when it is disconnected while transmitting the image It may take some time after uploading the image to be reflected in the WEB service depending on the status of the server Wait for a while and try ag...

Страница 208: ... LUMIX CLUB login settings will be reset excluding LUMIX CLUB Is the size of the image too large Transmit after dividing the motion picture with Video Divide P119 Reduce the size of the still picture then transmit P145 161 Image cannot be transmitted when the battery indicator is flashing red File format of the motion picture that can be sent differs depending on the destination P129 Is the size o...

Страница 209: ...o switch input For details on how to switch input please read the operating instructions for the TV Check the VIERA Link setting on the connected device Turn this unit off and on Set HDAVI Control to Off on the TV and then turn it back to On Refer to the operating instructions of the TV for details Is the camera connected to the PC correctly Is the camera recognized by the PC correctly Set to PC i...

Страница 210: ... details refer to the operating instructions for the printer When you order photo studios to print pictures ask the photo studio if the 16 9 pictures can be printed Since aspect ratio of a panorama picture differs from normal pictures it may not always be possible to print it correctly Please use a printer that supports panorama pictures For details refer to the operating instructions for the prin...

Страница 211: ...g time the clock may be reset Please set the clock message will be displayed please reset the clock P24 It is possible that the subject may be warped slightly or the borders get colored depending on the zoom magnification due to the characteristics of the lens but this is not a malfunction When using the Extended Optical Zoom the zooming action will stop temporarily This is not a malfunction Is th...

Страница 212: ...and file numbers for the pictures taken will not be stored in the memory When this unit is turned on again and pictures are taken they may be stored under file numbers which should have been assigned to previous pictures Formatting is not available in Intelligent Auto Mode Switch the recording mode to another one P27 The file numbers are not recorded consecutively The file numbers are recorded wit...

Страница 213: ...ED Logo is a certification mark of the Wi Fi Alliance The Wi Fi Protected Setup Mark is a mark of the Wi Fi Alliance Wi Fi Wi Fi Protected Setup Wi Fi Direct WPA and WPA2 are marks or registered marks of the Wi Fi Alliance DLNA the DLNA Logo and DLNA CERTIFIED are trademarks service marks or certification marks of the Digital Living Network Alliance This product uses DynaFont from DynaComware Corp...

Страница 214: ...nd or other materials provided with the distribution 3 All advertising materials mentioning features or use of this software must display the following acknowledgment This product includes software developed by the OpenSSL Project for use in the OpenSSL Toolkit http www openssl org 4 The names OpenSSL Toolkit and OpenSSL Project must not be used to endorse or promote products derived from this sof...

Страница 215: ...ary form must reproduce the above copyright notice this list of conditions and the following disclaimer in the documentation and or other materials provided with the distribution 3 All advertising materials mentioning features or use of this software must display the following acknowledgement This product includes cryptographic software written by Eric Young eay cryptsoft com The word cryptographi...

Страница 216: ...above copyright notice this list of conditions and the following disclaimer in the documentation and or other materials provided with the distribution 3 All advertising materials mentioning features or use of this software must display the following acknowledgement This product includes cryptographic software written by Eric Young eay cryptsoft com The word cryptographic can be left out if the rou...

Страница 217: ...h the distribution 3 Neither the name of the University nor the names of its contributors may be used to endorse or promote products derived from this software without specific prior written permission THIS SOFTWARE IS PROVIDED BY THE REGENTS AND CONTRIBUTORS AS IS AND ANY EXPRESS OR IMPLIED WARRANTIES INCLUDING BUT NOT LIMITED TO THE IMPLIED WARRANTIES OF MERCHANTABILITY AND FITNESS FOR A PARTICU...

Страница 218: ...rmission please contact licensing OpenSSL org 5 Products derived from this software may not be called OpenSSL nor may OpenSSL appear in their names without prior written permission of the OpenSSL Project 6 Redistributions of any form whatsoever must retain the following acknowledgment This product includes software developed by the OpenSSL Project for use in the OpenSSL Toolkit http www OpenSSL or...

Страница 219: ...above copyright notice this list of conditions and the following disclaimer in the documentation and or other materials provided with the distribution 3 All advertising materials mentioning features or use of this software must display the following acknowledgement This product includes cryptographic software written by Eric Young eay cryptsoft com The word cryptographic can be left out if the rou...

Страница 220: ...h the distribution 3 Neither the name of the University nor the names of its contributors may be used to endorse or promote products derived from this software without specific prior written permission THIS SOFTWARE IS PROVIDED BY THE REGENTS AND CONTRIBUTORS AS IS AND ANY EXPRESS OR IMPLIED WARRANTIES INCLUDING BUT NOT LIMITED TO THE IMPLIED WARRANTIES OF MERCHANTABILITY AND FITNESS FOR A PARTICU...

Страница 221: ...following acknowledgement This product includes software developed by the University of California Berkeley and its contributors 4 Neither the name of the University nor the names of its contributors may be used to endorse or promote products derived from this software without specific prior written permission THIS SOFTWARE IS PROVIDED BY THE REGENTS AND CONTRIBUTORS AS IS AND ANY EXPRESS OR IMPLI...

Страница 222: ...with the distribution 3 Neither the name of the University nor the names of its contributors may be used to endorse or promote products derived from this software without specific prior written permission THIS SOFTWARE IS PROVIDED BY THE REGENTS AND CONTRIBUTORS AS IS AND ANY EXPRESS OR IMPLIED WARRANTIES INCLUDING BUT NOT LIMITED TO THE IMPLIED WARRANTIES OF MERCHANTABILITY AND FITNESS FOR A PART...

Страница 223: ...e and to permit persons to whom the Software is furnished to do so subject to the following conditions The above copyright notice and this permission notice shall be included in all copies or substantial portions of the Software THE SOFTWARE IS PROVIDED AS IS WITHOUT WARRANTY OF ANY KIND EXPRESS OR IMPLIED INCLUDING BUT NOT LIMITED TO THE WARRANTIES OF MERCHANTABILITY FITNESS FOR A PARTICULAR PURP...

Отзывы: