background image


Please refer to the following sheet for detailed information. 
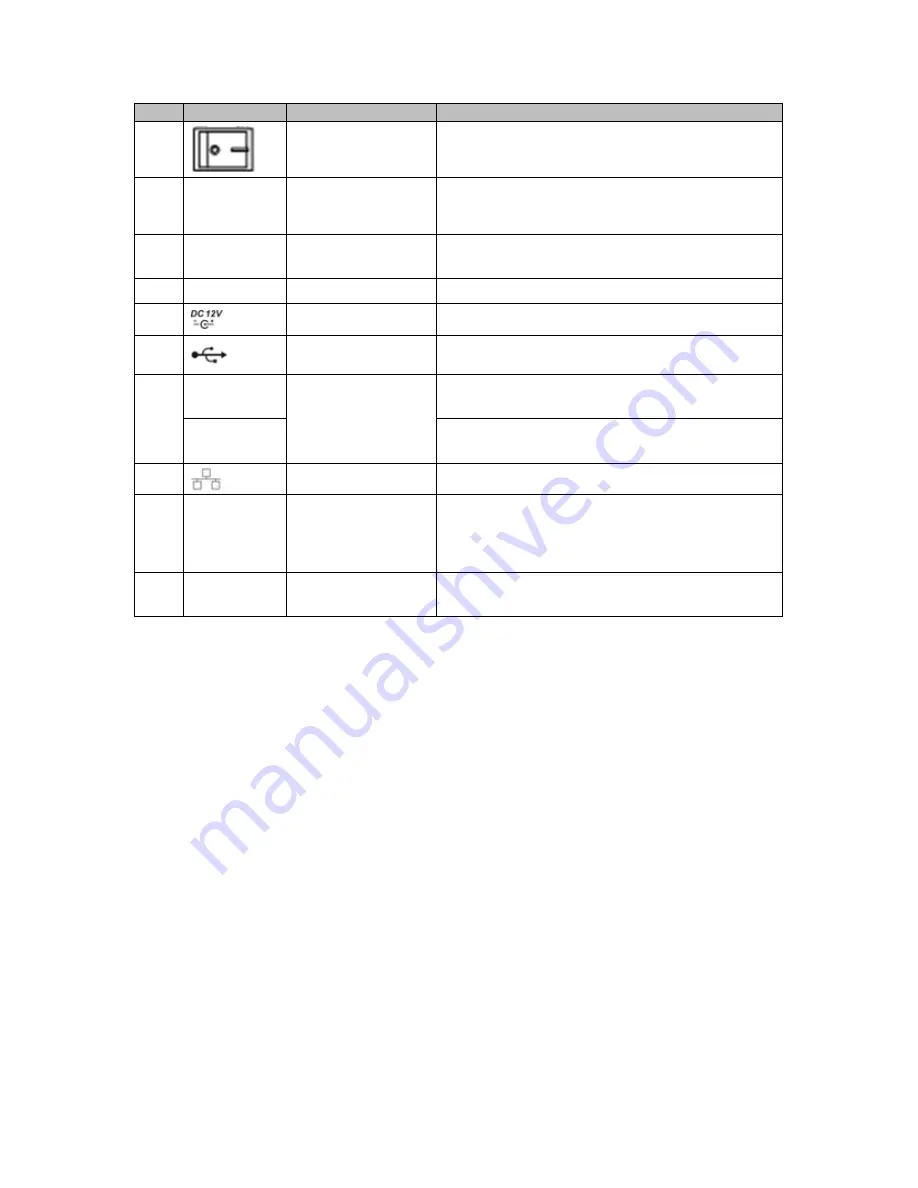
SN 

Icon 

Name 

Note 


Power on-off button   Power on/off button. 

VGA 

VGA video output 
port  

VGA video output port. Output analog video 
signal. Can connect to the monitor to view analog 
video output.  

AUDIO IN 

Audio input port  

Connect to audio input device such as 
microphone or other audio input device. 

VIDEO IN 

Video input port  

Connect to analog camera, video input signal.  


Power input port  

Input 12V DC. 


USB2.0 port 

Connect to USB storage device, mouse, burning 
DVD-ROM and etc. 

RS485 (RS-485) 
communication port  

RS485_A port. It is the cable A. You can connect 
to the control devices such as speed dome PTZ. 

RS485_B port. It is the cable B. You can connect 
to the control devices such as speed dome PTZ. 


Network port  

100M Ethernet port. 

HDMI 

High definition 
media interface 

High definition audio and video signal output port. 
It transmits uncompressed high definition video 
and multiple-channel data to the HDMI port of the 
display device. 

10 

AUDIO OUT 

Audio output port  

Connect to audio output device such as sound 
box. 


2


Local Login 

2.1


Device Initialization 

If it is you first time to boot up the device, system pops up device initialization interface. See 

Figure 2-1. Please set administrator password. The default administrator name is 

admin

. Set 

unlock pattern and security questions if necessary.  

Note 


The  password  ranges  from  8  to  32  digitals.  It  can  contain  letters,  numbers  and  special 
characters (excluding “'”, “"”, “;”, “:”, “&”) . The password shall contain at least two categories. 
Usually we recommend the strong password. 


STRONG PASSWORD RECOMMENDED-For your device own safety, please create a 

strong password of your own choosing. We also recommend you change your password 

periodically especially in the high security system.  

Содержание CJ-HDR104A

Страница 1: ...HD Analog Recorder Quick Start Guide Model No CJ HDR104A CJ HDR108A Version 1 0 0 ...

Страница 2: ...re Installation and Connection 1 1 1 Check Unpacked DVR 1 1 2 About the Panels and Cover 1 1 3 HDD Installation 1 1 4 Front Panel 2 1 5 Rear Panel 3 2 Local Login 4 2 1 Device Initialization 4 2 2 Schedule 5 2 3 Playback 6 3 Web 7 ...

Страница 3: ... for purchasing our HD Analog Recorder DVR This quick start guide will help you become familiar with our DVR in a very short time Before installation and operation please read the following safeguard and warning carefully ...

Страница 4: ...torage and installation 3 Installation Keep upwards Handle with care Do not apply power to the DVR before completing installation Do not place objects on the DVR 4 Qualified engineers needed All the examination and repair work should be done by the qualified service engineers We are not liable for any problems caused by unauthorized modifications or attempted repair 5 Environment The DVR should be...

Страница 5: ... keys in the front panel and the ports in the rear panel please refer to the User s Manual included in the resource CD The model label in the front panel is very important please check according to your purchase order The label in the top cover is very important too Usually we need you to represent the serial number when we provide the service after sales 1 3 HDD Installation This series DVR has o...

Страница 6: ...information Name Icon Function Power button Press this button to boot up or shut down the device USB port Connect to USB2 0 storage device mouse and etc Up Down Activate current controls and then move up move down or jump Change setup increase decrease numeral Assistant function such as PTZ menu Switch channel when playback Left Right Switch current activated controls move up and down When device ...

Страница 7: ...ol press it for 1 5 seconds to delete the previous character before the cursor Realize other special functions Power indicator POWER Light turns on when power connection is OK Network indicator NET Light turns on when network connection is abnormal Alarm indicator ALARM Light turns on when alarm occurs HDD indicator HDD Light turns on when HDD is abnormal 1 5 Rear Panel The 4 channel series rear p...

Страница 8: ...M Ethernet port 9 HDMI High definition media interface High definition audio and video signal output port It transmits uncompressed high definition video and multiple channel data to the HDMI port of the display device 10 AUDIO OUT Audio output port Connect to audio output device such as sound box 2 Local Login 2 1 Device Initialization If it is you first time to boot up the device system pops up ...

Страница 9: ... not input security question here or you need to update the security question information please go to the main menu SETTING SYSTEM ACCOUNT to set 2 2 Schedule From MAIN MENU SETTING STORAGE SCHEDULE enter schedule interface See Figure 2 2 Device begins all channel 24 hour record mode by default Set the record period and record type according to your actual requirements ...

Страница 10: ...ENU OPERATION PLAYBACK or on the preview window right click mouse and then select Playback enter Playback interface See Figure 2 3 It is to search and playback the record file Refer to the User s Manual for detailed information Figure 2 3 ...

Страница 11: ...ailed operation information please refer to the User s Manual included in the resource CD Note For detailed operation introduction please refer to our resource CD included in your package for electronic version of the User s Manual This quick start guide is for reference only Slight difference may be found in the user interface All pictured model is CJ HDR108A unless otherwise stated All the desig...

Отзывы: