


(?) Why is it possible to control the camera by this setting-up only?
Default IP address for
AW-XXXX
is (192.168.0.10).
Meanwhile, the camera IP address table (CAM IP ADR) /CAM1 provided for AW-RP50 in advance is set to
(192.168.0.10).
So, when the connection method for [1] CAM1 is set to [Network], AW-RP50 recognizes the camera as CAM1.
☆
AW-RP50: MENU
>
[10] SYSTEM
>
[7] CAM IP ADR with default setting values
to
*
When
AW-XXXX
with its IP address set to
(
192.168.0.11
)
is connected via IP connection, if the
Connection setting for [CAM IP ADR]/CAM2 is changed to [Network], this
AW-XXXX
is recognized as CAM2.
3.
Turn
AW-XXXX
on.
(How to switch over to POWER ON mode (power ON) on
AW-XXXX
connected to CAM1)
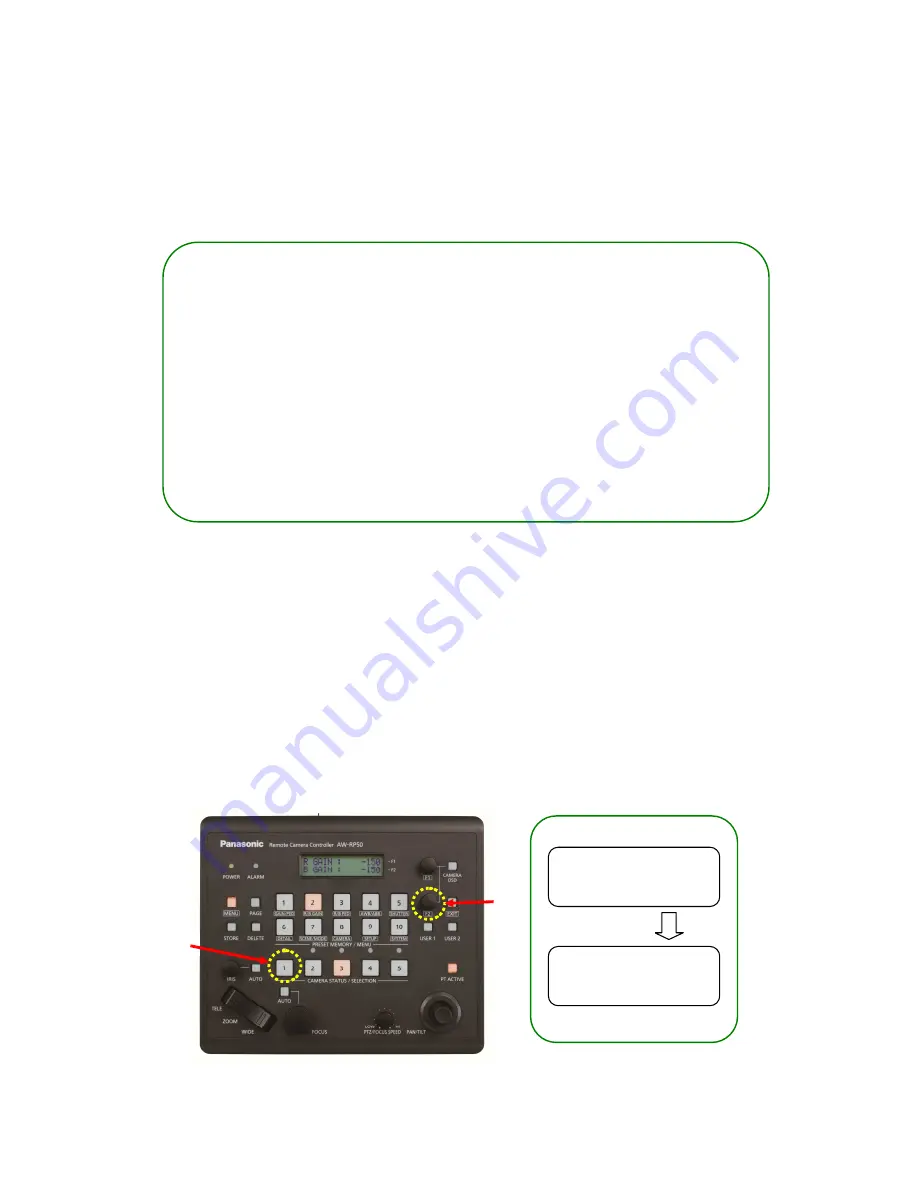
·
Hold down LED button 1 at CAMERA STATUS/SELECTION. – (Fig. 3-A)
* While the button is held down, the selected camera and its power status will be displayed on the LCD
screen.
– (Fig. 4)
·
Keeping the button held down, turn F2 dial to select “ON”. Then press F2 dial to determine it. – (Fig. 3-B)
* By this operation,
AW-XXXX
will be switched over to POWER ON mode after its default setting motion.
(The status lamp will light up in green and the LED on AW-RP50 will also light up in green.)
*
When performing the same procedure from POWER ON mode, if [POWER: OFF] is selected,
AW-XXXX
will be
switched over to STANDBY mode.
CAM1
<
AW-XXXX
>
POWER
:
OFF
CAM1
<
AW-XXXX
>
POWER
:
ON
1 IP: CAM1 (192.168.0.10)
100 IP: CAM100 (192.168.0.109)
“CAM1” is held down
Select “ON”
⇒
Press F2 to determine
Turn F2
(
A
)
(Figure 3)
(Figure 4)
(
B
)
②
Check that the LAN cable is connected to “LAN port”, not to “RS422 port”.
③
Double-check that there is no error in setting up the connection.
Содержание AW-RP50
Страница 13: ... Web Screen for AW XXXX ...


