– 48 –
Chapter 4 Shooting — Basic procedures
Basic procedures
This section describes the basic procedures for shooting. When you actually start shooting, pre-inspect your system to ensure that it works properly
after making preparations.
Preparation
1
Attach the fully charged battery, or connect the AC adaptor. (page 28)
2
Set the power switch to <ON>. (page 34)
3
Insert the microP2 memory card. (page 38)
4
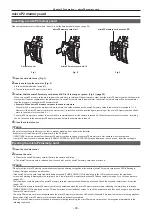
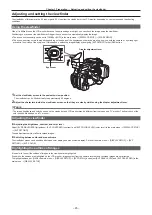
Adjust the angle of the LCD monitor and viewfinder or other conditions. (pages 44, 45)
5
Set the lens cover lever to <OPEN>. (page 32)
@
@
NOTE
t
Even if the battery is fully charged, the remaining capacity of the battery may not be correctly displayed.
Shooting
For shooting, use the following steps.
b
b
c
a
b
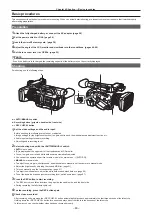
a:
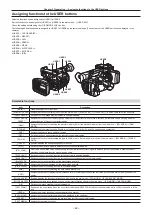
<AUTO/MANUAL> switch
b: Recording button (grip side, handle side, front side)
c: <REC CHECK> button
1
Set the video settings and the audio input.
Before shooting, the followings must be set or adjusted.
f
Image settings for the brightness function (iris, gain, shutter) and the white balance adjustment function, etc.
f
Audio input settings for audio recording.
f
Adjusting audio recording level
2
Select shooting mode with the <AUTO/MANUAL> switch.
<AUTO>:
auto mode
f
[A] is displayed at the upper part of the viewfinder and LCD monitor.
f
Focus, iris, gain, shutter, and white balance are automatically adjusted.
f
You can set the operation specifics for auto mode in the main menu
→
[AUTO SW].
<MANUAL>:
manual mode
f
To adjust focus, iris, gain, shutter speed, and white balance manually, set the camera to manual mode.
f
Adjust the brightness by adjusting the iris and ND filter. (page 51)
f
To focus manually, use the focus operation. (page 51)
f
To adjust the white balance, adjust the white balance and black balance. (page 55)
f
To set the audio input and adjust the recording level, switch audio input. (page 67)
3
Press the REC button to start recording.
f
The REC button is on three locations: the grip side, the handle side, and the front side.
f
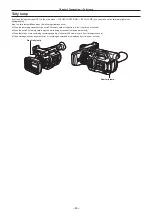
During recording, the tally lamp lights red.
4
To stop recording, press the REC button again.
5
Check videos recorded.
After recording ends, pressing the <REC CHECK> button automatically plays back approximately the last three seconds of the latest clip.
Holding down the <REC CHECK> button for one second plays back from the last ten seconds of the latest clip.
In this way, you can check whether video has been recorded properly.
Содержание AJ-PX230 Series
Страница 12: ...Before using the camera read this chapter Chapter 1 Overview ...
Страница 141: ...This chapter describes the screen displayed on the viewfinder or LCD monitor Chapter 7 Display ...
Страница 153: ...Maintenance of the camera or frequently asked questions are described Chapter 9 Maintenance ...
Страница 161: ...This chapter describes the specifications of this product Chapter 10 Specification ...
Страница 169: ...Web Site http www panasonic com Panasonic Corporation 2016 ...

