– 22 –
Chapter 2 Description of Parts — Right side
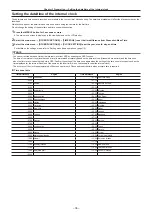
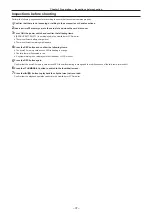
Right side
1
8
7
2
3
5
4
6
13
9
10
11
12
14
15
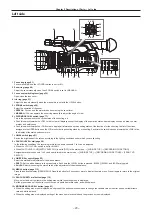
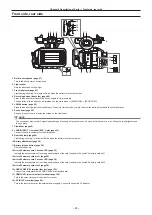
1 Eye cup (page 32)
2 Eye piece
3 Busy (active status indication) lamp (page 88)
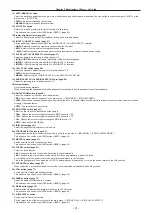
Indicate the active status of the SD memory card, and is illuminated when the card is active.
4 SD memory card slot (page 88)
This is the insertion slot for the SD memory card (optional). The SD memory card is used for recording/opening the camera setting menu, or
uploading the metadata, etc.
@
@
NOTE
t
Cautions when using SD memory cards
-
On the camera, use SD memory cards that conform to the SD standard, SDHC standard, or the SDXC standard.
-
MMC (Multi Media Card) cannot be used. (Bear in mind that taking pictures may no longer be possible if you use them.)
-
When using miniSD/microSD cards with the camera, always install the adaptor specially designed for miniSD/microSD cards. (The camera will
not work properly if only the miniSD/microSD adaptor is installed. Make sure that the card has been inserted into the adaptor before use.)
-
Use of Panasonic SD memory cards and miniSD/microSD cards is recommended. Be sure to format cards on the camera before use.
-
Refer to our support desk at the following website for the latest information not included in these operating instructions.
http://pro-av.panasonic.net/
-
SDHC memory cards are a standard that was established in 2006 by the SD Association for large-capacity memory cards that exceed 2 GB.
-
SDXC memory cards are a standard that was established in 2009 by the SD Association for large-capacity memory cards that exceed 32 GB.
5
Recording button (grip side) (page 48)
Press this button to start recording. Press it again to stop recording.
Used for direct shooting in thumbnail mode.
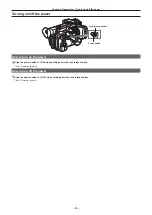
Switch on/off the power.
7
Microphone cable clamp (page 33)
Used for securing the microphone cable.
8 Pin holder
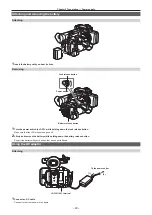
Attach the zoom ring pin which is removed from the camera.
9 Headphones terminal (page 150)
This is the connecting terminal of headphones for audio monitor.
10 <AUDIO INPUT 2> terminal (XLR, 3-pin) (page 67)
Connect the audio equipment or the microphone.
11 <SDI OUT> terminal (page 150)
This is the output terminal for HD/SD SDI signals.
12 <CAM REMOTE> terminal (page 150)
Connect the remote control (optional) to control some functions remotely.
<FOCUS IRIS>:
(3.5 mm mini jack) Control the focus operation and iris operation remotely.
<ZOOM S/S>:
(2.5 mm mini jack) Control the zoom operation and start/stop operation of recording remotely.
13 Tripod holes
Attach the tripod. (bottom)
f
Mounting hole size
-
1/4-20 UNC (screw length 5.5 mm or shorter)
-
3/8-16 UNC (screw length 5.5 mm or shorter)
14 <OPEN> button
Use this button when opening the cover of the <USB2.0 HOST> terminal at the bottom of the button.
Содержание AJ-PX230 Series
Страница 12: ...Before using the camera read this chapter Chapter 1 Overview ...
Страница 141: ...This chapter describes the screen displayed on the viewfinder or LCD monitor Chapter 7 Display ...
Страница 153: ...Maintenance of the camera or frequently asked questions are described Chapter 9 Maintenance ...
Страница 161: ...This chapter describes the specifications of this product Chapter 10 Specification ...
Страница 169: ...Web Site http www panasonic com Panasonic Corporation 2016 ...


