7
Electrical Installation
Revision 1.3
- 24 -
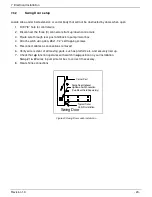
Typical Trailer
On/Off Installation
Corner Post
Shut Off
Place cab cut off switch (if applicable) in
clear view of the driver and within reach
from the ground
7.4
ON/OFF Switch
Liftgate Cab Cut Off Switch MUST be installed and in clear view of driver.
1. Disconnect the two (2) connectors from on/off control wire
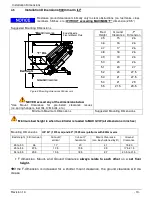
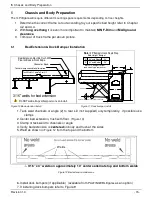
2. Install liftgate Cab On/Off Switch in truck dashboard or at rear of trailer in clear view of driver
(Figure 24 and Figure 25)
3. Route control wire along frame to pump/motor box and secure the cable every 12 inches against the
frame with frame clips or equivalent
4. Reconnect connectors as removed.
5. Verify if wire is clear of and moving parts and securely tied up.
6. Heat shrink connections
Inspect and test all electrical connections, wiring and the different
functions to make sure that the electrical installation is complete.
7.5
Remote Hand Control Installation (Optional)
1. Locate existing wires on gate for control switch, locate piggy bag connectors or splice cable.
2. Slide heat shrink onto wire and connect wires to matching numbers from hand control cord to liftgate
wire
test functions
3. Crimp connectors and heat shrink connections
4. Install Holster
2 Button Hand Control
Function
Cable number
Hand control cables
UP
-
5
-
RED
DOWN
-
6
-
YELLOW
12V HOT
-
4
-
GREEN
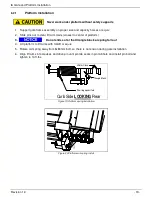
Figure 24 Cab on/off switch placement for trucks
Figure 25 trailer application for on/off switch


