background image

DESCRIPTION OF SYMBOLS

Wear eye, ear & breathing 

protection

Warning

Regulatory Compliance Mark

(RCM)

V

Volts

n

0

No load speed

/min

Revolutions or reciprocations 

per minute

Read Instruction Manual

Power tools that are no longer usable should not be disposed 

of with household waste but in an environmentally friendly 

way. Please recycle where facilities exist. Check with your local 

council authority for recycling advice.

Recycling packaging reduces the need for landfill and raw 

materials. Reuse of recycled material decreases pollution in the 

environment. Please recycle packaging where facilities exist. 

Check with your local council authority for recycling advice.

CARING FOR THE ENVIRONMENT

SPARE PARTS

Spare parts can be ordered from the Special Orders 

Desk at your local Bunnings Warehouse. 
For further information, or any parts not listed here, 
visit www.ozito.com.au or contact Ozito Customer 
Service: 
Australia 1800 069 486 
New Zealand 0508 069 486 
E-mail: [email protected]

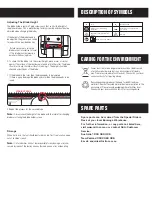
Adjusting The Blade Height

The blade holders contain 2 grub screws each that control the height of 

the planer blades. This is preset during factory assembly and should not be 

adjusted when changing the blades.

If the height of the blades need to 

be adjusted, the grub screws can be 

turned with the provided Hex key.

1.   Rotate clockwise to raise the 

blades or anti-clockwise to lower 

it. The blade should always be 

parallel with housing drum. 

2.  To check that the blade is in the correct height, place a ruler or similar 

against the surface of the rear base plate and rotate the roller. The blade 

should just touch the ruler without scratching it. The height  should be 

checked on both ends of the blade.

3.  If the blade hits the ruler, then the blade needs to be lowered.  

If there is a gap between the blade and ruler then the blade needs to be 

raised. 

4.  Repeat the process for the second blade.

Note: 

Always check the height of the blade with the ruler after changing 

blades or altering the blade holder screws. 

Storage

When not in use, the tool should be stored in a dry, frost free location, keep 

out of children’s reach.

Note: 

Ozito Industries will not be responsible for any damage or injuries 

caused by repair of the tool by an unauthorised person or by mishandling. 

1.5

2

FRONT BASE PLATE

REAR BASE PLATE

STRAIGHT EDGE

Содержание Power X Change PXPLS-082

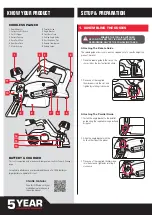
Страница 1: ...ed at law You are entitled to a replacement or refund for a major failure and for compensation for any other reasonably foreseeable loss or damage You are also entitled to have the goods repaired or replaced if the goods fail to be of acceptable quality and the failure does not amount to a major failure Generally you will be responsible for all costs associated with a claim under this warranty how...

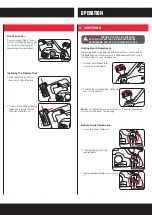
Страница 2: ...ne of the supplied thumbscrews into the hole and tighten by rotating it clockwise 1 Depth Adjustor 2 Safety Lock Off Button 3 On Off Trigger 4 Battery Seating 5 Base Park Shoe 6 Rear Base Plate 7 Motor Housing 8 Parallel Guide 9 Angle Bracket 10 Front Base Plate 11 Cutting Depth Guide 12 Dust Extraction Port 13 Rebate Thumbscrew 14 Rebate Guide This tool is compatible with all batteries chargers f...

Страница 3: ...e Adjustment 1 Loosen the rebate thumbscrew 2 Slide the rebate guide to the required depth 3 Tighten the rebate thumbscrew to secure it Dust Extraction A vacuum can be fitted to the dust extraction chute during planing jobs to collect dust and wood chips keeping the work area cleaner Installing The Battery Pack 1 Slide the battery into the tool base until it clicks into place 2 To remove the batte...

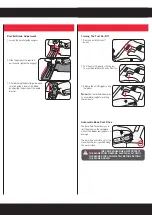
Страница 4: ...can then release the lock off button 3 Release the on off trigger to stop the planer Note Wait until the blade comes to a complete stop before setting the tool down Automatic Base Park Shoe The Base Park Shoe allows you to rest the planer on the workpiece without the blades causing dents or damage The park shoe will rotate out of the way when the tool is pushed along the work surface WARNING THE P...

Страница 5: ...to do the work Note Ensure that both base plates lie flat along the material during planing Note Place more pressure on the rear base plate when lifting the planer off the material This will reduce the possibility of creating gouges as you lift the planer off Chamfering Edges The planer has a precision machined V groove in the front base plate for making 45 chamfers along the edges of your workpie...

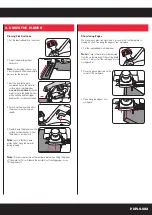
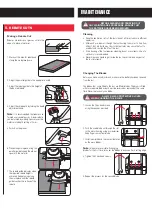
Страница 6: ...ng the spanner provided 2 Push the used blade out through the slot in the motor housing using a screwdriver Keep fingers away from blade 3 Install new blades in the same orientation as the worn blades Note Blades are reversible If changing blades for the first time turn over the blades to expose a fresh cutting edge 4 Tighten the 3 hex head screws 5 Repeat the process for the second blade 5 REBATE...

Страница 7: ...ews each that control the height of the planer blades This is preset during factory assembly and should not be adjusted when changing the blades If the height of the blades need to be adjusted the grub screws can be turned with the provided Hex key 1 Rotate clockwise to raise the blades or anti clockwise to lower it The blade should always be parallel with housing drum 2 To check that the blade is...

Страница 8: ...er at the rate for which it was designed b Do not use the power tool if the switch does not turn it on and off Any power tool that cannot be controlled with the switch is dangerous and must be repaired c Disconnect the plug from the power source and or the battery pack from the power tool before making any adjustments changing accessories or storing power tools Such preventive safety measures redu...

Отзывы: