

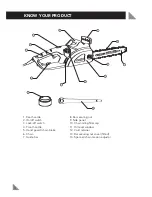
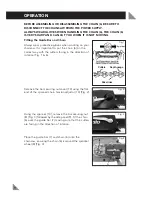


OPERATION (cont.)
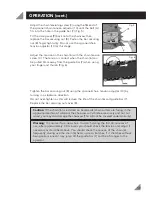
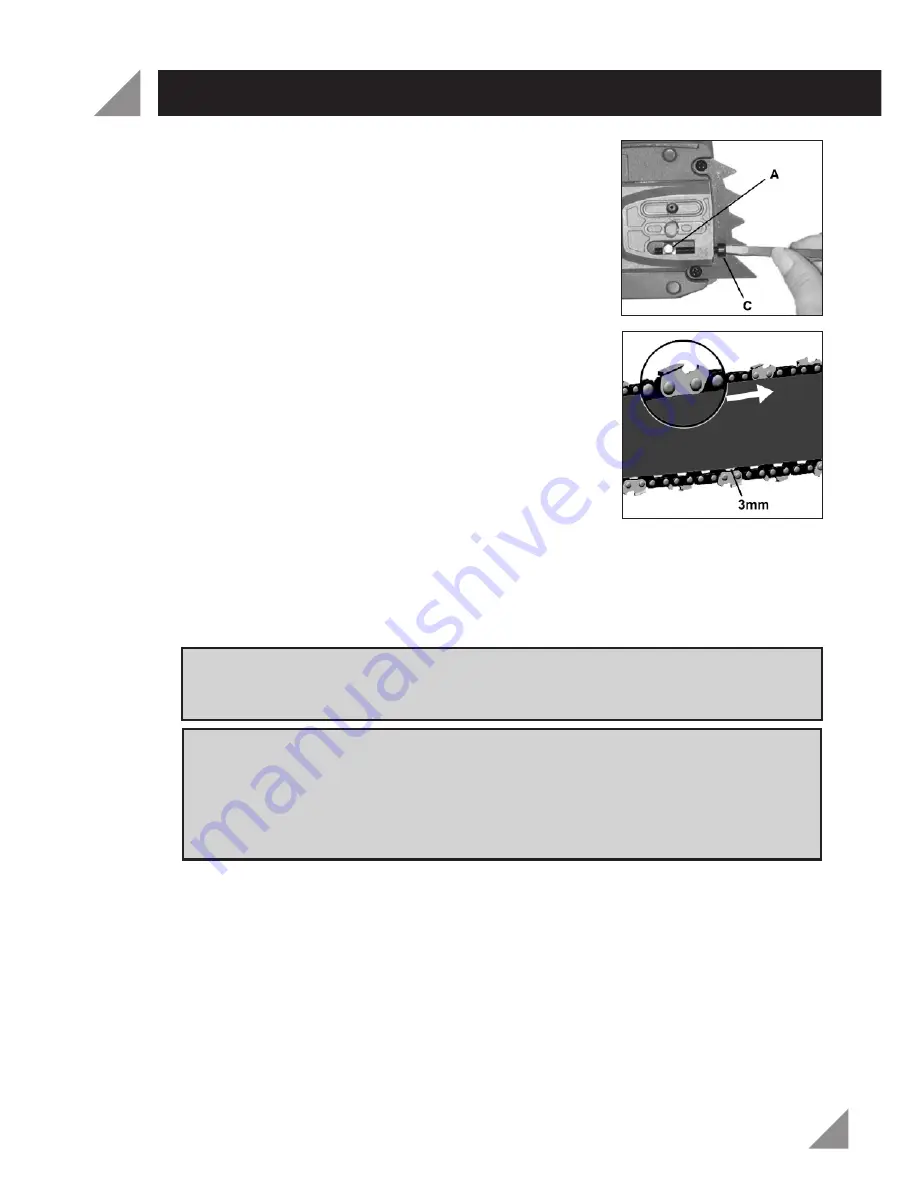
Adjust the chain tensioning screw (C) using the flat end of
the spanner/chain tension adjustor (14) until the bolt (A)
fits into the hole in the guide bar (7) (Fig. 5).
Fit the side panel (9) back onto the chainsaw, then
replace the bar securing nut (8). Fasten the bar securing
nut (8) finger tight only. Do not use the spanner/chain
tension adjustor (14) at this stage.
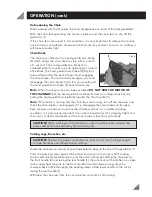
Adjust the tension on the chain (6) with the chain tension
screw (C). The tension is correct when the chain (6) can
be pulled 3mm away from the guide bar (7) when using
your finger and thumb (Fig. 6).
Tighten the bar securing nut (8) using the spanner/chain tension adjustor (14) by
turning in a clockwise direction.
Do not over-tighten as this will reduce the life of the chain (6) and guide bar (7).
Replace the bar securing nut cover (8).
Caution:
If the chain (6) is installed on backwards (chain cutters are facing in the
opposite direction of rotation) the chainsaw will vibrate excessively and not cut
wood, you may also damage the chainsaw (This will not be covered under warranty).
Warning:
It is normal for a new chain to stretch during the first 30 minutes of
use, after approximately 2-3 minutes you should check the tension and adjust if
necessary as described above. You should check the tension of the chain (6)
frequently; during use the chain (6) heats up and stretches, if it stretches without
being re-tensioned it may jump off the guide bar (7) and be of danger to the
operator.
10
Fig. 5
Fig. 6


