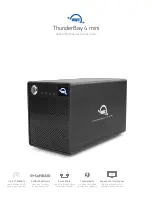

ThunderBay 4 mini – Thunderbolt 2
Installation
6
2.3 Why Install SoftRAID?
-
Depending on the SoftRAID version bundled with your ThunderBay 4 mini the RAID levels
supported include: 0, 1, 4, 5, and 1+0 (10).
-
Certify disks — writes a pattern to each sector on the disk and then reads it back to ensure that the
drive is functioning as designed.
-
Verify disks — reads every sector on the disk to ensure that it can be read without errors.
-
Validate volumes — reads every block on the volume to ensure it can be read without errors.
-
S.M.A.R.T. monitoring of all connected drives, including early warning for disk failure.
-
Custom email alerts for important events.
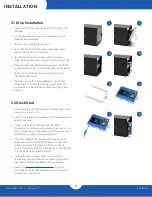
2.4 Replacing Drives
You can add or remove any drive without needing to turn off the ThunderBay 4 mini or unmount any of the
other drives. Each drive operates independently of the others and is not affected by the addition or removal of
another drive unless the drives have been set up as part of a RAID volume.
2.5 Drive Failure
The ThunderBay 4 mini does not monitor drive health, and it will not alert you to a drive failure. You can monitor
the health of your drives via SoftRAID in order to determine when a drive has failed or is in a pre-failure state.
To replace a failed drive, simply remove the drive from its bay and replace it with another drive, following the
steps in Section 2.1. The ThunderBay 4 mini does not need to be turned off during this process.


