background image

4

5

UK: INSTRUCTION MANUAL

UK: INSTRUCTION MANUAL

Connecting your appliance to a gas cartridge

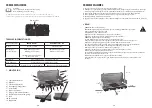
Please see TECHNICAL DATA table for information regarding regulator and hose. Only use a regulator 

complying with EN16129 and a hose complying with EN16436. The length of the hose shall not exceed 

150 cm. Both regulator and hose must also comply with national regulations.  

Replace the hose according to national regulations. Avoid twisting the hose. 

Always read the manual regarding the regulator and hose.

Never leave the regulator attached to the gas cylinder if disconnected from the gas hose.

1.  How to connect your gas grill to a gas cylinder depends on which model you have purchased.  

Please read the instructions below for your Rukutu model. 

Rukutu (650787):

To be able to use your gas stove you will need to purchase an LPG gas cylinder, a regulator and a hose. 

The type of gas can be butane or propane. The regulator needs to fit the chosen gas cylinder and deliver 

a supply pressure of 28-30mbar if the gas is butane. 30 or 37 mbar if the gas is propane. The hose needs 

to fit the regulator as well as the gas stove. The gas stove can be used with either 8mm ID or 

10/11mm ID. 

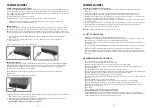
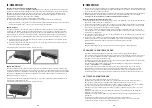
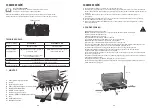
a) If your hose has an internal diameter of 8 mm, push the hose over the first ribbed half of the hose stud.

b) If your hose has an internal diameter of 10/11 mm, push the hose all the way over the ripped part of 

the hose stud (4). 

The hose should be threaded hand tight plus ¼ of a turn. 

Rukutu - DE (650788):

To be able to use your gas stove you will need to purchase an LPG gas cylinder and regulator (the hose 

is supplied with your gas grill). The type of gas can be butane or propane. The regulator needs to fit the 

chosen gas cylinder and deliver a supply pressure of 50mbar. The hose needs to fit the regulator as well 

as the gas stove. The gas stove is equipped with a ¼” LH thread. 

The supplied 80 cm hose is equipped with a ¼” LH thread and can be threaded directly onto the gas inlet 

connection. 

The hose should be threaded hand tight plus ¼ of a turn. 

2.  Once you have successfully connected your gas stove to a gas cylinder, position the gas cylinder at 

the side of your gas stove. Keep in mind that the cylinder must be kept away from heat and in a safe 

and upright position.

3.  Attach the regulator to the gas cylinder tap correctly (refer to the instruction manual provided with 

the regulator).

4.  Always check for leaks at all joints using soapy water. NEVER USE A NAKED FLAME TO CHECK FOR LEAKS.

How to light the burners (2) and grill (9):

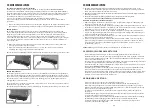
1.  Slowly open the gas by turning the relevant control knob(s) (5) slowly counterclockwise from the 

symbol “•”.

2.  Turn the piezo ignition button clockwise to ignite. If it fails to ignite after 3-5 attempts. Close the 

control knobs (5) and wait 5 minutes to allow for the unburned gas to evaporate, before making a 

new attempt.

3.  When the burner is lit, turn the control knob(s) (5) clockwise (towards symbol “•”) to decrease the 

flame and heat intensity or extinguish, and counterclockwise to increase.

4.  For maximum efficiency, ensure that the flames of the burner(s) (2) do not overlap the base of the 

pan/pot.

5.  Make sure the flame on the appliance is steady. The flame shall always leave the appliance straight 

upwards. Wind may press the flame down underneath the burner. If this happens stop use of the 

appliance and move it to a more wind sheltered place.


WARNING: Turn off the gas supply at the gas cylinder after use.

3. CHANGING THE GAS CYLINDER

•  Turn off the appliance completely. Be careful the gas cylinder could be hot.

•  The gas cylinder shall be changed in a well-ventilated location, preferably outside, away from any 

sources of ignition, such as naked flames, pilots, electric fires and away from other people.

•  Check the seals before connecting a new gas cylinder to the appliance. Follow the manuals of the gas 

cylinder and gas regulator.

•  To ensure a safe connection of a new gas cylinder to your appliance please read the sections


‘ASSEMBLY’ and ‘OPERATION’.

•  If there is a leak on your appliance (smell of gas), turn off the gas supply and take it outside 

immediately into a well-ventilated flame free location where the leak may be detected and stopped. 

If you wish to check for leaks on your appliance, do it outside. Do not try to detect leaks using a flame, 

use soapy water.

4. CLEANING & MAINTENANCE

•  Ensure the appliance is cool before cleaning

•  Check the good operation of the gas cylinder connection/disconnection system.

•  Visually check the general condition of the appliance and clean it if necessary.

•  If the appliance has not been used for some time, check the venturing pipes before use for spider 

webs or other obstructions.

•  Use a wire brush, steel wool or a scouring pad to clean the grid(s) (6).

•  Use a soft cloth with warm soapy water to clean the grill griddle (8) to avoid any scratches on the 

coating. 

•  Do not use metal utensils on the grill griddle (8) as this will damage the coating.

•  Please discard grill griddle (8) if the coating is cracked or damaged.

•  Interior surfaces of the appliance housing cover should be washed with hot soapy water. Make sure 

to dry immediately.

•  Remove the drip tray (11) and clean it with soapy water.

•  Visually inspect that the venturis are not blocked by debris. Clean if necessary.

•  If the burner ports become clogged, do not use a metal object to clean them.

•  If you suspect a gas leak or malfunction, stop using immediately, extinguish and disconnect

•  from the gas cylinder.

•  Check for leaks at all joints using soapy water. NEVER USE A NAKED FLAME TO CHECK FOR LEAKS.

•  If gas pressure drops or the gas will not light, check if there is gas left in the cylinder. 

•  If you are not able to rectify any fault following the abovementioned instructions, contact the dealer 

or Outwell Customer Service (contact details below).

a) 

b) 

Содержание 650787 / 210-GB

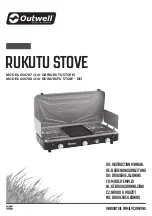
Страница 1: ...VEFAMILYCAMPING MODEL 650787 210 GB RUKUTU STOVE MODEL 650788 210 DE RUKUTU STOVE DE UK INSTRUCTIONMANUAL DE BEDIENUNGSANLEITUNG DK BRUGERVEJLEDNING FR MODED EMPLOI NL GEBRUIKSAANWIJZING CZ NÁVODKPOUŽITÍ NO BRUKERVEILEDNING ...

Страница 2: ... or which does not operate properly Turn off the gas supply immediately by gas leak The appliance shall be operated on a horizontal surface free from dry grass sand etc Do not place it on any combustible materials Hot fat may drip out at the bottom of the appliance Do not light your appliance on a surface that may be dirty by the hot fat Always disconnect the gas cylinder from the appliance when n...

Страница 3: ...he unburned gas to evaporate before making a new attempt 3 When the burner is lit turn the control knob s 5 clockwise towards symbol to decrease the flame and heat intensity or extinguish and counterclockwise to increase 4 For maximum efficiency ensure that the flames of the burner s 2 do not overlap the base of the pan pot 5 Make sure the flame on the appliance is steady The flame shall always le...

Страница 4: ...the soapy water By detection of any leaks stop using the appliance immediately and contact the dealer or Outwell Customer service contact details below 5 STORAGE Disconnect the gas cylinder before you store the appliance away Keep both the appliance and cylinder in a dry place safe from dust and dirt and away from heat and direct sunlight Outwell Customer Service e mail info outwell com Tel 45 70 ...

Страница 5: ...llen Sie die Grillplatte 8 auf die geformten Öffnungen am Gerät und stellen Sie sicher dass es eine feste Passform ergibt 5 Schieben Sie die Auffangschale 11 unter dem Gerät ein 6 Stellen Sie sicher dass alle drei Regler 5 ausgeschaltet sind indem Sie sie vollständig im Uhrzeigersinn in Richtung des Symbols drehen 2 BETRIEB WARNHINWEIS Nur für den Gebrauch im Außenbereich ACHTUNG Zugängliche Teile...

Страница 6: ...CH UNDICHTIGKEITEN So zünden Sie die Brenner 2 und den Grill 9 1 Öffnen Sie langsam den Gashahn indem Sie den die entsprechenden Regler 5 allmählich gegen den Uhrzeigersinn vom Symbol wegdrehen 2 Um das Gerät zu entzünden drehen Sie den Piezo Zündknopf im Uhrzeigersinn Wenn er nach 3 bis 5 Versuchen nicht zündet schließen Sie die Regler 5 und warten Sie 5 Minuten um das unverbrannte Gas abziehen z...

Страница 7: ...he befindet Wenn Sie nicht in der Lage sind den Fehler nach den oben genannten Anweisungen zu beheben setzen Sie sich mit dem Händler oder Outwell Kundendienst in Verbindung Kontaktdaten unten Wie man mit Seifenwasser nach Undichtigkeiten sucht Nehmen Sie ein weiches Tuch und tauchen Sie es in Seifenwasser Tragen Sie eine kleine Menge Seifenwasser auf alle Verbindungen von gasführenden Teilen auf ...

Страница 8: ... støbte huller og sørg for at den sidder godt fast 4 Placér grillristen 8 på apparatets støbte huller og sørg for at den sidder godt fast 5 Skub drypbakken 11 ind under apparatet 6 Sørg for at alle tre kontrolknapper 5 er i slukket stilling ved at dreje dem helt med uret mod symbolet 2 BRUG ADVARSEL Kun til udendørs brug FORSIGTIG Tilgængelige dele kan blive meget varme Brug grillhandsker og robus...

Страница 9: ...perne 5 med uret mod symbolet for at skrue ned for flammen og varmen eller slukke og mod uret for at skrue op 4 For maksimal effektivitet skal man sikres at flammerne på brænderne 2 ikke er større end grydens pandens diameter 5 Sørg for at apparatets flammer er konstante Flammen skal altid gå lige op fra apparatet Vinden kan presse flammen ned under brænderen Hvis det sker skal brugen af apparatet...

Страница 10: ...et Hvis du opdager en lækage skal du øjeblikkeligt stoppe brugen af apparatet og kontakte forhandleren eller Outwell Kundeservice se kontaktoplysninger herunder 5 OPBEVARING Kobl gasflasken af inden apparatet pakkes væk Opbevar både apparat og gasflaske på et tørt rent og køligt sted uden støvdannelse og udenfor direkte sollys Outwell Kundeservice e mail info outwell com Tlf 45 70 22 85 00 DK BRUG...

Страница 11: ...acez la grille du gril 8 dans les trous moulés sur l appareil et assurez vous qu elle est bien positionnée 5 Glissez le plateau d égouttement 11 sous l appareil 6 Assurez vous que les 3 boutons de commande 5 sont en position Arrêt en les tournant complètement dans le sens horaire vers le symbole 2 FONCTIONNEMENT AVERTISSEMENT Utilisation à l extérieur uniquement ATTENTION Les parties accessibles p...

Страница 12: ...9 1 Ouvrez lentement le gaz en tournant le s bouton s de commande 5 correspondant s doucement dans le sens antihoraire depuis le symbole 2 Tournez le bouton d allumage piézo dans le sens horaire pour allumer En cas d échec de l allumage après 3 5 tentatives fermez les boutons de commande 5 et attendez 5 minutes pour laisser le gaz non brûlé s évaporer avant de faire une nouvelle tentative 3 Une fo...

Страница 13: ...e de rectifier un défaut en suivant les instructions ci dessus contactez le distributeur ou le service après vente Outwell coordonnées ci dessous Comment vérifier la présence de fuites en utilisant de l eau savonneuse Prenez un chiffon et tordez le dans de l eau savonneuse Appliquez une petite quantité de mélange d eau savonneuse sur tous les joints des parties en contact avec le gaz S il y a une ...

Страница 14: ... toestel en controleer of het stevig vast zit 4 Plaats het grillrooster 8 op de voorgevormde gaten van het toestel en controleer of het stevig vast zit 5 Schuif de lekbak 11 onder het toestel 6 Zorg ervoor dat alle 3 regelknoppen 5 in de uit stand staan door ze volledig met de klok mee te draaien in de richting van het symbool 2 BEDIENING WAARSCHUWING Alleen buiten gebruiken VOORZICHTIG Bereikbare...

Страница 15: ...betreffende regelknop pen 5 langzaam tegen de klok in te draaien vanaf het symbool 2 Draai de piëzo ontstekingsknop met de klok mee om te ontsteken Als het na 3 5 pogingen niet lukt om te ontsteken Sluit u de regelknoppen 5 en wacht 5 minuten zodat het onverbrande gas kan verdampen voordat u een nieuwe poging doet 3 Als de brander aan is draait u de regelknop pen 5 met de klok mee in de richting v...

Страница 16: ...aler of de Outwell klantenservice contactgegevens hieronder Op lekken controleren met zeepsop Neem een washandje en wring het uit in een sopje Breng een kleine hoeveelheid van het zeepsop aan op alle verbindingen van de gasonderdelen Als er een lek is ziet u dat als belletjes in het zeepsop Als u een of meer lekken vaststelt stop dan onmiddellijk met het gebruik van het toestel en neem contact op ...

Страница 17: ...rnce pánve 6 do lisovaných otvorů na spotřebiči a zkontrolujte že se nepohybují 4 Umístěte grilovací mřížku 8 do lisovaných otvorů na spotřebiči a zkontrolujte že se nepohybují 5 Zasuňte odkapávací misku 11 pod spotřebič 6 Otočte všechny tři ovládací knoflíky hořáku 5 ve směru hodinových ručiček k symbolu čímž je kompletně uzavřete 2 POUŽÍVÁNÍ GRILU VAROVÁNÍ Používejte pouze venku POZOR Jednotlivé...

Страница 18: ...od symbolu 2 Plamen zapálíte otočením tlačítka piezo zapalování ve směru hodinových ručiček Pokud se hořák nepodaří zapálit po 3 5 pokusech Otočte ovládací knoflíky hořáku 5 do výchozí polohy a před dalším pokusem počkejte 5 minut než se nespálený plyn rozptýlí 3 Pokud chcete intenzitu plamene tepla snížit nebo plamen uhasit otočte ovládacím knoflíkem hořáku 5 ve směru hodinových ručiček k symbolu...

Страница 19: ...alit netěsnící místo pomocí mýdlové vody Namočte hadřík v mýdlové vodě a vyždímejte ho Naneste malé množství mýdlové vody na všechny spoje plynové kartuše Pokud dochází k úniku objeví se v příslušných místech mýdlové bubliny V případě že odhalíte netěsnosti okamžitě přestaňte spotřebič používat a kontaktujte prodejce nebo zákaznický servis společnosti Outwell kontaktní údaje níže 5 SKLADOVÁNÍ Před...

Страница 20: ...panner i de utsparede hullene på apparatet og sjekk at den sitter godt fast 4 Fest grillristen 8 i de utsparede hullene på apparatet og sjekk at den sitter godt fast 5 Skyv dryppskålen 11 inn under apparatet 6 Kontroller at alle de tre gassregulatorene 5 er i av posisjonen ved å dreie dem fullt ut med urviserne mot symbolet 2 BRUK ADVARSEL Kun for utendørs bruk FORSIKTIG De tilgjengelige delene ka...

Страница 21: ...assregulatoren e 5 sakte mot urviserne bort fra symbolet 2 Drei piezo tennerknappen mot urviserne for å tenne Hvis det ikke tennes etter 3 5 forsøk Steng gassregulatorene 5 og vent i 5 minutter Dette for å la ubrent gass fordampe før du gjør et nytt forsøk 3 Når en brenner er tent drei gassregulatoren e 5 mot urviserne mot symbolet for å minske varmeintensiteten eller slukke brenneren og mot urvis...

Страница 22: ... kundeservice kontaktinfo nedenfor Slik sjekker du for lekkasjer med såpevann Bruk en myk klut og vri den opp i såpevann Påfør en liten mengde såpevannblanding på alle skjøter i gassdelene Hvis det er lekkasje vil du kunne se bobler i såpevannet Hvis du oppdager lekkasjer avslutt bruken av apparatet umiddelbart og kontakt forhandleren eller Outwell kundeservice kontaktinfo nedenfor 5 OPPBEVARING K...

Страница 23: ...Outwell is a reg trademark of Oase Outdoors EU Kornvej 9 DK 7323 Give Denmark UK One Glass Wharf Bristol BS2 0ZX 12 2021 Oase Outdoors ApS Made in China outwell com P I N 2531 CT 0048 ...

Отзывы: