13
12
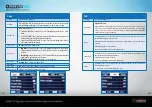
Cam
Settings
Programmable Options
Cam ID
Select “ON”, press “OK”, to set 4 digits/ letters for each camera. The name is then printed
across the bottom of the image. Used for identifying which camera images are from.
Cam Mode
Photo, PIC+VIDEO, Video
1. Switch ON “Photo/Video Switch” to Pic icon—Photographing mode, or PIC + Video
mode;
2. Select “PIC+VIDEO”, camera shoots photo(s) first, then video upon same trigger event
based on Video Length and Multi-shot user configured.
3. Switch Down “Photo/Video Switch” to Video icon—Video Recording mode (still has
same options in the menu though)
Image Size
5MP, 8MP, 12MP (5MP recommended)
Night Mode
1.
Min. Blur:
Short exposure time (1/30 sec) to minimize motion blur for better image
quality; shortened IR flash range; uses more battery because it uses a brighter infra-
red flash.
2.
Max. Range:
Longer exposure time (1/8 sec) to extend IR flash range for better night
vision; lower image quality; uses less battery.
3.
Balanced:
combination of above 2 options; (1/15 sec exposure)
Multi-shot
Programmable 1~5 photos per trigger (1P-5P)
Video On
Video Size
FHD1080P: 1920*1080, HD720P: 1280*720, VGA 640*480
Video length
5~60 Secs (recommended 20-30 seconds)
PIR
Settings
Programmable Options
Sensitivity
High, Middle, Low
Higher sensitivity is 1) more sensitive to movements by smaller subjects; 2) longer detection distance; 3)
easier for sensor to detect difference between body heat and outdoor temperature; 4) easier to trigger
camera to record. In
high temperature
environment, body heat of subjects and environment temperature
is hard to tell by camera, suggest setting
High
.
Delay
Select “ON”, press “OK”, to set a time interval that you desire between photos/videos upon motion. This will
reduce the number of images your camera takes..
Example: Camera will wait 1 minute between photo/video recordings with motion if pre-set time interval
is 00:01:00
Configurable delay time: 3 second to 24 hours.
Note: Pls don’t turn ON Time Lapse and Delay simultaneously!
Time Lapse
Select “ON”, press “OK”, to set the interval; PIR sensor of camera will be turned off; camera will shoot pics or
video clips automatically upon the interval user set.
Configurable interval: 3 seconds to 24 hours.
Note: Pls don’t turn ON Time Lapse and Delay simultaneously!
Timer
Select “ON”, press “OK”, to set the beginning time and end time (hour/minute); The camera will then only
work during the time period set.
i.e.: 15:00 – 18:00; camera only works during 15:00 – 18:00


