5
PB
ENGLISH
FLEX-SYMES™ COMPONENTS (Figure 1)
• Circular alignment wedges (SLX3001X) allowing up to 6° angulation
and adjustments in AP/ML planes
• Available in sizes 22-30cm.
• Minimal clearance:
– 53 mm for sizes 22-24
– 55 mm for sizes 25-27
– 57 mm for sizes 28-30
Figure 1
1. Foot Module
2. Heel (SLX2XYY0)
3. Heel fastener hardware kit (CM150004)
4. Socket Adapter (SLX5000X)
5. Alignment Disc Kit (SLP30001)
6. Central Bolt (SLX3002X)
7. Anti-Rotation Bolt Kit (SLX3000X)
8. Heel Wedge Kit (CM150011)
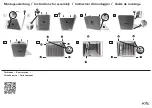
BENCH ALIGNMENT (Figure 2 & 3)
• Attach heels to the foot module without glue, fit foot with
selected cover.
• Adjust to appropriate heel height (using the shoe).
• Introduce appropriate socket angles flexion/extension and abduction
/adduction.
• Divide the foot cover into 3 equal portions.
• The load line should fall at the junction of the posterior and the
middle third portions as shown in the diagram (the mark on the brim
of the foot cover matches the one third portion).
FABRICATION PROCEDURES (Figure 4)
• Leave foot assembled to the socket adapter and protect foot with
appropriate film/sheet barrier.
• Roughen attachment surface, position socket in the desired
alignment and fill the space beneath the socket with epoxy putty
(CM160009).
• Let it harden (3-5 minutes)
• Wrap synthetic casting tape and proceed with dynamic alignment for
temporary use only.
Note:
Do not use polyurethane foam build-up since this compresses and
can lead to bolt or lamination failure.
IMPORTANT
Fasten the attachment bolts through the heel. Make sure there is no
interference with the central bolt head when heel is compressed. Verify
torque specifications. Position heel divider (CM140003) as demonstrated
in picture
(Figure 8)
.
DYNAMIC ALIGNMENT
Alignment Wedges
Use the alignment options of the circular alignment wedges to fine tune
the dynamic alignment. The alignment wedges provide angular
adjustments up to 6 degrees.
Содержание FLEX-SYMES
Страница 1: ...Instructions for Use FLEX SYMESTM Product Number SLPOXYYO...
Страница 3: ...3 Size Build height 1 3 7 4 5 8 2 6 1 2 3 BENCH ALIGNMENT...
Страница 4: ...4 4 1 2 3 5 6 7 Removal Insertion 8 9...
Страница 61: ...61 6mm 1 PVA PVC 1 6 7 8 Loctite 410 2 22 24 1 6 Minimum 4 25 30 1 6 Minimum 6 25 30 7 9 Minimum 8...


