3.6 Primary
F
low
and
R
eturn and
M
otorised valve
3.6.1
The
Heat Pump
primary flow and return connections should be made connections 1 & 2. The motorized valve
can be connected to either the primary flow or return pipe. The primary flow and return fittings are 3/4’’ BSP female.
The valve has 22mm x copper connections. The direction of primary flow in the coil is bottom to top. The maximum
operating temperature of the primary flow would typically be 82°C.
3.6.2
For electrical connection of the motorised valve and immersion heater, please read Electrical
Installation Instructions. (Pages
5
).
4
.
Commissioning
and
f
illing up
4
.1
Commissionin
g
4
.1.1
Check all connections for tightness.
4
.1.2
Open hot water tap furthest away from the OSO water heater. Open the mains stop cock to fill the water heater.
When water flows evenly from tap, allow to run for a few minutes to flush through any dirt, swarf or residue, then close
the tap. Open successive hot taps to purge any remaining air.
4
.1.3
Check all water connections for leaks and rectify if necessary.
Manually operate Expansion relief valve
4
(see page
3
) to ensure free water flow through discharge pipe by turning
knob counter-clockwise. To close continue to turn counter-clockwise until the valve shuts.
Manually operate Temperature and Pressure Relief Valve
5
(see page
3
) to ensure free water flow through discharge
pipe (Turn knob counter-clockwise).
Switch electrical power on.
5
.Draining & flushing out the system.
5
.1
Draining
Switch off the electrical power (Important to avoid damage to element). Isolate
Heat Pump
from
OSO unit. Turn off the cold water supply valve. Open hot water tap. Open drain
12
(see page 3)
at base of cylinder .
The unit will drain. Draining process may be speeded up by opening the temperature and pressure relief valve. An
internal ø18 mm hose can be applied to lead the water to a gully, sink or similar
.
5.2
System
f
lushing
This
will not be necessary under normal circumstances as the line strainer will
prevent ingress of foreign materials, however if flushing is required, run at least 50 litres of
water from the cylinder at the highest possible flow rate. Close the taps and follow draining
procedure (above).
6.
Electrical installation
- all wiring must conform to current IEE regulations
6.1
I
mmersion
H
eater
Thermostat
The immersion heater is designed as an auxiliary heater as an emergency back-up. Power to immersion heaters
should not be switched on until the unit is filled with water. All units are fitted with one 3 kW immersion heater which is
located behind the electrical box. Alternative thermostats should not be used, regulations require
immersion
heaters on
unvented cylinders to be connected with a thermal cut-out.
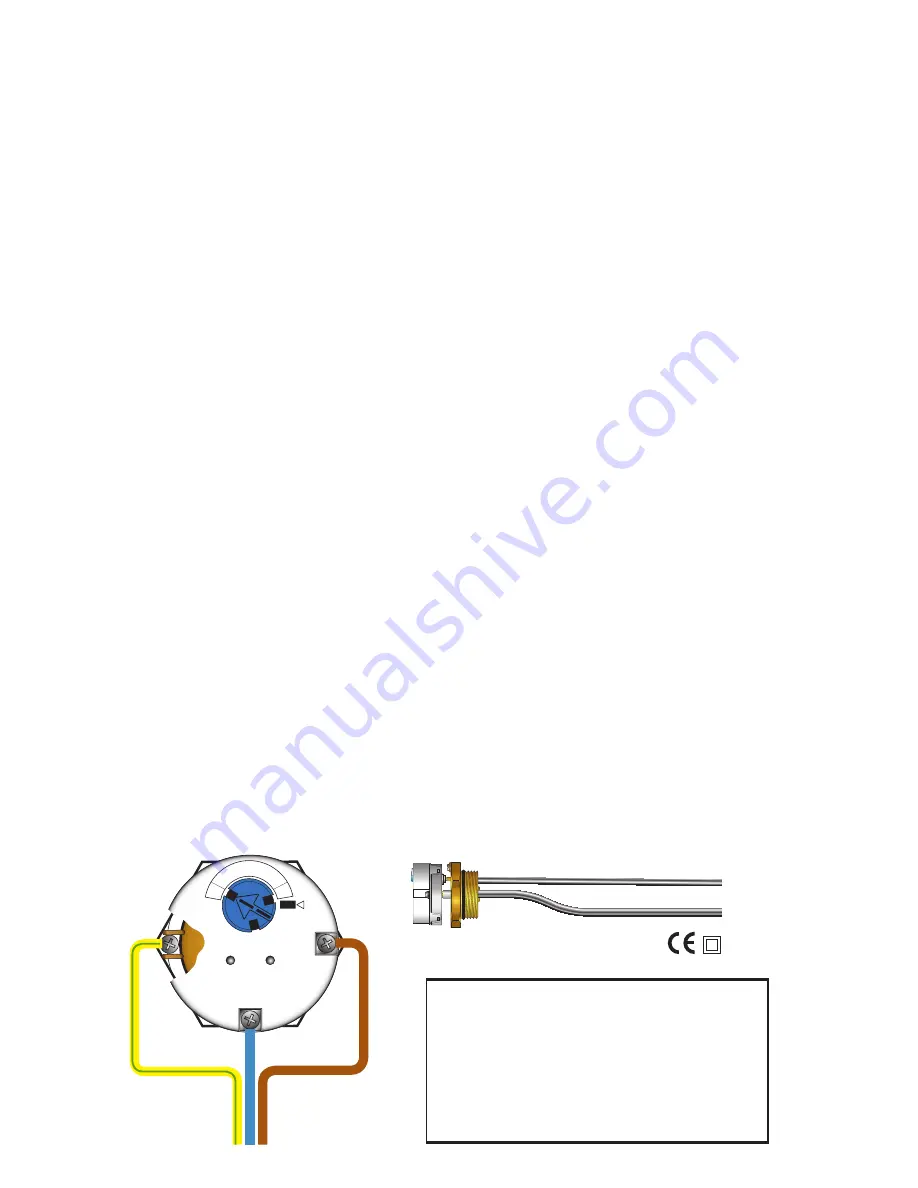
Follow the wiring instructions below connecting the live,
neutral and earth as indicated. The unit must be permanently connected to the electrical supply through a double-pole
linked switch with a minimum break capacity of 13 amps. All internal wiring is factory mounted. Each immersion heater
has a working thermostat adjustable between
18
°C - 70°C
(+/- 5°C)
. A safety cut-out is also incorporated within the
thermostat and will operate at 8
7
°C
(
±
7
°C
)
. Should this happen, check reasons for thermal cut-out button being
released and when
satisfied
press the reset button
.
5
2 KW
OS
O
3
2
4
5
a
t
e
nt
e d
A
T
1
1 5
16
A
2
5
0
V
B
Safety reset
Eart
h
Liv
e
Neutra
l
earth cable
connected to
immersion
Thermostat
sensor pocket
Immersion
IP21
OSO Hotwater (UK) Limited can not be
held responsible if alternative wiring plans
are used.
Important: Before resetting the safety cut-
out or altering the thermostat setting isolate
electrical supply to the unit before removal
of the lid.
Ensure the lid to the electrical box
is replaced.
Содержание DGC 200
Страница 11: ......


