Orved MULTIPLE 315VM P4 Скачать руководство пользователя страница 1

Manuale d’istruzione
Operating and service manual
Mode d’emploi et d’entretien
Bedienungs- und Wartungshandbuch
Manual de uso y mantenimiento

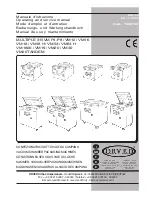
MULTIPLE 315VM P4-P8 / VM12 / VM16
VM18 / VM18 H / VM53 / VM53 H
VM1800 / VM19 / VM20 / VM30
VM20 TANDEM

CONFEZIONATRICI SOTTOVUOTO A CAMPANA
VACUUM CHAMBER PACKAGING MACHINES
CONDITIONNEUSES SOUS VIDE À CLOCHE
KAMMER - VAKUUM-VERPACKUNGSMASCHINEN
MÁQUINAS ENVASADORAS AL VACÍO DE CAMPANA

REV. 00

Ed. 10 - 2005

Cod.: 1500154

I

GB

F

D

E

ORVED Srl Soc. Unipersonale

 - Via dell'Artigianato, 30 - 30024 MUSILE DI PIAVE (VE) ITALY

Tel.: ++39 0421 54387 - 340340 / Telefax: ++39 0421 333100 - 332295

E-mail: [email protected] - [email protected] - Internet: www.orved.it

AZIENDA CON

SISTEMA DI GESTIONE

PER LA QUALITÁ

CERTIFICATO DA DNV

=UNI EN ISO

9001:2000=

COMPANY WITH

QUALITY MANAGE-

MENT SYSTEM

CERTIFIED BY DNV

=UNI EN ISO

9001:2000=

Содержание MULTIPLE 315VM P4

Страница 1: ...ONDITIONNEUSESSOUSVIDE CLOCHE KAMMER VAKUUM VERPACKUNGSMASCHINEN M QUINASENVASADORASALVAC ODECAMPANA REV 00 Ed 10 2005 Cod 1500154 I GB F D E ORVEDSrlSoc Unipersonale Viadell Artigianato 30 30024MUSIL...

Страница 2: ...guide correct et une rapide identification de la machine dans toutes ses parties et versions Les dessins les tableaux et les autres contenus dans le pr sent Manuel d Utilisation sont de nature r serv...

Страница 3: ...ALLO 10 4 1 AVVERTENZE GENERALI 10 4 2 DISIMBALLO 10 4 3 MOVIMENTAZIONEEDIMMAGAZZINAGGIO 10 5 INSTALLAZIONE 10 5 1 DESCRIZIONE DELL APPARECCHIO 10 5 2 TENSIONE DIALIMENTAZIONE 12 5 3 NORME GENERALI D...

Страница 4: ...one di questo apparecchio dandogli la possibilit di poterlo consultare liberamente ogni qual volta ve ne fosse la necessit Qualsiasi emendamento aggiornamento o modifica tecnica comunicata dalla ditta...

Страница 5: ...ENERALI La garanzia ORVED prevede a La garanzia da diritto esclusivamente alla sostituzione gratuita dei componenti riconosciuti difettosi da ORVED o da un suo incaricato autorizzato b La responsabili...

Страница 6: ...PERICOLO USTIONI Segnala un pericolo immediato nel caso si venga a contatto con superfici molto calde 2 4 2 AVVERTENZE E PERICOLI DERIVANTI DALL USO DELLA MACCHINA 2 4 2 1 PERICOLI DERIVANTI DALL UTI...

Страница 7: ...larmente seguendo le istruzioni contenute nel presente manuale Utilizzare e maneggiare i prodotti detergenti secondo le prescrizioni del produttore Demolire e smaltire la macchina parti di essa ed i p...

Страница 8: ...H 130mm SPECIALE H 190mm 280mm h STANDARD H 190mm SPECIALE H 260mm 490mm i STANDARD H 130mm SPECIALE H 180mm 300mm j STANDARD H 130mm SPECIALE H 250mm 320mm 350mm k P PIATTO B BOMBATO l 1 B STD 1 BAR...

Страница 9: ...9 REV 00 Cod 1500154 Manuale d uso e manutenzione Ed 10 2005 CONFEZIONATRICI SOTTOVUOTOACAMPANA I I H1 H2 B A A A B B H1 H1 H2 H2 INFORMAZIONI PRELIMINARI...

Страница 10: ...portata dei bambini o dispersi nell ambiente consigliabile conservare integro l imballo per eventuali esigenze future di movimentazione o immagazzinamento dell apparecchio AVVERTENZA L eventuale smalt...

Страница 11: ...16 e MULTIPLE 315 P8 presente un pannello laterale F per il rabbocco d olio pompa su altri modelli il rabbocco situato nella parte posteriore della confezionatrice Fig 2 L attacco per il collegamento...

Страница 12: ...sulla targhetta di identificazione della macchina sia la stessa della Vs rete Fig 2 b Inserire la spina nella presa ad apparecchio spento c Controllare il corretto livello dell olio della pompa visib...

Страница 13: ...corare alla parete le bombole A fine utilizzo e a macchina spenta chiudere sempre la valvola della bombola e del riduttore di pressione PERICOLO Negli apparecchi provvisti di opzione gas E VIETATO USA...

Страница 14: ...do digitale MULTIPLE 315 VM12 e VM16 queste dispongono di un sistema di segnalazione per il cambio dell olio raggiunti i 15 000 cicli di lavoro all avviamento della macchina ed alla fine di ogni ciclo...

Страница 15: ...NI 6 SEL TASTO DI SELEZIONE DELLE FUNZIONI SELEZIONALAFUNZIONE DAPROGRAMMARE 7 JARS TASTO PERATTIVAZIONE VUOTO IN CONTENITORI ESTERNI E O BUSTE GOFFRATE ATTIVA DISATTIVALAFUNZIONE DIASPIRAZIONE ESTERN...

Страница 16: ...tasto VAC espresso in secondi utile ad ottenere il massimo vuoto possibile Nei modelli VM12 e VM16 la funzione VAC pu essere impostata premendo il tasto SEL dopo la programmazione della funzione VAC...

Страница 17: ...apre durante il ciclo diminuire il tempo di iniezione gas Nelle versioni con comando digitale la percentuale viene indicata direttamente dal display 5 5 3 FUNZIONE SALDATURA SEAL Dopo l esecuzione del...

Страница 18: ...etato Usare buste di spessore e formato adeguati alla durezza e alle dimensioni del prodotto 1 Abbassare il gancio fermacoperchio C il coperchio in plexiglass della campana D si apre Posizionare il nu...

Страница 19: ...namento in serie di prodotto in modo da calibrare il parametro ed ottimizzare i tempi di lavorazione 3 IMPOSTAZIONE DEL TEMPO DI SALDATURA A titolo indicativo per buste di grammatura 90 100 regolare i...

Страница 20: ...postare il tempo di saldatura con la manopola SEAL A titolo indicativo per buste di grammatura 90 100 regolare il potenziometro SEAL sulla posizione 3 5 per buste aventi grammatura 150 100 regolare su...

Страница 21: ...presente che alla massima percentuale di gas 60 corrisponde un vuoto di 0 40 bar Nella posizione OFF la funzione GAS disattivata Premendo il pulsante STOP l apparecchio passa alla fase di saldatura Se...

Страница 22: ...della macchina la pompa entra in funzione 5 Dal momento in cui la lancetta del vuotometro 1 indica 1 0 bar aprire la levetta F sul fianco e tramite l apposito tubo sara possibile effettuare l aspiraz...

Страница 23: ...rogramma impostato nel quadrante superiore e le eventuali funzioni attivate nel quadrante inferiore V VASI G GAS S SOFTAIR 2 SELEZIONE PROGRAMMA Selezionare il programma da 0 a 9 mediante le frecce 3...

Страница 24: ...mmediata con il rientro dell aria nella camera Il ciclo di lavoro pu essere interrotto anche agendo sull interruttore generale spegnendo l apparecchio il ciclo viene interrotto ma non avviene il rient...

Страница 25: ...l numero espresso in centesimi Ad esempio la dicitura cic 048 indica il raggiungimento di 48 100 4800 cicli di lavoro Per azzerare il valore dopo aver premuto i quattro tasti sopra menzionati premere...

Страница 26: ...impostati e quindi procedere con il secondo ciclo INTERRUZIONE DEL CICLO DI LAVORO VM18 VM53 VM19 VM20 VM30 VM1800 Azionando il pulsante il ciclo di lavoro pu essere interrotto in qualsiasi momento l...

Страница 27: ...DEGUATI ALLA DIMENSIONE DUREZZA E SPIGOLOSITA DEL PRODOTTO PRIMA DI INIZIARE LE OPERAZIONI DI CONFEZIONAMENTO SOTTOVUOTO DEI PRODOTTI NELLA CAMPANA ACCERTARSI CHE LA LEVETTA DEL RUBINETTO VASI POSTO S...

Страница 28: ...ntrollare che siano collegati Pulire la parte superiore con un panno umido Fare funzionare la pompa per circa 30 minuti mediante funzione pompa o funzione Jars in modo da permettere l espulsione dell...

Страница 29: ...arra saldante A Fig 1 3 Estrarre la barra saldante con i cavetti Fig 2 4 Afferrare e tirare verso l alto il cuscinetto sottobarra B Fig 3 5 Inserire il cappuccio di protezione C nel foro centrale come...

Страница 30: ...1 Togliere la barra saldante A dalla sede sganciando i due cavi di collegamento B Fig 1 2 Staccare la copertura di teflon marrone C Fig 2 3 Pulire la barra saldante con alcool Fig 3 4 Applicare il nas...

Страница 31: ...disinserendo la funzione pompa 3 Spegnere l apparecchio mediante l interruttore ON OFF ed estrarre la spina dalla rete 4 Svitare il tappo di riempimento A nel seguente modo Modelli VM12 VM16 e MULTIP...

Страница 32: ...hio filtro 3 Estrarre il filtro D dalla sede 4 Inserire il nuovo filtro controllando che l O ring E sia in posizione corretta 5 Chiudere il coperchio calzando la molla F sopra la sporgenza del filtro...

Страница 33: ...o sottobarra B Valvola rientro aria CONT2 Teleruttore saldatura VG Valvola immissione gas VA Valvola aspirazione TRA Trasformatore scheda CV Camera a vuoto TSR1 Termica salvamotore pompa TRS Trasforma...

Страница 34: ...generale ON OFF Inserire la spina in una presa verificare tensione Verificare integrit cavo alimentazione Verificare che i fusibili PF3 e PF4 sulla scheda potenza siano integri e ben inseriti Rivolge...

Страница 35: ...Diminuire la percentuale di gas con la manopola GAS Diminuire la percentuale di gas con il tasto GAS Aumentare il tempo di saldatu ra con la manopola SEAL Aumentare il tempo di saldatu ra con il tasto...

Страница 36: ...CONFEZIONATRICI SOTTOVUOTOACAMPANA 36 Manuale d uso e manutenzione Ed 10 2005 REV 00 Cod 1500154 I I NOTE...

Страница 37: ...44 4 1 GENERAL WARNINGS 44 4 2 UNPACKING 44 4 3 HANDLING AND STORAGE 44 5 INSTALLATION 44 5 1 APPLIANCE DESCRIPTION 44 5 2 SUPPLY VOLTAGE 46 5 3 GENERAL REGULATIONS FOR USE 47 5 4 CONTROL PANEL 49 5...

Страница 38: ...ntenance of this appliance read this Manual entirely it must always be readily available for consultation It is the Buyer s responsibility to make sure all amendments updates or technical modification...

Страница 39: ...cument 2 3 1 3 GENERAL CONDITIONS According to the ORVED warranty a The warranty gives exclusive rights for free replacement of components acknowledged as defective by ORVED or our authorized represen...

Страница 40: ...he manufacturer of a particular situation or the possibility of requesting information regarding a certain topic RISK OF BURNS Indicates immediate danger in case of contact with very hot surfaces 2 4...

Страница 41: ...MACHINE ATTENTION Clean the machine regularly by following the instructions given in this Manual Use and handle cleaning products according to the manufacturer s instructions Scrapping and disposal of...

Страница 42: ...130mm 200mm g STANDARD H 130mm SPECIALH 190mm 280mm h STANDARD H 190mm SPECIALH 260mm 490mm i STANDARD H 130mm SPECIALH 180mm 300mm j STANDARD H 130mm SPECIALH 250mm 320mm 350mm k P FLAT B CONVEX l 1...

Страница 43: ...43 REV 00 Cod 1500154 Operation and maintenance manual Ed 10 2005 VACUUM CHAMBER PACKAGING MACHINES GB G B GB H1 H2 B A A A B B H1 H1 H2 H2 PRELIMINARYINFORMATION...

Страница 44: ...als plastic bags etc must be kept out of the reach of children and not dumped in the environment Keep the packaging materials for future handling or storage of the machine WARNING Disposal of the pack...

Страница 45: ...is a side panel F for topping up the oil in the pump in other models the topping up is done from the back of the packaging machine Fig 2 The connection for the gas cylinder option is provided on the...

Страница 46: ...he voltage indicated on the machine nameplate corresponds to that of your mains supply Fig 2 b Insert the plug in the socket with the machine Off c Check the oil level in the pump through the glass wi...

Страница 47: ...the machine includes the gas option fix the cylinders to the wall After using the machine and after switching it off also close the cylinder valve and pressure reducer valve DANGER In appliances provi...

Страница 48: ...sparent oil means suction of liquids and moisture or that the oil is old respectively In models with digital control MULTIPLE 315 VM12 and VM16 an oil change indicator system is provided after 15 000...

Страница 49: ...FUNCTIONS 6 SEL FUNCTIONSSELECTIONKEY SELECTSTHEFUNCTIONTOBEPROGRAMMED 7 JARS KEYFORACTIVATING VACUUM INSIDE OUTSIDE CONTAINERSAND OR CHANNELLED BAGS ACTIVATES DEACTIVATESTHE EXTERNALEVACUATION SYSTEM...

Страница 50: ...VAC key expressed in seconds useful for obtaining the maximum possible vacuum In models VM12 and VM16 the VAC can be set by pressing the SEL key after the VAC function programming THE VAC FUNCTION CAN...

Страница 51: ...pprox 60 at 0 3 bar it is equal to 60 and so on If the cover opens during the cycle reduce the gas flushing time In versions with digital control the percentage is indicated directly on the display 5...

Страница 52: ...fully Soft products may be damaged by the compression in the bag when the cycle is complete Use bags having thickness and size suitable for the product hardness and dimensions 1 Lower lid holder C the...

Страница 53: ...le It is therefore advisable to carry out a few test runs before starting product packaging in series so as to calibrate the parameter and optimize operating times 3 SETTING THE SEALING TIME For bags...

Страница 54: ...parameter to avoid waste of time 5 SETTING THE SEALING TIME Set the sealing time using the SEAL control knob For bags with basic weight 90 100 set the SEAL control knob at 3 5 for bags with basic wei...

Страница 55: ...he vacuum gauge reading note that the maximum gas percentage 60 corresponds to a vacuum of 0 40 bar In the OFF position the GAS function is deactivated When the STOP button is pressed the machine proc...

Страница 56: ...d the pump starts operating 5 The moment the vacuum gauge 1 indicates 1 0 bar open lever F on the side so that it will be possible to start suction from the containers through the hose When the operat...

Страница 57: ...quadrant and eventual functions activated in the bottom quadrant V JARS G GAS S SOFTAIR 2 PROGRAM SELECTION Select the program from 0 to 9 using arrows 3 SELECTING THE VAC FUNCTION See page 49 Select...

Страница 58: ...can also be interrupted by means of the main switch the cycle is interrupted but air does not re enter the suction cup the lid therefore remains closed When the machine is switched on again the cycle...

Страница 59: ...sed in hundredths For example cic 048 indicates that 48 100 4800 work cycles have been reached To reset the value after pressing the four buttons mentioned above immediately press OPERATION AND PROGRA...

Страница 60: ...VM53 VM19 VM20 VM30 VM1800 Activate the button the work cycle can be interrupted at any moment interruption is immediate with air re entering the chamber The work cycle can also be interrupted by mean...

Страница 61: ...THE PRODUCT BEFORE STARTING WITH VACUUM PACKAGING OF PRODUCTS IN THE CHAMBER CHECK TO MAKE SURE THE CONTAINERS VALVE LEVER ON THE LEFT SIDE OF THE MACHINE IF PRESENT IS CLOSED IN MACHINES WITH DIGITA...

Страница 62: ...f damaged Clean to remove impurities oil and grease Check to make sure it is connected Clean the upper part with a damp cloth Run the pump for about 30 minutes using the Pump or Jars function to allow...

Страница 63: ...he two sealing bar connection wires A Fig 1 3 Remove the sealing bar together with the connection wires Fig 2 4 Hold the sealbag and pull it upwards B Fig 3 5 Insert the safety cap C in the central op...

Страница 64: ...follows 1 Remove sealing bar A from its seat by releasing the two connection wires B Fig 1 2 Detach the brown Teflon cover C Fig 2 3 Wipe the sealing bar with alcohol Fig 3 4 Fit a new band Fig 4 cutt...

Страница 65: ...g the Pump function 3 Switch off the machine using the ON OFF main switch and remove the plug from the power socket 4 Unscrew the oil filling screw A as follows Models VM12 VM16 e MULTIPLE 315 P4 P8 r...

Страница 66: ...rew the four screws C on the filter cover 3 Remove filter D from its seat 4 Insert the new filter after checking to make sure O ring E is in the correct position 5 Refit the cover by fixing spring F o...

Страница 67: ...ve B Devacumation valve CONT2 Sealing remote control switch VG Gas flushing valve VA Evacuation valve TRA Board transformer CV Vacuum chamber TSR1 Pump motor thermal cutout switch TRS Sealing Transfor...

Страница 68: ...ng the ON OFF main switch Insert the plug in a socket check the voltage Check power cable to make sure it is intact Check fuses PF3 and PF4 on the power board to make sure they are intact and inserted...

Страница 69: ...GAS control knob Reduce gas percentage using GAS key Increase sealing time using SEAL control knob Increase sealing time using SEAL key Reposition then create vacuum by pressing slightly on the lid 8...

Страница 70: ...VACUUM CHAMBER PACKAGING MACHINES 70 Operation and maintenance manual Ed 10 2005 REV 00 Cod 1500154 GB G B GB NOTES...

Страница 71: ...78 4 2 D BALLAGE 78 4 3 MANUTENTION ET ENTREPOSAGE 78 5 INSTALLATION 78 5 1 DESCRIPTION DE L APPAREIL 78 5 2 TENSION D ALIMENTATION 80 5 3 NORMES G N RALES D EMPLOI 81 5 4 LE PILOTAGE LECTRONIQUE 83 5...

Страница 72: ...eil en leur donnant la possibilit de le consulter librement chaque fois qu elles en ont besoin Tout amendement mise jour ou modification technique communiqu e par la soci t constructrice l acheteur do...

Страница 73: ...ITIONS G N RALES La garantie ORVED pr voit a La garantie donne droit exclusivement au remplacement gratuit des composants reconnus d fectueux par ORVED ou par un responsable agr b La responsabilit de...

Страница 74: ...ment d termin DANGERBR LURES Signale un danger imm diat lorsque l on entre en contact avec des surfaces tr s chaudes 2 4 2 AVERTISSEMENTS ET DANGERS D RIVANT DE L EMPLOI DE LA MACHINE 2 4 2 1 DANGERS...

Страница 75: ...a machine r guli rement en suivant les instructions du manuel Utiliser et manier les produits d tergents selon les indications du producteur D molir et liminer la machine ses pi ces et les produits d...

Страница 76: ...D H 130mm SP CIALE H 190mm 280mm h STANDARD H 190mm SP CIALE H 260mm 490mm i STANDARD H 130mm SP CIALE H 180mm 300mm j STANDARD H 130mm SP CIALE H 250mm 320mm 350mm k P PLAT B BOMB l 1 B STD 1 BARRE D...

Страница 77: ...77 R V 00 Code 1500154 Manuel d utilisation et d entretien Ed 10 2005 CONDITIONNEUSES SOUSVIDEACLOCHE F F H1 H2 B A A A B B H1 H1 H2 H2 INFORMATIONS PR LIMINAIRES...

Страница 78: ...nt pas tre laiss s la port e des enfants ni jet s dans l environnement Il est conseill de conserver l emballage intact pour d ventuelles exigences futures de manutention ou d entreposage de l appareil...

Страница 79: ...E 315 P8 ont un panneau lat ral F pour l appoint d huile pompe sur les autres mod les l appoint est situ dans la partie post rieure de la conditionneuse Fig 2 Le raccord pour les bouteilles de gaz opt...

Страница 80: ...aque signal tique de la machine est celle de votre r seau Fig 2 b Introduire la fiche dans la prise appareil teint c Contr ler le niveau de l huile de pompe indiqu sur le voyant de la pompe Fig 1 Si l...

Страница 81: ...paroi A la fin de l utilisation et avec appareil teint fermer la vanne de la bouteille et du r ducteur de pression DANGER Sur les appareils quip s d option gaz IL EST INTERDIT D UTILISER DES M LANGES...

Страница 82: ...humidit ou la v tust de l huile Dans les mod les commande num rique MULTIPLE 315 VM12 et VM16 les machines disposent d un syst me de signalisation pour la vidange de l huile apr s 15 000 cycles de tra...

Страница 83: ...NTRERDANSLAPROGRAMMATIONDESDIFF RENTESFONCTIONS 6 SEL TOUCHEDES LECTIONDESFONCTIONS S LECTIONNELAFONCTION PROGRAMMER 7 JARS TOUCHEPOURACTIVATIONVIDEENR CIPIENTSEXT RIEURSET OUSACHETSGAUFR S ACTIVE D S...

Страница 84: ...emps d ex cution du vide suppl mentaire au moyen de la touche VAC exprim en secondes utile pour obtenir le vide maximum possible Dans les mod les VM12 et VM16 la fonction VAC peut tre introduite en ap...

Страница 85: ...s ouvre pendant le cycle diminuer le temps d injection du gaz Dans les versions avec commande num rique le pourcentage est indiqu directement sur l afficheur 5 5 3 FONCTION SOUDURE SEAL Apr s la r al...

Страница 86: ...et cycle compl t Utiliser des sachets d paisseur et format appropri s la duret et aux dimensions du produit 1 Abaisser le crochet du couvercle C le couvercle en plexiglas de la cloche D s ouvre Positi...

Страница 87: ...s avant de proc der au conditionnement en s rie de produits de mani re calibrer le param tre et optimiser les temps de travail 3 INTRODUCTION DU TEMPS DE SOUDURE A titre indicatif pour les sachets de...

Страница 88: ...OUDURE Introduire le temps de soudage avec la manette SEAL A titre d exemple pour des sachets de grammage 90 100 r gler le potentiom tre SEAL sur la position 3 5 pour les sachets de grammage 150 100 r...

Страница 89: ...uom tre 1 ne pas oublier qu au pourcentage maximum de gaz 60 correspond un vide de 0 40 bar Dans la position OFF la fonction GAZ est d sactiv e En appuyant sur le bouton STOP l appareil passe la phase...

Страница 90: ...T RIEURS FONCTION POTS JARS VM12 VM16 EX CUTION DU VIDE EN R CIPIENTS EXT RIEURS 1 Visser le raccord tuyau A fourni avec la machine sur le raccord situ sur le devant et introduire le petit tube B muni...

Страница 91: ...elles fonctions actives dans le cadran inf rieur V POTS G GAZ S SOFTAIR 2 S LECTION PROGRAMME S lectionner le programme de 0 9 au moyen des fl ches 3 S LECTION FONCTION VAC Voir page 83 S lectionner l...

Страница 92: ...t imm diate avec la d compression dans la chambre Le cycle de travail peut tre interrompu en agissant sur l interrupteur principal en teignant l appareil le cycle est interrompu mais la d compression...

Страница 93: ...heur ainsi que le nombre exprim en centi mes Par exemple le message cic 048 indique l atteinte de 48 100 4800 cycles de travail Pour mettre la valeur z ro apr s avoir appuy sur les quatre touches pr c...

Страница 94: ...VM20 VM30 VM1800 En actionnant le bouton le cycle de travail peut tre interrompu tout moment l interruption est imm diate avec la d compression dans la chambre Le cycle de travail peut tre interrompu...

Страница 95: ...ET FORME DU PRODUIT AVANT DE COMMENCER LES OP RATIONS DE CONDITIONNEMENT SOUS VIDE DES PRODUITS DANS LA CLOCHE V RIFIER QUE LE LEVIER DU ROBINET POTS SITU SUR LE C T GAUCHE DES MACHINES QUI EN SONT Q...

Страница 96: ...ntr ler qu ils sont reli s Nettoyer la partie sup rieure avec un chiffon humide Faire fonctionner la pompe pendant 30 minutes environ avec la pompe en service ou fonction Jars de mani re expulser l ea...

Страница 97: ...barre de soudure A Fig 1 3 Extraire la barre de soudure avec les c bles Fig 2 4 Saisir et tirer vers le haut le roulement sous barre B Fig 3 5 Ins rer le capuchon de protection C dans l orifice centr...

Страница 98: ...re de soudure A du si ge en d crochant les deux c bles de raccordement B Fig 1 2 D tacher la couverture en t flon marron C Fig 2 3 Nettoyer la barre de soudure avec de l alcool Fig 3 4 Appliquer le no...

Страница 99: ...la touche STOP ou en d sins rant la fonction pompe 3 Eteindre l appareil au moyen de l interrupteur ON OFF et extraire la fiche du secteur 4 D visser le bouchon de remplissage A de la mani re suivante...

Страница 100: ...s C du couvercle filtre 3 Extraire le filtre D du si ge 4 Ins rer le nouveau filtre en contr lant que l O ring E soit en position correcte 5 Fermer le couvercle en mettant le ressort F sur la partie e...

Страница 101: ...re B Vanne d compression CONT2 T l rupteur soudure VG Vanne injection gaz VA Vanne aspiration TRA Transformateur carte CV Chambre vide TSR1 Thermique disjoncteur pompe TRS Transformateur soudure PF1 F...

Страница 102: ...al ON OFF Ins rer la fiche dans une prise v rifier la tension V rifier l tat du c ble d alimentation V rifier que les fusibles PF3 et PF4 sur la carte de puissance sont intacts et bien ins r s S adres...

Страница 103: ...le pourcentage de gaz avec la manette GAZ Diminuer le pourcentage avec la touche GAZ Augmenter le temps de soudure avec la manette SEAL Augmenter le temps de soudure avec la touche SEAL Repositionner...

Страница 104: ...CONDITIONNEUSES SOUSVIDE CLOCHE 104 Manuel d utilisation et d entretien Ed 10 2005 R V 00 Code 1500154 F F NOTE...

Страница 105: ...EMEINE HINWEISE 112 4 2 AUSPACKEN 112 4 3 TRANSPORT UND LAGERHALTUNG 112 5 INSTALLATION 112 5 1 BESCHREIBUNG DES GER TS 112 5 2 VERSORGUNGSSPANNUNG 114 5 3 ALLGEMEINE BETRIEBSVORSCHRIFTEN 115 5 4 BEDI...

Страница 106: ...artung des Ger ts betrauten Personen dieses Handbuch gr ndlich lesen wozu sie jederzeit bei Bedarf berechtigt sein m ssen Der K ufer muss eigenverantwortlich alle vom Hersteller mitgeteilten berarbeit...

Страница 107: ...EDINGUNGEN Die ORVED Garantieleistungen a Die Garantie berechtigt ausschlie lich zum kostenlosen Ersatz derjenigen Teile die von ORVED selbst oder einem Beauftragten als fehlerhaft anerkannt worden si...

Страница 108: ...SERVICE UND REPARATUR DER MASCHINE GEFAHR Vor jedem Eingriff ist der Netzstecker abzuziehen Regelm ig s mtliche Wartungs und Servicearbeiten der Maschine durchf hren Etwaige Sch den m ssen durch Fach...

Страница 109: ...NE ACHTUNG Die Maschine ist regelm ig entsprechend den Vorschriften in diesem Handbuch zu reinigen Die Reinigungsprodukte nach den Herstelleranweisungen handhaben und benutzen Bei Stilllegung und Ents...

Страница 110: ...mm g STANDARD H 130mm SPEZIAL H 190mm 280mm h STANDARD H 190mm SPEZIAL H 260mm 490mm i STANDARD H 130mm SPEZIAL H 180mm 300mm j STANDARD H 130mm SPEZIAL H 250mm 320mm 350mm k P PLATT B GEW LBT l 1 B S...

Страница 111: ...111 REV 00 Cod 1500154 Bedienungs und Wartungshandbuch Ausgabe 10 2005 KAMMER VAKUUM VERPACKUNGSMASCHINEN D D F H1 H2 B A A A B B H1 H1 H2 H2 VORABINFORMATIONEN...

Страница 112: ...Ger t nicht benutzen und sich umgehend an den H ndler wenden Halten Sie die Verpackungsstoffe Plastikbeutel usw au erhalb der Reichweite von Kindern und entsorgen Sie sie vorschriftsm ig Wir raten Ih...

Страница 113: ...315 P8 verf gen ber eine Seitenplatte F zum Nachf llen des Pumpen ls die F ll ffnung an den anderen Modellen befindet sich auf der R ckseite der Verpackungsmaschine Abb 2 R ckseitig ist auch der Ansc...

Страница 114: ...rfahren a Vergewissern Sie sich ob die Spannung am Typenschild der Maschine mit der Ihres Stromnetzes bereinstimmt Abb 2 b Schlie en Sie den Stecker bei abgeschalteter Maschine an die Steckdose an c b...

Страница 115: ...n Maschinen mit Gasfunktion sollten Sie die Flaschen an der Wand befestigen Schlie en Sie das Flaschenventil und den Druckminderer nach Einsatz immer bei abgeschalteter Maschine GEFAHR In Ger ten mit...

Страница 116: ...Modelle mit digitaler Steuerung MULTIPLE 315 VM12 und VM16 beinhalten ein Meldesystem des anstehenden lwechsels nach 15 000 Betriebszyklen erscheint beim Start der Maschine sowie bei jedem Zyklusende...

Страница 117: ...AHLTASTE DER FUNKTIONEN W HLT DIE ZU PROGRAMMIERENDE FUNKTIONAUS 7 JARS TASTE ZUR EINSCHALTUNG DER EXTERNEN VAKUUMIERUNG VON GEF SSEN BZW GEPR GTEN BEUTELN AKTIVIERT DEAKTIVIERT DIE EXTERNE SAUGFUNKTI...

Страница 118: ...eit in Sekunden eingegeben werden um den gr tm glichen Vakuumbetrag zu erzielen In den Modellen VM12 und VM16 erfolgt die Einstellung der Funktion VAC mit Taste SEL im Anschluss an die Programmierung...

Страница 119: ...gt das Volumen genau 60 Sollte sich der Deckel beim Verpackungsvorgang ffnen muss die Begasungszeit verringert werden In den digitalen Versionen wird der Prozentwert direkt am Display angezeigt 5 5 3...

Страница 120: ...els nach der Verpackung besch digt werden Die St rke und das Format der Beutel sind daher auf die H rte und Abmessungen des Produkts abzustimmen 1 Klappen Sie den Halteb gel C ab der Plexiglasdeckel d...

Страница 121: ...packung in Serie einige Probel ufe fahren um den Parameter genau festzulegen und die Bearbeitungsdauer zu optimieren 3 EINSTELLUNG DER SCHWEISSDAUER F r Beutel mit 90 100 Gramm sollten Sie als Richtwe...

Страница 122: ...INSTELLUNG DER SCHWEISSDAUER Regeln Sie die Schwei dauer am Drehknopf SEAL Als Richtwerte sollten Sie f r Beutel mit 90 100 Gramm das Potentiometer SEAL auf Position 3 5 stellen f r Beutel mit 150 100...

Страница 123: ...icht ein Vakuum von 0 40 bar In der Position OFF ist die GASFUNKTION abgeschaltet Durch Dr cken der Taste STOP geht das Ger t zum Schwei vorgang ber Sollte sich der Deckel w hrend dieses Vorgangs ffne...

Страница 124: ...ch sich die Pumpe einschaltet 5 Sobald der Zeiger des Vakumeters 1 auf 1 0 bar steht ffnen Sie den seitlichen Hebel F und saugen Sie somit ber den Schlauch die Luft in den Gef en ab ImAnschluss daran...

Страница 125: ...e jeweils aktivierten Funktionen V GEF SSE G GAS S SOFTAIR 2 PROGRAMMWAHL Rufen Sie das Programm 0 bis 9 mit den Pfeilen ab 3 AUSWAHL FUNKTION VAC siehe Seite 117 W hlen Sie die Funktion VAC mit Taste...

Страница 126: ...Abbruch erfolgt sofort mit Bel ftung der Vakuumkammer F r denAbbruch des Betriebs k nnen Sie ebenfalls den Hauptschalter benutzen beim Abschalten des Ger ts wird der Vorgang zwar unterbrochen die Vaku...

Страница 127: ...inblenden am Display erscheint die Meldung cic und die Anzahl in 1 100 Beispielsweise bedeutet die Meldung cic 048 das Erreichen von 48 100 4800 Betriebszyklen Zum L schen dieses Wertes m ssen Sie nac...

Страница 128: ...ndern Sie ggf die Eingaben und f hren Sie den zweiten Verpackungsvorgang aus ABBRUCH DES BETRIEBS BEI VM18 VM53 VM19 VM20 VM30 VM1800 Sie k nnen den Betriebsablauf jederzeit mit der Taste unterbreche...

Страница 129: ...H RTE UND KANTIGKEIT DES PRODUKTS GEEIGNETER ST RKE UND GR SSE AUS VERGEWISSERN SIE SICH VOR DER VAKUUMVERPACKUNG DER PRODUKTE IN DER SAUGVORRICHTUNG DASS DER HEBEL DES GEF SSHAHNSAN DER LINKEN MASCHI...

Страница 130: ...und Fette beseitigen Kabelanschluss berpr fen Oberseite mit feuchtem Tuch reinigen Pumpe ca 30 Minuten lang laufen lassen ber Funktion Pumpe bzw Funktion Gef e um das Wasser aus dem Pumpen l auszusche...

Страница 131: ...wei leiste A Abb 1 3 Ziehen Sie die Schwei leiste mit den Kabeln heraus Abb 2 4 Ziehen Sie den Schwei sack hoch B Abb 3 5 Setzen Sie die Schutzkappe C in die mittlere Bohrung gem Abb 4 6 Putzen Sie mi...

Страница 132: ...Schwei leiste A durch L sen der zwei Anschlusskabel B Abb 1 2 Entfernen Sie das braune Teflonband C Abb 2 3 Reinigen Sie die Schwei leiste mit Alkohol Abb 3 4 Bringen Sie das neue Band Abb 4 an und s...

Страница 133: ...e 3 Schalten Sie das Ger t am Hauptschalter ON OFF ab und ziehen Sie den Stecker aus der Steckdose 4 Drehen Sie die F llverschluss A folgenderma en auf Modelle VM12 VM16 und MULTIPLE 315 P4 P8 entfern...

Страница 134: ...Sie die 4 Schrauben C des Einsatzdeckels ab 3 Ziehen Sie den Einsatz D aus seinem Sitz 4 Pr fen Sie bei Installation des neuen Einsatzes dieAusrichtung des O Rings E 5 Schlie en Sie den Deckel und ra...

Страница 135: ...wei sack B Ventil Bel fung CONT2 Schwei sch tz VG Begasungsventil VA Saugventil TRA Steuertrafo CV Vakuumkammer TSR1 Leistungsschutzschalter Pumpenmotor TRS Schwei trafo PF1 Schutzsicherung Pumpe PF4...

Страница 136: ...auer zu lang Schwei dauer zu kurz Maschine an Hauptschalter ON OFF einschalten Stecker an Steckdose schlie en Spannung pr fen Zustand des Stromkabels berpr fen Zustand und Anschluss der Sicherungen PF...

Страница 137: ...Drehknopf GAS verringern Gasanteil mit Taste GAS verringern Schwei dauer mit Drehknopf SEAL erh hen Schwei dauer mit Taste SEAL erh hen Deckel mit leichtem Druck abermals schlie en und Vakuum erzeugen...

Страница 138: ...KAMMER VAKUUM VERPACKUNGSMASCHINEN 138 Bedienungs und Wartungshandbuch Ausgabe 10 2005 REV 00 Cod 1500154 D D F NOTE...

Страница 139: ...DE CAR CTER GENERAL 146 4 2 DESEMBALAJE 146 4 3 DESPLAZAMIENTOYALMACENAMIENTO 146 5 INSTALACI N 146 5 1 DESCRIPCI N DE LA M QUINA 146 5 2 TENSI N DEALIMENTACI N 148 5 3 NORMAS GENERALES DE USO 149 5...

Страница 140: ...eer atentamente este manual al personal encargado del uso y mantenimiento de la m quina d ndole la posibilidad de consultarlo libremente cada vez que sea necesario Cualquier enmienda actualizaci n o m...

Страница 141: ...blecido que a la garant a concede derecho exclusivamente a la sustituci n gratuita de los componentes reconocidos como defectuosos por ORVED o por un encargado autorizado por la misma ORVED b la respo...

Страница 142: ...eligro inmediato en caso de entrar en contacto con superficies muy calientes 2 4 2 ADVERTENCIAS Y PELIGROS DERIVADOS DEL USO DE LA M QUINA 2 4 2 1 PELIGROS DERIVADOS DEL USO DE LA M QUINA PELIGRO Las...

Страница 143: ...instrucciones de este mismo manual Utilizar y operar con los productos detergentes respetando las indicaciones de los productores Desguazar y desechar reciclar la m quina sus componentes y los product...

Страница 144: ...ESPECIAL H 190 mm 280 mm h EST NDAR H 190 mm ESPECIAL H 260 mm 490 mm i EST NDAR H 130 mm ESPECIAL H 180 mm 300 mm j EST NDAR H 130 mm ESPECIAL H 250 mm 320 mm 350 mm k P PLATO B COMBADO l 1 B EST 1...

Страница 145: ...145 REV 00 Cod 1500154 Manual de uso y mantenimiento Ed 10 2005 M QUINASENVASADORASAL VAC ODECAMPANA E D E H1 H2 B A A A B B H1 H1 H2 H2 INFORMACIONES PRELIMINARES...

Страница 146: ...con el revendedor Los componentes del embalaje bolsas de pl stico etc no deben dejarse al alcance de los ni os ni abandonados en el ambiente Es conveniente conservar ntegro el embalaje para utilizarl...

Страница 147: ...nte un panel lateral F que permite efectuar el relleno de aceite de la bomba en otros modelos el relleno se efect a a trav s de la parte trasera de la envasadora Fig 2 El racor para efectuar la conexi...

Страница 148: ...eviamente que la tensi n indicada en la placa de identificaci n de la m quina sea la misma de la red del establecimiento Fig 2 b Introducir el enchufe en la toma de corriente con m quina apagada c Con...

Страница 149: ...ed Al concluir el uso y con m quina apagada cerrar siempre la v lvula de la bombona y del reductor de presi n PELIGRO En las m quinas provistas de opci n gas EST PROHIBIDO USAR MEZCLAS DE GAS QUE CONT...

Страница 150: ...indica la necesidad de cambiar el aceite una vez alcanzados los 15 000 ciclos de trabajo al encender la m quina y al concluir cada ciclo en el display aparece una indicaci n de alarma aceite El n mer...

Страница 151: ...S 6 SEL TECLADE SELECCI N DE LAS FUNCIONES SELECCIONALAFUNCI NAPROGRAMAR 7 JARS TECLAPARAACTIVACI N DELVAC O EN CONTENEDORES EXTERNOS Y O BOLSAS GOFRADAS ACTIVA DESACTIVALAFUNCI N DEASPIRACI N EXTERNA...

Страница 152: ...ac o mediante la tecla VAC expresado en segundos til a fin de obtener el vac o m ximo posible En los modelos VM12 y VM16 la funci n VAC puede ser programada presionando la tecla SEL despu s de haber p...

Страница 153: ...rirse la cubierta durante el ciclo se deber reducir el lapso de inyecci n de gas En las versiones con mando digital el porcentaje es indicado directamente en el display 5 5 3 FUNCI N SOLDADURA SEAL Un...

Страница 154: ...la primera puesta en funcionamiento es necesario calibrar el sensor de depresi n en funci n de la presi n atmosf rica que depende de la altitud del lugar procediendo de la siguiente forma encender la...

Страница 155: ...el envasado en serie de productos a fin de calibrar adecuadamente el par metro y optimizar los lapsos de trabajo 3 PROGRAMACI N DEL TIEMPO DE SOLDADURA En general para bolsas de 90 100 g de peso situ...

Страница 156: ...SOLDADURA Programar el lapso de soldadura mediante el mando SEAL En general para bolsas de 90 100 g de peso situar el potenci metro SEAL en la posici n 3 5 para bolsas con peso de 150 100 g situar el...

Страница 157: ...70 corresponde un vac o de 0 40 bar En la posici n OFF la funci n GAS queda desactivada Presionando el bot n STOP la m quina pasa a la fase de soldadura En caso de abrirse la cubierta durante el cicl...

Страница 158: ...ARS VM12 VM16 EJECUCI N DEL VAC O EN CONTENEDORES EXTERNOS 1 Enroscar el racor portagoma A suministrado adjunto en la conexi n situada en la parte delantera e introducir el tubito B provisto de campan...

Страница 159: ...de programa dispuesto en el cuadrante superior y las eventuales funciones activadas en el cuadrante inferior V VASI G GAS S SOFTAIR 2 SELECCI N PROGRAMA seleccionar el programa entre 0 y 9 mediante la...

Страница 160: ...odo inmediato con el retorno del aire a la c mara El ciclo de trabajo tambi n puede ser interrumpido operando con el interruptor general apagando la m quina el ciclo se interrumpe pero sin que el aire...

Страница 161: ...te las dos teclas la tecla y la tecla en el display aparecer el mensaje cic y el respectivo n mero expresado en cent simos Por ejemplo el mensaje cic 048 indica el hecho de haberse alcanzado 48 100 48...

Страница 162: ...segundo ciclo INTERRUPCI N DEL CICLO DE TRABAJO VM18 VM53 VM19 VM20 VM30 VM1800 El ciclo de trabajo puede ser interrumpido en cualquier momento presionando el bot n la interrupci n se verifica de modo...

Страница 163: ...Y ARISTAS DEL PRODUCTO ANTES DE COMENZAR LAS OPERACIONES DE ENVASADO EN VAC O DE LOS PRODUCTOS EN LA CAMPANA CONTROLAR QUE EST CERRADA LA PALANQUITA DEL GRIFO CONTENEDORES SITUADO EN EL COSTADO IZQUIE...

Страница 164: ...trolar su correcta conexi n Limpiar su parte superior con un pa o h medo Hacer funcionar la bomba por unos 30 minutos mediante funci n bomba o funci n Jars a fin de obtener la expulsi n del agua prese...

Страница 165: ...traer la barra soldadora con sus hilos Fig 2 4 Tomar y tirar hacia arriba el cojinete situado debajo de la barra B Fig 3 5 Colocar el capuch n de protecci n C en el agujero central de la manera ilustr...

Страница 166: ...siguiente forma 1 desmontar la barra soldadora A desconectando para ello sus dos hilos de enlace B Fig 1 2 quitar la cobertura de tefl n marr n C Fig 2 3 limpiar la barra soldadora con alcohol Fig 3 4...

Страница 167: ...ba para detenerla 3 Apagar la m quina mediante el interruptor ON OFF y extraer el enchufe desde la toma el ctrica 4 Desenroscar el tap n de llenado A procediendo de la siguiente forma modelos VM12 VM1...

Страница 168: ...3 Extraer el filtro D desde su alojamiento 4 Instalar el filtro nuevo controlando que la junta t rica E quede correctamente posicionada 5 Cerrar la tapa calzando el resorte F sobre el salidizo del fil...

Страница 169: ...o aire CONT2 Telerruptor soldadura VG V lvula admisi n gas VA V lvula aspiraci n TRA Transformador tarjeta CV C mara de vac o TSR1 T rmica protecci n motor bomba TRS Transformador soldadura PF1 Fusibl...

Страница 170: ...eneral ON OFF Introducir el enchufe en una toma controlar tensi n Controlar integridad cable de alimentaci n Controlar en tarjeta de potencia que fusibles PF3 y PF4 est n ntegros y correctamente insta...

Страница 171: ...Aumentar tiempo de soldadura mediante mando SEAL Aumentar tiempo de soldadura mediante tecla SEAL Reposicionar la cubierta y obtener el vac o mediante una ligera presi n sobre la cubierta misma DESGU...

Страница 172: ...172 Ed 10 2005 REV 00 Cod 1500154 I GB F D E 11 RICAMBIPRINCIPALI MAINSPAREPARTS PI CESDERECHANGEPRINCIPAUX HAUPTERASTZTEILE PIEZASDEREPUESTOPRINCIPALES...

Страница 173: ...173 REV 00 Cod 1500154 Ed 10 2005 I E D F GB MULTIPLE 315 P4 315 P8 315H P8 VM12 VM10 VM16 VM18...

Страница 174: ...174 Ed 10 2005 REV 00 Cod 1500154 I GB F D E MULTIPLE 315 P4 315 P8 315H P8 VM12 VM10 VM16 VM18...

Страница 175: ...175 REV 00 Cod 1500154 Ed 10 2005 I E D F GB VM18H VM53 VM53H VM20 VM19 VM1800 VM20 TANDEM VM30...

Страница 176: ...176 Ed 10 2005 REV 00 Cod 1500154 I GB F D E VM18H VM53 VM53H VM20 VM19 VM1800 VM20 TANDEM VM30...

Отзывы: