1.
Navigate to
INTERFACES: REFERENCES > GNSS Reference
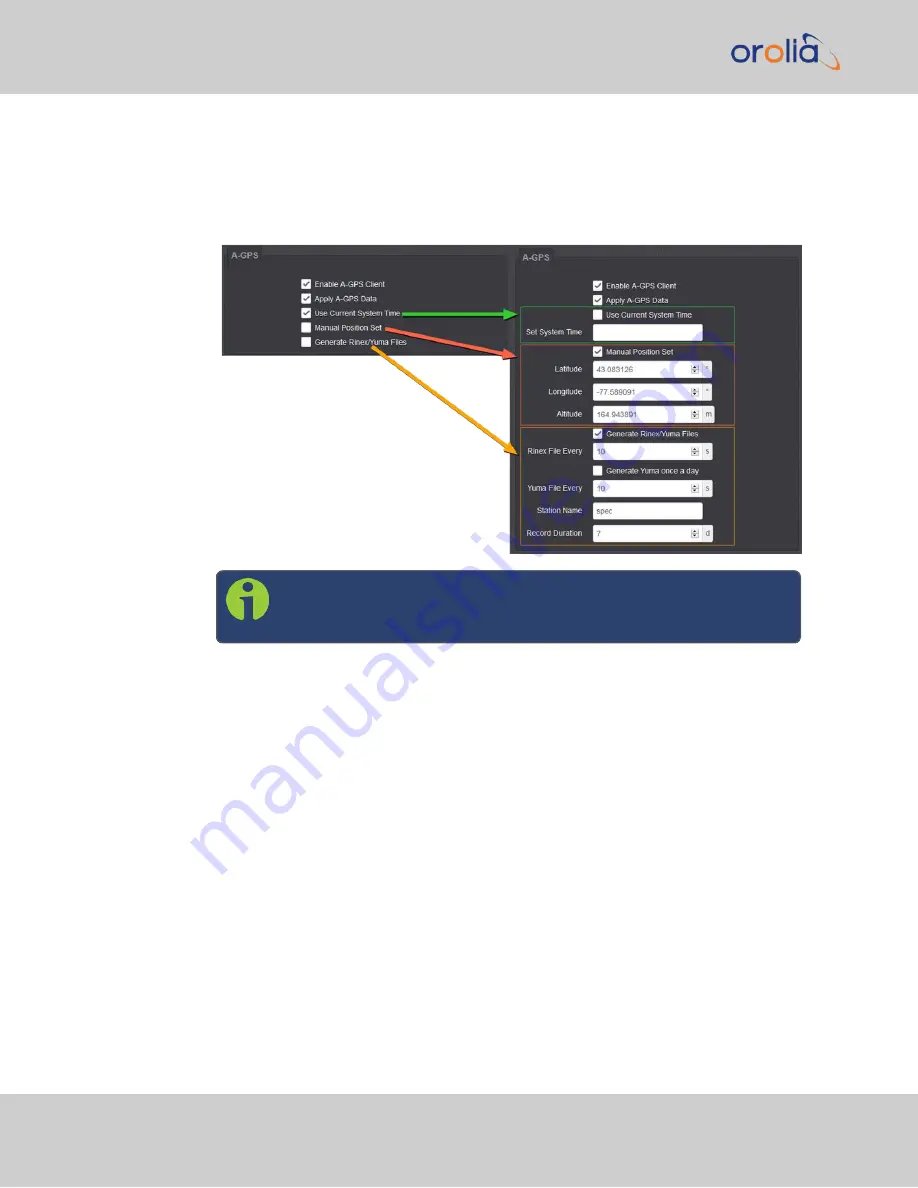
. The GNSS screen
will be displayed.
2.
In the
GNSS Reference
panel on the right, click the GEAR button next to
GNSS 0
.
3.
In the
GNSS 0
window, locate the
A-GPS
panel at the bottom.
Note:
The options displayed on your screen depend on your system
configuration.
4.
Configure the menu options as required:
Enable A-GPS Client
This feature will schedule assistance data to be collected and updated every hour. On star-
tup, if data is present, it will be sent to the receiver.
Apply A-GPS Data
If this option is selected, VelaSync will
immediately
apply the time, position and satellite
data to the receiver once you click
Submit
.
Time and position are user-configurable via the next two menu options; VelaSync collects
A-GPS satellite data from an external source automatically.
144
CHAPTER
3
•
VelaSync 1232 User Manual Rev. 4
3.3 Managing References
Содержание Spectracom VelaSync 1232
Страница 2: ......
Страница 4: ...Blank page II VelaSync 1232 User Manual...
Страница 12: ...BLANK PAGE X VelaSync 1232 User Manual TABLE OF CONTENTS...
Страница 28: ...16 CHAPTER 1 VelaSync 1232 User Manual Rev 4 1 7 The VelaSync Web UI...
Страница 34: ...BLANK PAGE 1 9 Regulatory Compliance 22 CHAPTER 1 VelaSync 1232 User Manual Rev 4...
Страница 264: ...BLANK PAGE 252 VelaSync 1232 User Manual...


