PT-Link II N2-3
®
Technical Guide
PT-Link II N2-3 Interface
4
Setting Up Your PT-Link
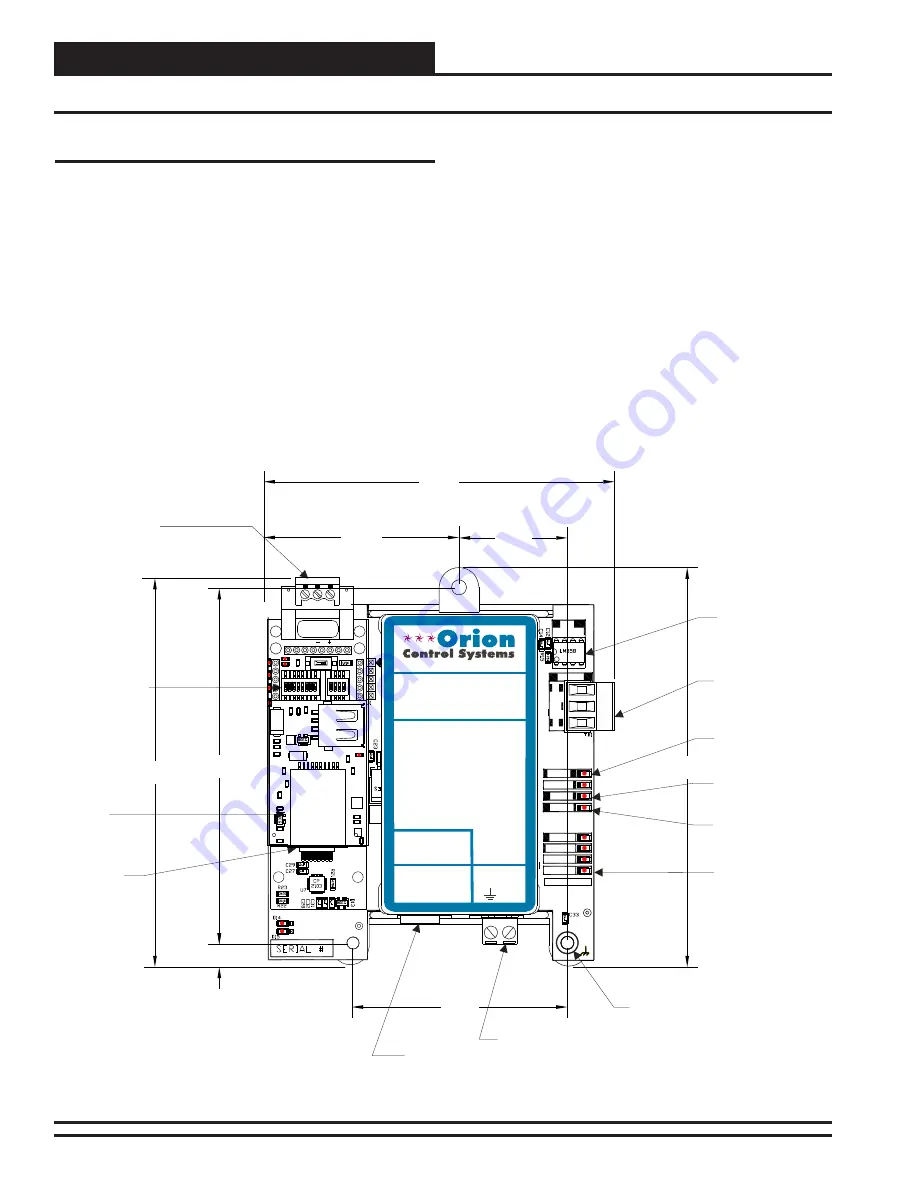
Figure 1: PT-Link II N2
®
Dimensions and Components
485
DRIVER
COMM
R
SH
T
LOOP
PROTO
LED1
LED2
TIMER
W_DOG
H-BEAT
POWER
MADE IN USA
4.82
4.70
0.27
4.31
1.31
2.61
4.25
2.37
N2
®
Communications
Wiring Terminal
N2
®
Protocessor
Module
Ethernet
Port
0.20 Dia.
Mounting Hole
Typ. 4 PL.
Local Loop
Communications
Wiring Terminal
Local Loop
Communications
Driver Chip
24 VAC Power
Terminal
Communications
LED
Diagnostic
LED #1
Diagnostic
LED #2
Power
LED
USB
Port
Configuration
DIP Switches
(Not Used)
IAEZH004
Made in USA
1
2
3
4
5
6
7
8
O
N
O
N
1
2
3
4
ON
RSGND
www.orioncontrols.com
WattMaster Label
#LB102080-01
Rev. 01A
OE368-23N-N2-3
PT-LINK II PROTOCOL
TRANSLATOR
FOR N2
+24
VAC
GND
LOOP
LED 1
LED 2
=RAPID BLINK
=BLINKS QTY
CONTROLLERS
= STEADY BLINK
PROTO
TIMER
WATCH DOG
H-BEAT
=RAPID BLINK
= STEADY BLINK
= ON SOLID
= STEADY BLINK
LED BLINK CODES (NORMAL)
Quick Start Guide
The following steps will get you up and running in no time:
1.
Familiarize yourself with the PT-Link II components (
Figure 1
).
NOTE:
The DIP Switches should be left in their default positon
which is all OFF. They are not used in this application.
2.
Connect your PT-Link II to the Controller(s) on your system
(up to four) and connect your PT-Link II to the N2-3 Network
(
Figure 2
).
3.
Copy the contents of the PT Link II CD to your PC’s Desktop.
You can also download the fi les from orioncontrols.com
under PT-Link II Setup Files. These fi les include RUINET.
4.
Connect your PT-Link II to your computer using an Ethernet
connection
(
Figure 3, page 6
).
5.
Change your PCs IP Address. Follow the directions that match
your current operating system - Windows XP, Vista, 7, 8 or 10.
See directions on
pages 7 & 8
.
6.
Obtain the following from your Building Automation System
Integrator: the N2-3 Device Instant Number (Client Node ID).
7.
Using FieldServer’s Graphical User Interface, edit the
Confi g.csv fi le and verify PT Link II communications.
Follow the directions on
pages 9-11
.
8.
If you run into any problems, follow the instructions in the
Troubleshooting section starting on
page 12
of this guide.


