background image

SF 0156 


when you go out for long time. 


Never use the fan before finishing assembly to avoid any 

hurts. 


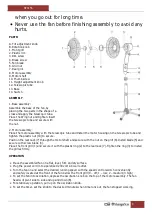
PARTS:


A. Tilt adjustment knob  

B. Rotation knob 
1. Front grill 

2. Plastic rim 

3. Rim screw 
4. Blade screw 

5. Fan blade 

6. Grill nut 
7. Rear grill 

8. Motor assembly 

9. Motor shaft 
10. Thumb screw 

11. Height adjustment knob 

12. Telescopic tube 
13. Base 

14. Switch 


ASSEMBLY  


1. Base assembly: 

Assemble the base of the fan, by 
placing the two parts in the shape of a 

cross and apply the telescopic tube. 

Place the Wing nut and tighten. Insert 
the telescopic tube and secure with 

the nut. 

 
2. Motor assembly: 

Place the motor assembly with the telescopic tube and Install the motor housing on the telescopic tube and 

tighten the plastic nut (10) to secure. 
Position the rear rack (7) through the motor shaft and secure with the nut on the grill (6). Install blade (5) and 

secure with screw blade (4). 

Place the front grill (1) and secure it with the plastic ring (2) to the rear rack (7). Tighten the ring (3) to install 
the grilles firmly. 


OPERATION 


Place the assembled fan on a flat, level, firm and dry surface. 


Plug the power cord into a polarized 230 volt AC wall outlet. 


Turn the fan on and select the desired running speed with the speed control switch conveniently                   

and safely located at the front of the fan below the front grill (0 – off; 1 – low; 2 – medium; 3 high) 


To set the fan into oscillation, depress the oscillation knob on the top of the motor assembly. The fan 

head will pivot side to side and up and down (B). 


For stationary operation, pull up on the oscillation knob. 


To set the timer, set the knob to the desired minutes when time runs out, the fan stopped working 


Содержание 8436044533600

Страница 1: ...ejores resultados y la m xima seguridad de uso Read this manual carefully before running this appliance and save it for reference in order to obtain the best results and ensure safe use Veuillez lire...

Страница 2: ...su cable fuera del alcance de los ni os menores de 8 a os 4 PRECAUCI N Para la seguridad de sus ni os no deje material de embalaje bolsas de pl stico cart n polietileno etc a su alcance 5 Si el cable...

Страница 3: ...se de colocarlo sobre una superficie plana y estable para evitar que vuelque NO USE el ventilador en una ventana La lluvia puede ocasionar un peligro de naturaleza el ctrica No deje el ventilador en f...

Страница 4: ...Parte posterior de la rejilla 8 Motor 9 Cubierta del motor 10 Tornillo 11 Boton de ajuste de altura 12 Tubo telesc pico 13 Base 14 ON OFF y Temporizador MONTAJE 1 Montaje de la base Monte las cuatro...

Страница 5: ...jillas se deben limpiar regularmente para su mejor funcionamiento Desconecte el ventilador y siga las instrucciones de montaje en sentido inverso para quitar las aspas y las rejillas antes de limpiarl...

Страница 6: ...reach of children less than 8 years old 4 WARNING In order to ensure your children s safety please keep all packaging plastic bags boxes polystyrene etc out of their reach 5 If the supply cord is dama...

Страница 7: ...an area where water has been collected to avoid the potential of electrical hazard Use fan only for intended use as described in instruction manual Unplug from outlet when not in use when moving fan f...

Страница 8: ...c nut 10 to secure Position the rear rack 7 through the motor shaft and secure with the nut on the grill 6 Install blade 5 and secure with screw blade 4 Place the front grill 1 and secure it with the...

Страница 9: ...t WEEE requires that old household electrical appliances must not be disposed of in the normal unsorted municipal waste stream Old appliances must be collected separately in order to optimize the reco...

Страница 10: ...cet appareil 3 Gardez l appareil et le c ble la port e des enfants de moins de 8 ans 4 ATTENTION Par mesure de s curit vis vis des enfants ne laissez pas les emballages sac en plastique carton polysty...

Страница 11: ...une surface stable et plane lorsqu il fonctionne pour viter qu il se renverse N UTILISEZ JAMAIS un ventilateur pr s d une fen tre La pluie peut cr er un danger lectrique Ne laissez pas le ventilateur...

Страница 12: ...d avoir termin de l assembler compl tement A Bouton de reglage del nclinaison B Bouton de rotation 1 Front grille 2 Plastic jante 3 Jante visser 4 Ecrou pour l helice 5 Helice 6 crou 7 Grille arriere...

Страница 13: ...de l oscillation qui se trouve en haut du moteur La t te du ventilateur tourne d un c t l autre avec un angle d environ 90 et de haut en bas environ 45 NETTOYAGE ET ENTRETIEN Pour un meilleur fonction...

Страница 14: ...e 3 Mantenha o aparelho e o seu cabo fora do alcance de crian as menores de 8 anos 4 PRECAUC O Para a seguranca dos seus filhos nao deixe partes da embalagem sacos plasticos papelao esferovite etc ao...

Страница 15: ...evitar a queda da mesma N O utilize a ventoinha colocada sobre o parapeito de uma janela A chuva pode criar um risco de choque el ctrico N o deixe a ventoinha a funcionar perto de uma rea onde se acu...

Страница 16: ...le 2 Plastic jante 3 Clip da grelha de prote ao dianteira 4 Porca para a aleta 5 Vane 6 Porca 7 Grelha de protec ao dianteira 8 Conjunto do motor 9 Haste do motor 10 Parafuso de polegar 11 Contr le do...

Страница 17: ...S LIMPEZA E ARMAZENAMENTO A l mina da ventoinha e as grelhas de protec o devem ser limpas regularmente para garantir um funcionamento mais eficiente Desligue a ventoinha em seguida inverta o procedime...

Отзывы: