


Upgrade a Fabric Interconnect F1-15 to a QDR Fabric Board
12.
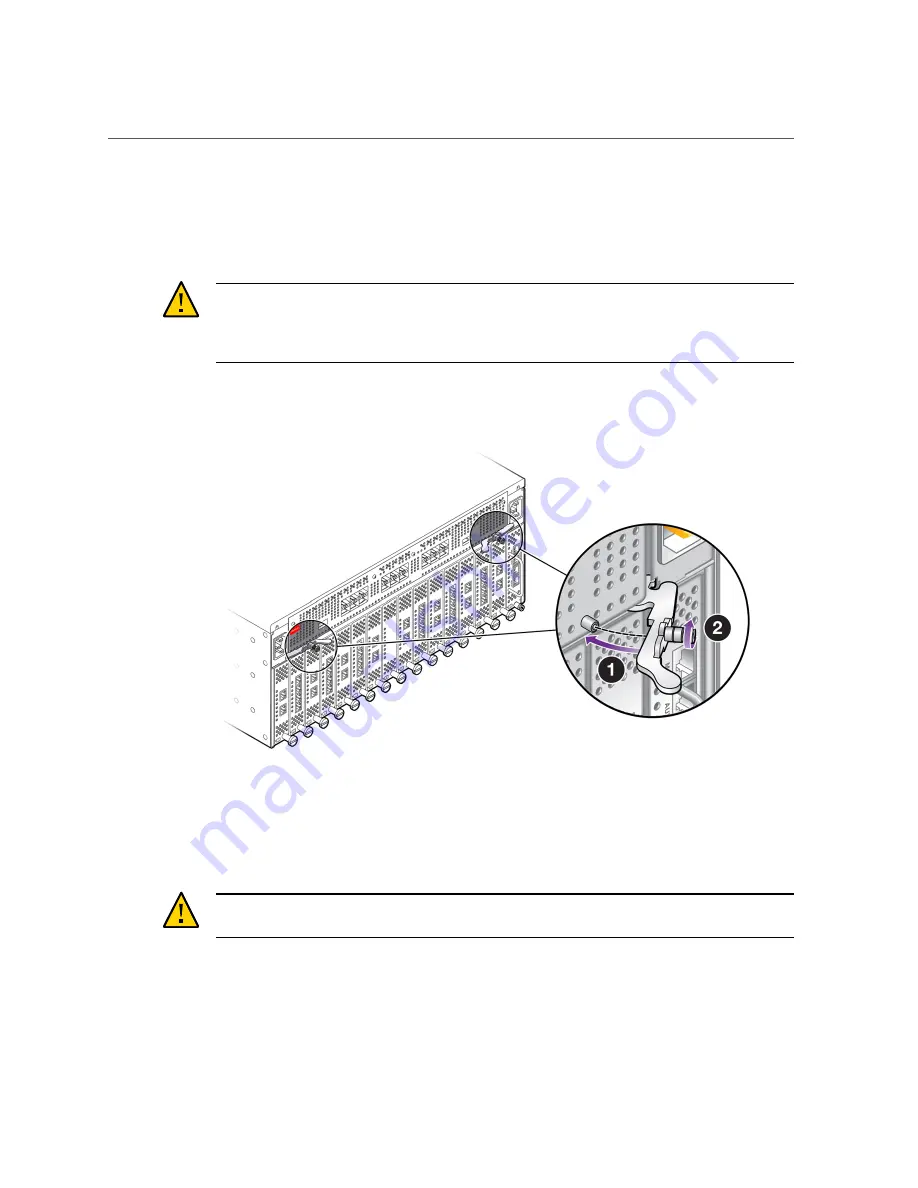
When the notches and guides are properly positioned, press the Fabric Board's
handles inward to seat the Fabric Board (1) as shown in
QDR Fabric Board into a Fabric Interconnect F1-15,” on page 133
Board is properly seated when it and its handles lie flush against the chassis.
Caution -
Do not force the levers. They should glide easily when properly aligned. If you
feel uneven resistance or the release levers do not move easily, gently swing the levers away
from each other, partially remove the Fabric Board, and attempt
while
paying attention to how the release levers contact the edge of the chassis.
FIGURE 86
Seating the QDR Fabric Board into a Fabric Interconnect F1-15
13.
When the release levers have correctly locked the QDR Fabric Board into the
chassis, use the screwdriver to secure the captive screws in the release levers
(2).
Caution -
When tightening screws, make sure to tighten them to lightly snug. Do not
overtighten screws or they can break.
14.
Reconnect the Fabric Interconnect to facility power, then power on the Fabric
Interconnect, and allow it to completely boot up.
The Fabric Board will boot, and when the board completes is bootup and passes to runtime, the
Power LED will glow. The Power LED does not glow until the Fabric Board is in runtime.
Performing Service Tasks
133
Содержание Fabric Interconnect F1-15
Страница 1: ...Oracle Fabric Interconnect Hardware User s Guide Part No E50997 04 July 2016...
Страница 2: ......
Страница 8: ...Contents Index 173 8 Oracle Fabric Interconnect Hardware User s Guide July 2016...
Страница 10: ...10 Oracle Fabric Interconnect Hardware User s Guide July 2016...
Страница 94: ...94 Oracle Fabric Interconnect Hardware User s Guide July 2016...
Страница 168: ...168 Oracle Fabric Interconnect Hardware User s Guide July 2016...
Страница 172: ...172 Oracle Fabric Interconnect Hardware User s Guide July 2016...
Страница 176: ...176 Oracle Fabric Interconnect Hardware User s Guide July 2016...


